
 Join our Discord
Connect Zephyr Scale to Test Companion
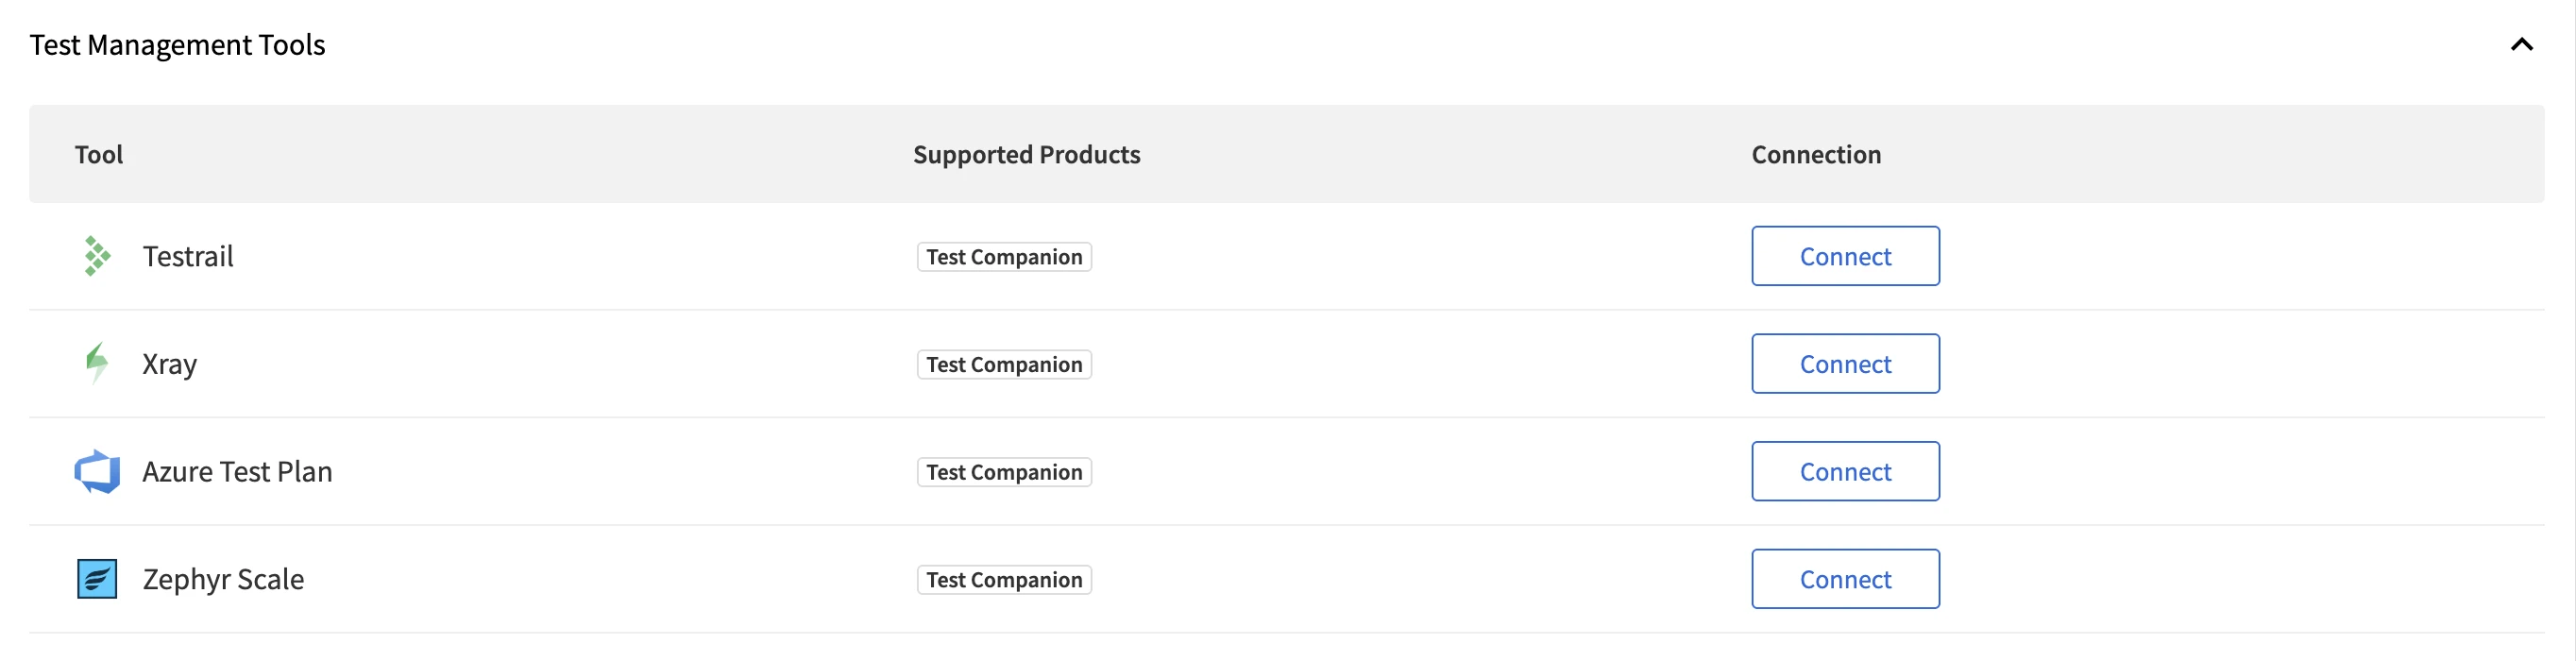
Connect Zephyr Scale to Test Companion to browse your test repository in your IDE and turn test cases into automation scripts.
Zephyr Scale stores your test cases in Jira, along with their steps, preconditions, and acceptance criteria. When you connect Zephyr Scale to Test Companion, you browse that repository from your IDE instead of switching to Jira.
You select a test case, and Test Companion reads its steps, expected results, and preconditions. It then generates an automation script in the chat window. This skips the manual copy and paste between tools.
Test Companion can only fetch test cases that your Jira account can access. Your Jira permissions still apply when Test Companion reads test case data from Zephyr Scale.
Set up Zephyr Scale for your IDE
In Visual Studio Code, the Test Cases panel reaches Zephyr Scale through the Zephyr Scale MCP server. In every IDE, it reaches Zephyr Scale through the BrowserStack integration. Select your IDE:
In Visual Studio Code, the Test Cases panel uses the Zephyr Scale MCP server once the server is connected. When the server is not connected, the panel uses the BrowserStack integration described in the Other IDEs tab. The panel never starts an MCP sign-in on its own.
Prerequisites for the MCP server
Ensure you have the following:
- Test Companion is installed in Visual Studio Code and you are signed in.
- A Zephyr Scale account with access to the projects that hold your test cases.
Connect the Zephyr Scale MCP server
To connect the server:
- Click
...(more options) on the Test Companion panel, then select MCP Servers. -
Select the Catalog tab, then click Connect on the Zephyr Scale card.
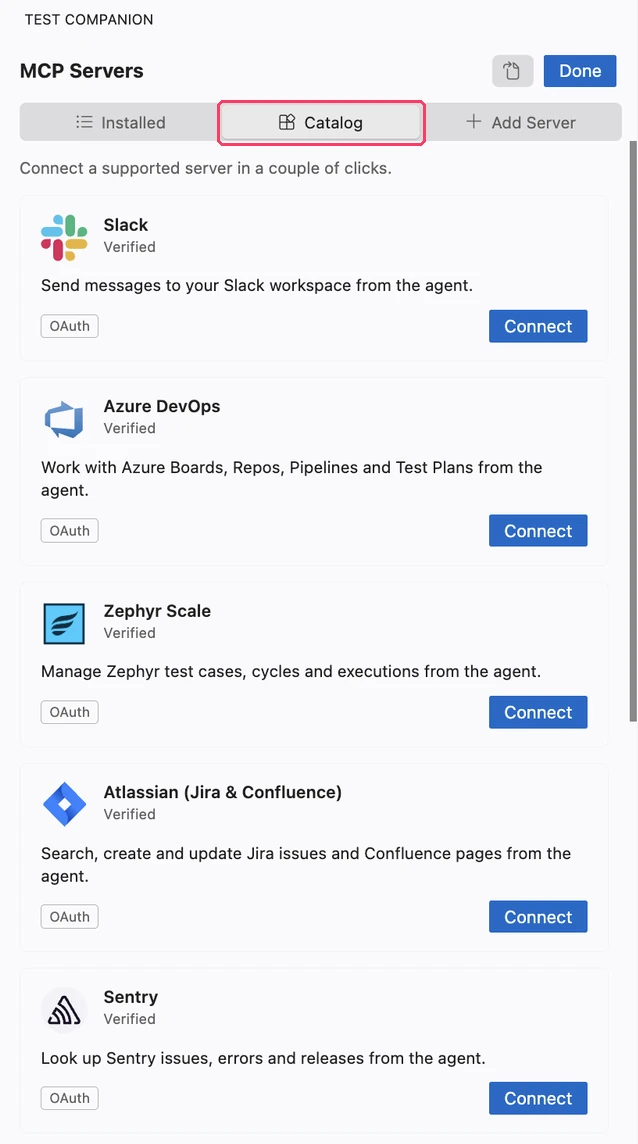
- Sign in with your Zephyr Scale account in the browser and grant the requested access, then return to your IDE. The Installed tab shows the server with a green dot and its tool count.
For the controls of a connected server, see Zephyr Scale in Connect an MCP server to Test Companion.
The first time Test Companion uses the server, it detects which Zephyr Scale region your account uses. You do not set the region yourself.
Actions that are not available over the MCP server
Over the MCP server, the Test Cases panel cannot create projects or delete custom fields. The rest of this page applies to both routes.
Automate from Zephyr Scale
After you connect, browse your test repository and generate automation without leaving the IDE.
Currently, you can only automate individual test cases from Zephyr Scale from the UI.
Select a project and folder
- Open Test Companion.
-
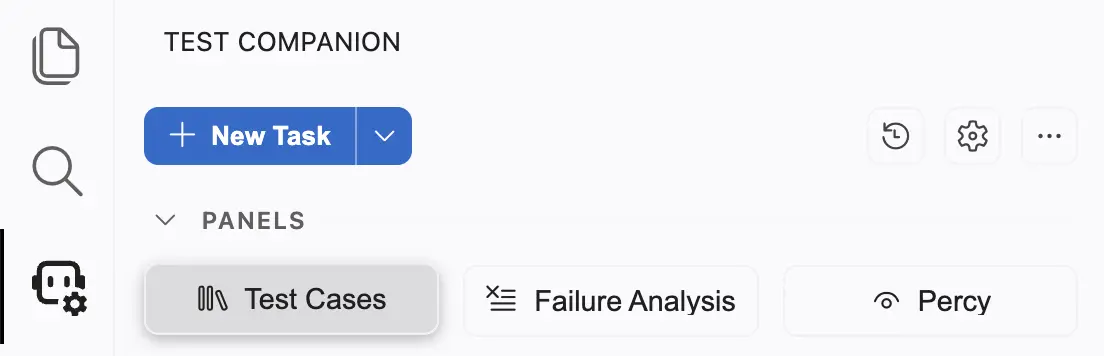
Under Panels, click Test Cases to open the Test Management pane.
-
In the Test Management Service dropdown, select Zephyr Scale.
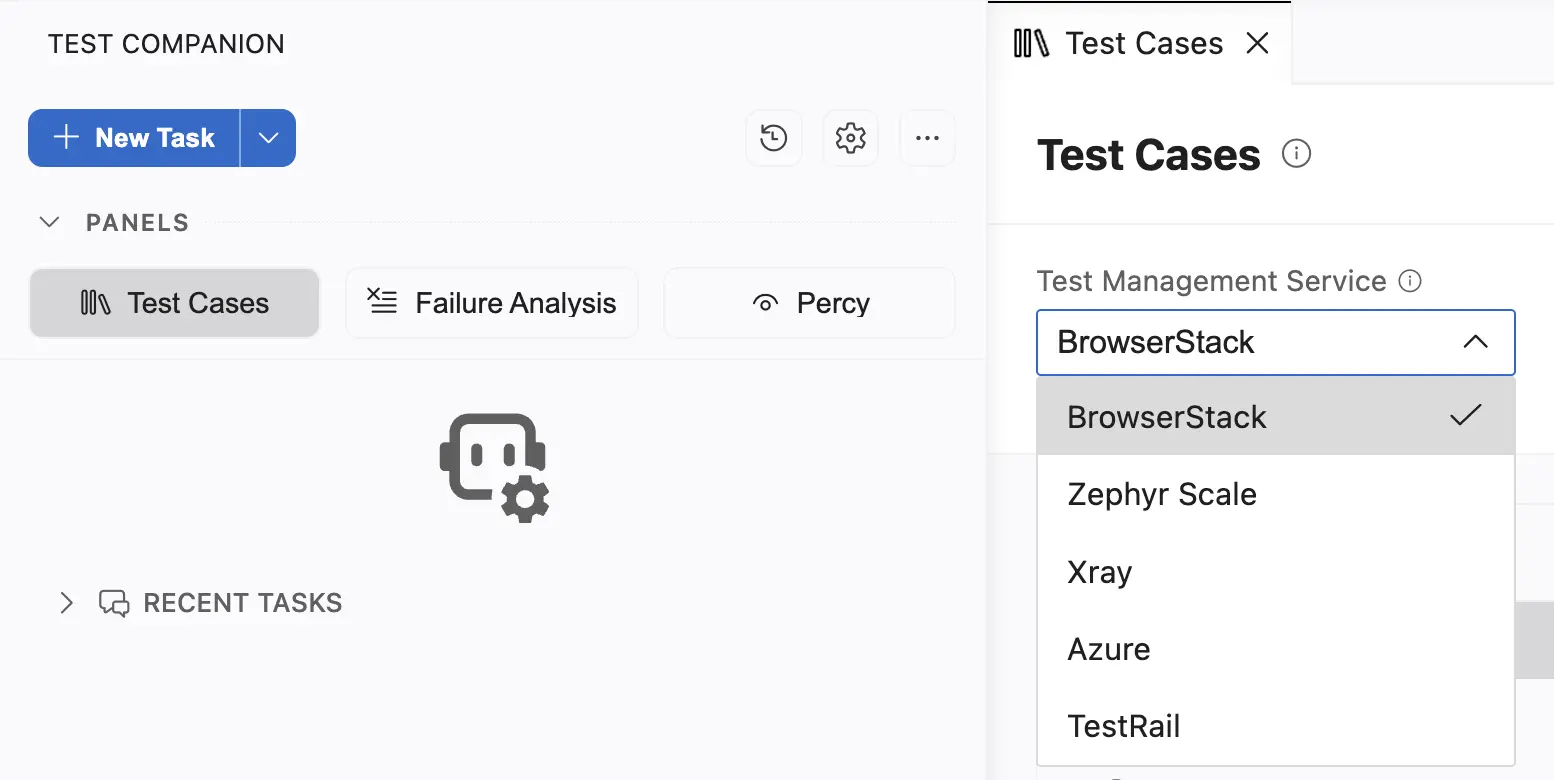
- Use the dropdown menus in the Test Cases pane to navigate your repository:
- Project: Select the Zephyr Scale project that holds your test cases.
- Folder: Browse the folder tree to find specific test suites.
View test cases
- Click a folder to list the test cases it contains. Each test case shows key details:
- Test ID, such as T-45
- Test Name
- Preconditions
- Description
- Priority
In the test cases panel, steps are not shown in the table, but they will be retrieved when you click the Automate button for that specific test case.
Generate automation
To automate a test case:
- Find the test case in the list.
-
Click Automate next to the test case.
Test Companion adds the test case details to the chat input.
- Click Send message.
Test Companion reads the steps, expected results, and preconditions from Zephyr Scale. It generates an automation script in the chat window, matched to your selected framework.
What Test Companion reads from Zephyr Scale
When you automate a test case, Test Companion fetches these fields to build context:
| Field | What it provides |
|---|---|
| Test ID | The unique identifier for the test case, such as T-45 |
| Test Name | The name of the test case |
| Description | A summary of what the test case covers |
| Test Steps | The manual steps the script should follow |
| Expected Results | The outcome expected after each step |
| Preconditions | The setup required before the steps run |
| Priority | The priority assigned to the test case in Zephyr Scale |
Next steps
- Automate tests: Convert selected test cases into automation scripts.
- Generate test cases: Generate new test cases from requirements or by exploring a URL.
We're sorry to hear that. Please share your feedback so we can do better
Contact our Support team for immediate help while we work on improving our docs.
We're continuously improving our docs. We'd love to know what you liked
We're sorry to hear that. Please share your feedback so we can do better
Contact our Support team for immediate help while we work on improving our docs.
We're continuously improving our docs. We'd love to know what you liked
Thank you for your valuable feedback!