
 Join our Discord
Run visual tests on web apps
Capture Percy snapshots of your web pages from Test Companion, then compare each browser and width against the baseline in your IDE.
Test Companion captures snapshots of your web pages, sends them to Percy, and opens the comparison in the Visual Analysis panel. Each page is compared per browser and per viewport width. For how the review loop and the panel work, read Visual analysis.
Prerequisites
Before you start, confirm the following:
- Test Companion is installed in a supported IDE and you are signed in to your BrowserStack account.
- Your BrowserStack account has access to BrowserStack Percy.
- You have a public URL, a running local server, or a web project in your workspace.
Run a visual test
These steps assume your project is already connected. If this is your first visual test, start from Connect Visual Analysis and let the panel build the prompt for you.
To capture a page and start a Percy build, follow these steps:
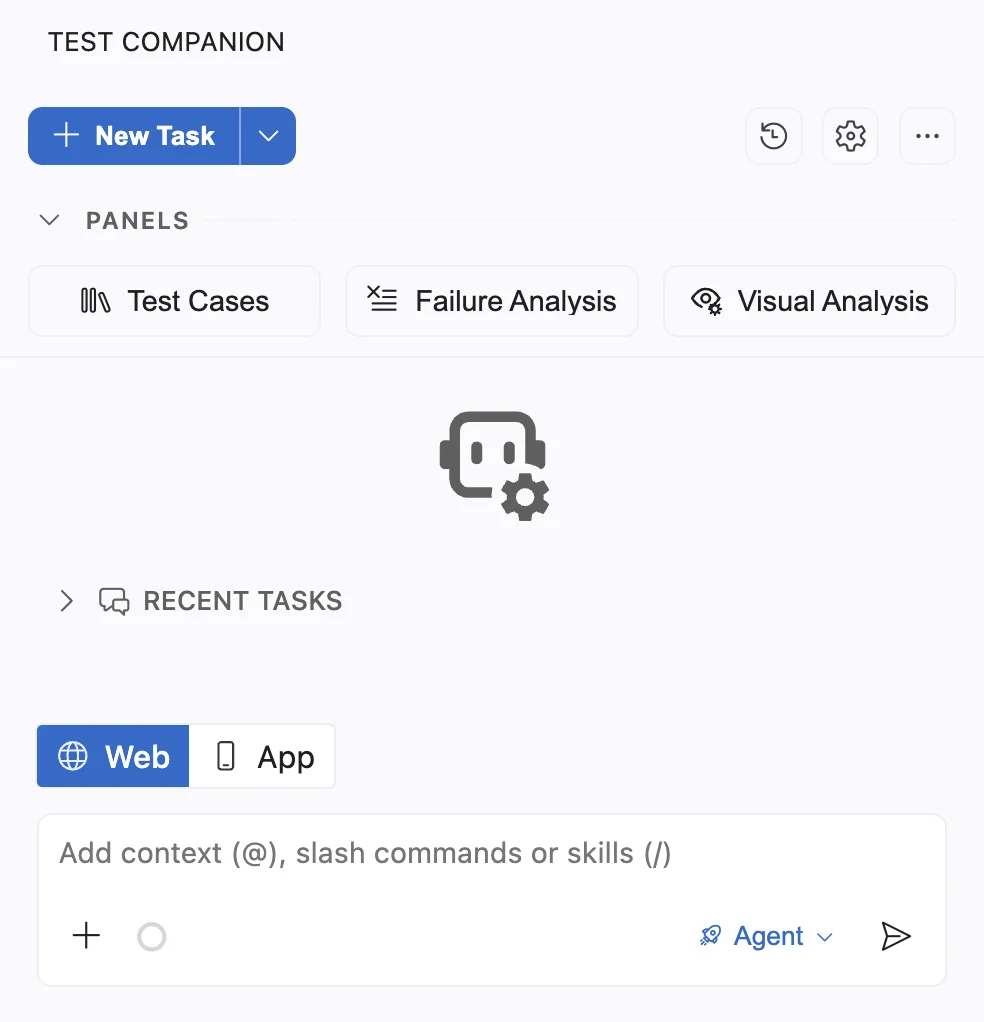
- Open the Test Companion panel in your IDE.
-
Click Web in the toggle above the chat input.
-
Describe what you want to check. Point Test Companion at a URL, a local server, or your project:
Do visual testing on example.com - Press Enter.
Test Companion decides how to capture the page, captures the snapshots, and runs a Percy build.
How Test Companion captures snapshots
Test Companion selects one of two capture routes, based on what your project already has.
| Capture route | Applies when | What Test Companion does |
|---|---|---|
| Your Percy SDK | Your project already runs a Percy SDK, such as @percy/playwright or @percy/cli. |
Runs your existing setup unchanged and captures snapshots from it. |
| BrowserStack SDK | Your project has no Percy setup, or it uses a Selenium-family framework. | Sets up capture through the BrowserStack SDK, which needs only configuration changes to start capturing snapshots. |
To choose a route yourself, name it in your prompt, for example, use the Percy SDK or use the BrowserStack SDK.
Review the build
The Visual Analysis panel opens on the finished build.
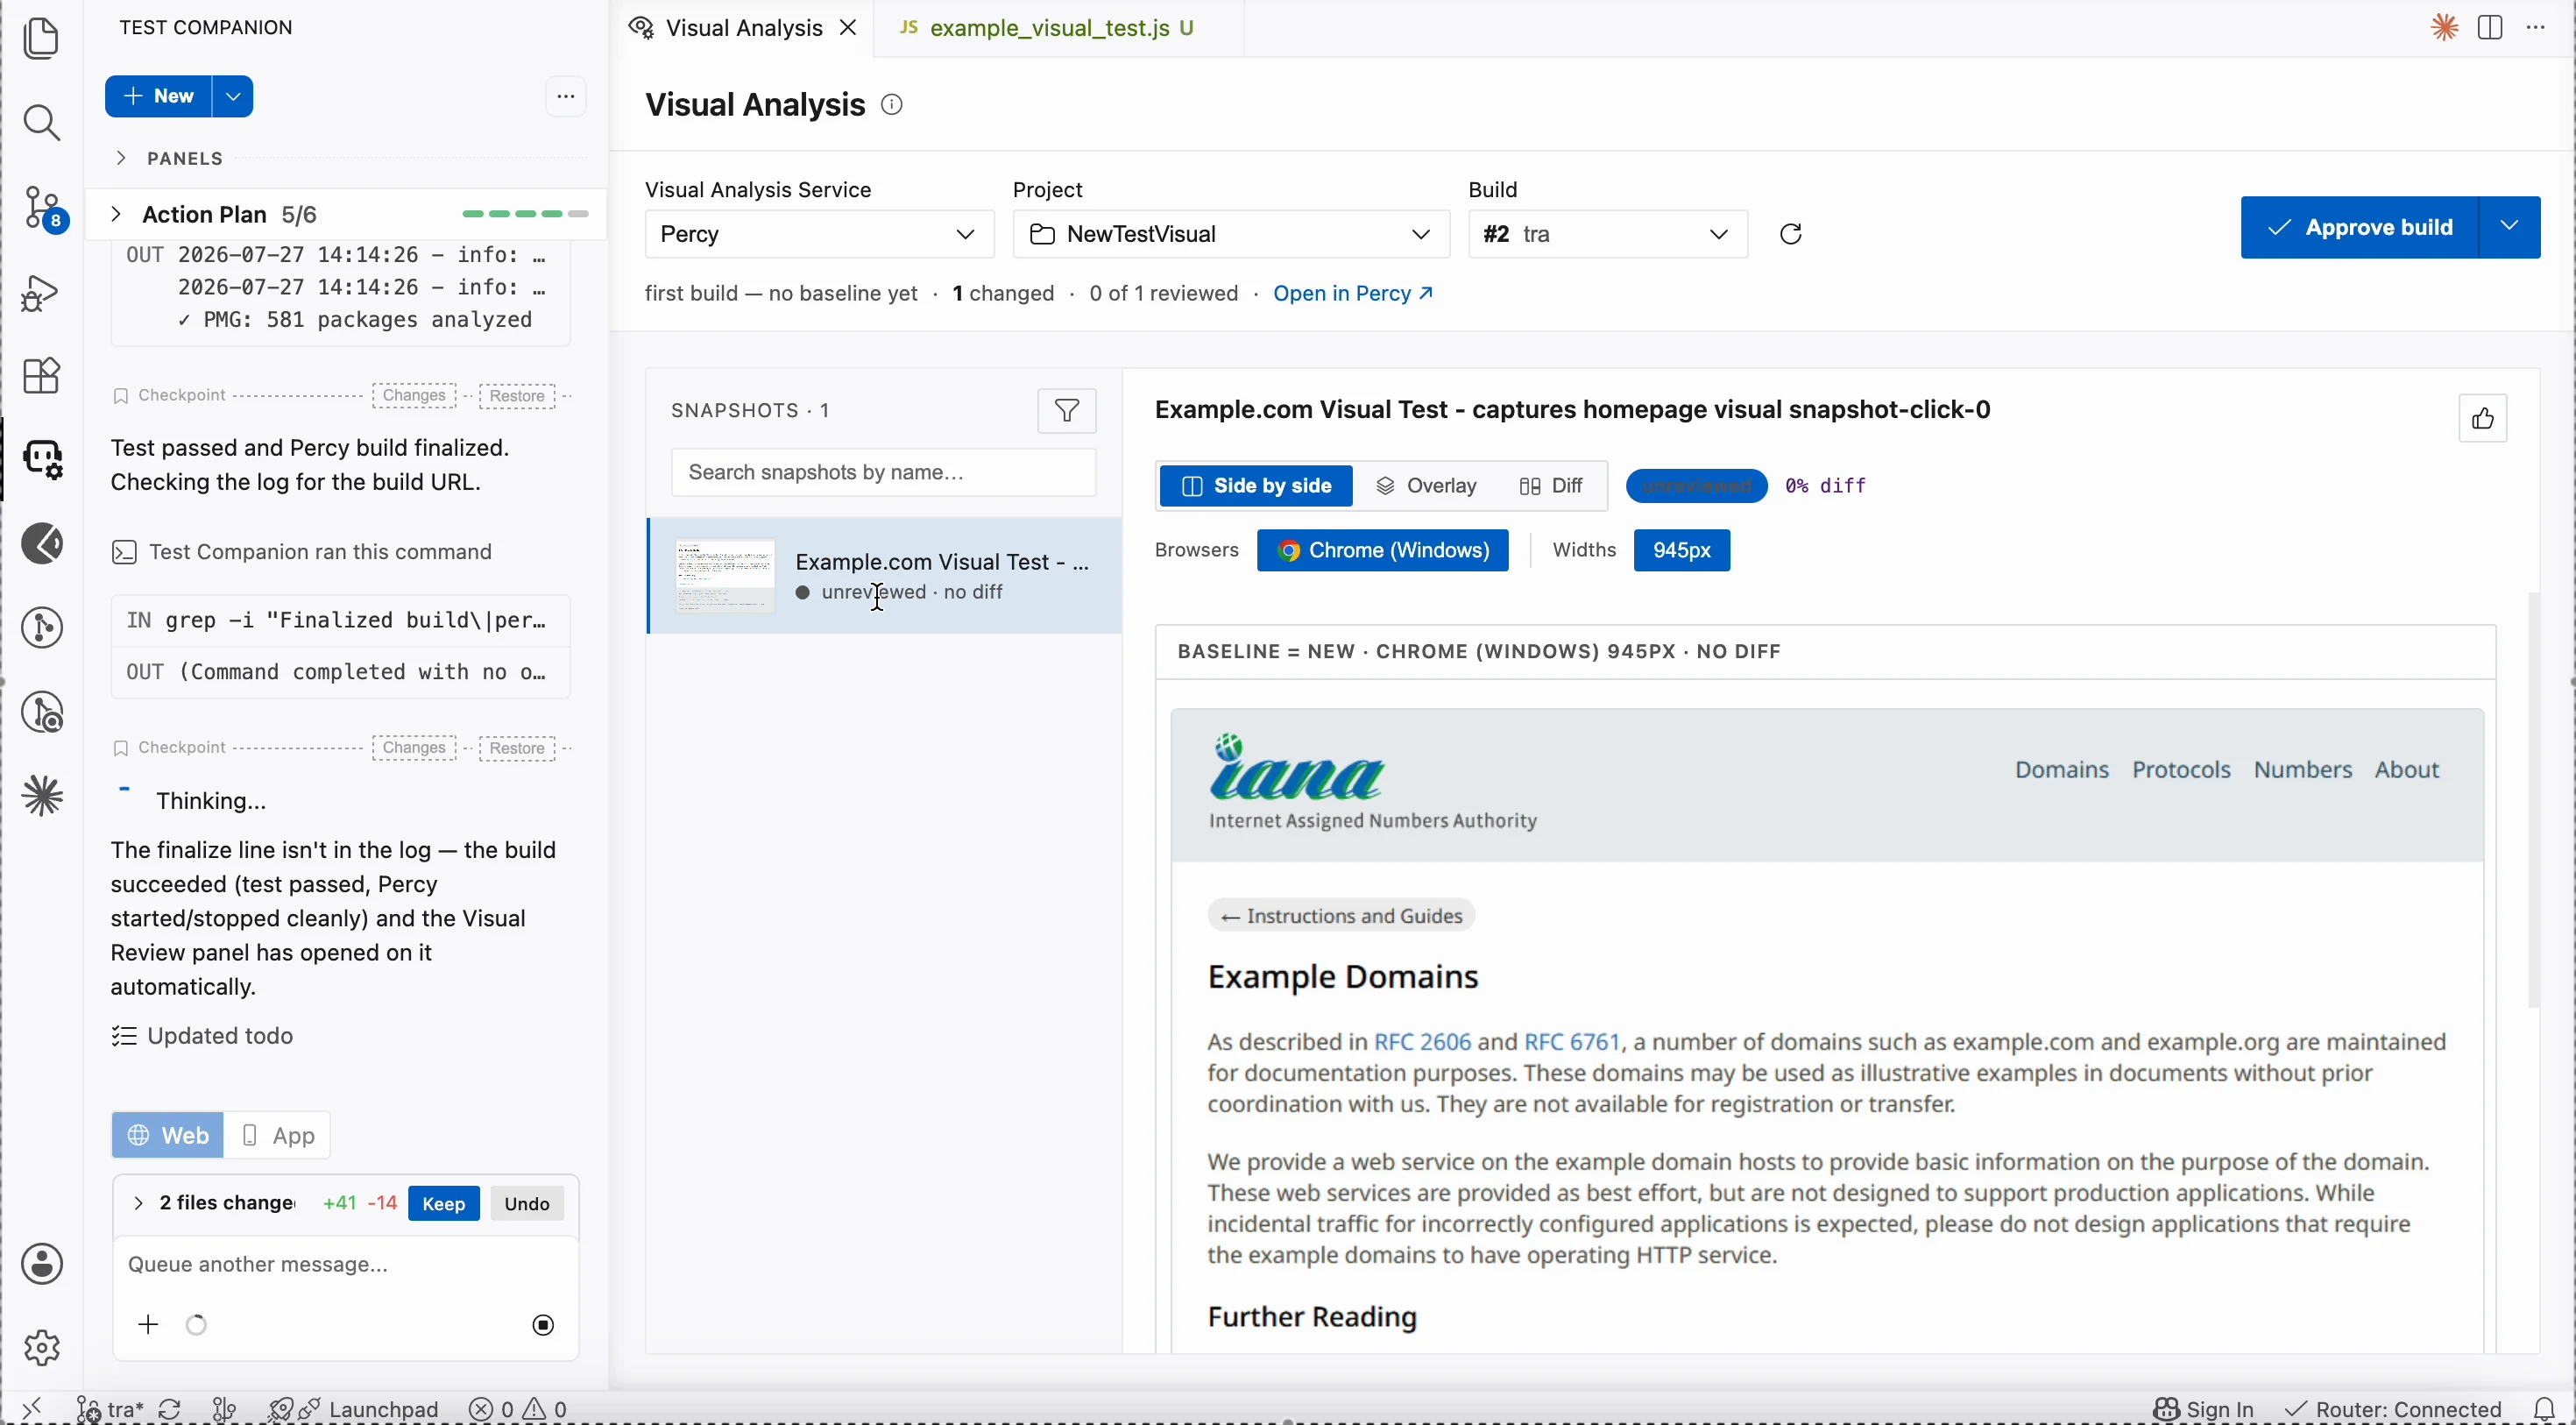
To work through the build, follow these steps:
- Select a snapshot in the Snapshots list to open its comparison.
- Compare the snapshot in Side by side, Overlay, or Diff view.
- Use Browsers and Widths to check the render at each captured browser and width.
- Click Approve build when every change is intended.
When a difference is a real regression, leave the build unapproved. Fix the code, then run the visual test again.
Example prompts
Name the pages you want to capture, so Test Companion captures those and nothing else.
Snapshot a live URL
Do visual testing on https://example.com
Snapshot pages on a local server
Run visual regression on my app at localhost:3000 for the home and pricing pages.
Next steps
- Visual analysis: Read how baselines, builds, and the Visual Analysis panel work.
- Run visual tests on mobile apps: Run the same review loop for Android and iOS screens.
- Automate tests: Turn manual test cases into automation scripts.
We're sorry to hear that. Please share your feedback so we can do better
Contact our Support team for immediate help while we work on improving our docs.
We're continuously improving our docs. We'd love to know what you liked
We're sorry to hear that. Please share your feedback so we can do better
Contact our Support team for immediate help while we work on improving our docs.
We're continuously improving our docs. We'd love to know what you liked
Thank you for your valuable feedback!