Custom test case templates
Learn about the functionalities related to custom test case templates in Test Management.
This feature is available as part of the Team Pro plan.
Custom test case templates standardize test case creation by providing predefined formats, simplifying documentation, execution, and analysis of tests. You will find two default system-defined templates, Test Case Steps and Test Case BDD, which cannot be removed. However, creating custom templates enables you to tailor test formats precisely to your specific project requirements.
For instance, you might create specialized templates for regression testing or exploratory testing, which can then be reused across multiple projects, enhancing efficiency and consistency in your testing workflows.
By default, Product Admins have permission to create custom fields and templates. For the Enterprise plan, this permission can be modified by the IAM Admin.
Create custom test case templates
Follow these steps to create a custom test case template:
- Navigate to Settings and select the Templates tab.
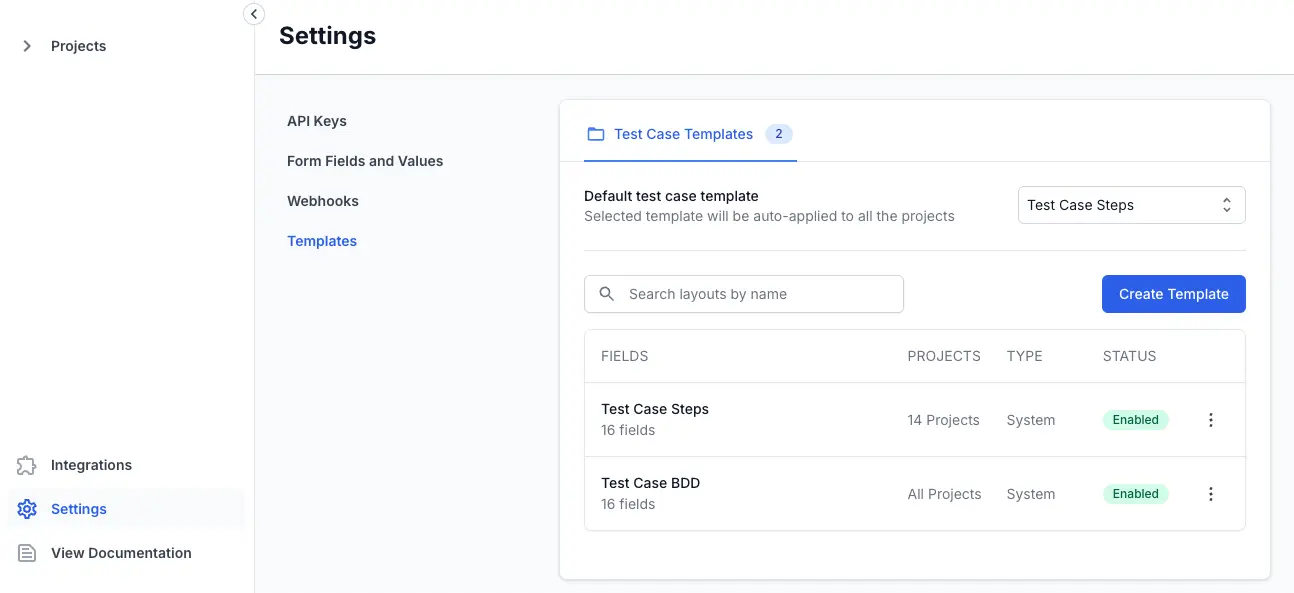
- Click Create Template.
- Enter the Template Name (see annotation 1).
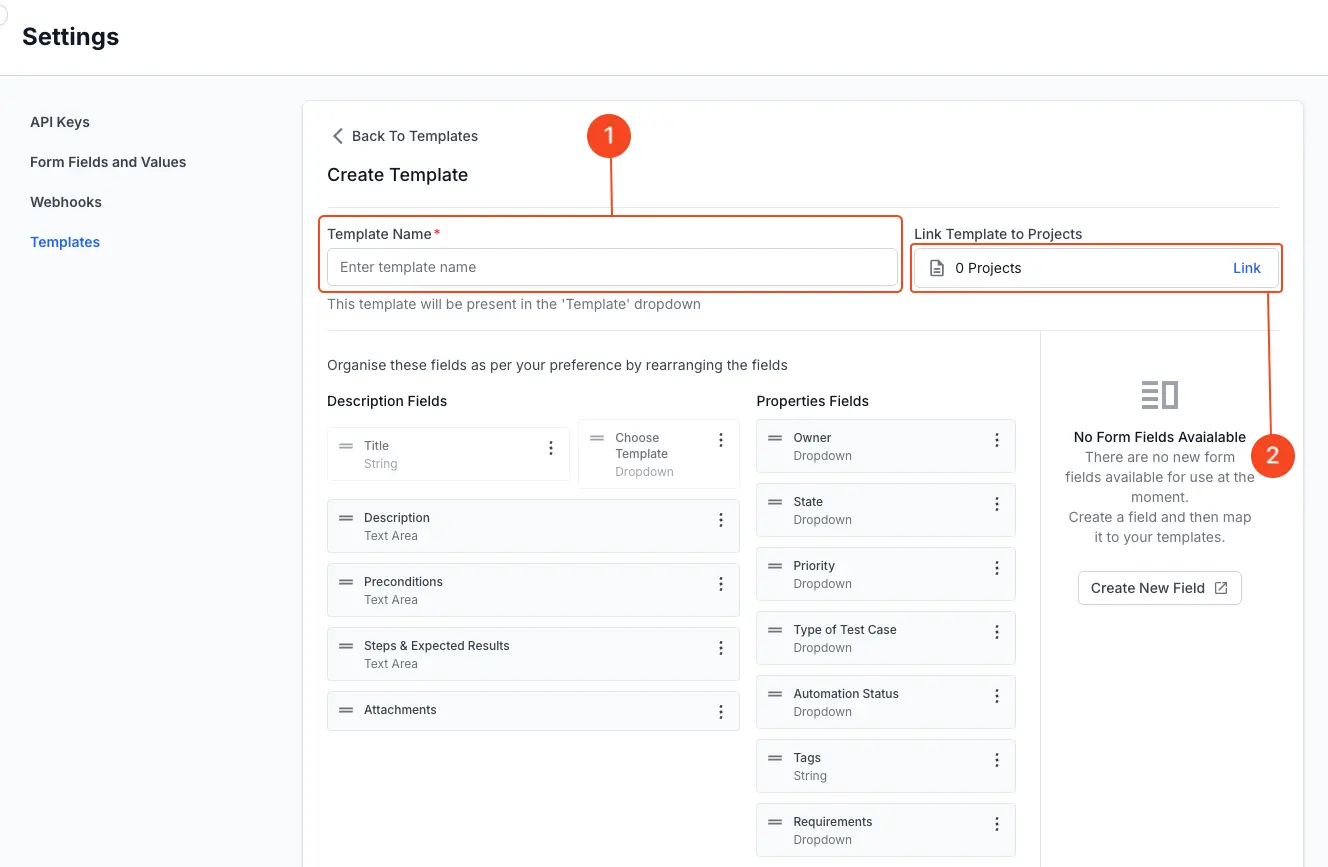
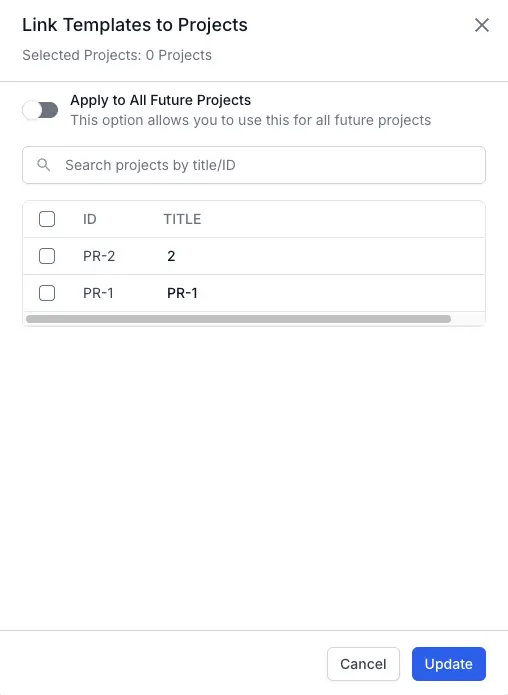
- Click Link to associate this template to specific projects (see annotation 2).
- Select checkboxes against the project you desire to link this template.
- Optionally, enable Apply to All Future Projects toggle to add this template to all future projects by default.
- Click Update to confirm.
- Define your template structure:
- Organize fields: Arrange fields into Description Fields and Properties Fields (see annotation 3).
- Reorder fields: Click and hold a field, then drag and drop to rearrange the field order (see annotation 4).
- Move or remove fields: Click the options menu icon next to each field to move or remove fields from the template (see annotation 5).
-
Add new fields: Click Create New Field and follow these instructions (see annotation 6).
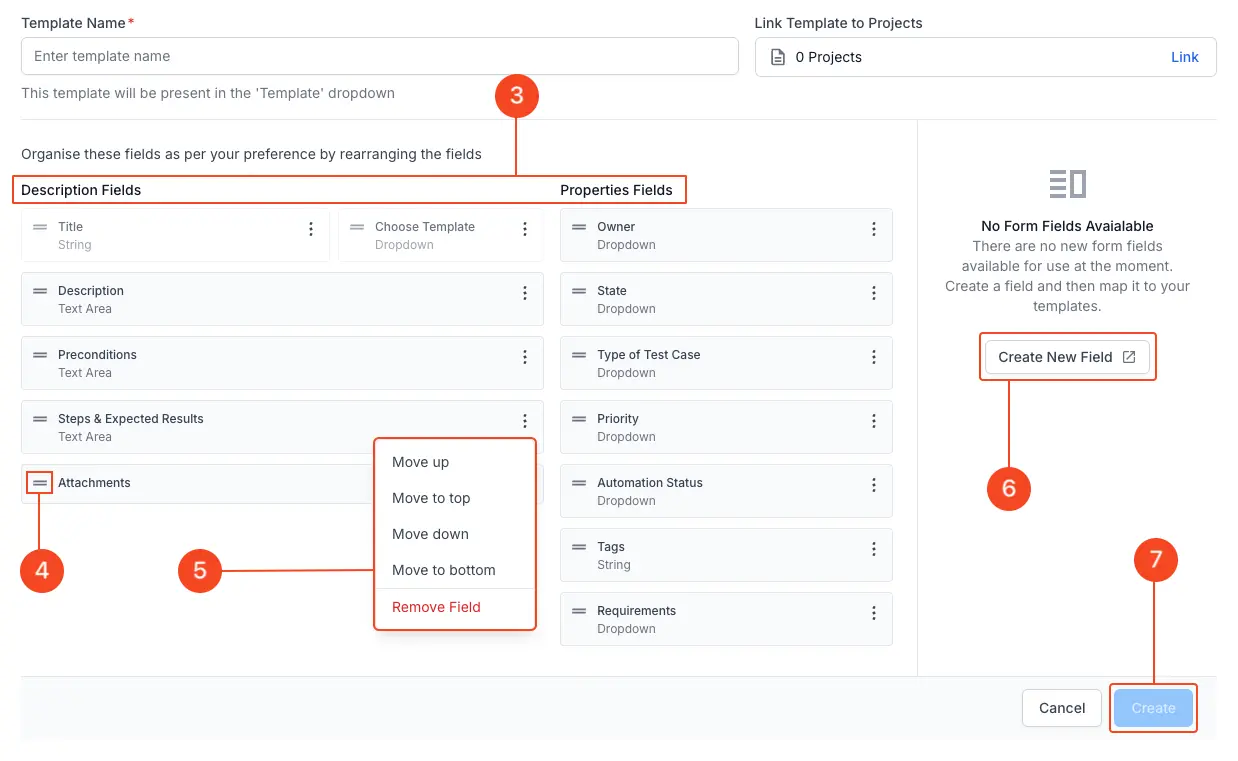
- After configuring the fields, click Create to save your template (see annotation 7).
The newly created template is now available for use across your linked projects.
The following fields are present by default in all templates and cannot be removed:
- Title
- Choose Template
- Steps & Expected Results
- Requirements
- Attachments
- Owner
Update a custom test case template
Follow these steps to update a custom template:
- Click the custom template or the options menu (three dots) next to the template.
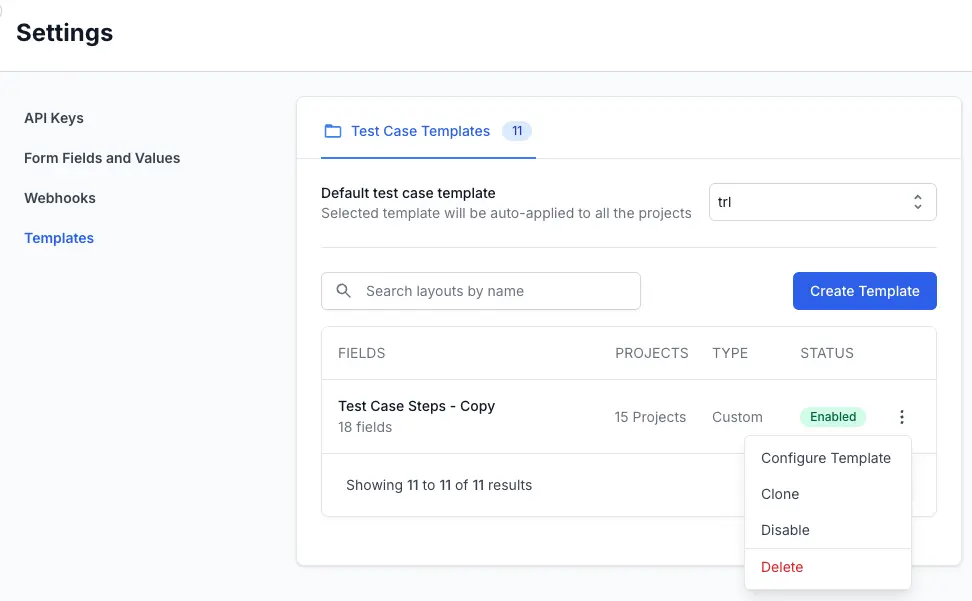
- Select Configure Template.
- To rearrange the fields:
- Reorder fields: Click and hold a field, then drag and drop to rearrange the field order (see annotation 1).
- Move or remove fields: Click the options menu icon next to each field to move or remove fields from the template (see annotation 2).
- Add new fields: Click Manage Form Fields and follow these instructions.
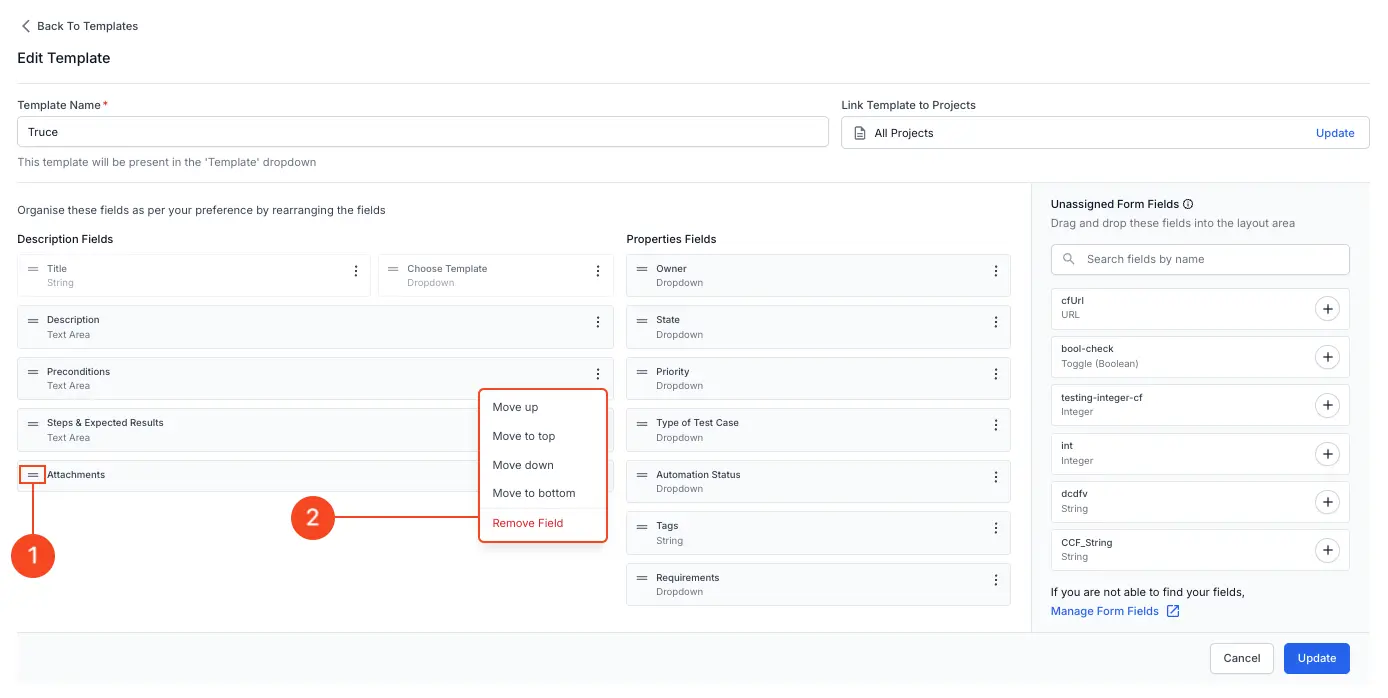
- Click Update.
Delete a custom test case template
You cannot delete a system template or a default template.
To delete an existing custom test case template:
- Navigate to Settings and select the Templates tab.
- Locate the template you want to delete and click the options menu (three dots) next to the template.
-
Select Delete.

- Confirm the deletion in the prompt.
The template will be permanently removed and no longer available for test cases.
Enable and Disable a custom test case template
You can enable or disable custom test case templates based on your requirements. Disabling a template temporarily prevents it from being selected when creating test cases without permanently removing it.
To enable or disable a template:
-
Navigate to Settings and select the Templates tab.
-
Locate the desired template and click the options menu (three dots) next to the template.
-
Select Enable or Disable based on your current needs.
The custom test case template will enable or disable as per the action and the Status of the template changes to Enabled or Disabled accordingly.
Clone a custom test case template
Cloning allows you to quickly duplicate an existing template and customize it further without starting from scratch. Follow these steps to clone a custom template:
-
Click the custom template or the options menu (three dots) next to the template.
-
Click Clone.
A new template appears at the end of the list of templates using the same name followed by - Copy. You can update the template and make the necessary changes.
Use a custom test case template
When creating new test cases, you can only select templates linked to the project you are working on. The linked templates appear in the template dropdown, ensuring relevant template usage.
To select a custom template in your test case:
- Navigate to the project linked to the custom test case template.
- Follow these instructions to create a new test case or update an existing test case.
- Select your custom template from the template dropdown.
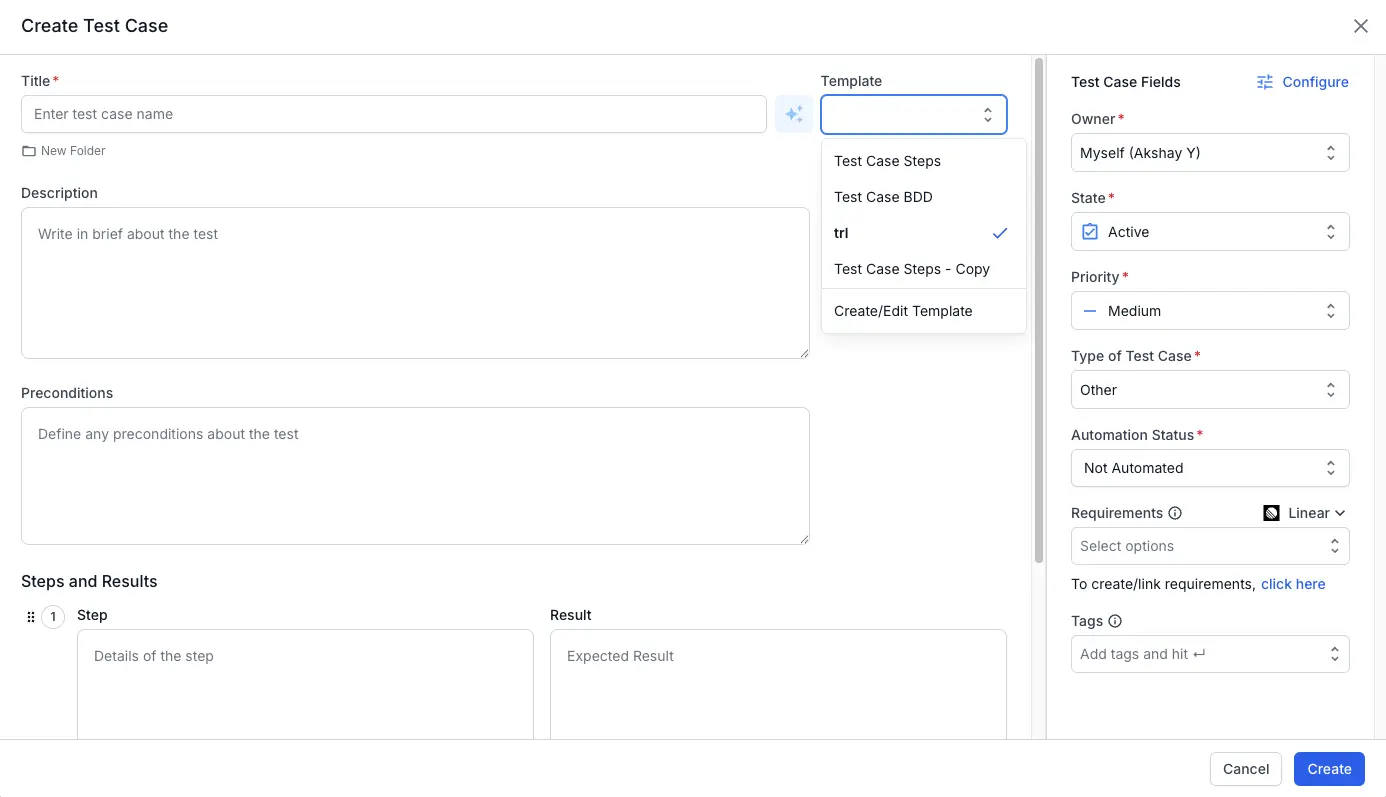
- Your predefined fields and settings will auto-populate, making test case creation faster and more consistent.
Set a default template
To set a template as default to all future test cases:
- Navigate to Settings and select the Templates tab.
- Choose your preferred template from the Default test case template dropdown.
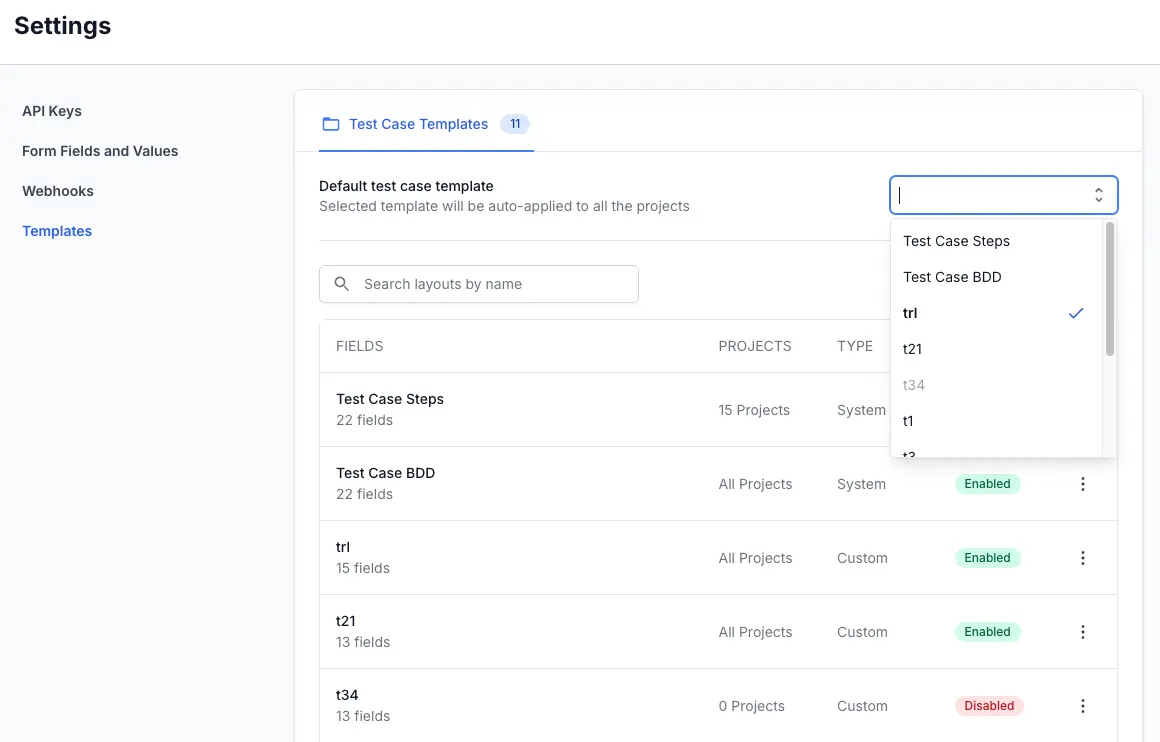
This template will now appear as default when you want to create a new test case.
We're sorry to hear that. Please share your feedback so we can do better
Contact our Support team for immediate help while we work on improving our docs.
We're continuously improving our docs. We'd love to know what you liked
We're sorry to hear that. Please share your feedback so we can do better
Contact our Support team for immediate help while we work on improving our docs.
We're continuously improving our docs. We'd love to know what you liked
Thank you for your valuable feedback!