Generate test cases using existing requirements
Generate test cases directly from multiple files, including various file types to keep your tests aligned with the original specification.
You can also generate test cases directly from an existing requirement, such as a Jira issue or an internal user story. This method ensures you can trace your tests back to the original requirement.
- When BDD test cases are selected, the generator returns Feature/Scenario style output using Given / When / Then.
- Context from attachments is ignored when generating test cases from a JIRA issue.
- You can upload multiple files, including various file types, to generate test cases.
- For the most accurate AI-generated test cases, ensure the information in your prompt does not conflict with the content in your requirements documents.
- When details conflict, the AI cannot determine the correct source of truth, which may lead to incomplete or incorrect test cases.
To generate detailed test cases based on what you want to test:
- Navigate to the test cases list view in your project and select an existing test case folder or create a new one.
- Click Generate with AI.
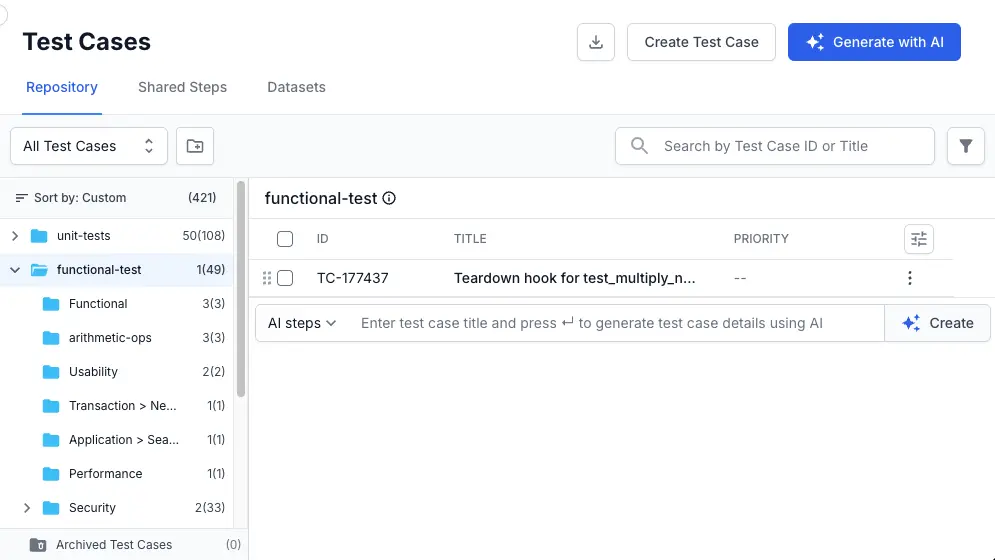
- On the generation screen, you need to provide input to the AI to generate test cases. You can do this by:
-
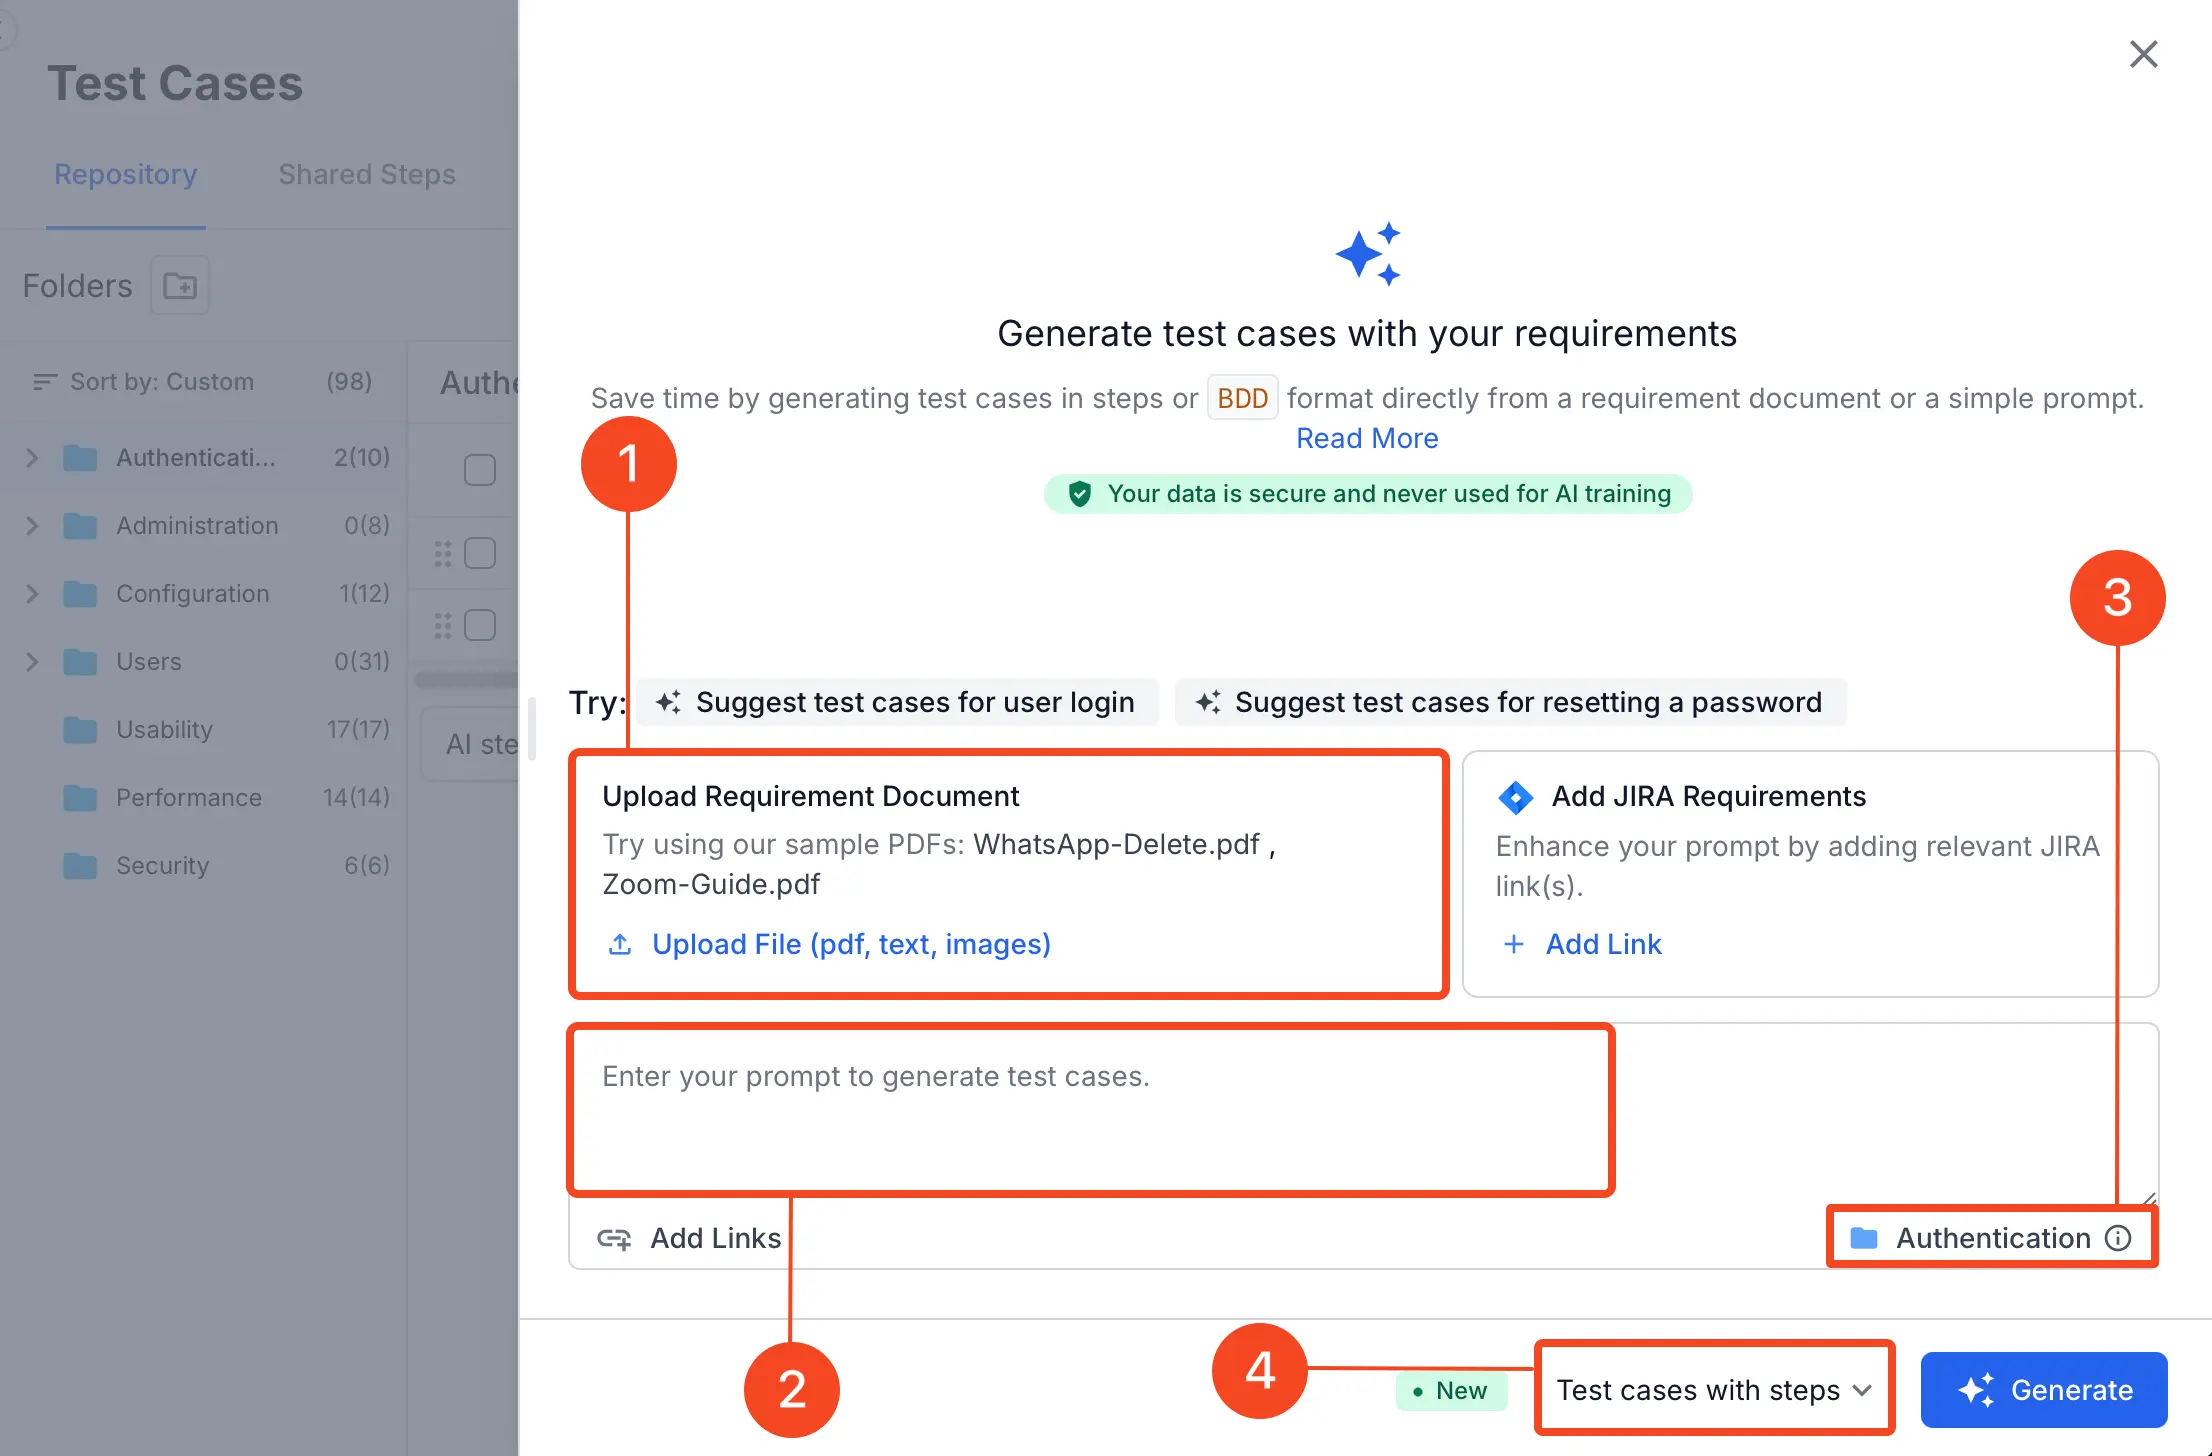
Uploading a requirements file (See annotation 1):
- Upload a requirements document (example, a PDF file) containing detailed requirements specifications.
- This file is attached to each generated test case.
- You can provide both a prompt and a requirements document for more comprehensive input.
-
Using a prompt (See annotation 2):
- Enter a detailed description of the test case scenarios you need. The prompt has a character limit of 30,000 characters.
-
Choose the destination folder where accepted AI-generated test cases will be saved (See annotation 3):
- Click the folder icon next to the folder name at the bottom of the modal window.
- From the displayed folder structure, select the desired folder.
- By default, the test cases will be saved in the currently selected folder. You can change the folder at any time before generating test cases.
-
Uploading a requirements file (See annotation 1):
- Choose the output format for your test cases from the dropdown menu (See annotation 4) beside Generate button.
- Test cases with steps: Creates comprehensive test cases complete with preconditions and detailed, step-by-step instructions.
- Test cases without steps: Generates concise cases with Title, Description, Priority, State, and Type of test case.
- BDD test cases: Generates test scenarios using the Gherkin Given/When/Then structure.
- Click Generate button.
- The AI generates test cases across scenarios, with all test cases selected by default and categorized accordingly.
-
Monitor the AI’s analysis:
The AI will now analyze your input and provide real-time feedback on its process. You can expand each section to see more details. The process includes:- Analyze your requirement: The AI parses the prompt, documents, and linked pages to understand the core functional and non-functional requirements.
- Scan for context: It searches for existing test cases and linked artifacts in your project to gather more context.
- Generate a summary: The AI presents its findings, including core requirements and relevant artifacts, before it begins creating the test cases.
- After test case generation completes, review the generated results.
- If you selected Test cases with steps or Test cases without steps, the AI groups your test cases into scenarios. On the review screen, you can perform the following actions:
- Expand a scenario: Click the arrow (>) next to the scenario to see its individual test cases.
- Review test cases: Deselect any test case you do not need by unchecking its box.
-
View test case details: Click View besides a generated test case to view test case details and make inline edits.
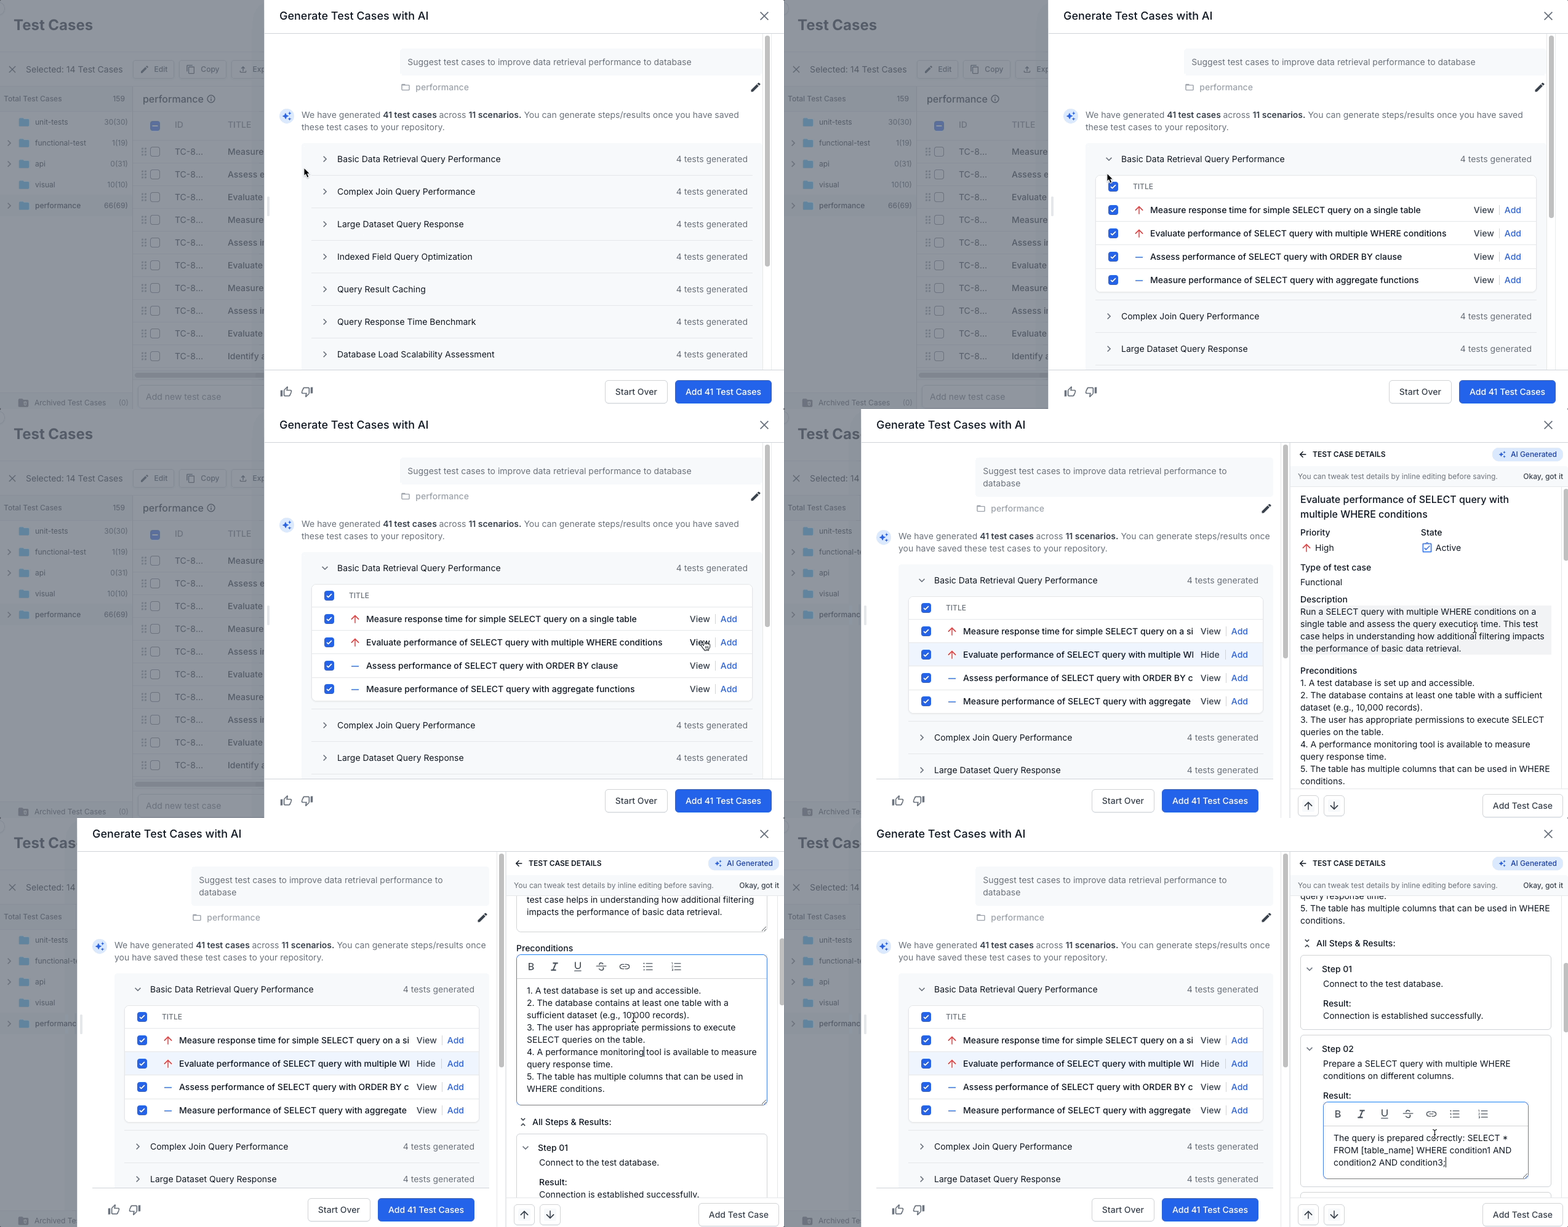
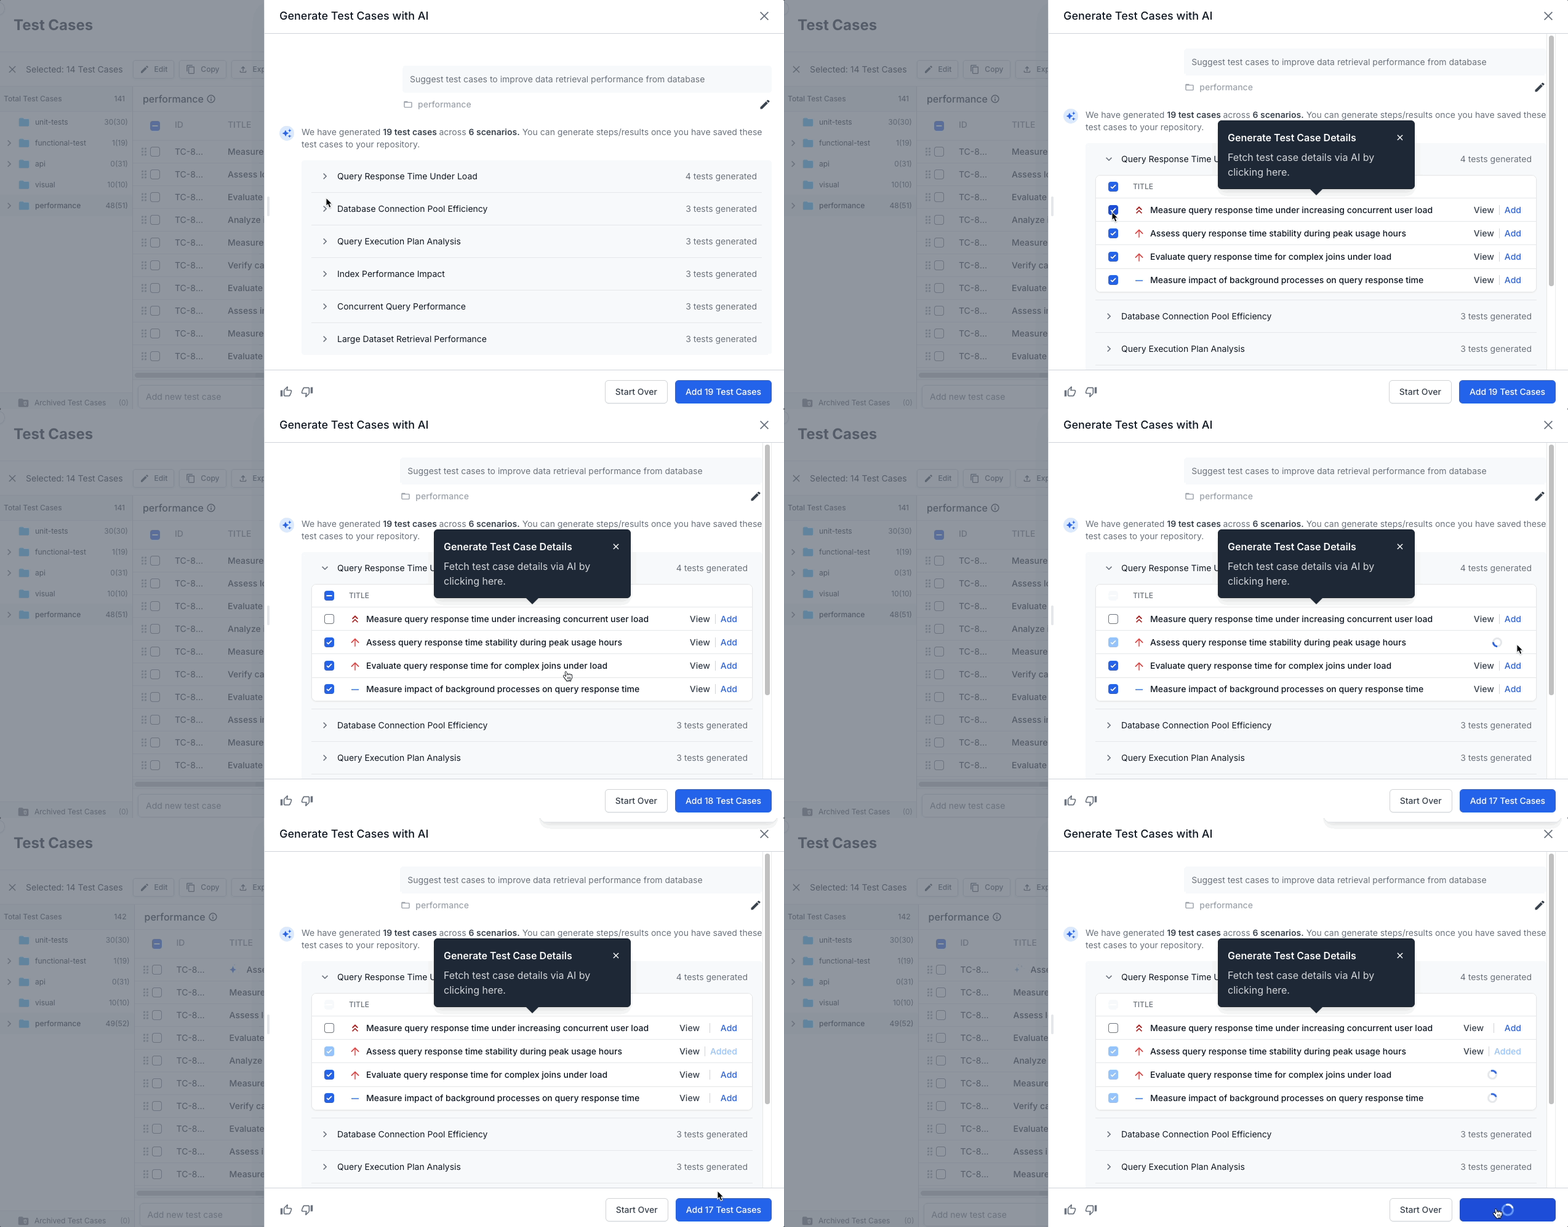
- Add individually: Click Add next to a specific case.
- If you selected BDD test cases, the AI groups your BDD scenarios into features. On the review screen, you can perform the following actions:
- Expand a feature: Click the arrow (>) next to the feature to see its individual test cases.
- Edit dataset: You can view or edit the dataset if it is generated within a test case. Refer to generate test datasets with AI documentation.
- Review test cases: Deselect any test case you do not need by unchecking its box.
- View test case details: Click View besides a generated test case to view test case details and make inline edits.
-
Add individually: Click Add next to a specific case.
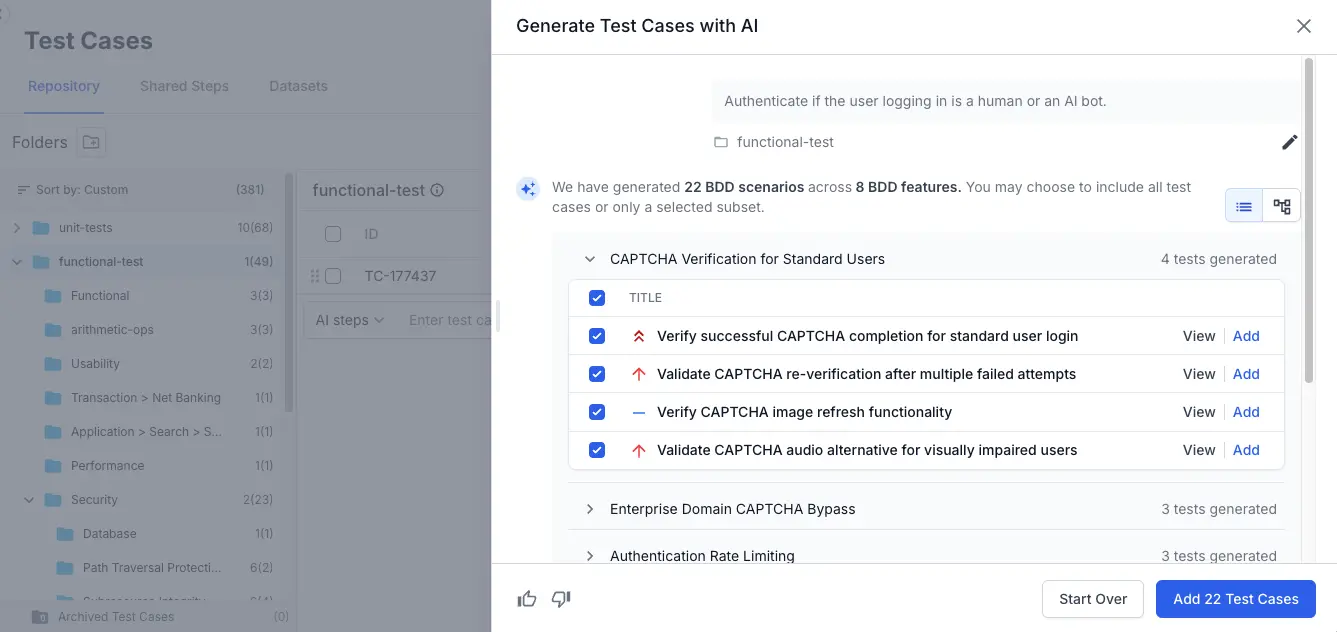
- If you selected Test cases with steps or Test cases without steps, the AI groups your test cases into scenarios. On the review screen, you can perform the following actions:
- Add to your repository:
- Add to destination folder: Adds the selected test cases directly to destination folder.
-
Create subfolders and add: Organizes results into subfolders inside the destination folder:
- For Test cases with/without steps: one subfolder per Scenario.
- For BDD test cases: one subfolder per Feature.
- Click Add Test Cases to include the selected test cases in your suite.
- To discard and start over, click Start Over and choose any method to regenerate test cases.
You have now successfully generated a comprehensive set of test cases linked directly to your requirement, ensuring your testing is aligned with your project goals.
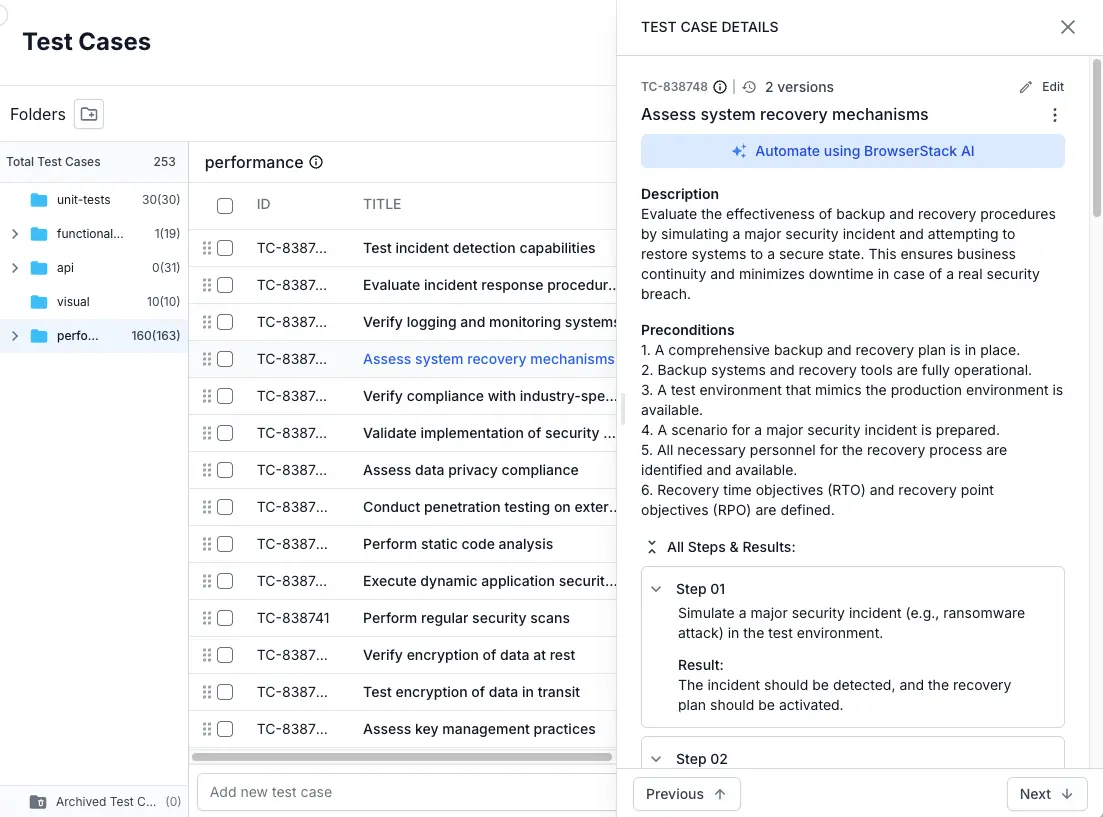
Test case details are generated asynchronously and may take some time.
Now, you have successfully generated and added AI-powered test cases with detailed test case details to your test case repository, tailored to your specific requirements and context.
The following image shows an example of an AI-generated test case along with its details.
Persistent background generation
Once you start, the AI test case generation runs in the background. You can safely close the generation window or navigate to other parts of the application without interrupting the process. The job is tied to your current browser session and will only stop if you refresh the page or log out. To check the progress, simply reopen the Generate with AI modal.
Document limitations
BrowserStack AI performs best with PRD’s that are well-structured, detailed, and unambiguous. For optimal performance, adhere to the following PRD constraints:
| File Category | Supported Formats | Maximum Size | Other Limits |
|---|---|---|---|
| Documents |
DOC, DOCX, PDF, RTF
|
25 MB |
25 pages |
| Presentations | PPTX |
10 MB |
25 slides |
| Images |
PNG, JPG, JPEG
|
5 MB |
N/A |
| Data & Text |
CSV, JSON, TXT, XLSX
|
500 KB |
N/A |
If your document exceeds the size or page limit, the upload will fail. To proceed, you must split the document into smaller parts or compress its content before uploading.
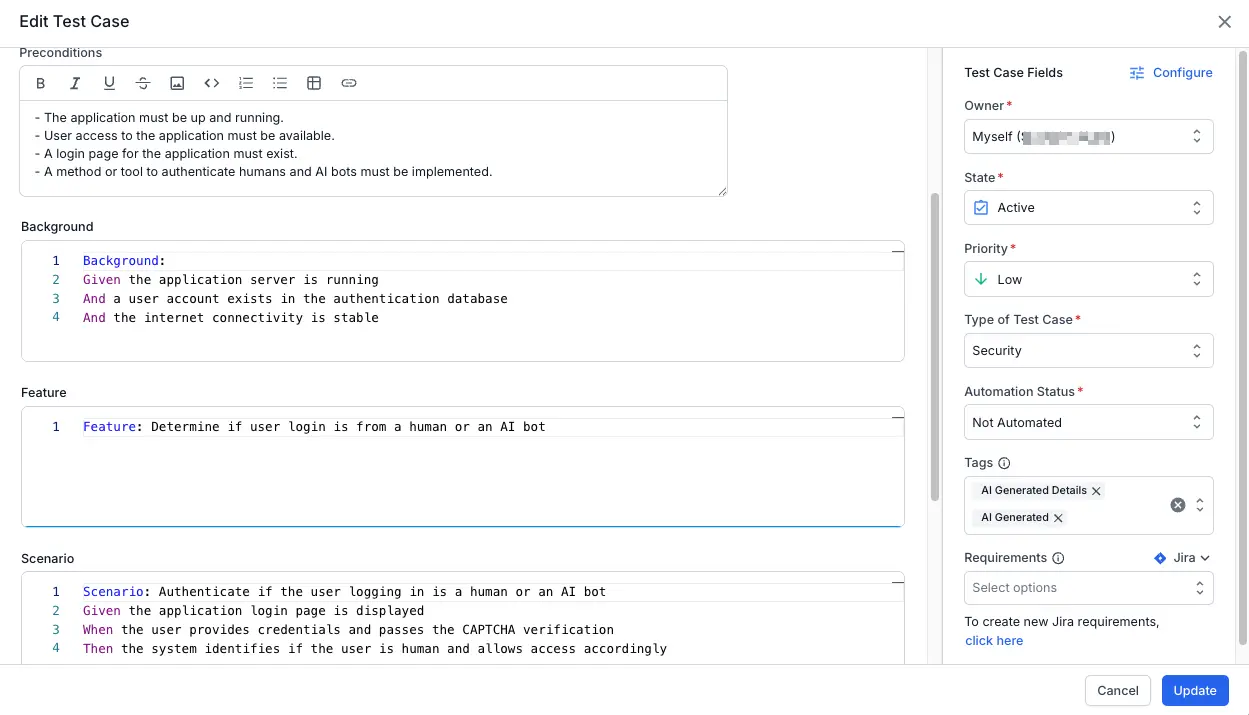
Example of an AI-generated BDD test case
The following image shows an example of an AI-generated BDD test case along with its details.
We're sorry to hear that. Please share your feedback so we can do better
Contact our Support team for immediate help while we work on improving our docs.
We're continuously improving our docs. We'd love to know what you liked
We're sorry to hear that. Please share your feedback so we can do better
Contact our Support team for immediate help while we work on improving our docs.
We're continuously improving our docs. We'd love to know what you liked
Thank you for your valuable feedback!