Link Issues to an Exploratory Session
Learn how to link issues to an exploratory session in BrowserStack Test Management, including connecting findings to your issue tracker.
Connect your exploratory sessions to external requirements before testing and to defects during testing, so every finding is traceable to your issue tracker.
Requirements and defects
Exploratory Sessions support two categories of linked issues, each serving a different purpose in your workflow.
Requirements are issues you link before or at the start of a session. They represent the scope of what you are testing.
For example, you might link a Jira epic like CHECKOUT-142: Redesign payment form to establish that this session is testing against that requirement. Requirements give your session context and create a traceability link between your testing effort and the feature or user story it validates.
Defects are issues you link during a session when you find a bug. You can either link an existing issue from your tracker or create a new one directly from a session log entry. Defects connect your session findings to the defect lifecycle in your workflow.
Both types are accessible from the Linked Issues button in the top-right corner of the session page.

Supported integrations
Linking issues requires a configured integration with your requirement management or issue tracking tool. Exploratory Sessions support the following tools:
- Jira, Azure DevOps (Azure Boards), Asana, Linear, ClickUp, DevRev, GitHub, and GitLab.
If you have not set up an integration yet, you can do so from the Integrations page in the left navigation panel, or by clicking the relevant tool tile during session creation. For step-by-step setup instructions, see Integration with Jira or the guide for your specific tool.
Link requirements to a session
You can link requirements in two places: during session creation and from the session detail page.
During session creation
Follow these steps to link requirements when you create a new exploratory session:
- Navigate to the exploratory sessions repository view and click Create session.
- In the Create Session window, the right panel shows a Requirements field with each supported tool in the dropdown.
- Select your configured integration to search for and link requirement issues.
From the session detail page
- Open the desired exploratory session.
-
Click Linked Issues in the top-right corner.
-
In the Linked Issues panel, select the Requirements linked to this session tab.
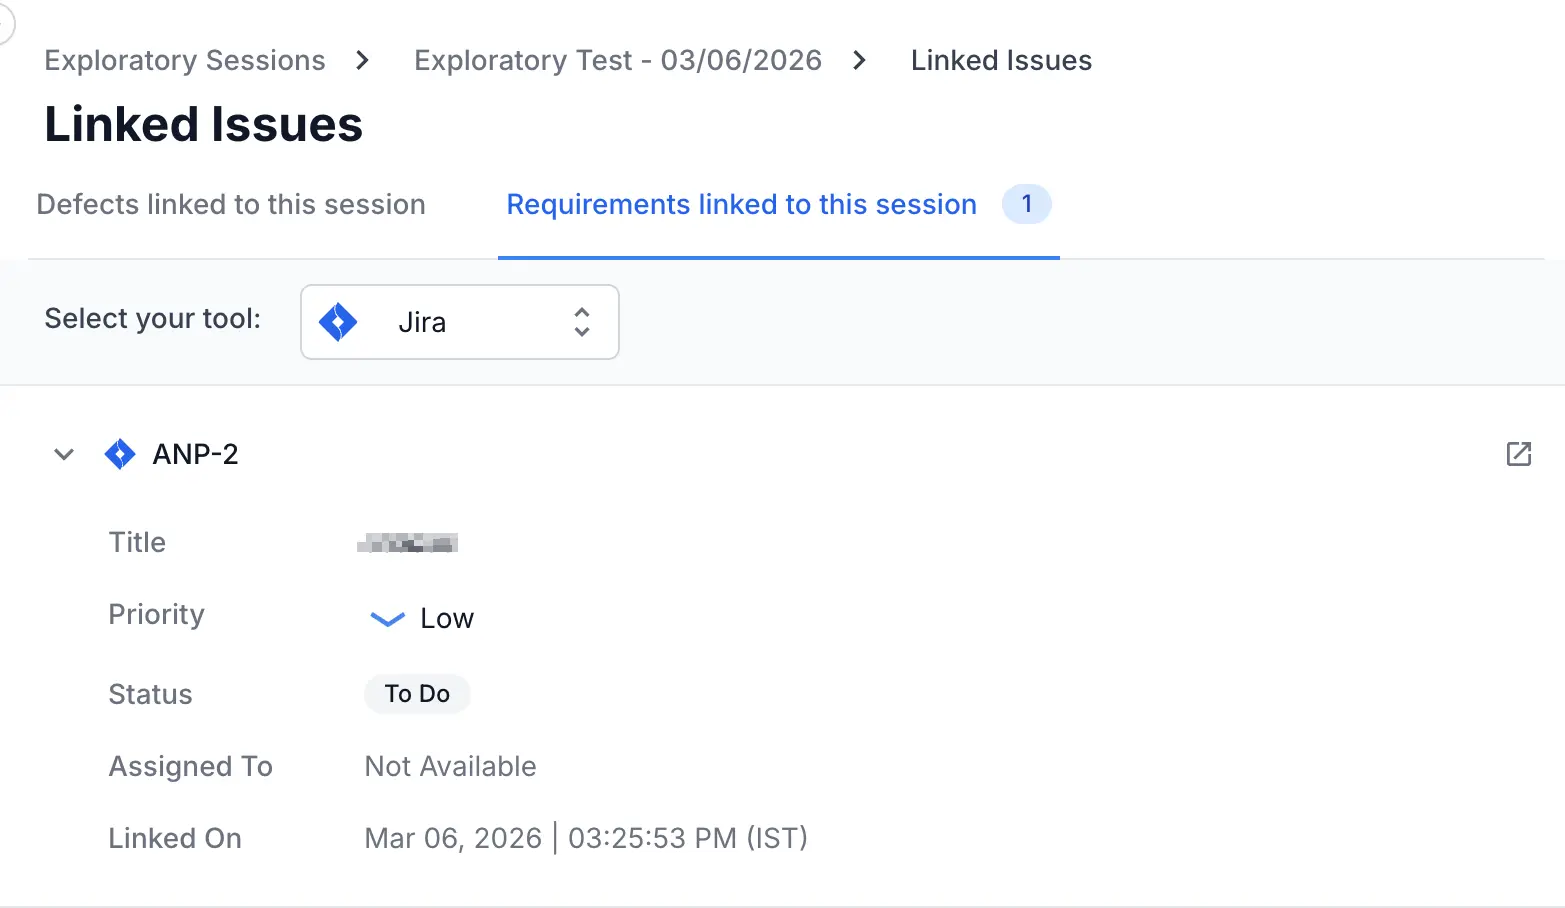
- Select the desired issue tracker from the Select your tool dropdown.
- Select the issue to link it.
The linked requirement now appears in the Linked Issues panel and provides traceability between this session and the feature being tested.
Link defects to a session
When you find a bug during testing, you have two options: link an existing issue from your tracker or create a new one.
Link an existing defect
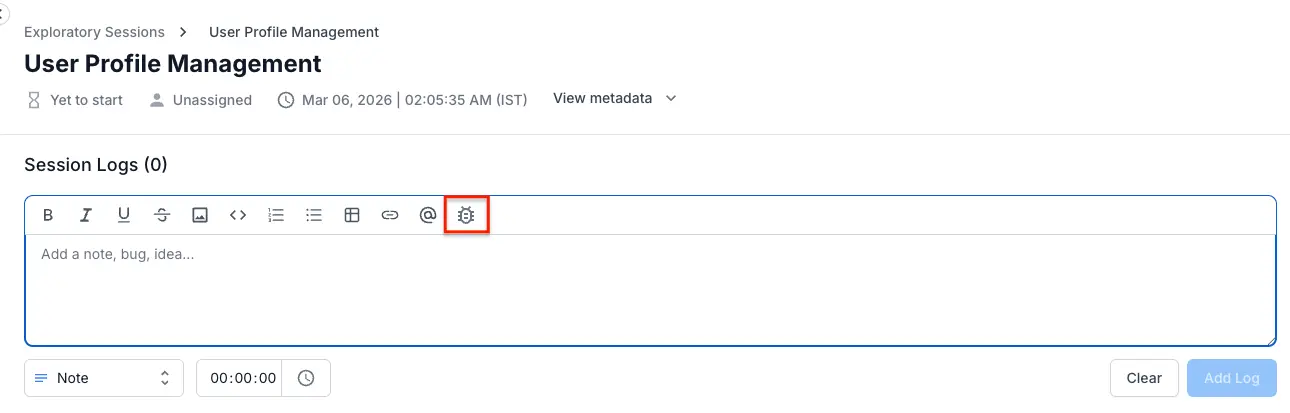
If the bug is already logged in your issue tracker:
- Add a log entry with the Bug status describing the issue you found.
-
Click the Link Bug button that appears on the right side of the Bug entry.
- In the Linked Issues panel, select the Defects linked to this session tab.
- Select the desired issue tracker from the Select your tool dropdown.
-
Select the defect to link it.
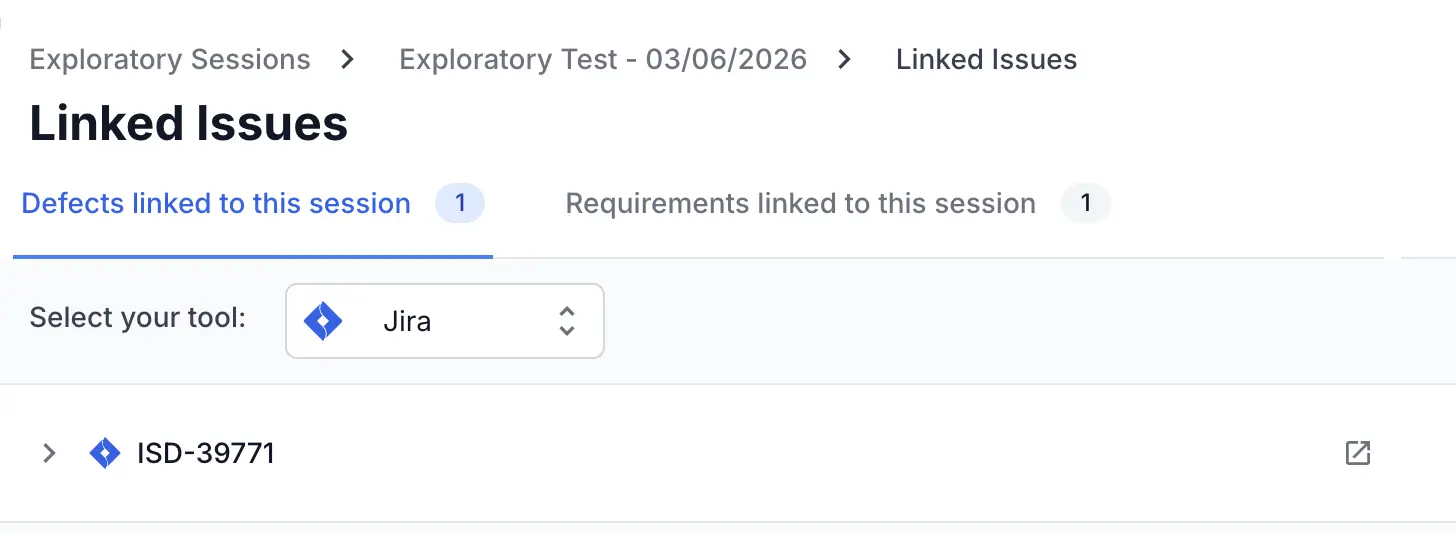
The linked defect appears in both the log entry and the session’s Linked Issues panel.
For bug bash workflows, use labels or custom fields in your issue tracker (such as tc_miss, dev_miss, or automation_candidate) when creating new defects. This metadata is valuable when reviewing session outcomes later.
View all linked issues
To see all requirements and defects connected to a session:
- Open the session.
- Click Linked Issues in the top-right corner of the session header.
The panel shows all linked issues grouped by type (requirements and defects), with each issue displaying its ID, title, status, and the integration source. Click any issue to open it directly in your external tracker.
Linking restrictions by session state
You can link requirements and defects while the session is in an Active state (either Yet to start or In Progress*). Once a session is Closed, it becomes read-only. You cannot add, remove, or modify linked issues on a closed session.
Plan your requirement linking during session creation, or before you begin testing. Link defects as you find them during execution. This ensures all traceability data is captured before you close the session.
Next steps
To finalize a session after you have finished testing and linking issues, see Edit, close, and delete Exploratory Sessions.
We're sorry to hear that. Please share your feedback so we can do better
Contact our Support team for immediate help while we work on improving our docs.
We're continuously improving our docs. We'd love to know what you liked
We're sorry to hear that. Please share your feedback so we can do better
Contact our Support team for immediate help while we work on improving our docs.
We're continuously improving our docs. We'd love to know what you liked
Thank you for your valuable feedback!