
 Join our Discord
Integrate a custom issue tracker with Test Management
Link defects and requirements from any web-based issue tracker to your test cases, test runs, and results using a URL template.
Test Management includes built-in integrations for trackers such as Jira, Asana, and Azure DevOps. A custom issue tracker covers the rest. When your team uses ServiceNow, Monday, Rally, or any tracker without a built-in integration, you connect it once with a URL template. After that, you link issues by their ID across your test cases, test runs, and results.
Only an IAM admin can create, edit, or delete custom issue trackers. Everyone else in the workspace can link issues from a configured tracker.
Prerequisites
Before you begin, ensure you have the following:
- An active Test Management account.
- A web-based issue tracker whose issues open at a consistent URL.
- A project with at least one test case or test run.
How custom issue tracking works
Most issue trackers open an issue at a predictable web address, where only the issue ID changes. A custom issue tracker uses that pattern.
You configure two URLs for each tracker:
-
View Issue URL: the address that opens an existing issue. Mark the ID position with
$ID. For issues that open athttps://track.example.com/browse/BUG-123, enterhttps://track.example.com/browse/$ID. - Create issue link: the address of your tracker’s new-issue page. Test Management opens this page when you create an issue. This link takes no ID.
At setup, $ID marks where the issue ID goes in the View Issue URL. When you link an issue, Test Management stores its ID and shows it across your test cases, test runs, and results. Click the ID to open the issue in your tracker.
Because a custom issue tracker connects through a URL template and not an API, Test Management stores only the issue ID. It does not show the issue title, status, or priority. To open the full issue, click the ID. Test Management opens your tracker in a new browser tab.
Set up a custom issue tracker
Only an IAM admin can create or manage custom issue trackers. After a tracker is configured, everyone in the workspace can link issues from it. To connect a tracker, configure its name and URLs once from the Integrations page:
In the navigation menu of Test Management, select Integrations.
Select Custom Issue Tracker under Don’t see your application?.
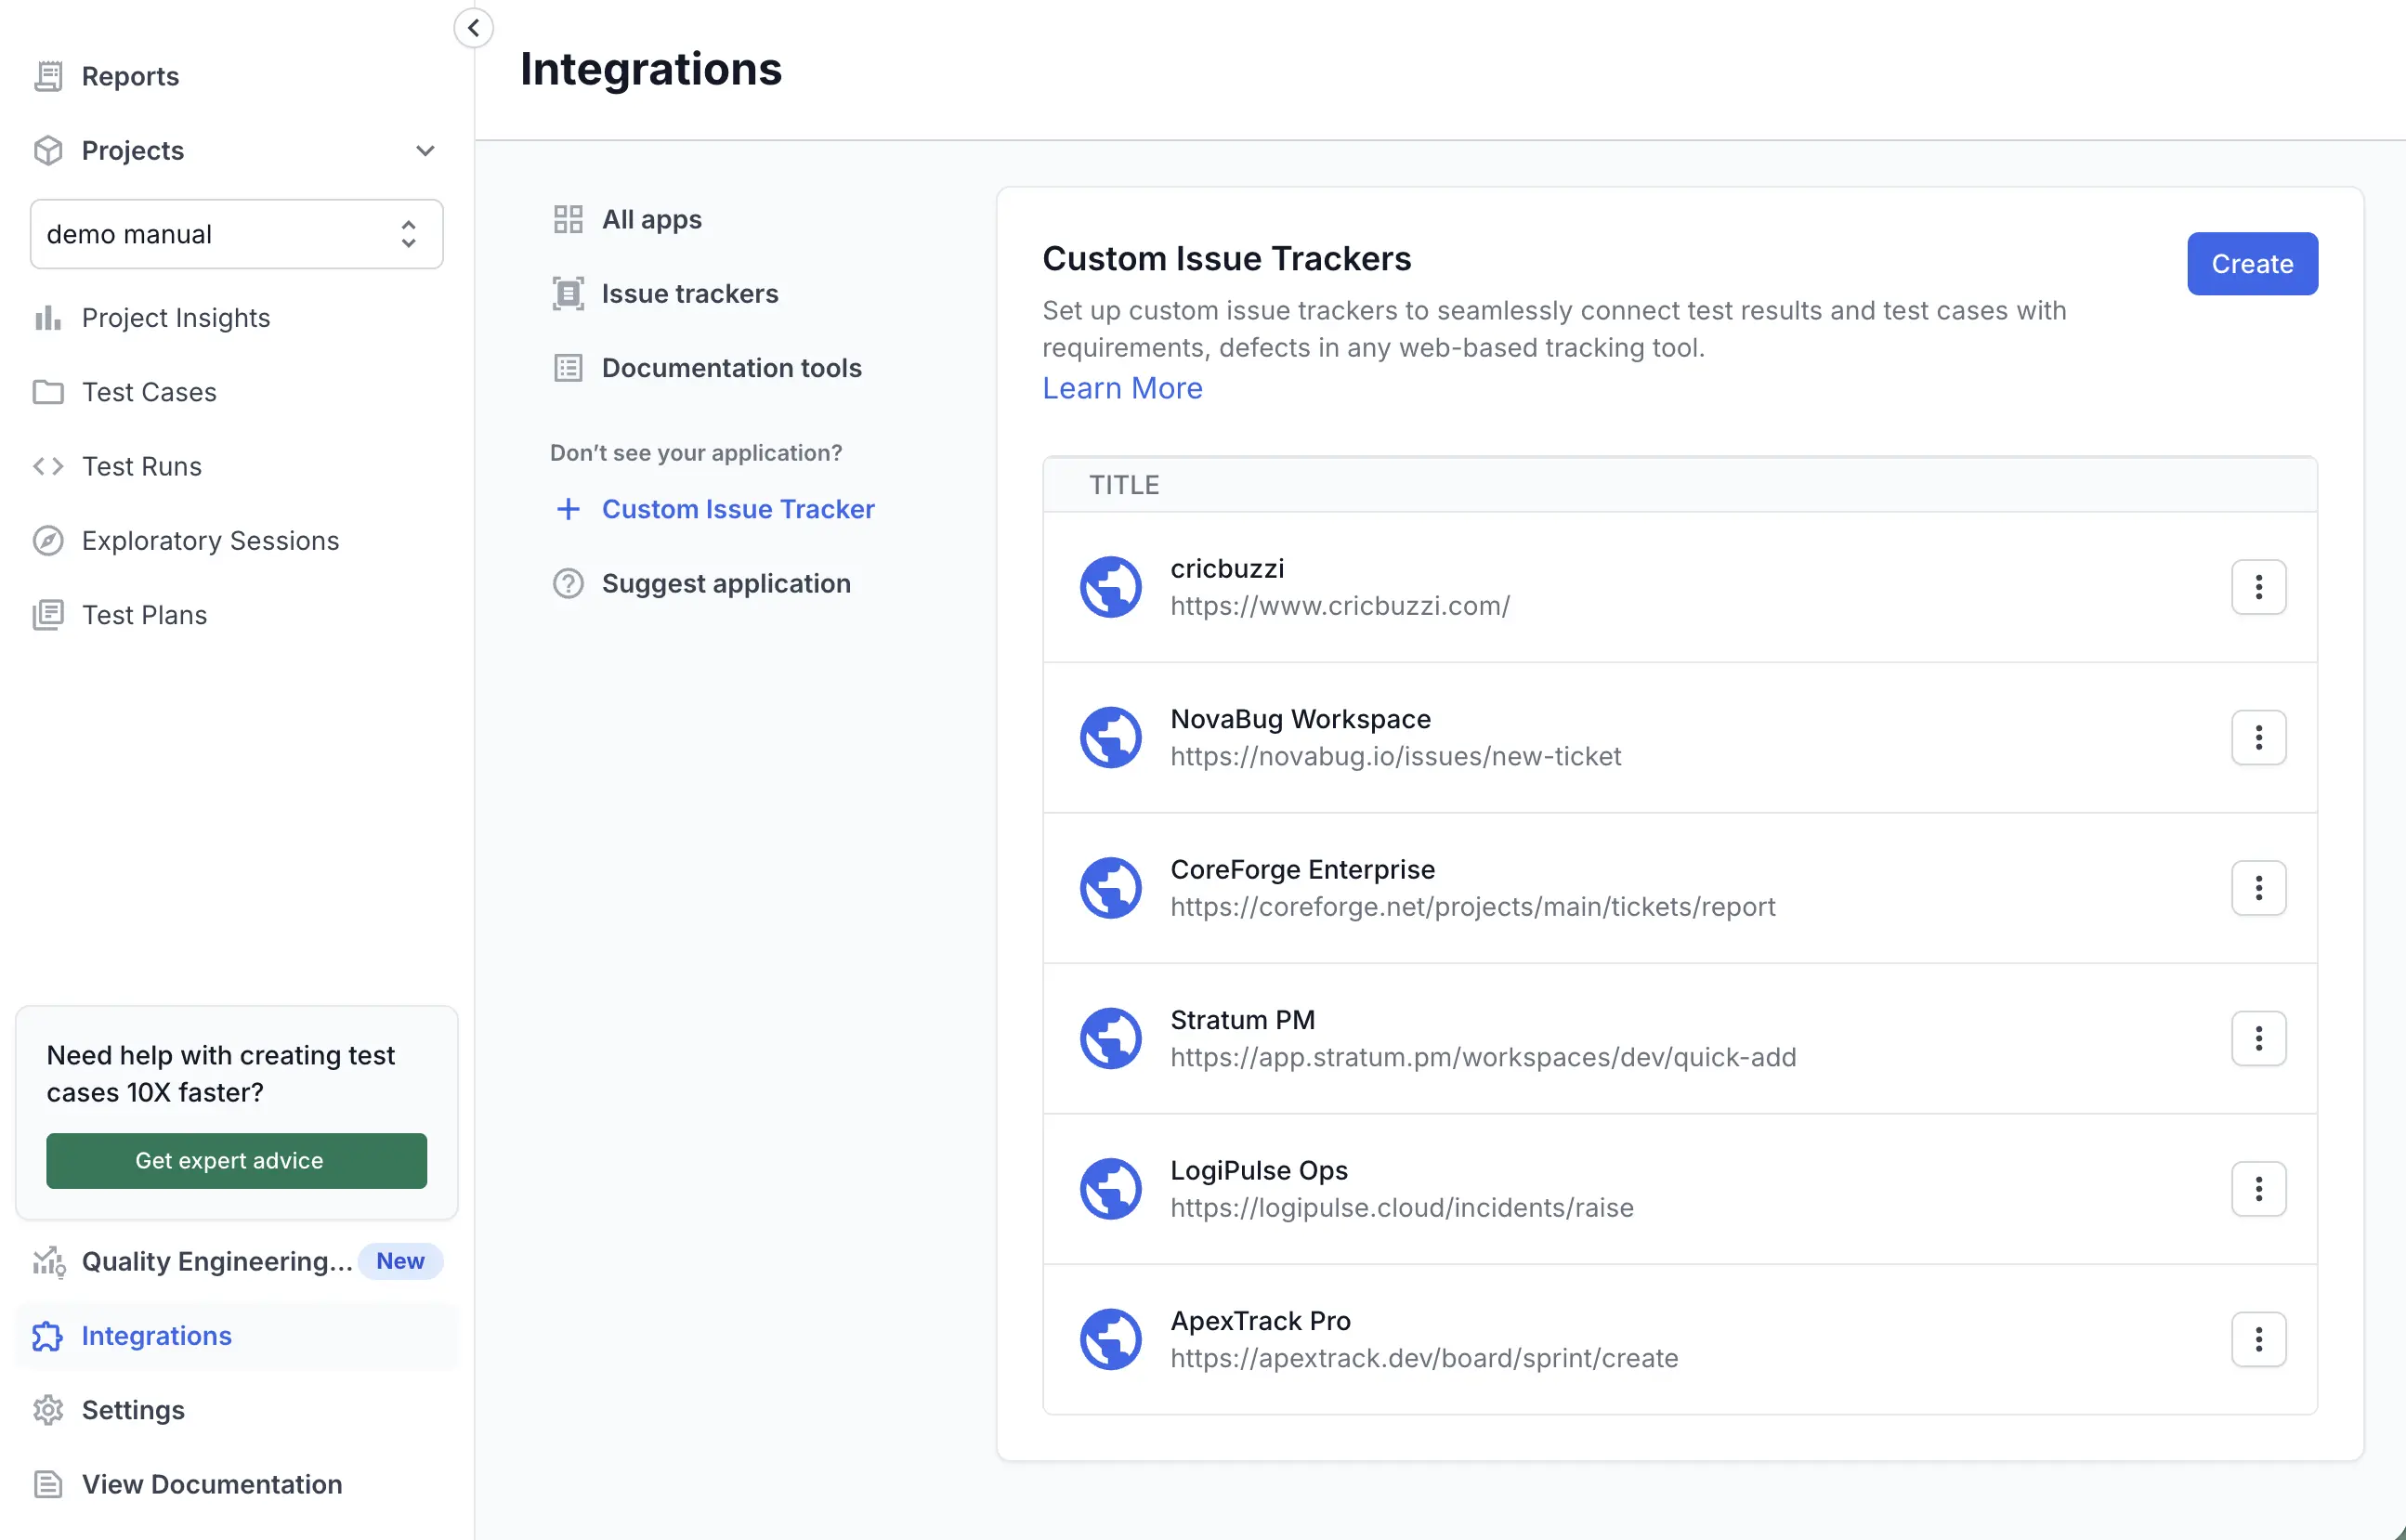
Click Create to open the Create Custom Tracker form.
In Tracker Name, enter a name for the tracker.
In View Issue URL, enter the address that opens an existing issue.
In Create issue link, enter the address of your tracker’s new-issue page.
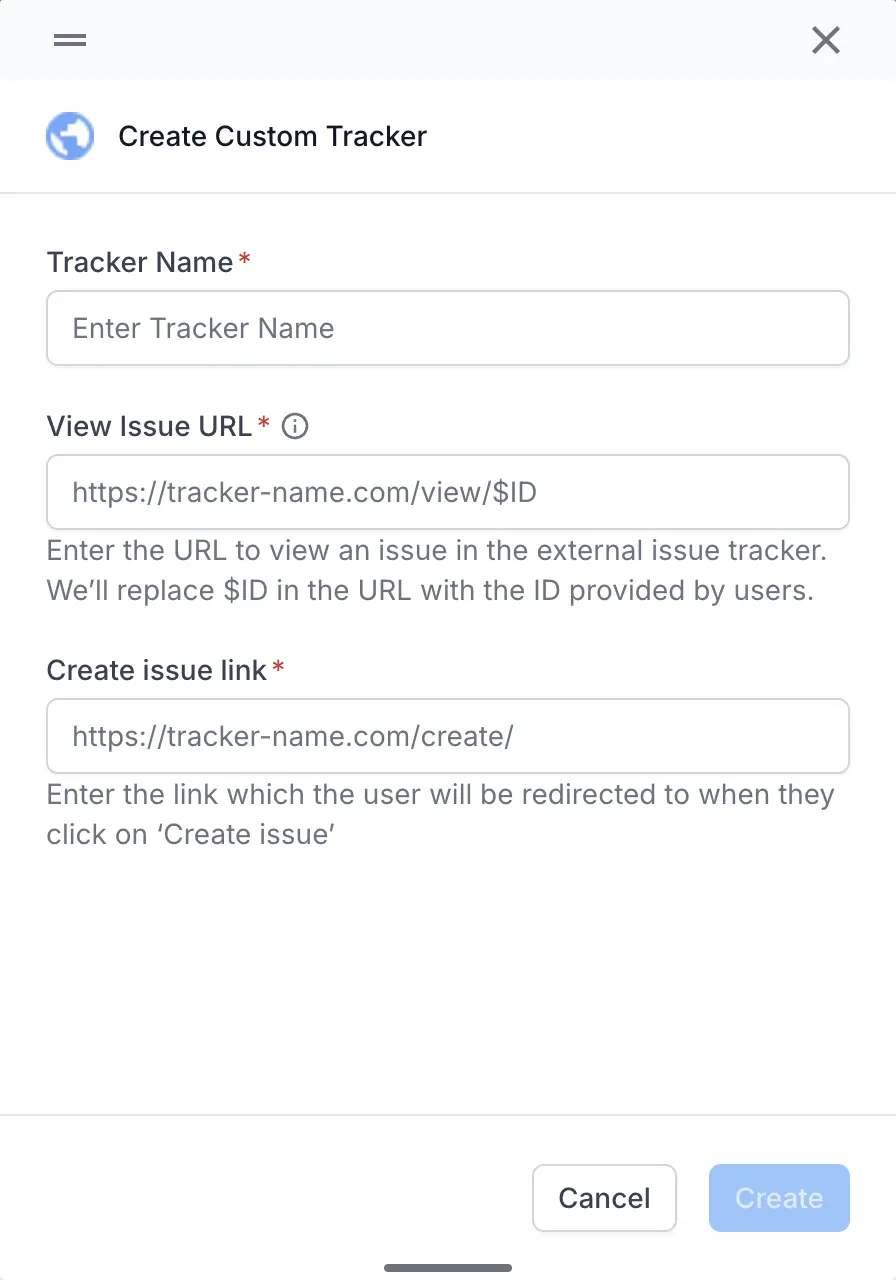
Click Create to save the tracker.
Your new tracker appears in the list of custom issue trackers. Everyone in your workspace can now link issues from it, the same way they link Jira or Asana issues.
Edit or delete a custom issue tracker
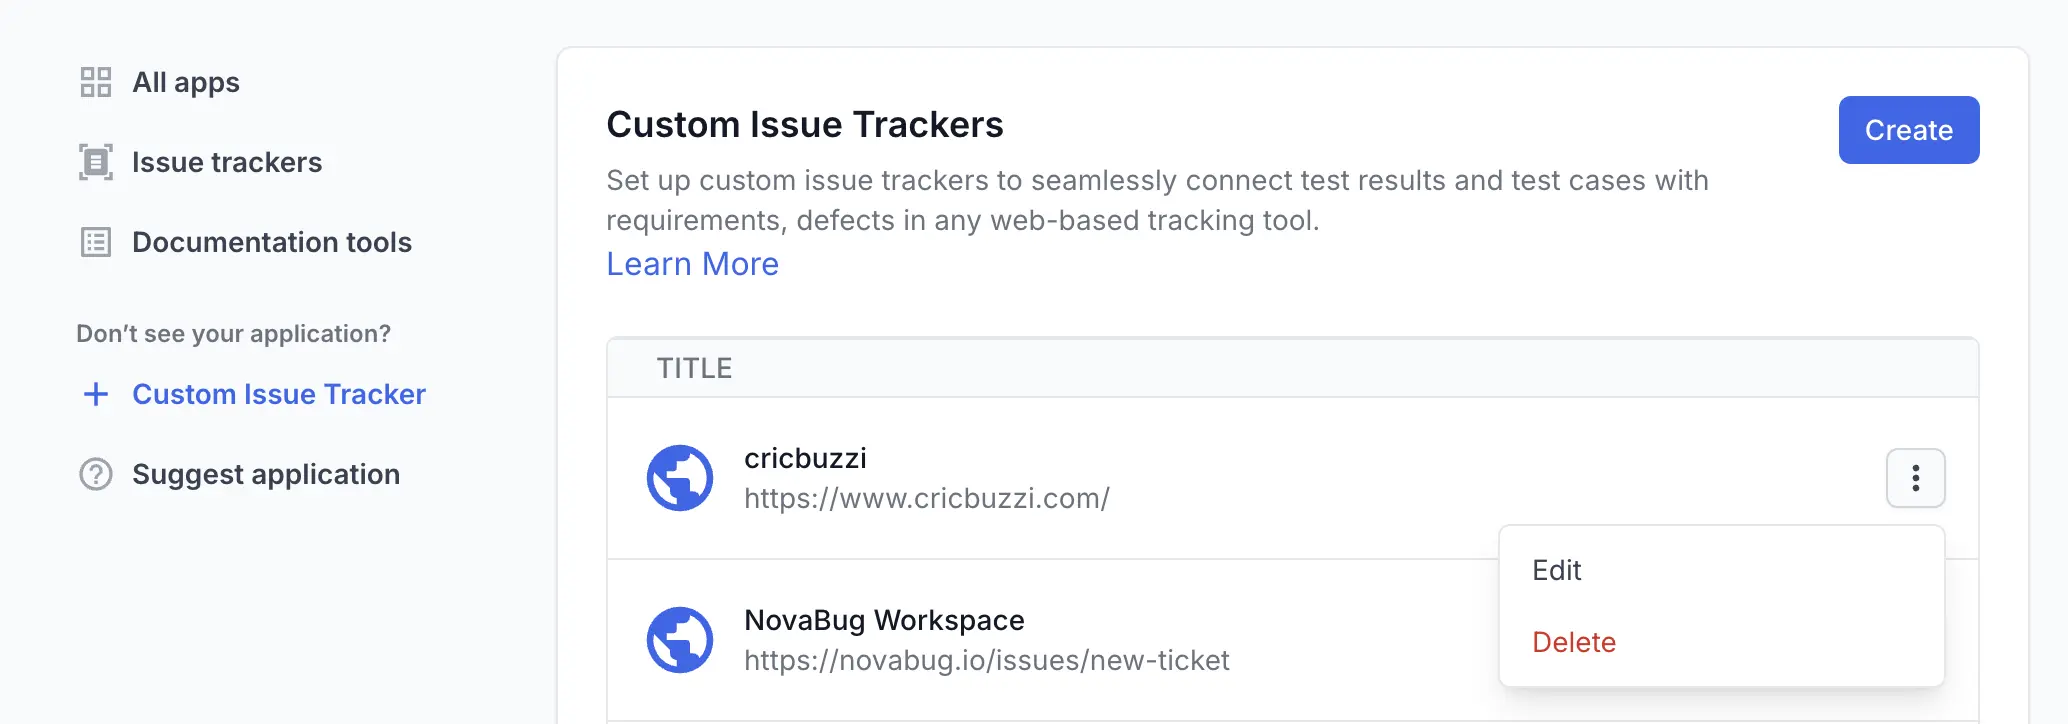
Your configured trackers appear on the Custom Issue Trackers screen. Each row shows the tracker name and its base URL. Open the more options (three dots) icon on a tracker’s row to edit or delete it.
Edit a tracker
To change a tracker’s name or URLs, follow these steps:
-
On the tracker’s row, click the more options (three dots) icon, then select Edit.
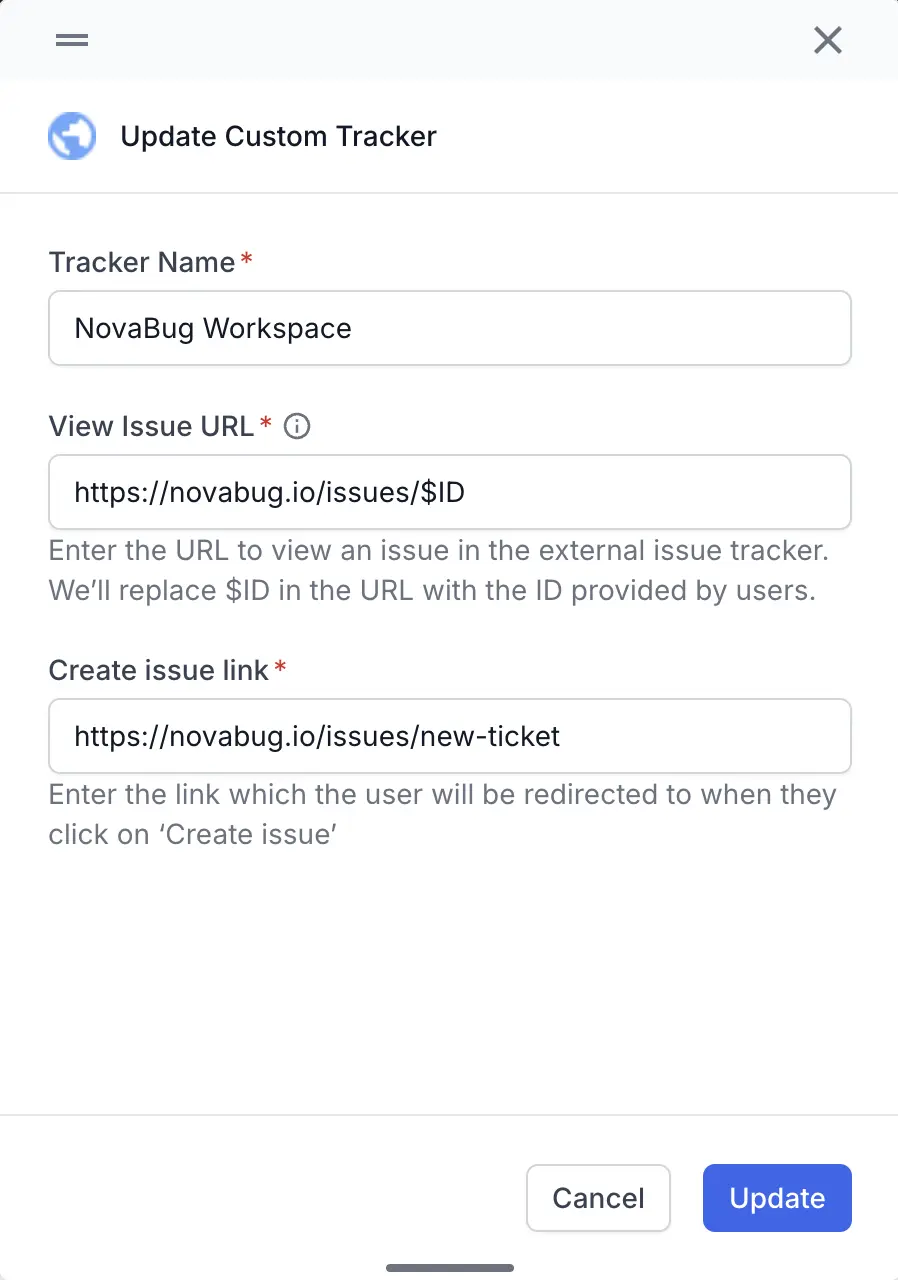
The Update Custom Tracker form opens. -
Change the Tracker Name, View Issue URL, or Create issue link.
-
Click Update to save. New links use the updated URLs.
Delete a tracker
To remove a tracker, follow these steps:
-
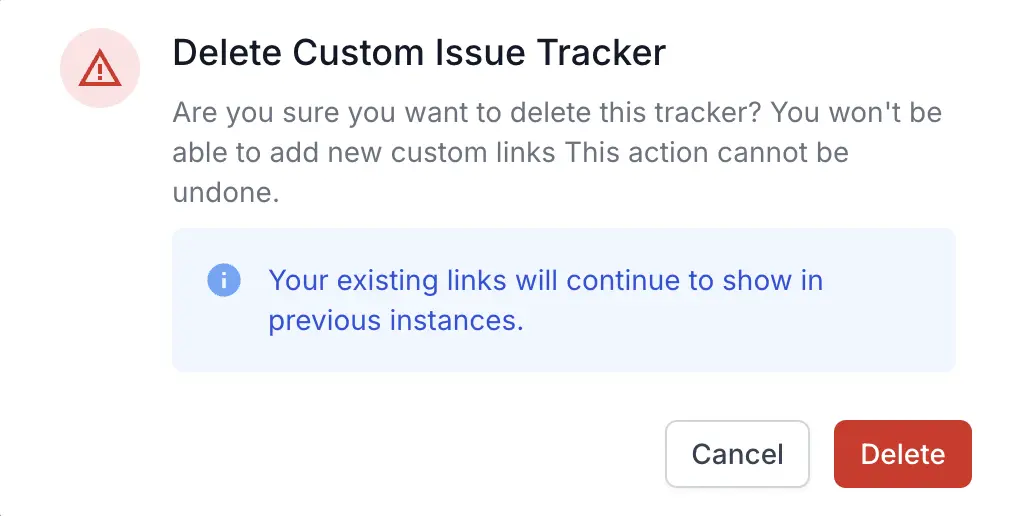
On the tracker’s row, click the more options (three dots) icon, then select Delete. A confirmation dialog opens.
-
Click Delete in the dialog to confirm. Deleting a tracker cannot be undone.
After you delete a tracker, it no longer appears when you link or create an issue. Issues already linked to your test entities stay in place.
Where custom issues appear
After you link custom issues, they behave like any other tracked issue across Test Management:
- Test entities: linked issue IDs show on test cases, test runs, and test results, including step-level results.
- Filters: filter test cases, test runs, and results by custom issue ID.
- Reports: Test Run and Test Plan reports count custom issues in their issue widgets. The detailed run report lists them in the issues table.
- Dashboards: the Defects Logged widget includes defects from your custom tracker.
- Traceability: select your custom tracker in the Requirement Traceability report to populate the requirement and defect columns.
- APIs: read and write custom issue IDs through the Test Management public APIs, the same as Jira and Asana IDs.
Next steps
Continue with the linking guides for your test entities:
-
Link custom issues to test cases: add requirements from your tracker to test cases.
-
Link custom issues to test runs and results: add requirements and defects to runs, results, and automation runs.
-
Integrate issue trackers: see every issue-tracking integration Test Management supports.
If something is not working as expected, contact BrowserStack Support, available at any time. Sharing your project name and tracker name helps the team resolve your query faster.
We're sorry to hear that. Please share your feedback so we can do better
Contact our Support team for immediate help while we work on improving our docs.
We're continuously improving our docs. We'd love to know what you liked
We're sorry to hear that. Please share your feedback so we can do better
Contact our Support team for immediate help while we work on improving our docs.
We're continuously improving our docs. We'd love to know what you liked
Thank you for your valuable feedback!