
 Join our Discord
Link custom issues to test runs and results
Add requirements to test runs and defects to test results and automation runs from your custom issue tracker.
You can link custom issues across a test run, from the requirements you attach when you create it to the defects you log on each result. You add requirements on the run itself. You record defects when you enter a result, including results on automation runs.
Prerequisites
Before you begin, ensure you have the following:
- A configured custom issue tracker.
- A project with at least one test run.
Link a custom issue to a test run
You add requirements to a test run from the run form, the same way you add them to a test case:
Open the create or edit test run window in your project.
In the run form, find the Requirements field. From its tracker dropdown, select your custom tracker.
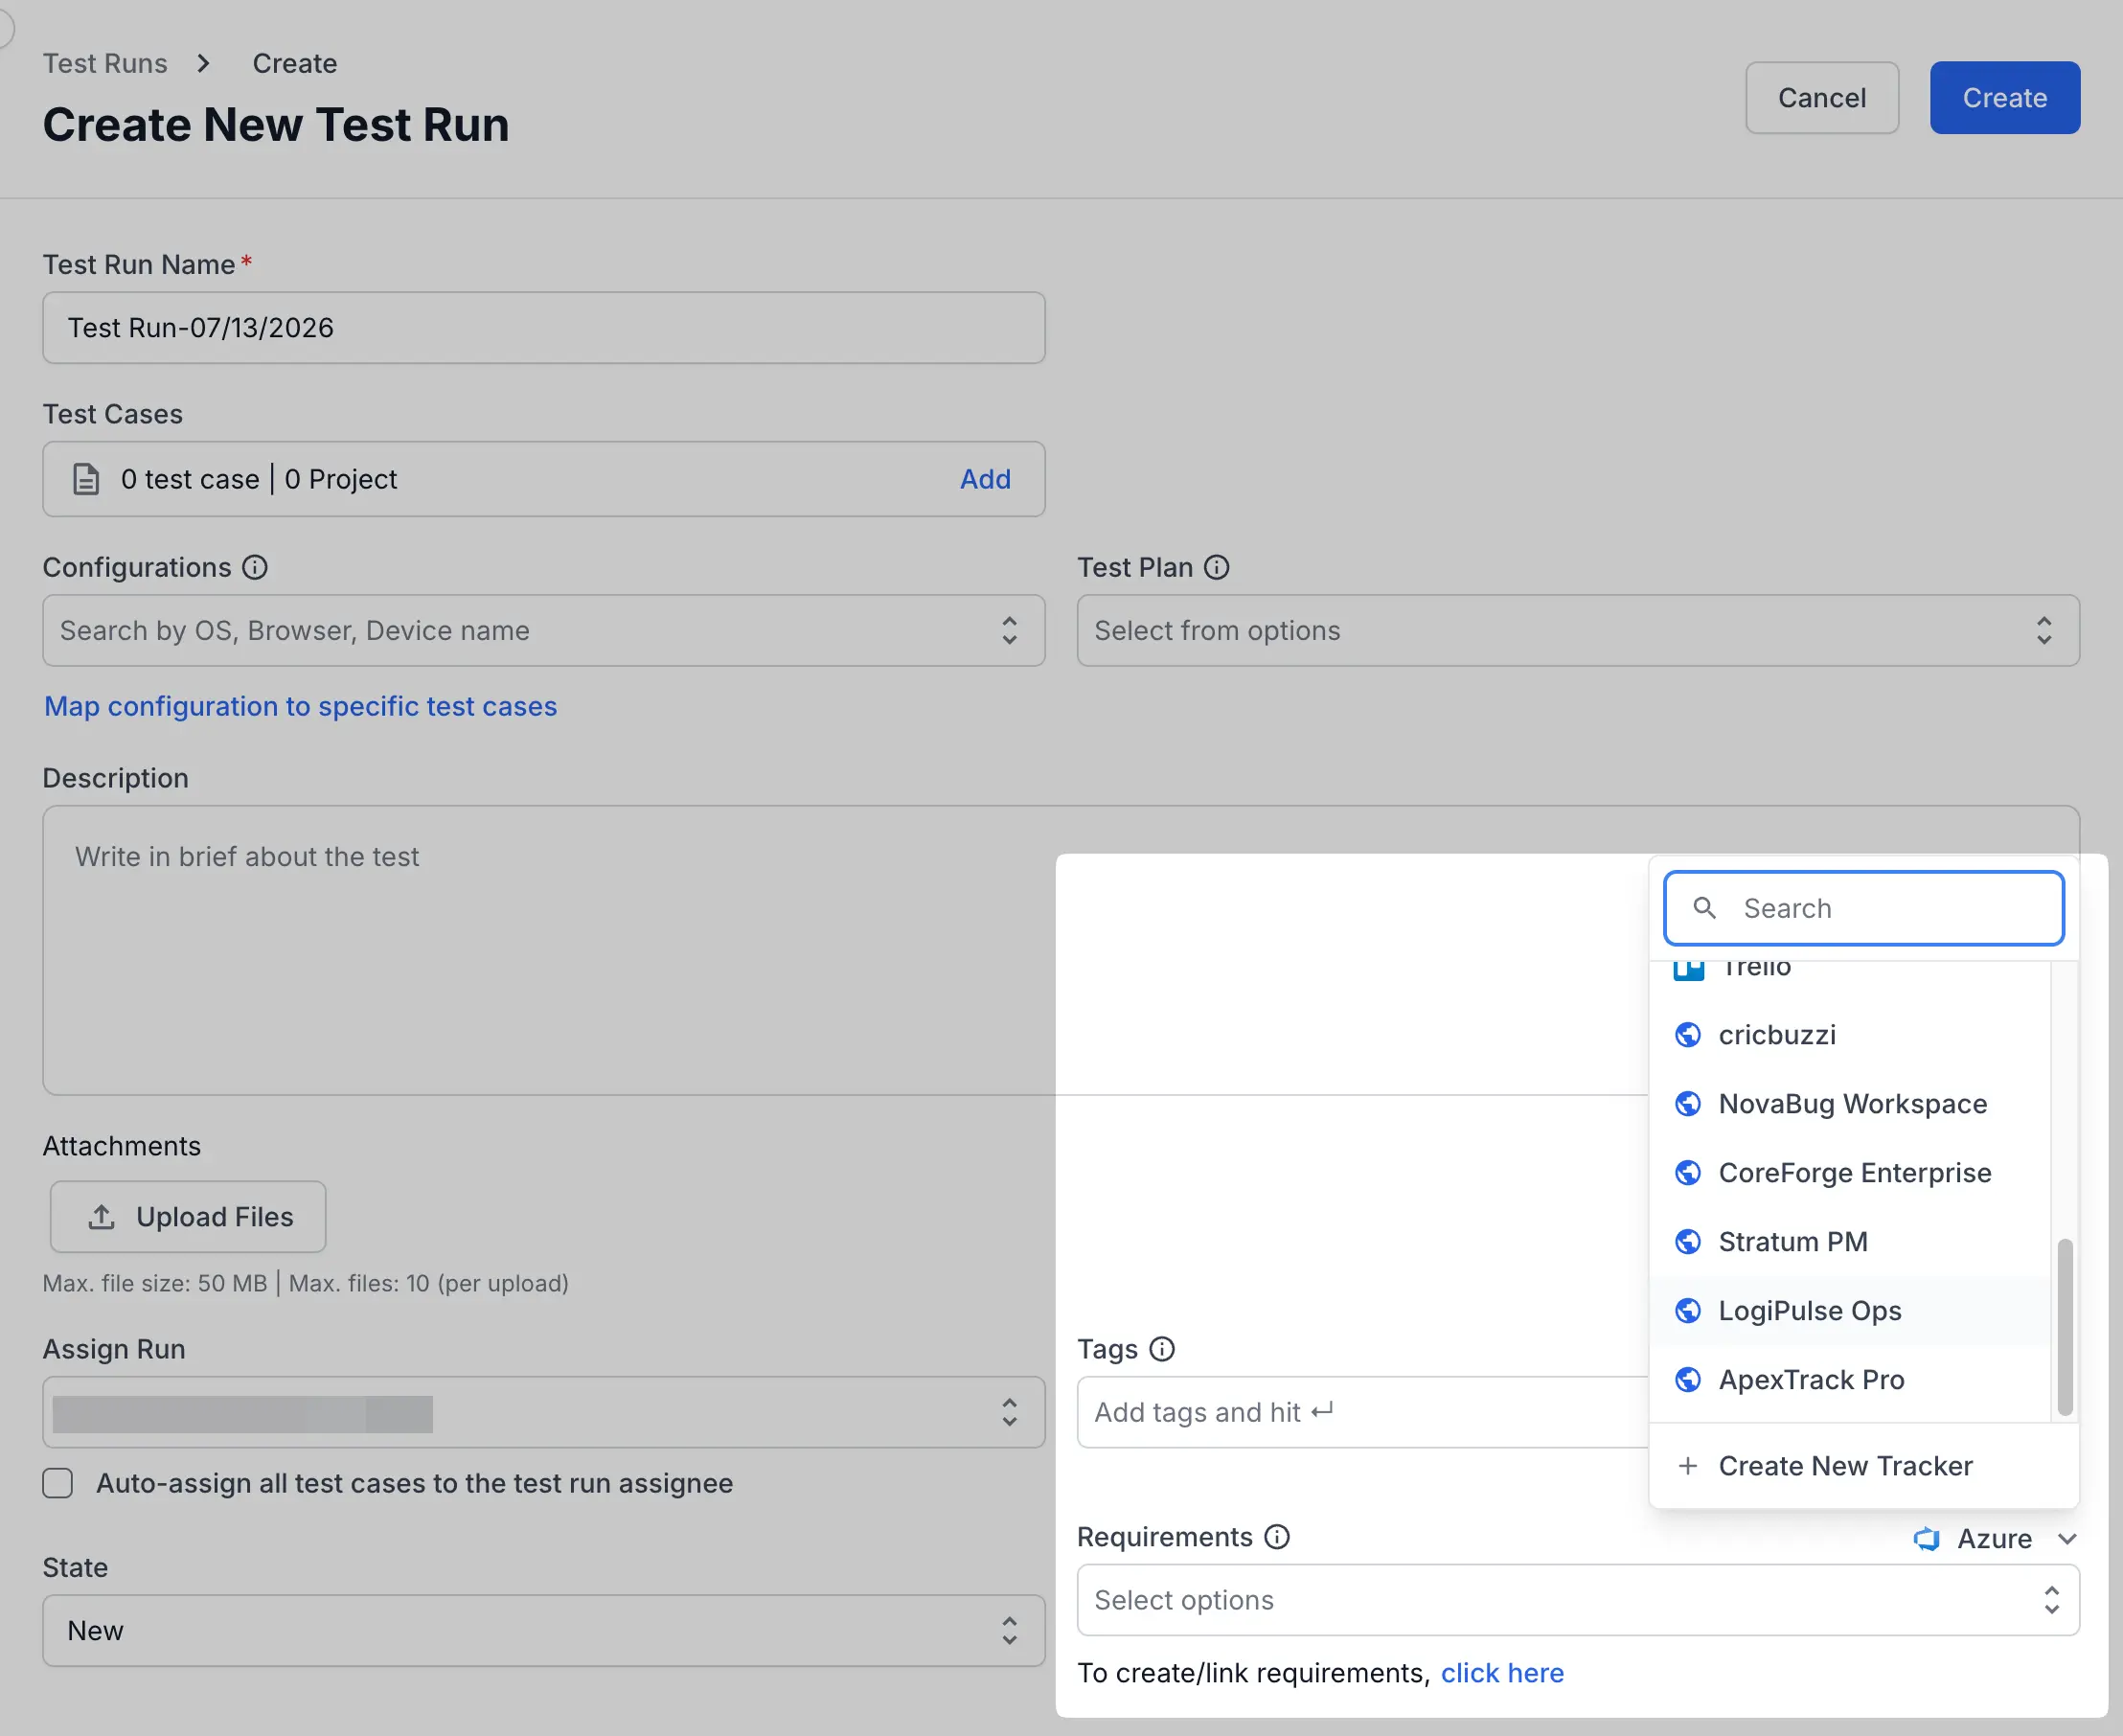
Next to To create/link requirements, click the click here link. The custom tracker widget opens.
In the widget, enter the Issue Link and Issue ID, then click Link Issue. To create a new issue, click Create Issue.
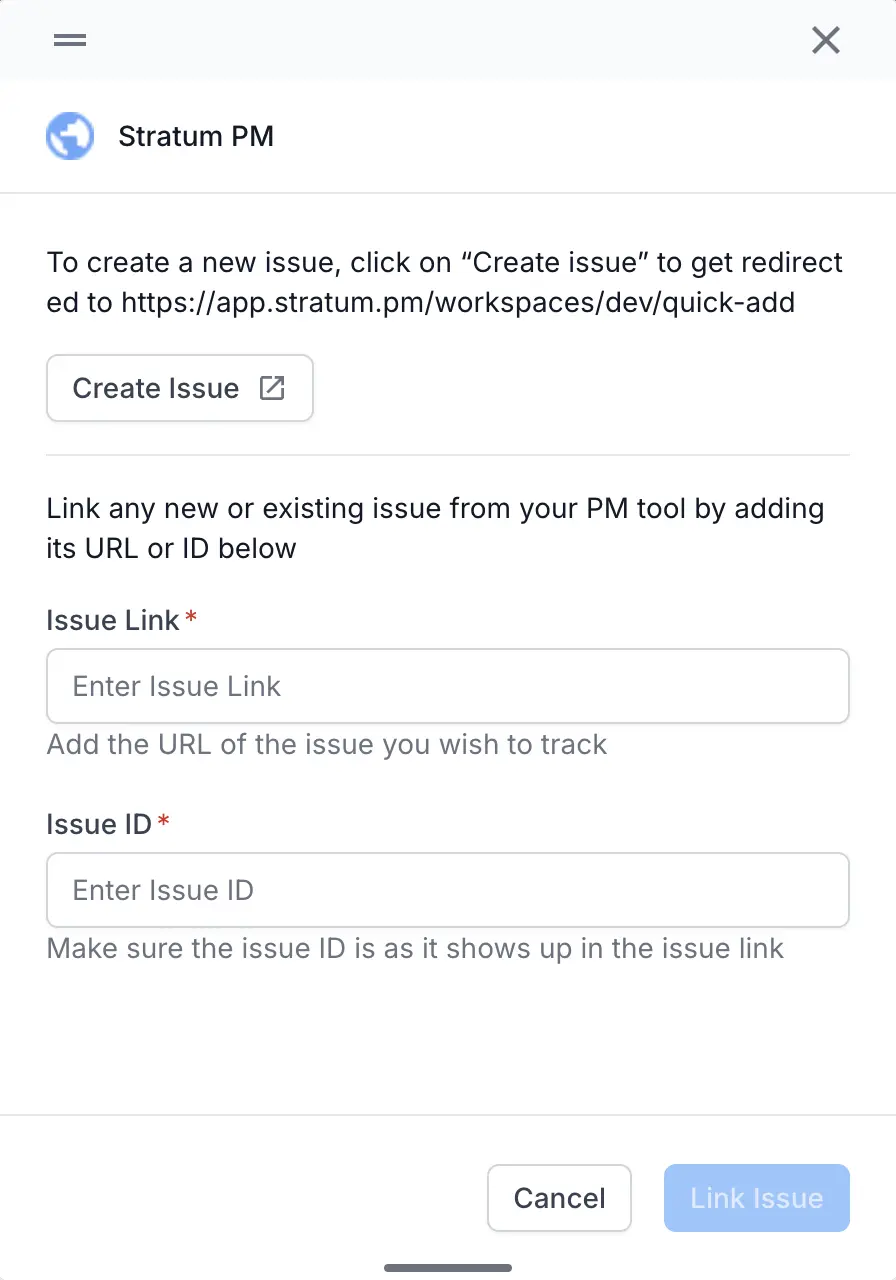
Save the test run.
The linked requirement appears on the test run. The run’s Linked Issues page lists it under Requirements linked to Test Run.
Link a custom issue to a test result
You add defects when you record a result for a test, including step-level results:
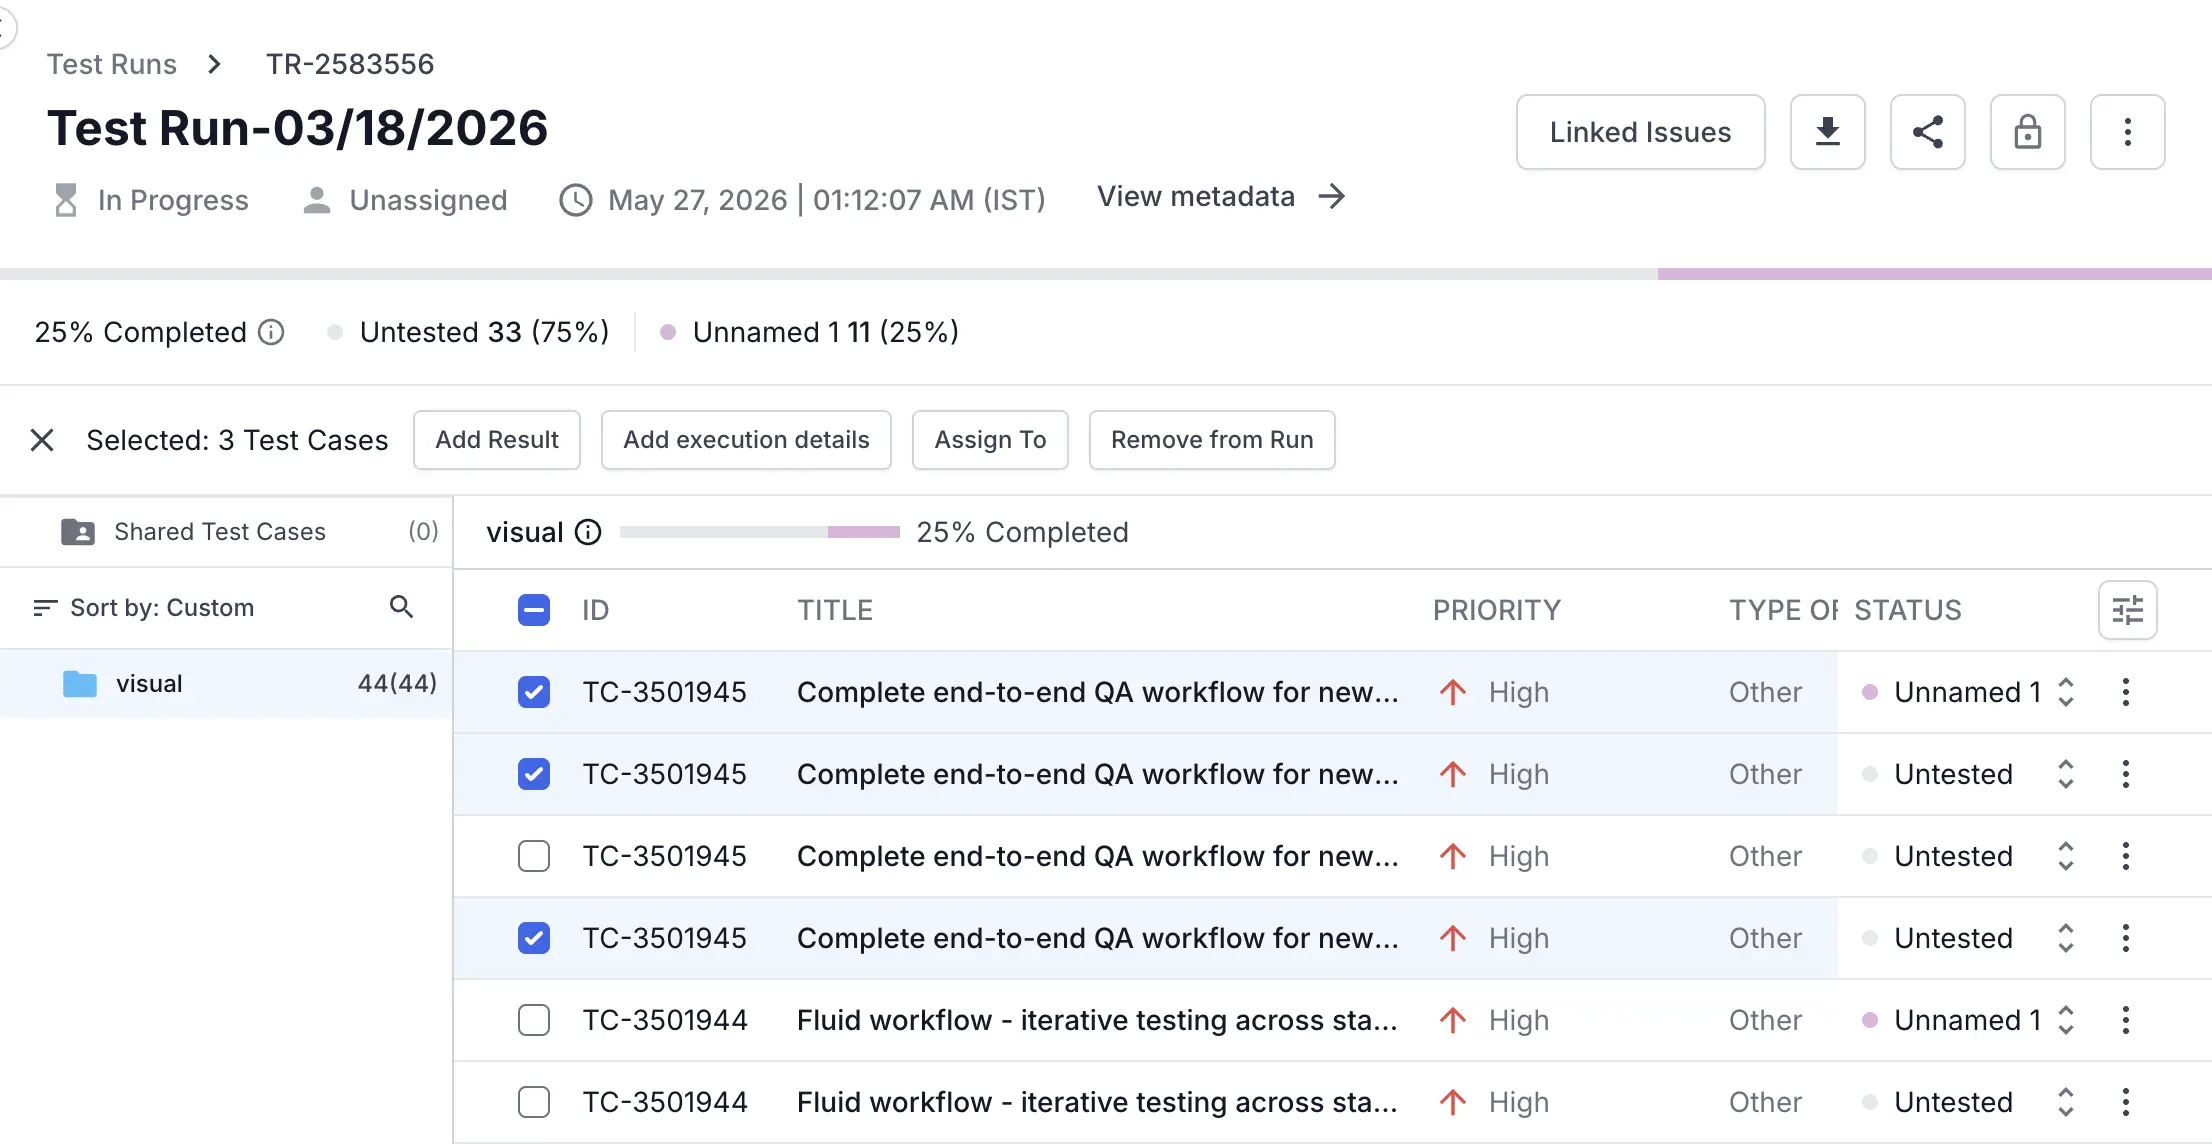
Open a test run, then select the test cases you want to add results to.
Click Add Result.
In the Defects field, select your custom tracker.
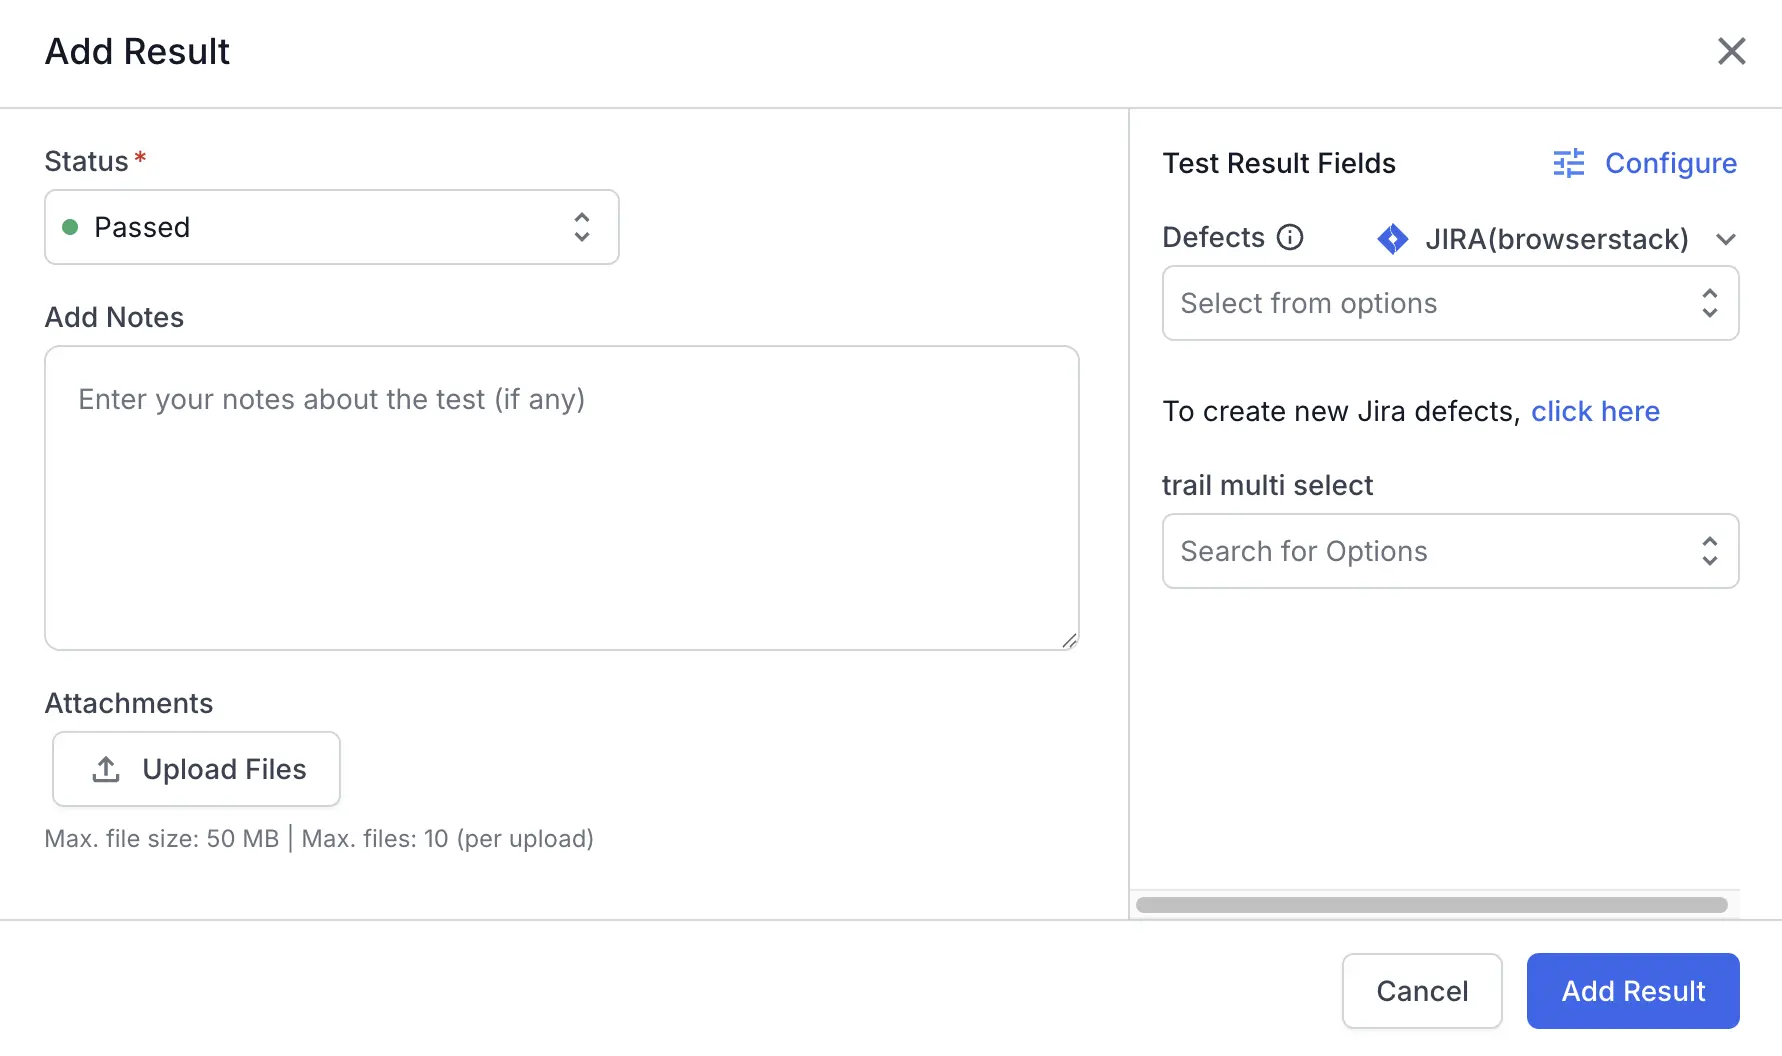
Click the click here link to open the custom tracker widget.
Enter the Issue Link and Issue ID, then click Link Issue. To create a new defect, click Create Issue.
Click Add Result to save.
The linked defect appears on the result. The run’s Linked Issues page lists it under Defects linked to Results.
Log custom issues on automation runs
You link custom issues on automation test runs the same way you do on manual runs. Two entry points let you log a defect from your custom tracker:
- Report a bug: on an automation run, click the bug icon, then select your custom tracker.
- Add a manual result: when you record a manual result on an automation test, select your custom tracker in the Defects field.
Either entry point opens the custom tracker widget, where you enter the issue link and ID. The linked issue then appears on the automation run’s Linked Issues page, next to issues from your other trackers.
View linked issues in a test run
The Linked Issues page shows every requirement and defect linked across a test run, including issues from your custom tracker. To open it, follow these steps:
-
Open the test run, then click Linked Issues in the header.

-
Select a tab to see the linked issues:
- Requirements linked to Test Run: the requirements you added on the run.
- Defects linked to Results: the defects you logged on the run’s results.
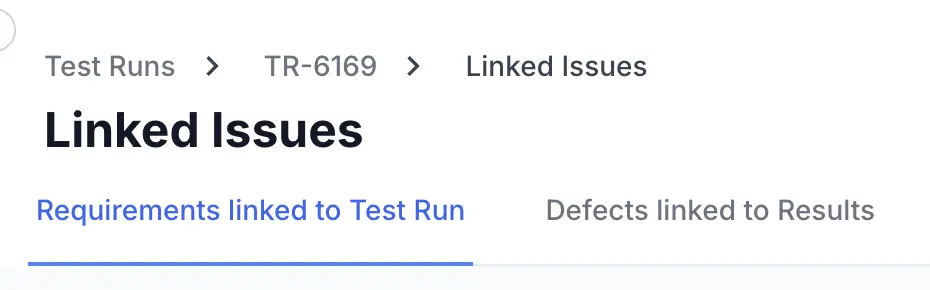
Each custom issue shows only its ID, because a custom tracker has no API connection. Click an ID to open the issue in your tracker.
Next steps
Continue with the related custom issue tracker guides:
-
Link custom issues to test cases: add requirements from your tracker to test cases.
-
Integrate a custom issue tracker: set up, edit, or delete a tracker, and see where custom issues appear.
If something is not working as expected, contact BrowserStack Support, available at any time. Sharing your project name and the test run URL helps the team resolve your query faster.
We're sorry to hear that. Please share your feedback so we can do better
Contact our Support team for immediate help while we work on improving our docs.
We're continuously improving our docs. We'd love to know what you liked
We're sorry to hear that. Please share your feedback so we can do better
Contact our Support team for immediate help while we work on improving our docs.
We're continuously improving our docs. We'd love to know what you liked
Thank you for your valuable feedback!