Add a result
Learn how to add test case result and result to each step in a test case.
For test cases with multiple steps, you can set a status for each individual step. This provides a more detailed view of the test execution.
Add status to a test case
- Click ID or TITLE of the test run to open the executed test run.
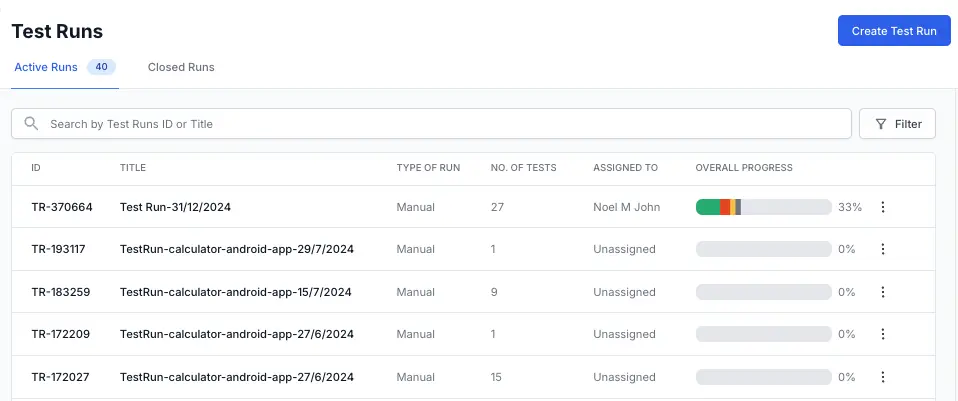
- From the Status dropdown menu, select the test run status.
Add a result for each step in a test case
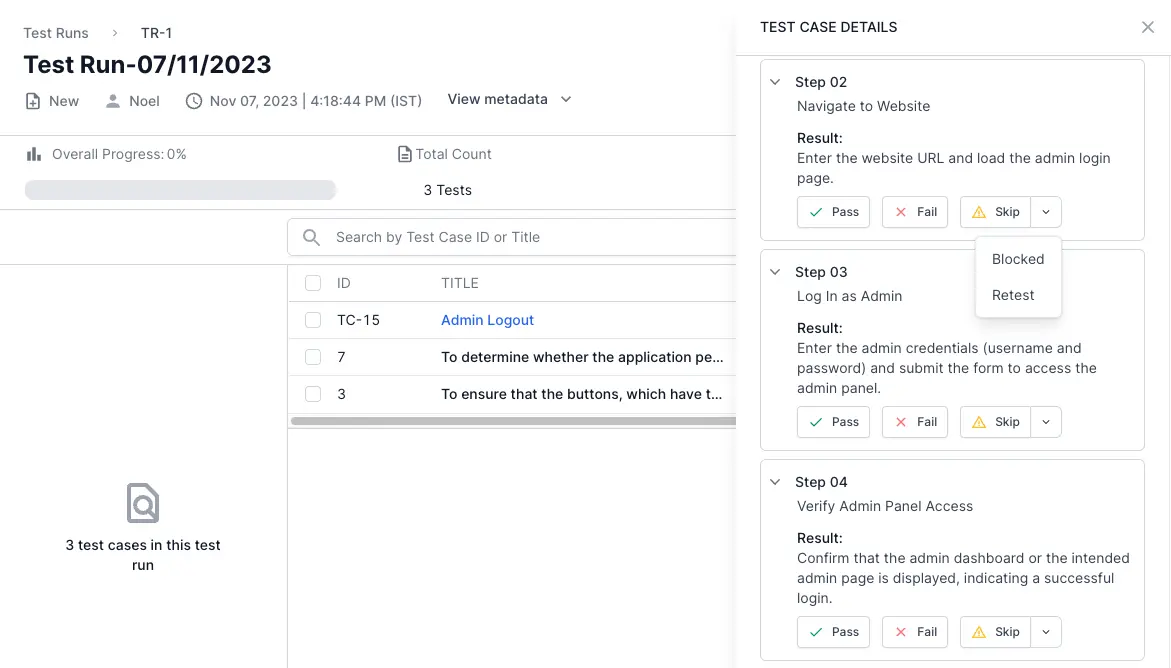
If you use the steps template for a test case, you can add the result of each step. It allows you to track the exact step that caused the failure of the test case.
Follow these steps to add test results to a test case in a test run:
- Navigate to the relevant test run.
-
Locate and click the test case with a steps template to which you wish to add step results.
The test case details view appears. -
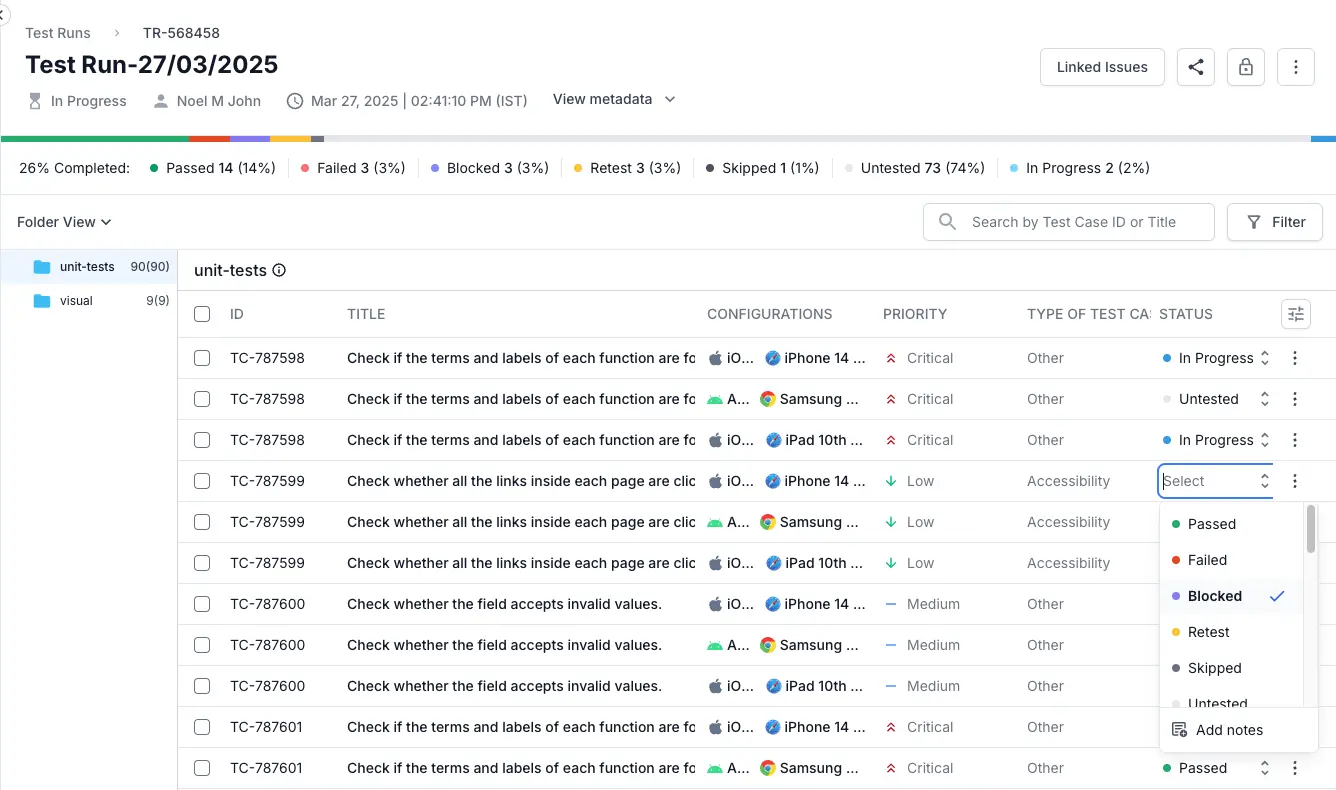
Based on the result of a step, assign the appropriate status to it. The options are:
-
Pass: The step was executed successfully without issues.
-
Fail: The step encountered issues and did not execute as expected.
-
Skip: The step was intentionally not executed.
-
Blocked: The step could not be executed due to external factors or dependencies.
-
Retest: The step needs to be executed again, typically after a failure or other issue.
-
Pass: The step was executed successfully without issues.
 You can also assign Untested to a step and reset the step result.
Edit an existing test result
You can modify a manually added test result, its status, notes, and attachments, if you have originally added that result.
- Select a test case in test runs or from the test case details view.
- Locate the test result under the Results tab in the test case details slide-over.
- Hover over the test result and click the overflow menu (three dots).
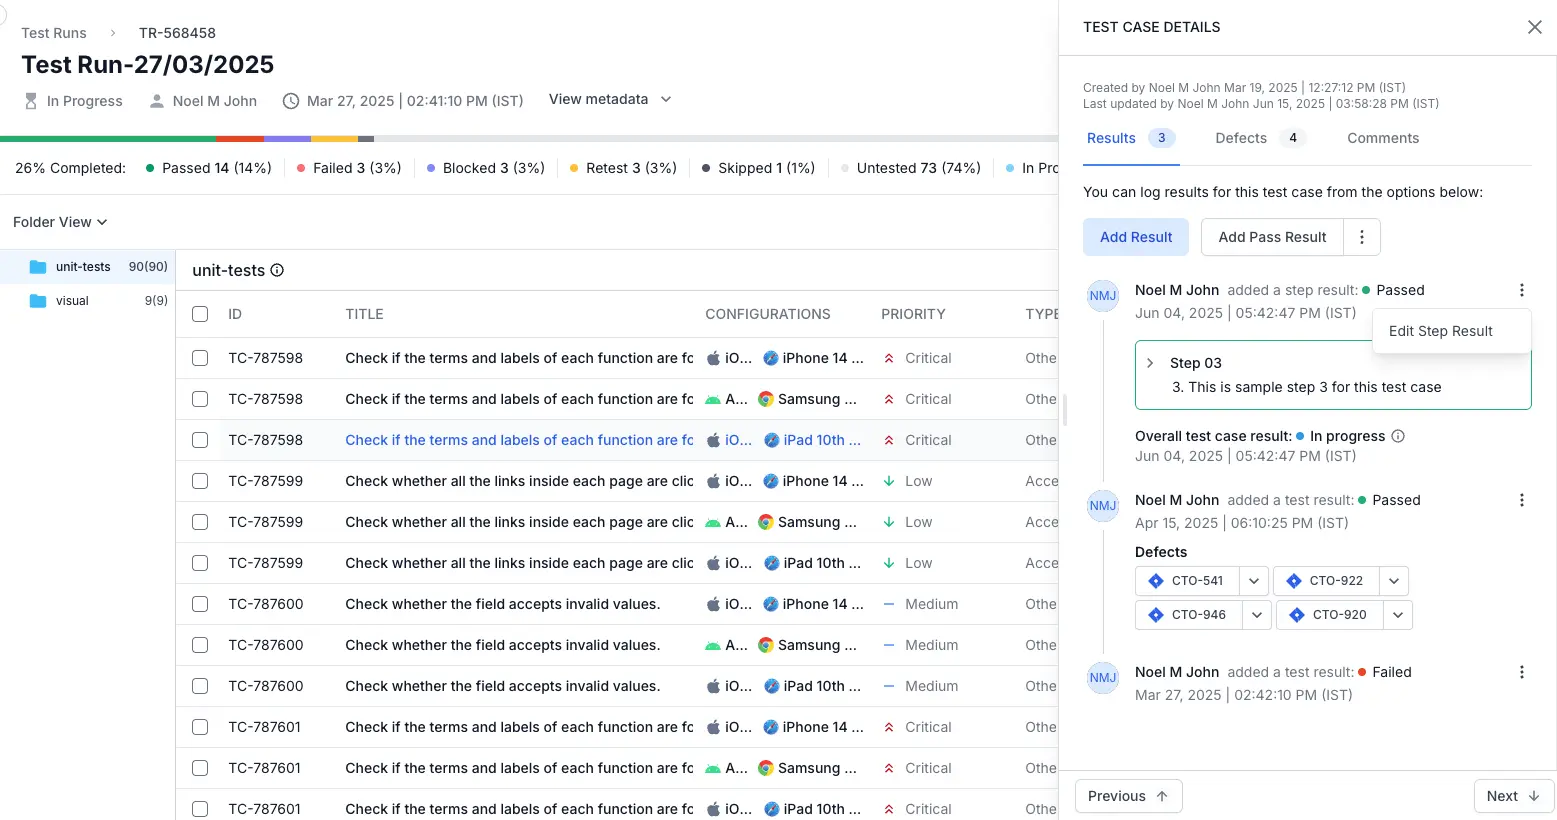
- Select Edit Step Result to open the Edit Step Result form.
- Update the Status, Notes, Attachments or custom result fields as needed.
- Use the Defects field to add/remove any Jira, Azure or Asana items tracking related bugs.
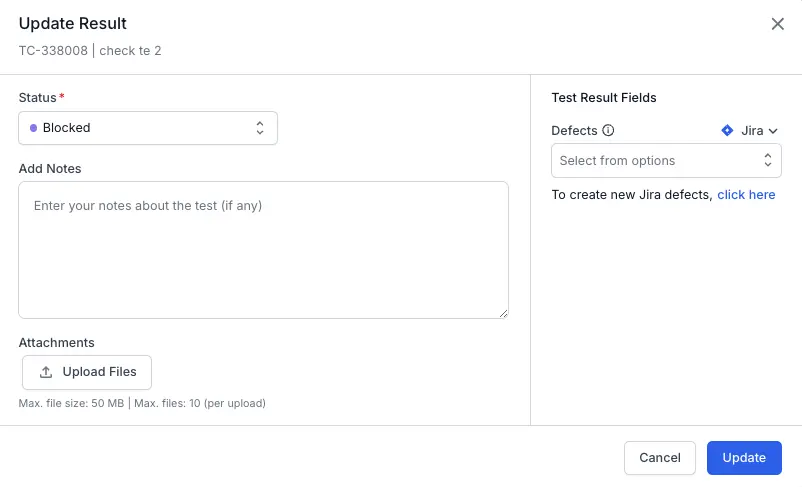
- Click Update Result to save your changes.
Automatic test case status assignment
The status of the Test Case is automatically determined based on the outcomes of the individual steps according to a predefined result mapping logic.
| Step result | Test Case status |
|---|---|
| All steps are set to Pass | Passed |
| One or more steps are set to Fail | Failed |
| None of the steps have failed, but one or more are set to Blocked | Blocked |
| None of the steps have failed or blocked, but one or more are set to Skip or Retest | In Progress |
We're sorry to hear that. Please share your feedback so we can do better
Contact our Support team for immediate help while we work on improving our docs.
We're continuously improving our docs. We'd love to know what you liked
We're sorry to hear that. Please share your feedback so we can do better
Contact our Support team for immediate help while we work on improving our docs.
We're continuously improving our docs. We'd love to know what you liked
Thank you for your valuable feedback!