Multipage authentication
Learn how to configure Website Scanner to log in through a flow that spans multiple screens.
Use multipage authentication when your login requires entering a username on one screen and a password on the next.
Before you begin
Identify the following CSS selectors on your login screens:
- Username input field selector (first screen)
- Next button selector (button that advances from the username screen to the password screen)
- Password input field selector (second screen)
- Submit button selector (final login button)
For more information, see Find CSS selectors.
Configure multipage authentication
-
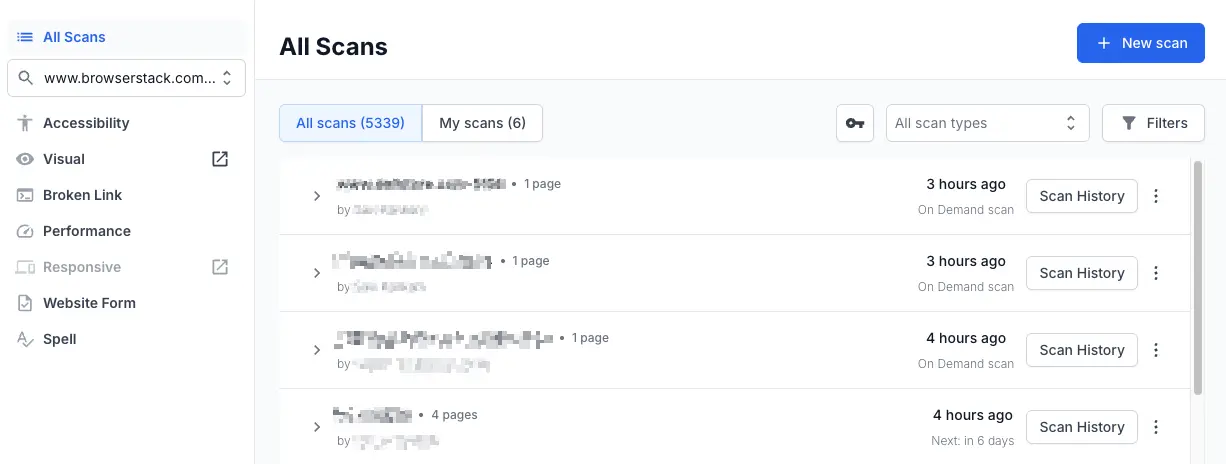
Navigate to the Website Scanner dashboard and click New scan.
- Select a scan mode tab: Manual mode, Sitemap, or Crawler.
- Add pages to scan based on your selected mode:
- Manual mode: Enter a URL in the Enter page URL field and click Add page. Repeat for each URL, or use the dropdown to upload a CSV.
- Sitemap: Enter a domain URL or sitemap.xml URL in the Enter domain URL or sitemap.xml URL field and click Add sitemap.
- Crawler: Enter a starting URL in the Enter page URL field and click Start Crawl. The crawler discovers linked pages automatically.
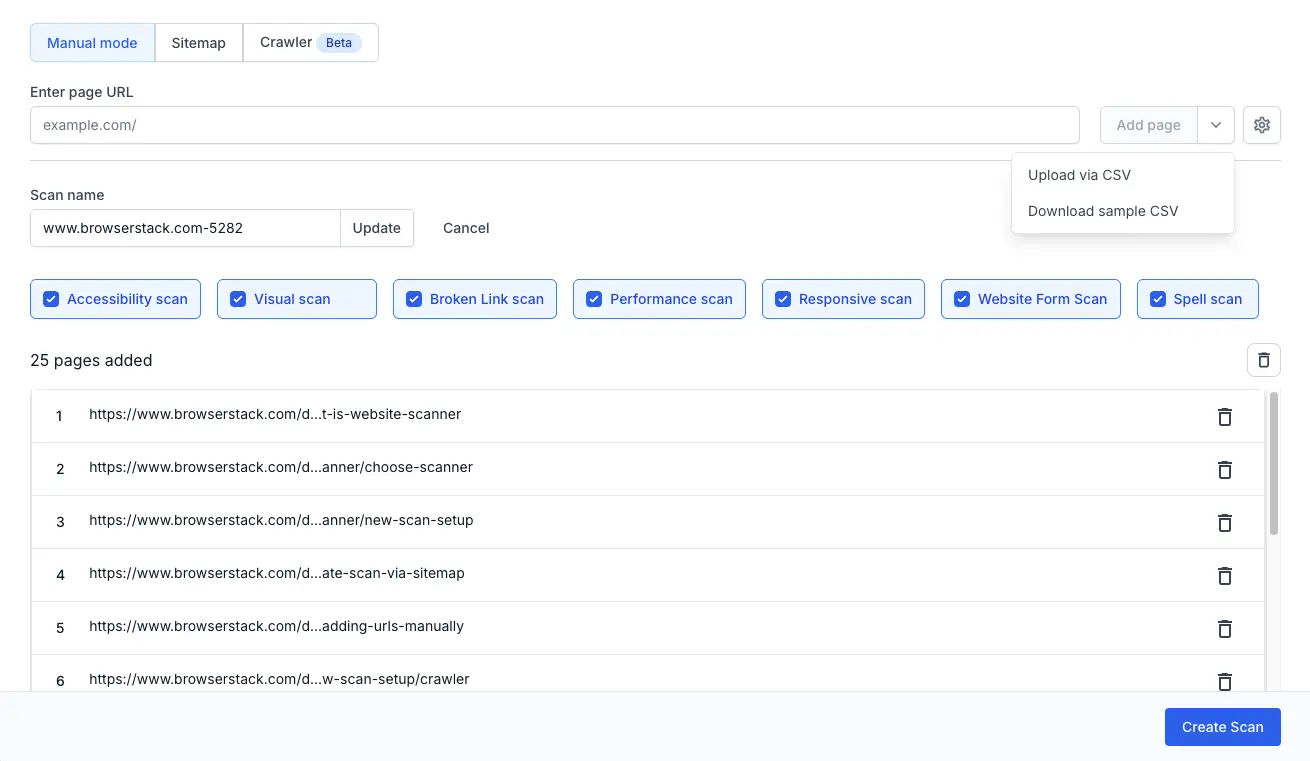
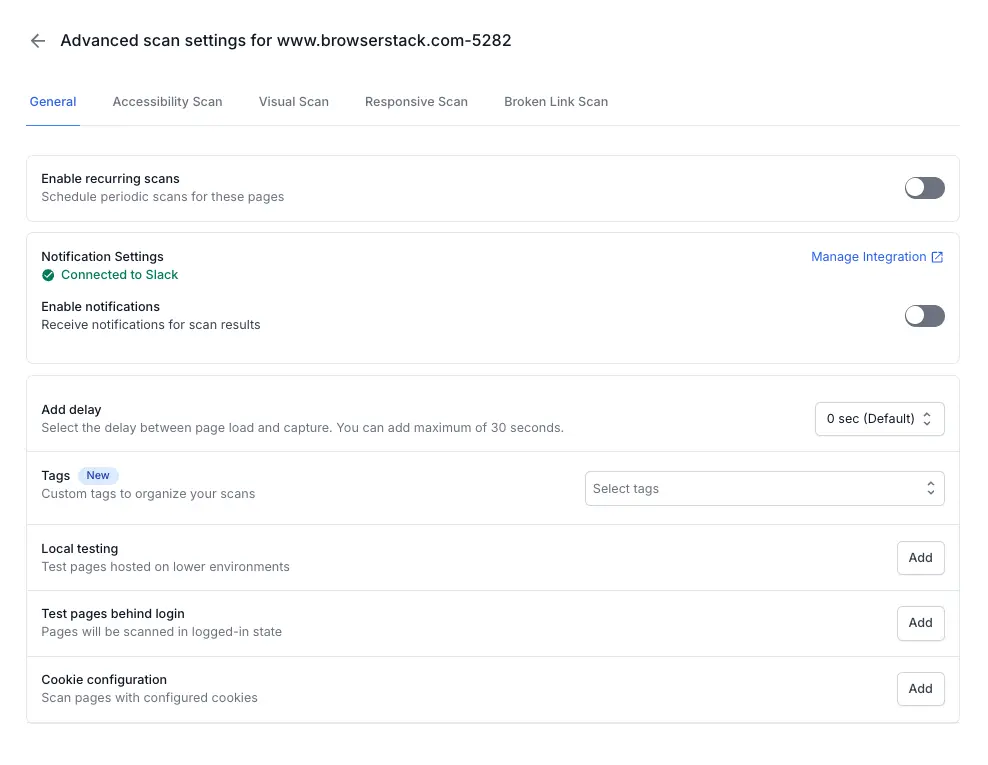
- Click the settings (gear icon) to open Advanced scan settings.
-
Click Add next to Test pages behind login.
- Enter a configuration name.
-
Select Multipage authentication from the dropdown.
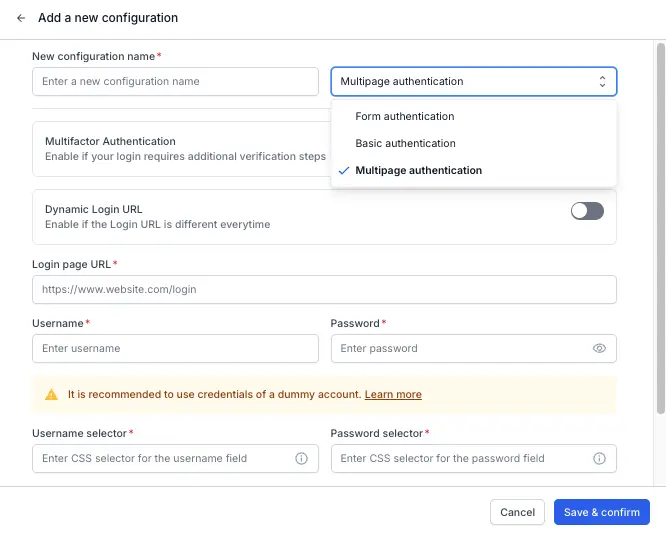
- Optionally, enable Multifactor Authentication toggle if your login requires additional verification steps.
- Optionally, if your login URL changes between sessions, toggle Dynamic Login URL to on and enter the Initial page URL. Otherwise, enter the static Login page URL.
- Enter the Sign in button selector. This is the CSS selector for the button that starts the login flow on the initial page.
- Enter the Username and Username selector.
- Enter the Next button selector. This is the CSS selector for the button that advances from the username screen to the password screen.
- Enter the Password and Password selector.
- Enter the Submit button selector. This is the CSS selector for the final login button.
- Click Save & Confirm.
Your multipage authentication is now configured. If your login also requires MFA or uses a dynamic login URL, continue with the relevant sections below.
Add MFA to multipage authentication
Toggle Multifactor Authentication to ON if your login requires an email-based one-time password (OTP) after entering credentials.
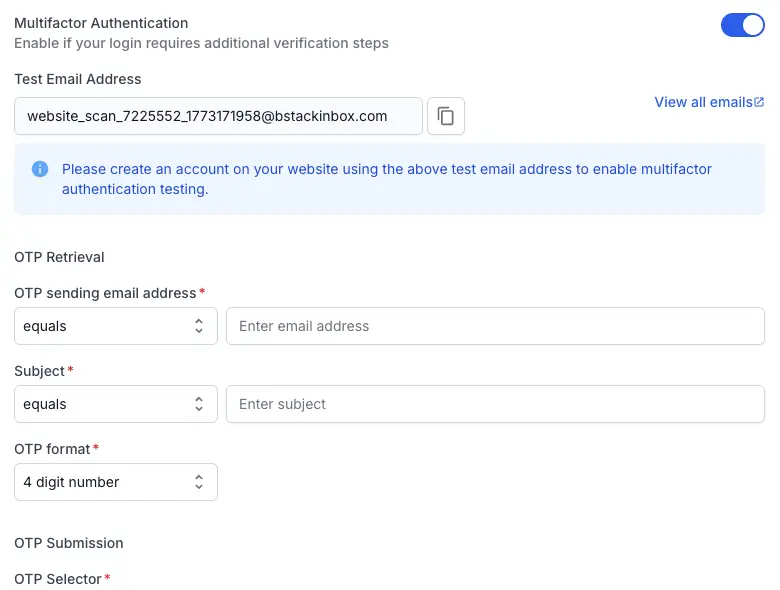
How MFA works
When you enable MFA, Website Scanner generates a unique test email address. Register this address on the website you plan to scan. During each scan, the scanner retrieves the OTP from that mailbox, enters it into the designated field, and completes the login.
Create an account on your website using the test email address displayed in the configuration panel before running the scan.
MFA configuration fields
Follow the table below to understand the MFA configuration fields, and fill them in accordingly:
| Field | Description |
|---|---|
| Test Email Address | Auto-generated address. Click View all emails to inspect the inbox. |
| OTP sending email address | The sender address (or partial match) from which the OTP email arrives. Use the contains operator for partial matching. |
| Subject | The email subject line (or partial match) that identifies the OTP message. Use the contains operator for partial matching. |
| OTP Format | Choose 4-digit number, 5-digit number, 6-digit number, or Regex for custom patterns. |
| OTP Selector | CSS selector for the input field where the OTP is entered on the website. |
| OTP submit button selector | CSS selector for the button that submits the OTP. |
OTP format options
The OTP Format dropdown determines how the scanner extracts the code from the email body:
- 4-digit number: Matches a 4-digit numeric code.
- 5-digit number: Matches a 5-digit numeric code.
- 6-digit number: Matches a 6-digit numeric code.
- Regex: Enter a custom regular expression to match non-standard OTP formats.
Handle dynamic login URLs
Toggle Dynamic Login URL to on if your login page URL changes every session. This applies to URLs that include session tokens or CSRF parameters.
When enabled, the scanner does not load the login URL directly. Instead, it navigates to the initial page URL you provide and follows the login flow from there.
-
Toggle Dynamic Login URL to on.
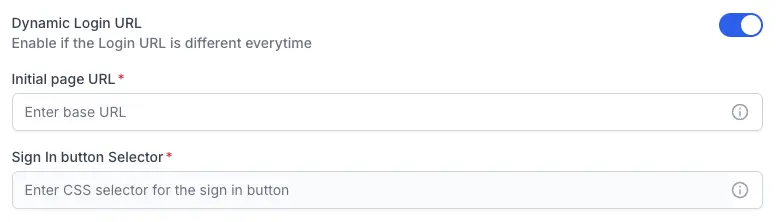
- Enter the Initial page URL. This is the page from which the login flow starts.
- Enter the Sign in button selector. This is the CSS selector for the button that launches the login flow from the initial page.
- The scanner clicks the sign-in button and reaches the first screen of the multipage login. From there, it fills in credentials using the selectors you already configured.
Next steps
- Configure form authentication if your login uses a single-page form instead.
- Configure basic authentication if your site uses HTTP Basic auth popups.
We're sorry to hear that. Please share your feedback so we can do better
Contact our Support team for immediate help while we work on improving our docs.
We're continuously improving our docs. We'd love to know what you liked
We're sorry to hear that. Please share your feedback so we can do better
Contact our Support team for immediate help while we work on improving our docs.
We're continuously improving our docs. We'd love to know what you liked
Thank you for your valuable feedback!