View Website Form scan results
Review the forms detected on your website and identify forms that fail to open or submit.
The Website Form scanner automatically discovers HTML forms across your scanned pages and runs two tests against each form: whether the form opens correctly and whether the form submits successfully. The scanner detects standard <form> elements, JavaScript-rendered forms, and forms inside modals or iframes. It captures metadata for each form, including the form name, field types, and action URL.
The scanner submits forms using safe dummy data. It does not test payment gateway flows, authentication or sign-in forms, or forms that require CAPTCHA.
Access the Website Form scan report
- Open All Scans and locate the scan you want to review.
-
In the scan summary, find the Website Form card.
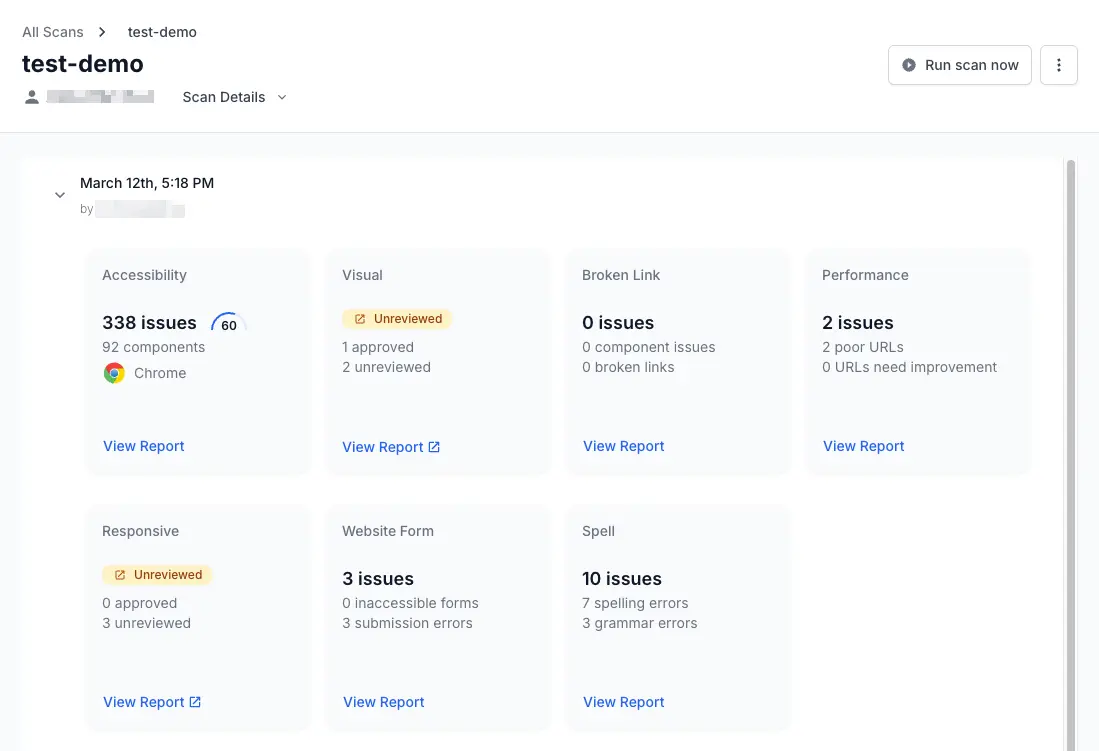 The card displays the total issue count, broken down by inaccessible forms and submission errors.
 - Click View Report.
You can also click Website Form in the left navigation of any scan report to open the results.
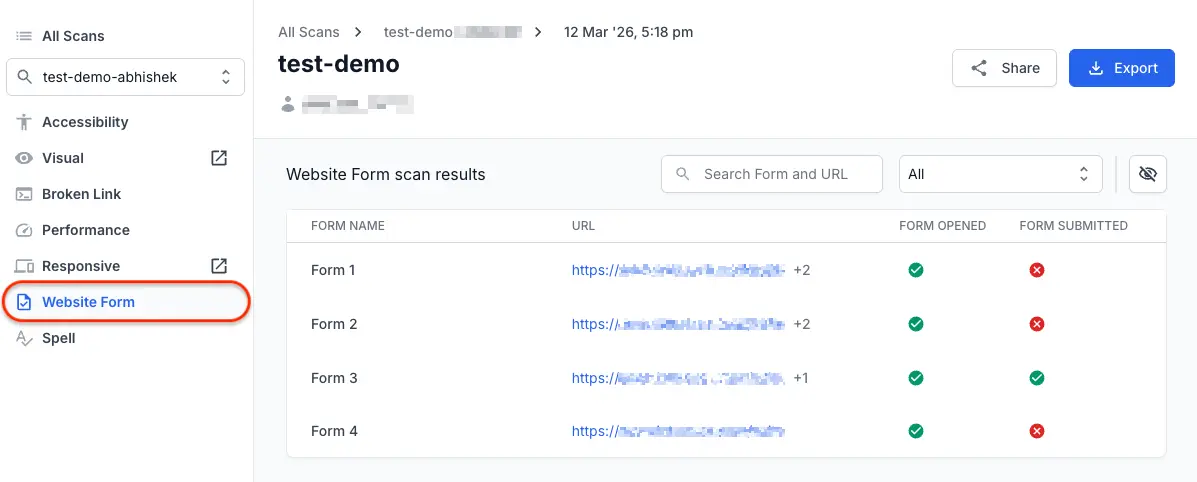
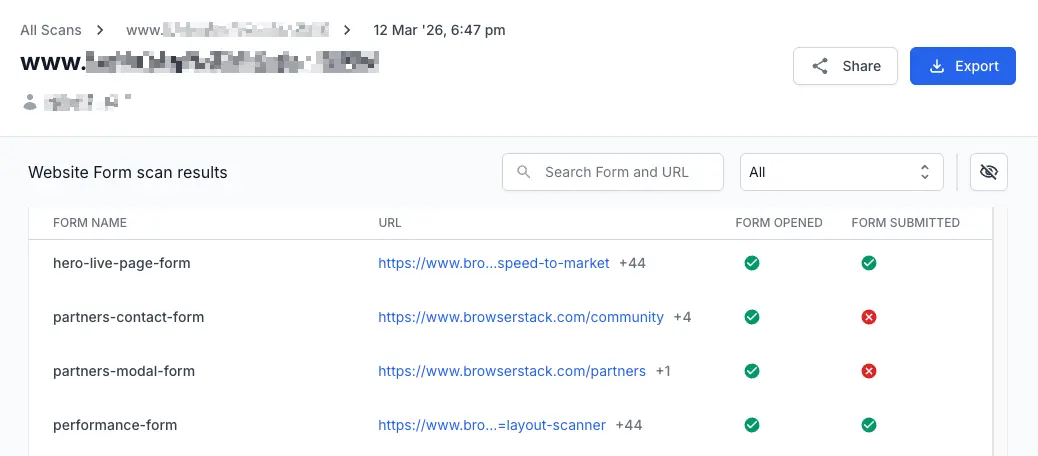
Understand the results table
The results table lists every form detected across your scanned pages. Each row represents one form and displays the following columns:
| Column | Description |
|---|---|
| FORM NAME | The name or identifier of the form as detected in the page markup. Forms without an explicit name receive a generic label such as Form 1. The scanner identifies distinct forms and does not test the same form twice. |
| URL | The page URL where the form was found. |
| FORM OPENED | A green indicator means the form rendered and became accessible during page load. A red indicator means the form failed to open. |
| FORM SUBMITTED | A green indicator means the form submitted successfully (HTTP 200 or 302 response, no 4xx/5xx errors). A red indicator means the submission failed. |
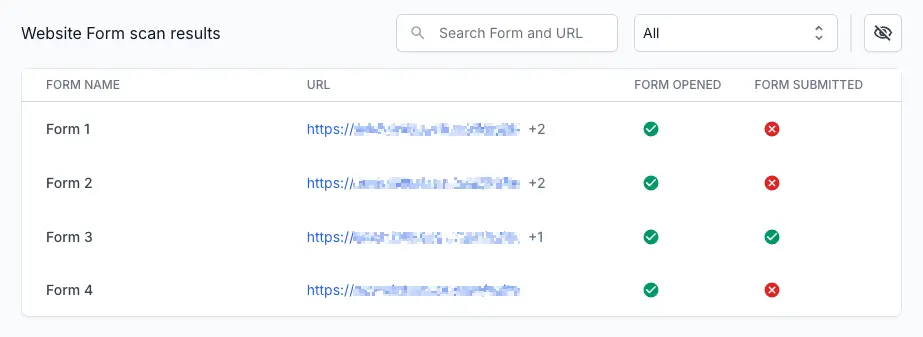
Search and filter forms
Use the Search Form and URL field at the top right of the results table to locate a specific form by name or page URL. Use the Filter dropdown to filter results by status.
| Filter | Description |
|---|---|
| All | Shows all detected forms. |
| Open failures | Shows forms with unresolved failures. |
| Submission failures | Shows forms where test submissions failed. |
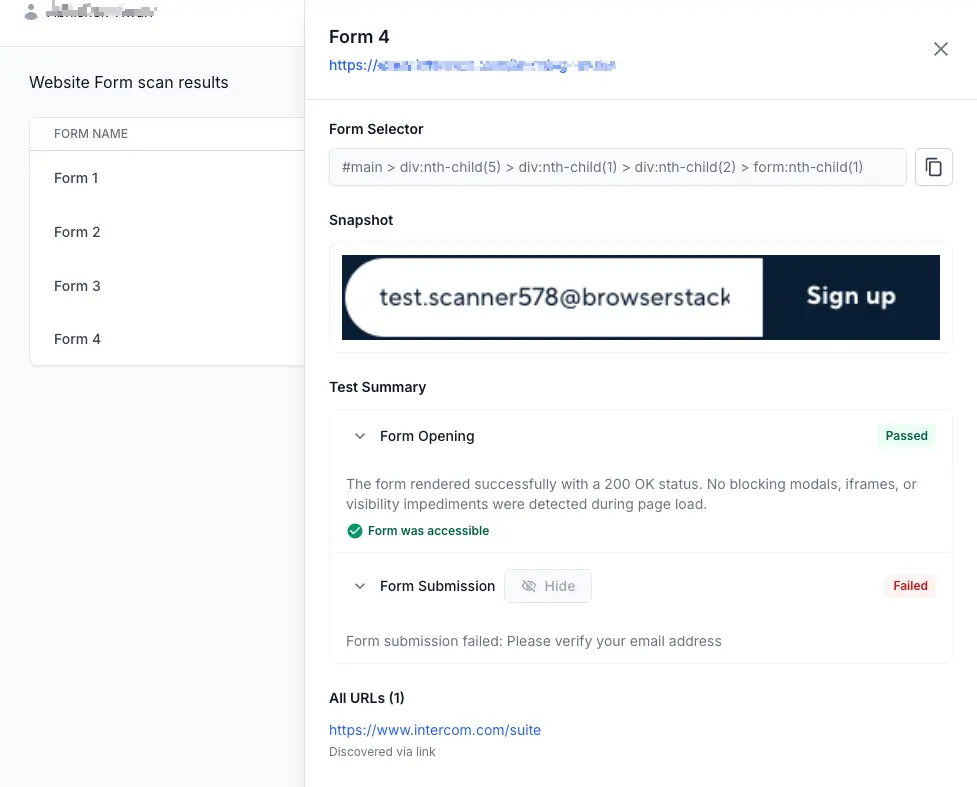
View form details
Click any row in the results table to open the form detail panel on the right side of the page. The panel displays the following information:
-
Form name and URL: The form name appears as the panel heading. The page URL where the form was found appears below it as a clickable link.
-
Form Selector: The CSS selector used to identify the form in the page DOM. Click the copy icon next to the selector to copy it to your clipboard. Use this selector to locate the form element in your source code.
-
Snapshot: A rendered preview of the form as captured during the scan. The snapshot shows the form fields, labels, and layout as they appeared at scan time.
-
Test Summary: Two expandable sections display the results of each test:
-
Form Opening: Expand this section to see whether the form rendered with a
200 OKstatus. The scanner checks for blocking resources and visibility impediments during page load. A green Form was accessible label confirms the form loaded correctly. A red label indicates the form was hidden, blocked by other UI elements, or failed to load. -
Form Submission: Expand this section to see whether the form submitted successfully. The scanner submits the form using safe dummy data and verifies that the form action request returns HTTP
200or302, the redirect or thank-you page loads, and no silent JavaScript errors occur.
-
- All URLs: Lists all URLs where this form was discovered, along with how each URL was added to the scan.
Hide false issues
Some forms fail submission tests for expected reasons. Forms that require CAPTCHA, multi-factor authentication, or dynamic user input may always fail the automated test. You can hide these issues to reduce noise in your report.
To hide a form submission issue, follow these steps:
-
Open the form detail panel by clicking a row in the results table.
-
Click Hide next to the test result you want to suppress.
- In the Hide this issue? dialog, configure the following options:
- Hide. Select This issue from the dropdown.
- Also hide this issue in my new reports of this scan. Select this checkbox to suppress the same issue type in future scan runs automatically.
- Reason to hide issue: Select a reason: False Positive, Duplicate, Not a priority, Not relevant, or Others.
- Click Confirm.
The issue is removed from the visible results and excluded from the total issue count. A confirmation toast notifies you that the issue has been hidden. Click Undo in the toast to reverse the action immediately.
Only the report author can hide issues. Other team members who view the shared report cannot hide or unhide results.
To view hidden issues, use the filter controls in the results table. You can unhide a previously hidden issue at any time to restore it to the active results view.
How auto-hide works across scan runs
When you select the auto-hide checkbox, the scanner suppresses only the specific issue type you hid. For example, if a form failed the opening test and you hid that issue, only future opening failures for that form are hidden. If the same form opens successfully in a later scan but fails the submission test, the submission failure appears as a new visible issue.
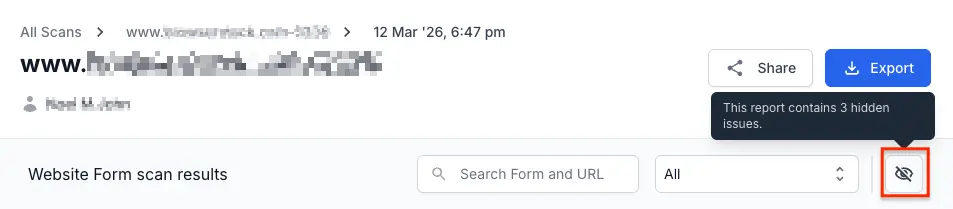
View hidden issues
Click the hidden issues icon (eye with a strikethrough) in the results table toolbar to switch to the hidden issues list. Each hidden issue displays the reason it was hidden and the full form details.
Unhide an issue
-
Open the hidden issues list.

- Click a hidden issue to view its details.
-
Click Un-hide.
-
In the confirmation prompt, confirm that you want to unhide the issue. You can also choose to stop auto-hiding this issue type from future reports.
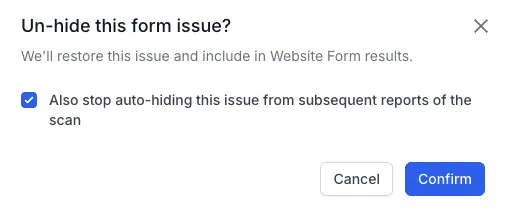
- Click Confirm.
The issue moves back to the visible results list.
Share and export results
Use the Share button at the top right of the report to share your scan results with team members or external stakeholders. You can also use the Export button to download the report as a CSV file for offline analysis.
- For more information, refer to share scan reports with your team and external stakeholders.
- For more information, refer to export scan results as CSV for offline analysis.
Known limitations
Currently, the Website Form scanner does not test the following:
- Payment gateway flows.
- Authentication, sign-in, or sign-up forms.
- Forms protected by CAPTCHA.
- Field-level validation (testing empty required fields or invalid email formats).
- Email confirmation after form submission.
Next steps
- Set up a new scan to include the Website Form scanner in your next scan.
- View Spell scan results to check for spelling and grammar errors on your pages.
- Configure scan settings to adjust scheduling and other scan options.
We're sorry to hear that. Please share your feedback so we can do better
Contact our Support team for immediate help while we work on improving our docs.
We're continuously improving our docs. We'd love to know what you liked
We're sorry to hear that. Please share your feedback so we can do better
Contact our Support team for immediate help while we work on improving our docs.
We're continuously improving our docs. We'd love to know what you liked
Thank you for your valuable feedback!