Preview images or videos with Camera Preview on Android
Many applications such as social media, retail, and banking apps use the built-in device camera to preview the camera content and do further processing. The Camera Preview feature of App Live enables you to preview the camera content in your app and test the related scenarios.
This feature is currently a Private Beta service and available only under Team Pro and Enterprise Pro plans. For more details, check out our pricing page.
With Camera Preview, you can inject an asset (image or video) into your app and view the injected asset in the camera preview. You can use Camera Preview to test scenarios such as:
- Manually capturing an image by clicking the camera shutter button.
- Automatically capturing an image by detecting the face liveliness.
Supported devices and APIs
- Supported devices: Devices running Android OS 9 and higher.
- Supported APIs: Apps using the Camera X API.
Prerequisite
The Camera Preview feature only works with image and video injection. Ensure that you enable either Image Injection or Video Injection, or both. If both image and video injection settings are disabled, Camera Preview is automatically disabled.
Enable the Camera Preview setting for your app
To enable the Camera Preview setting:
- Log in to the App Live dashboard.
- Upload your app from the Select Source panel.
- After your app is uploaded, click the configuration icon next to the file name of your app.
- Under App Configurations, enable Camera Preview.
Ensure that either Image Injection or Video Injection, or both are enabled.
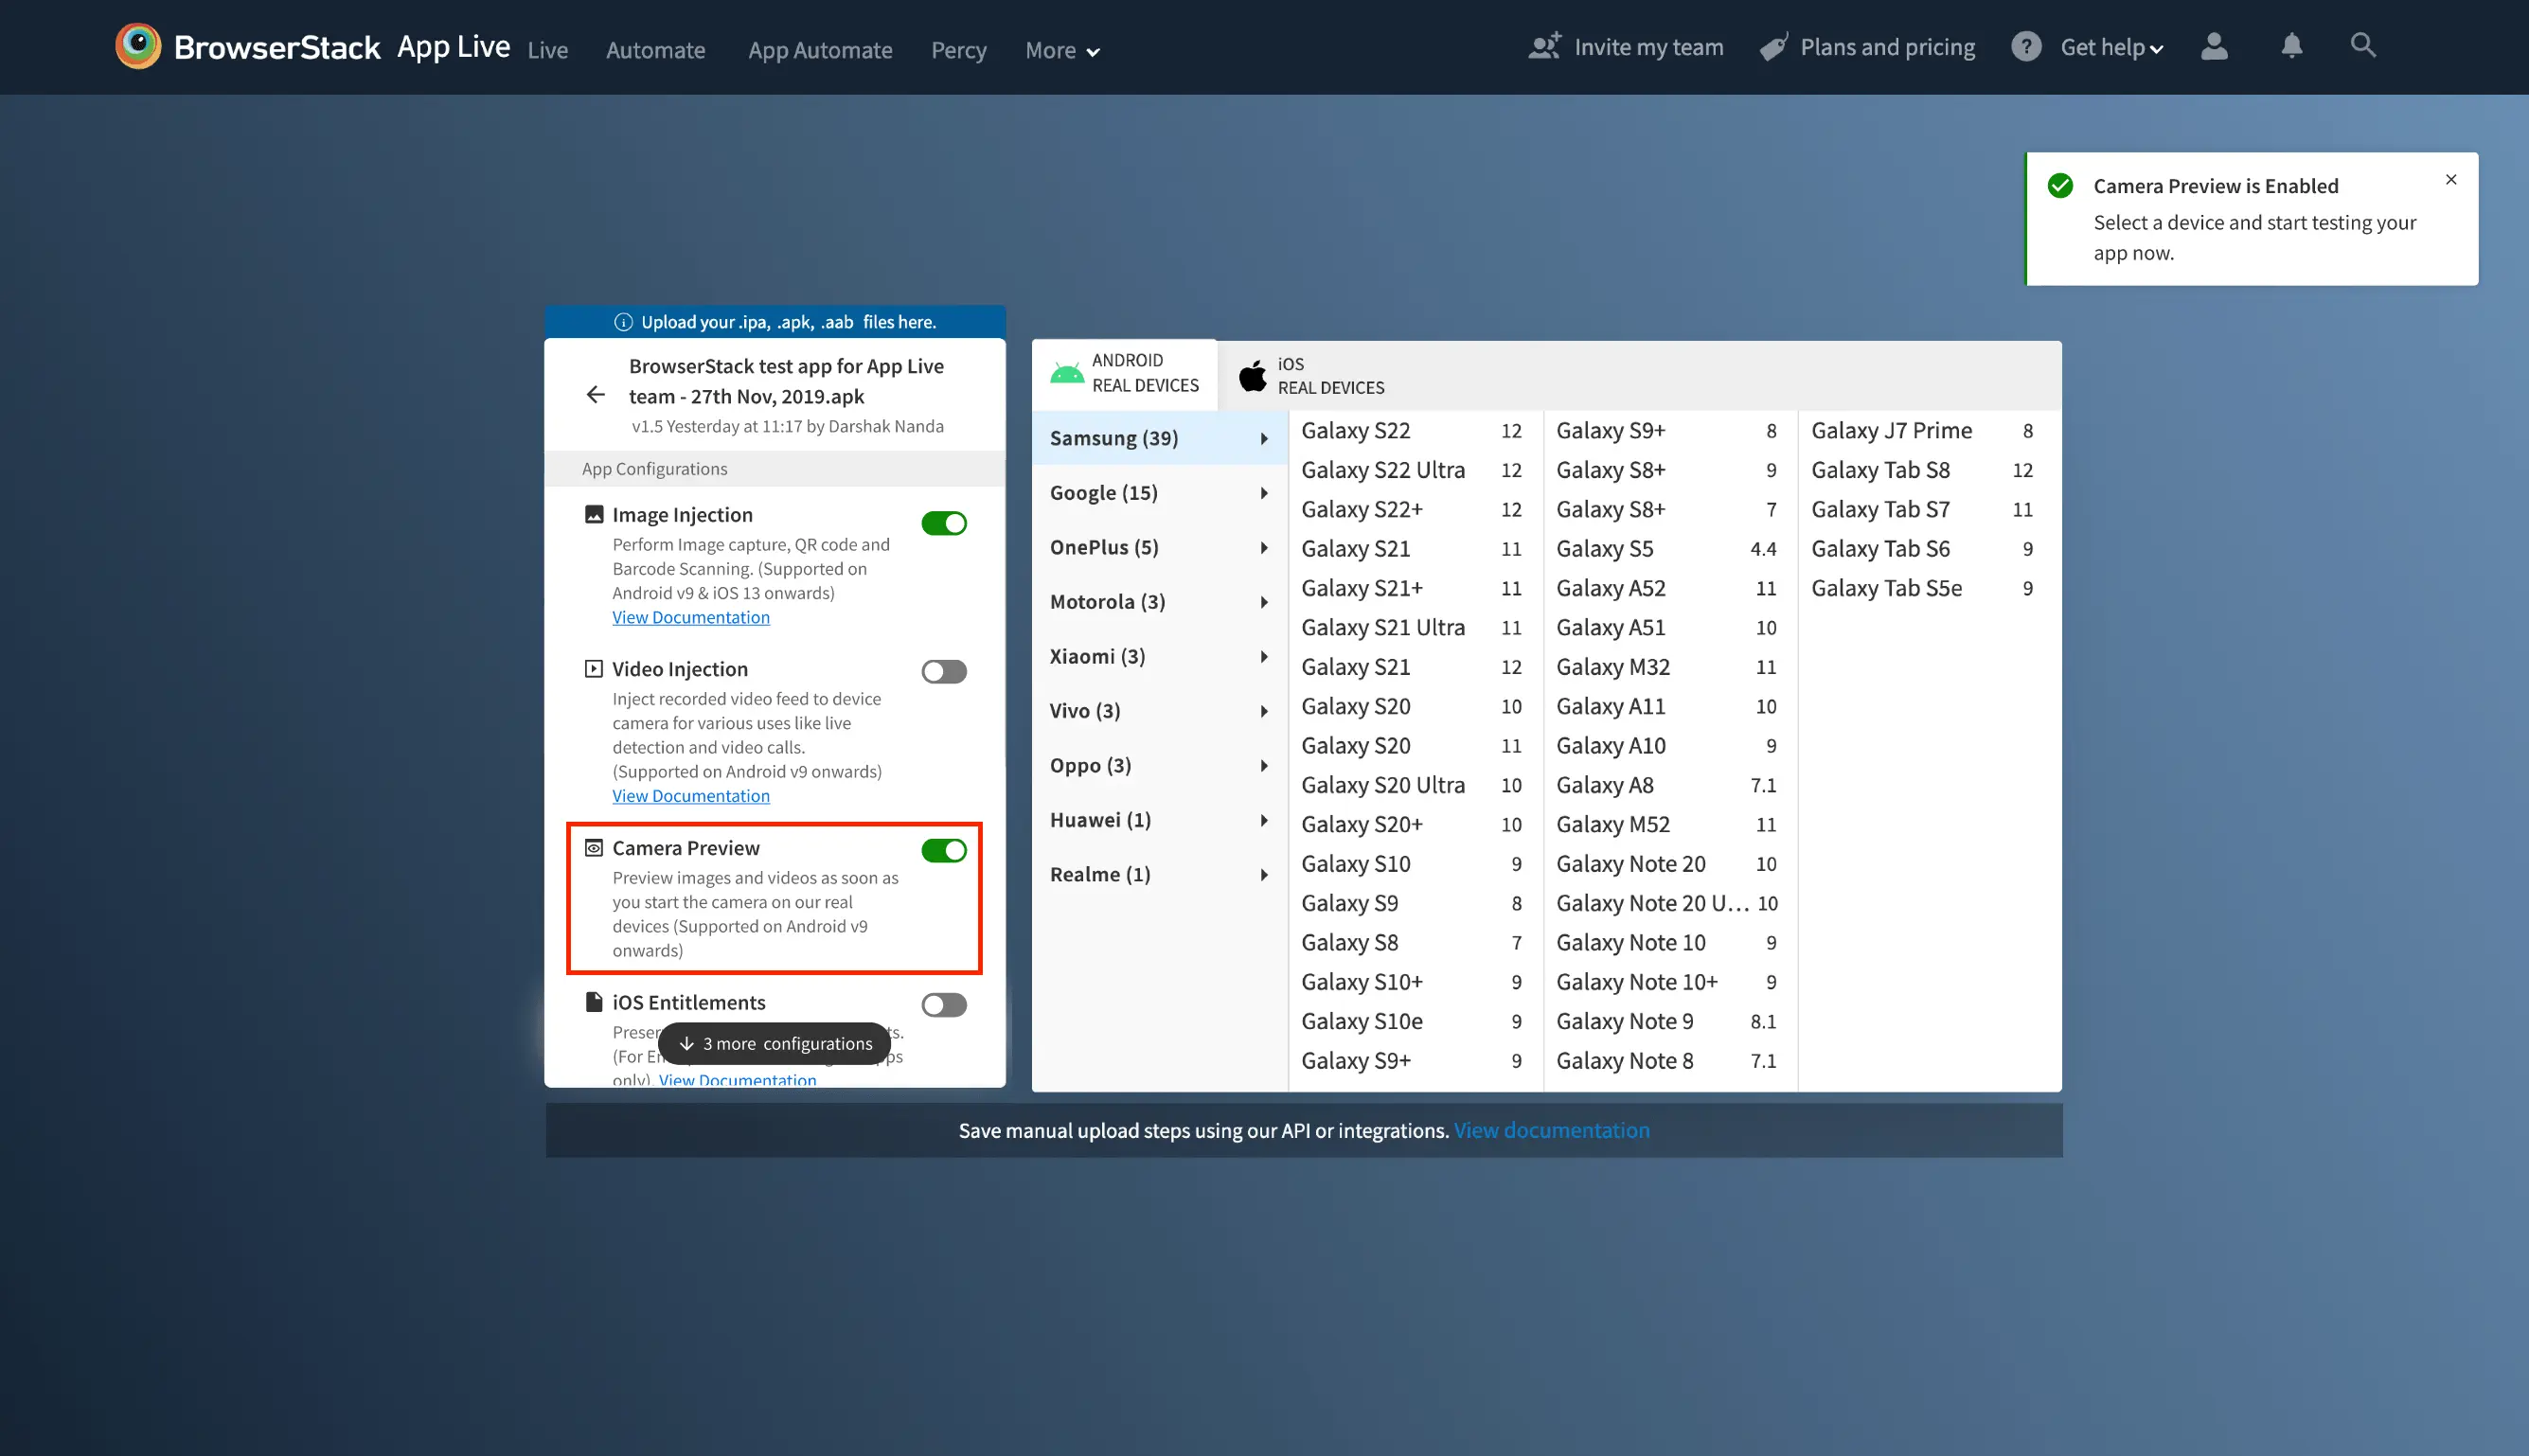
After the Camera Preview setting is enabled, select your device from the list of available devices in the device listing to launch your test session.
Upload an asset and test your app by injecting the asset
Ensure that the Camera Preview setting is enabled for your app.
To upload an asset and inject into your app:
- Log in to the App Live dashboard.
- Select your app and a device to launch a test session.
- On the App Live vertical toolbar, click Files & Media.
- On the Files & Media prompt, click the Gallery tab.
A sample asset is available on the device and injected into your app. You can use the sample asset or upload your own asset to inject into your app. - To upload an asset, click Upload asset, select the asset that you want to upload from your system, and click Open.
The Files & Media prompt displays the following:- The progress bar while the asset is being uploaded. Click Cancel if you want to cancel the current upload and upload another asset.
- A preview of the asset after the upload is complete.
- Gallery that displays the uploaded asset.
You see a message on the dashboard that the asset is uploaded and injected into your app. The latest uploaded asset is injected into your app by default. However, you can select another asset from the gallery to be injected into your app, and click Inject this asset.
You can upload up to 5 assets to the gallery. If you upload another asset after the gallery is full, the oldest asset is removed to upload the latest asset.
In your app, trigger the camera workflow. The injected asset is shown in the camera preview.
We're sorry to hear that. Please share your feedback so we can do better
Contact our Support team for immediate help while we work on improving our docs.
We're continuously improving our docs. We'd love to know what you liked
We're sorry to hear that. Please share your feedback so we can do better
Contact our Support team for immediate help while we work on improving our docs.
We're continuously improving our docs. We'd love to know what you liked
Thank you for your valuable feedback!