
 Join our Discord
Install Test Companion in Visual Studio
Install Test Companion in Visual Studio 2022 or Visual Studio 2026 to generate, automate, and fix test cases without leaving your IDE.
You install Test Companion from the Visual Studio Marketplace, the same way you install any other Visual Studio extension.
The setup process has three steps:
Prerequisites
Before you install the extension, make sure you have:
- A BrowserStack account. If you do not have one, create a BrowserStack account.
- Visual Studio 2022 version
17.14or later, or Visual Studio 2026, on 64-bit Windows. - The Microsoft Edge WebView2 runtime and .NET Framework 4.8.
The extension works in the Community, Professional, and Enterprise editions. To check your version, choose Help > About Microsoft Visual Studio.
Visual Studio 2022 and current versions of Windows install the WebView2 runtime and .NET Framework 4.8 for you. A separate install is rarely necessary.
Install the extension
You can install Test Companion in two ways. Use the Extension Manager inside Visual Studio unless a policy in your organization blocks installs from the IDE.
Install from Extension Manager
Visual Studio checks the marketplace signature on every extension it installs, so you do not have to judge whether a .vsix file from another source is genuine. Use this path by default. Extensions installed this way also update themselves when a new version reaches the marketplace.
Visual Studio must close before the install finishes, so save your open work first.
-
On the menu bar, choose Extensions > Manage Extensions. The Extension Manager window opens.

- In the left pane, select Browse.
- In the search box, type
Test Companion. -
In the results list, locate the Test Companion extension published by BrowserStack.
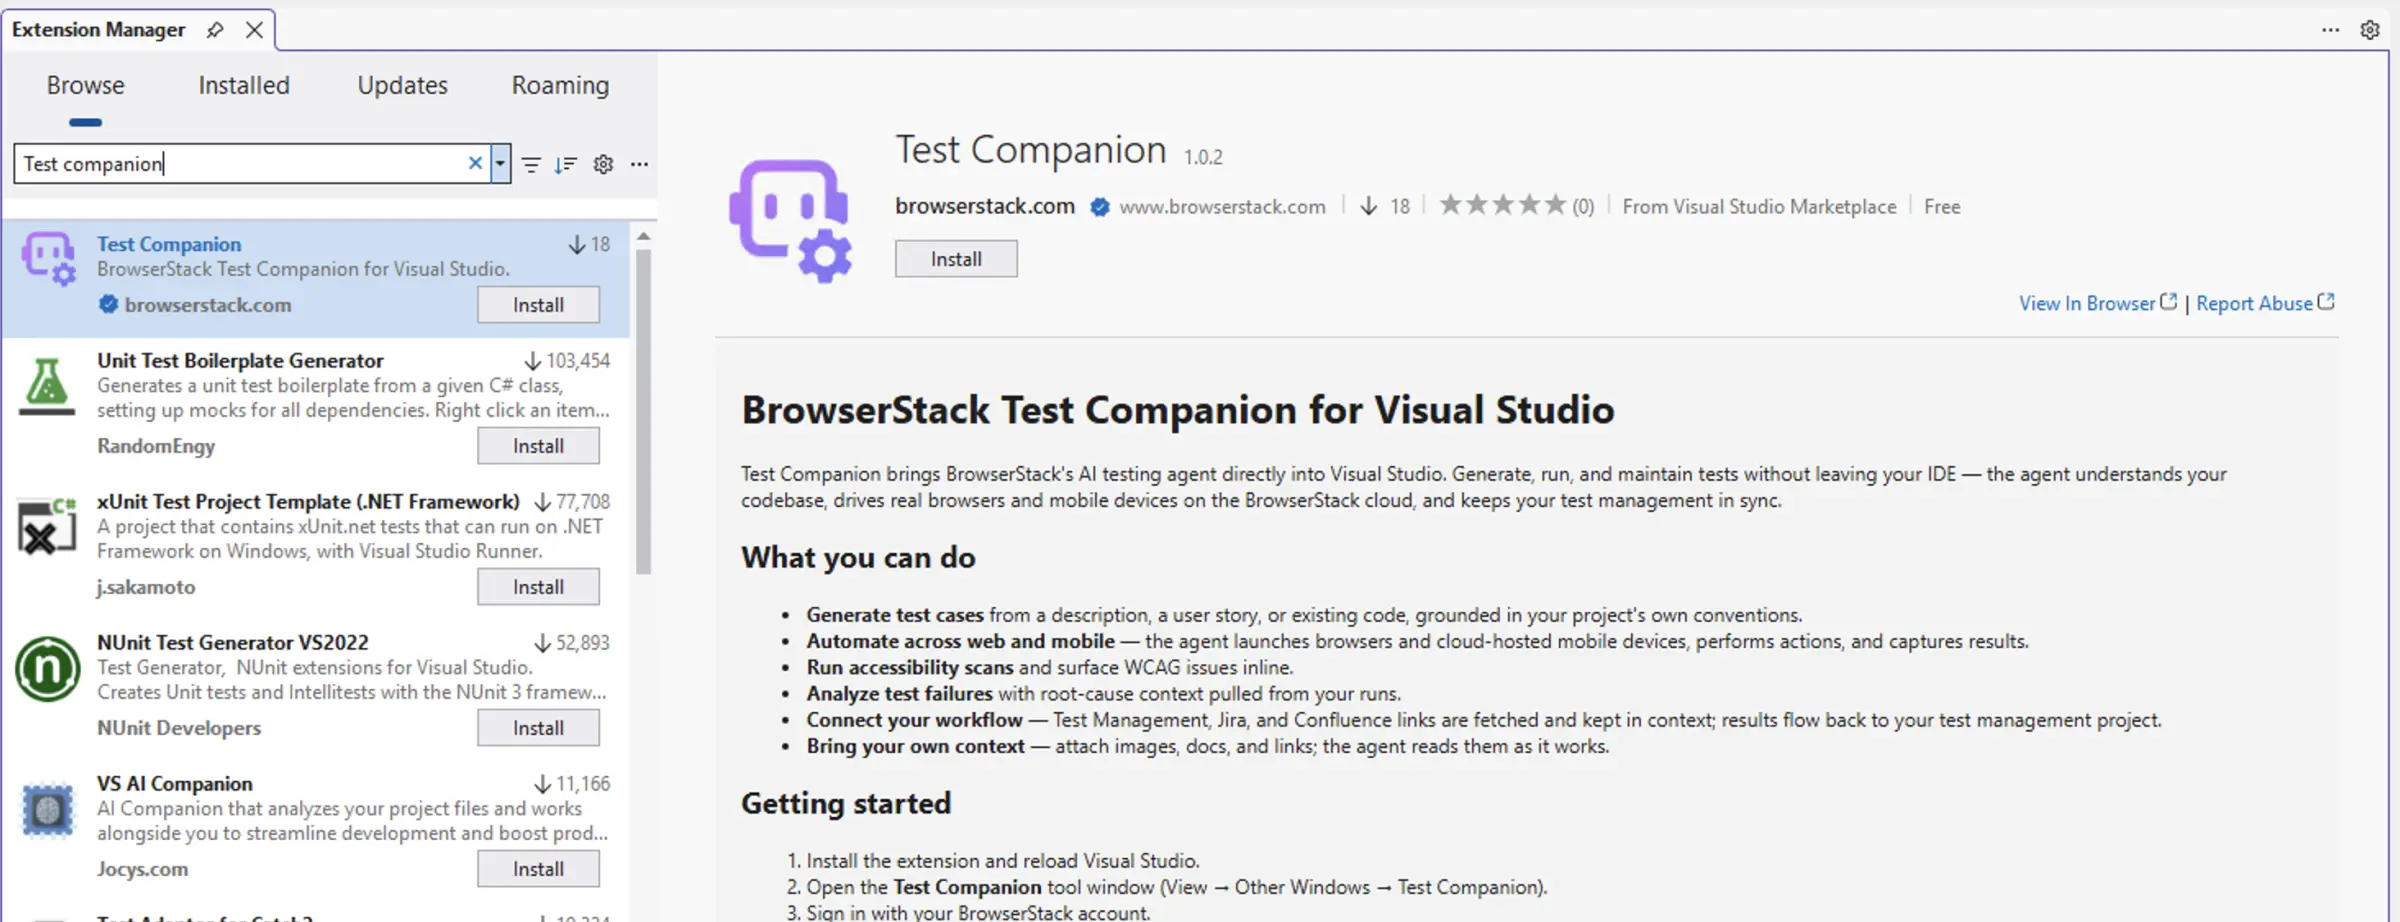
- Click Install. Extension Manager shows a notice that your changes are scheduled and start after Visual Studio closes.
-
Close Visual Studio. The VSIX Installer opens and lists the pending change.
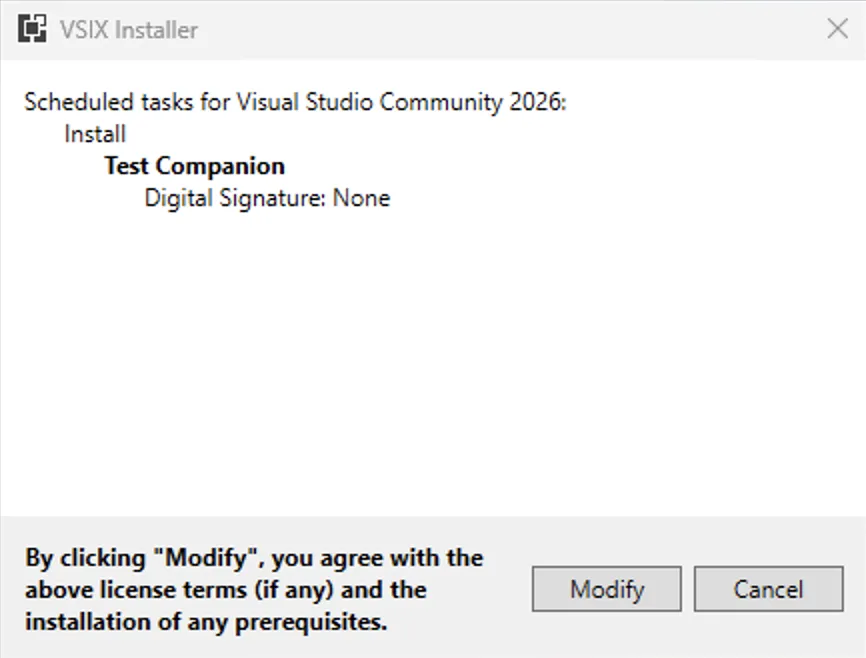
- Click Modify. Wait for the installer to report that the change is complete.
- Reopen Visual Studio.
Install from the Visual Studio Marketplace website
Use this path when your organization distributes extensions as files, or when a policy blocks installs from inside the IDE.
- Go to Test Companion on the Visual Studio Marketplace.
-
Click Download.
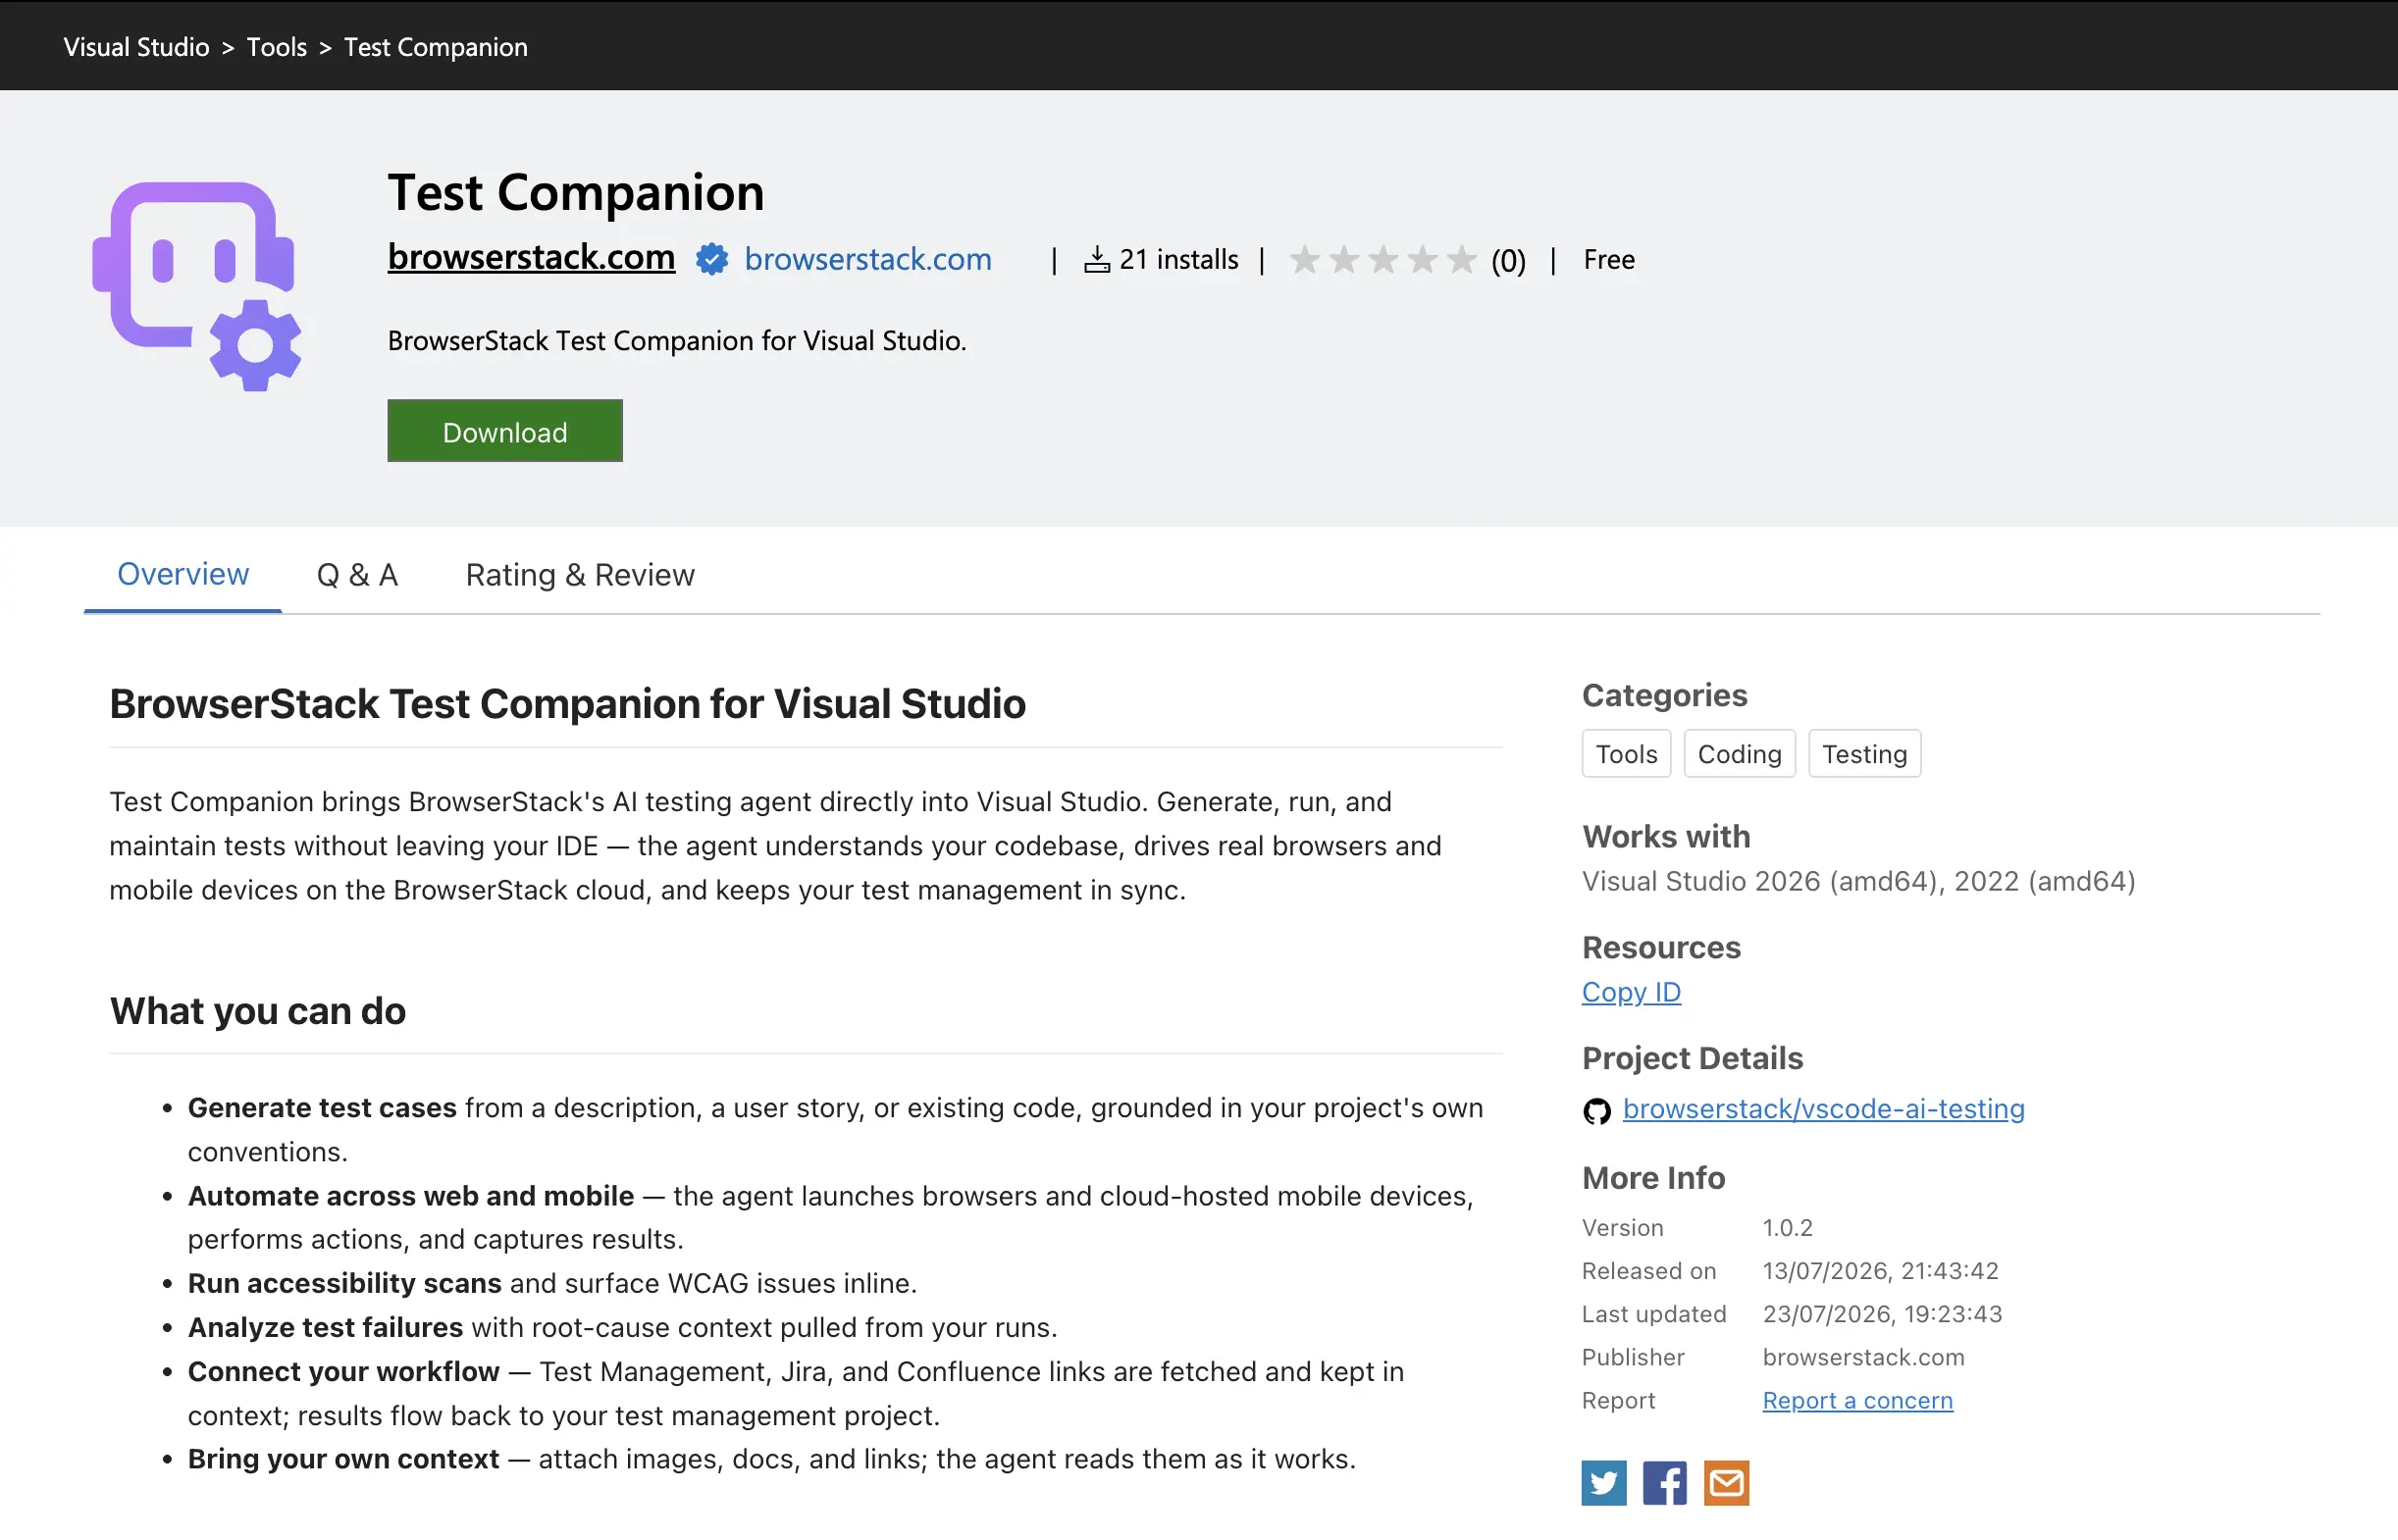
- Close Visual Studio.
- Open the downloaded
.vsixfile. Follow the prompts in the VSIX Installer. - Reopen Visual Studio.
Verify the installation
After Visual Studio reopens, open the Test Companion tool window in any of these ways:
- Click Test Companion on the Standard toolbar, the row that holds the solution configuration and run controls.
- Choose Tools > Test Companion.
- Press
Ctrl+Alt+T.
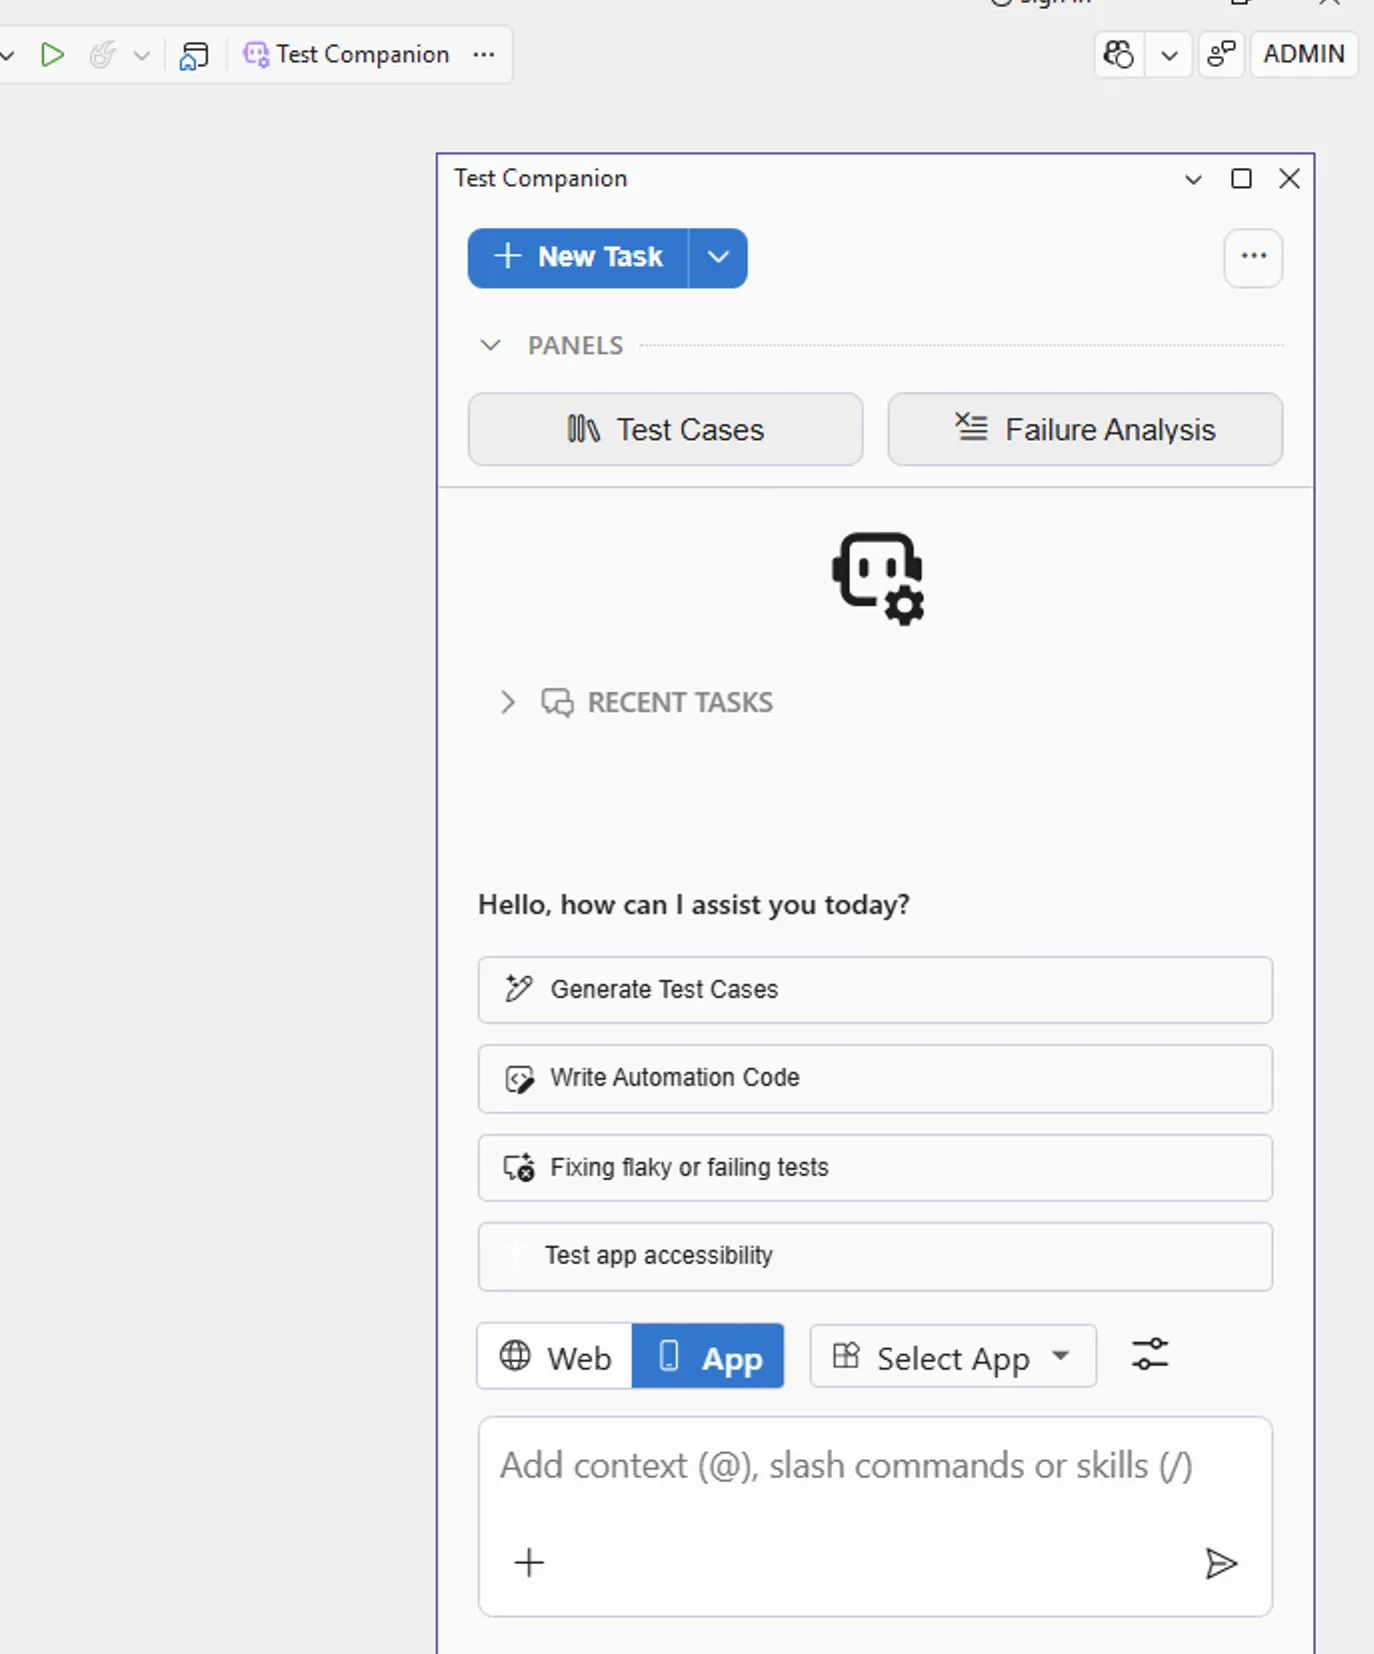
Test Companion docks on the left side of the editor the first time it opens. You can move it to another dock position or float it as a separate window. Visual Studio remembers the position you choose.
To rebind the keyboard shortcut, choose Tools > Options > Environment > Keyboard.
If Test Companion does not appear, confirm that the install finished. Choose Extensions > Manage Extensions, then select Installed in the left pane and look for Test Companion.
To use Test Companion, enable BrowserStack AI in your account settings. For more about these settings, read Activate BrowserStack AI.
Sign in to BrowserStack
Connect the extension to your BrowserStack account.
- Open the Test Companion tool window.
- In the panel, click Sign in with BrowserStack.
- Your default browser opens. It prompts you to authorize the extension.
- Follow the prompts to sign in. If you do not have an account, create a BrowserStack account.
After you sign in, the browser confirms that you are signed in. You can close the browser tab. The Test Companion panel in Visual Studio then shows your user information.
Test Companion is installed and configured.
Next steps
Start exploring what Test Companion can do:
- Generate test cases: Write test cases from requirements using AI.
- Automate tests with AI: Convert manual test cases into executable automation scripts.
- Fix failed tests: Debug and fix test failures using Test Reporting & Analytics.
We're sorry to hear that. Please share your feedback so we can do better
Contact our Support team for immediate help while we work on improving our docs.
We're continuously improving our docs. We'd love to know what you liked
We're sorry to hear that. Please share your feedback so we can do better
Contact our Support team for immediate help while we work on improving our docs.
We're continuously improving our docs. We'd love to know what you liked
Thank you for your valuable feedback!