
 Join our Discord
Quick Import from Xray
Connect your Xray account and import your projects and test cases into BrowserStack Test Management for Jira.
Follow these steps to connect your Xray account and copy your projects and test cases into Test Management for Jira.
Prerequisites
Before you start, make sure you have:
- Jira administrator access, because only Jira admins can open the BrowserStack app settings.
- A Xray account with administrator privileges.
- The Jira and Xray API tokens, which you generate during the connection step.
Do not change the folder structure in Xray while the import runs.
Open Quick Import
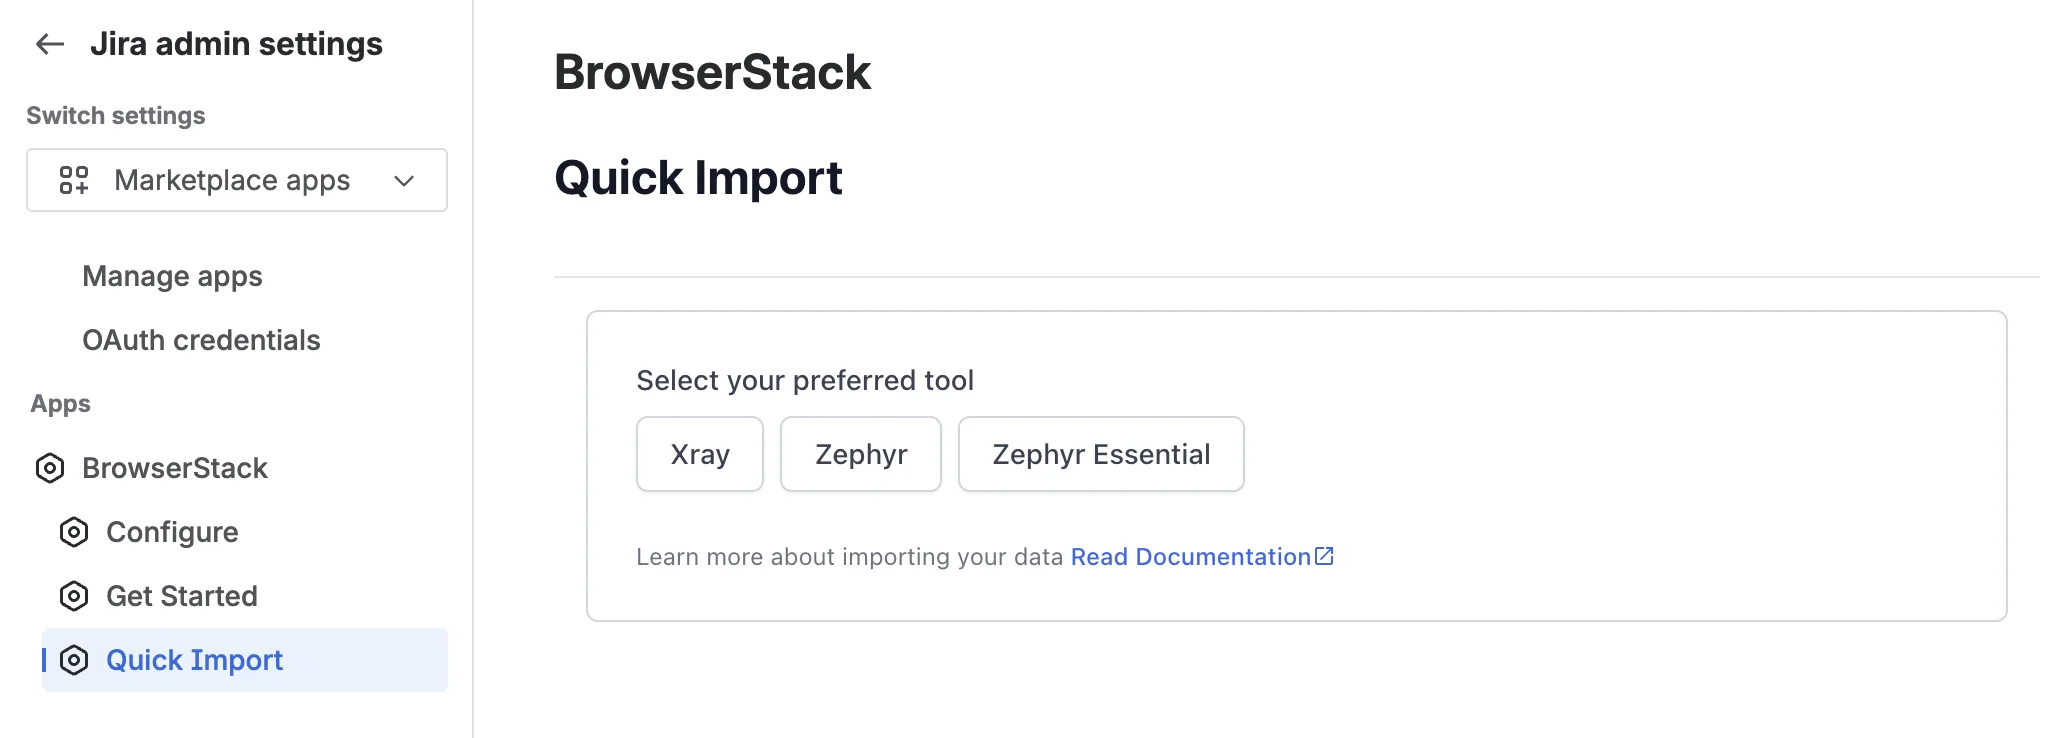
Open Quick Import from the BrowserStack app settings in Jira:
- In Jira, go to Apps > Manage your apps.
- Under BrowserStack, select Quick Import.
Connect your Xray account
On the Quick Import page, under Select your preferred tool, click Xray. Then provide the following connection details:
-
JIRA Host Name: your Jira site URL, for example
https://your-domain.atlassian.net. - JIRA Email Address: the email address for your Jira account.
- JIRA API Token: generate one from your Atlassian API tokens page.
- Xray Client ID: copy it from your Xray API key.
- Xray Client Secret: create an API key in Xray global settings.
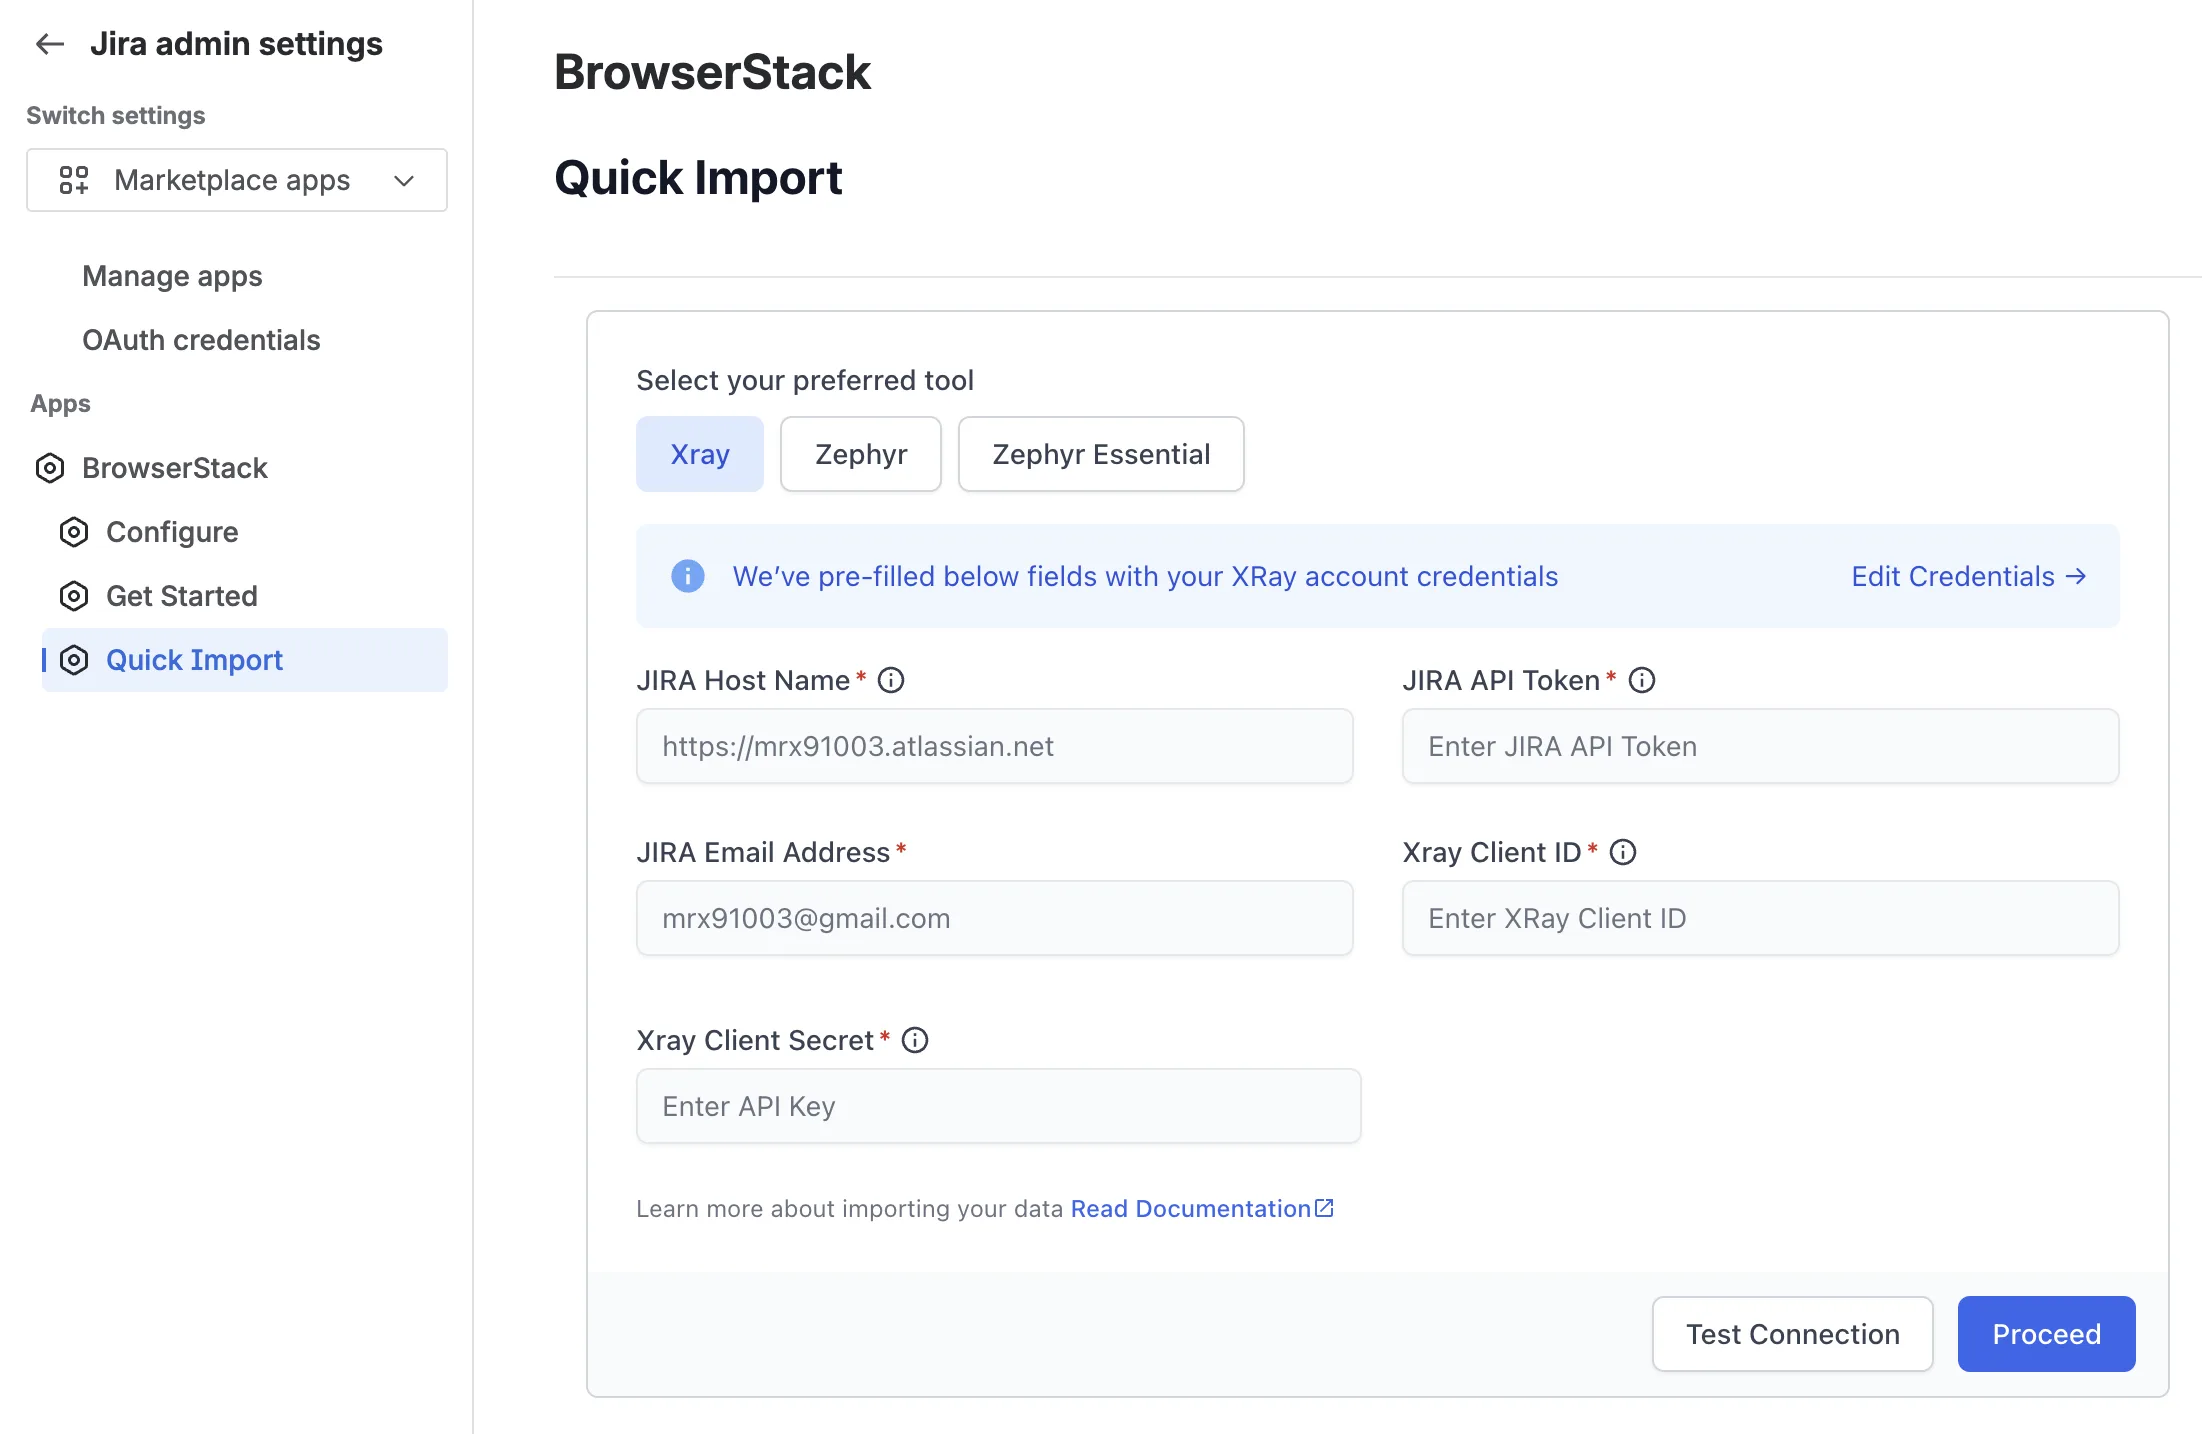
If you connected Xray before, Test Management pre-fills these fields. Select Edit Credentials to change them.
After you enter the details:
- Click Test Connection to check that the details work.
- Click Proceed to save the connection.
Choose whether to retain test case IDs
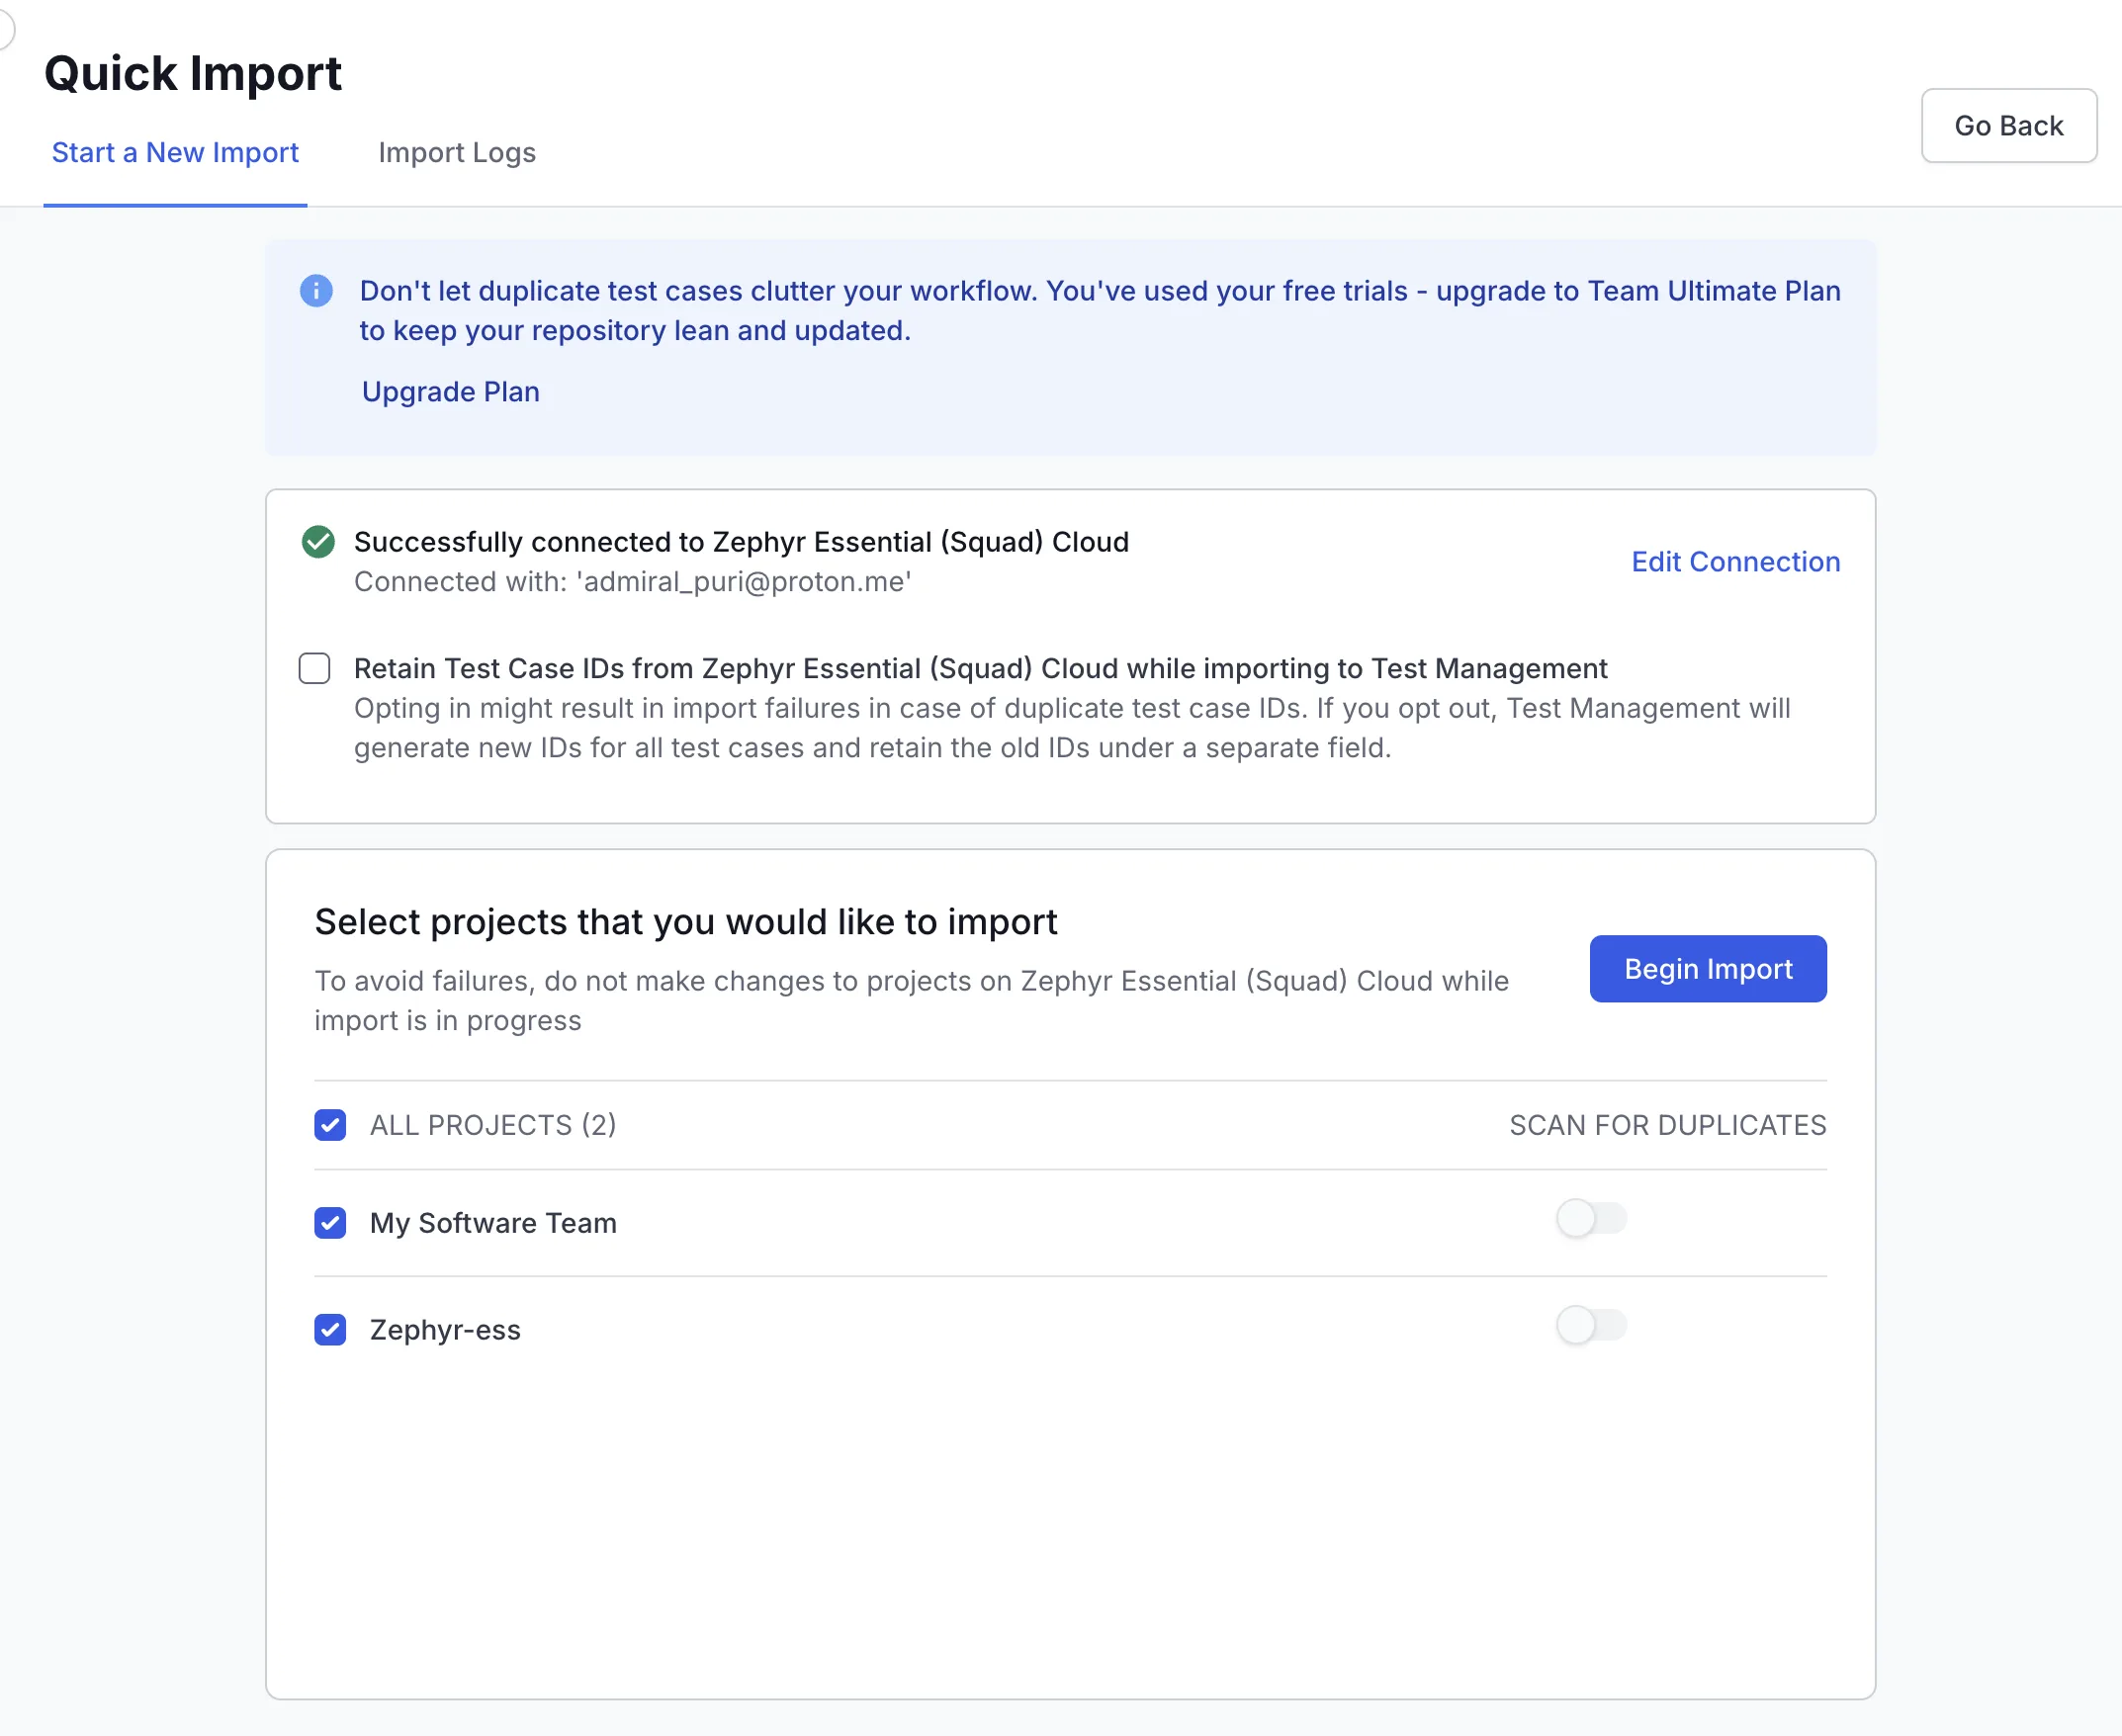
After you connect, the import screen appears. First, decide how Test Management handles the test case IDs from Xray:
- To keep your existing IDs, select Retain Test Case IDs. An import can fail when two test cases share the same ID.
- To let Test Management assign new IDs, leave the option clear. Test Management saves each original ID in a separate field, so you keep the reference.
Select projects and start the import
Do not change the projects you are importing while the import runs. Changes during an active import can cause it to fail.
To start your import:
- Select the projects you want to import, or select All Projects to import everything.
- If your plan includes AI Deduplication, turn on Scan for Duplicates for the projects you want scanned.
- Click Begin Import.
The duplicate scan runs in the background, so you do not need to wait for it.
Track the import progress
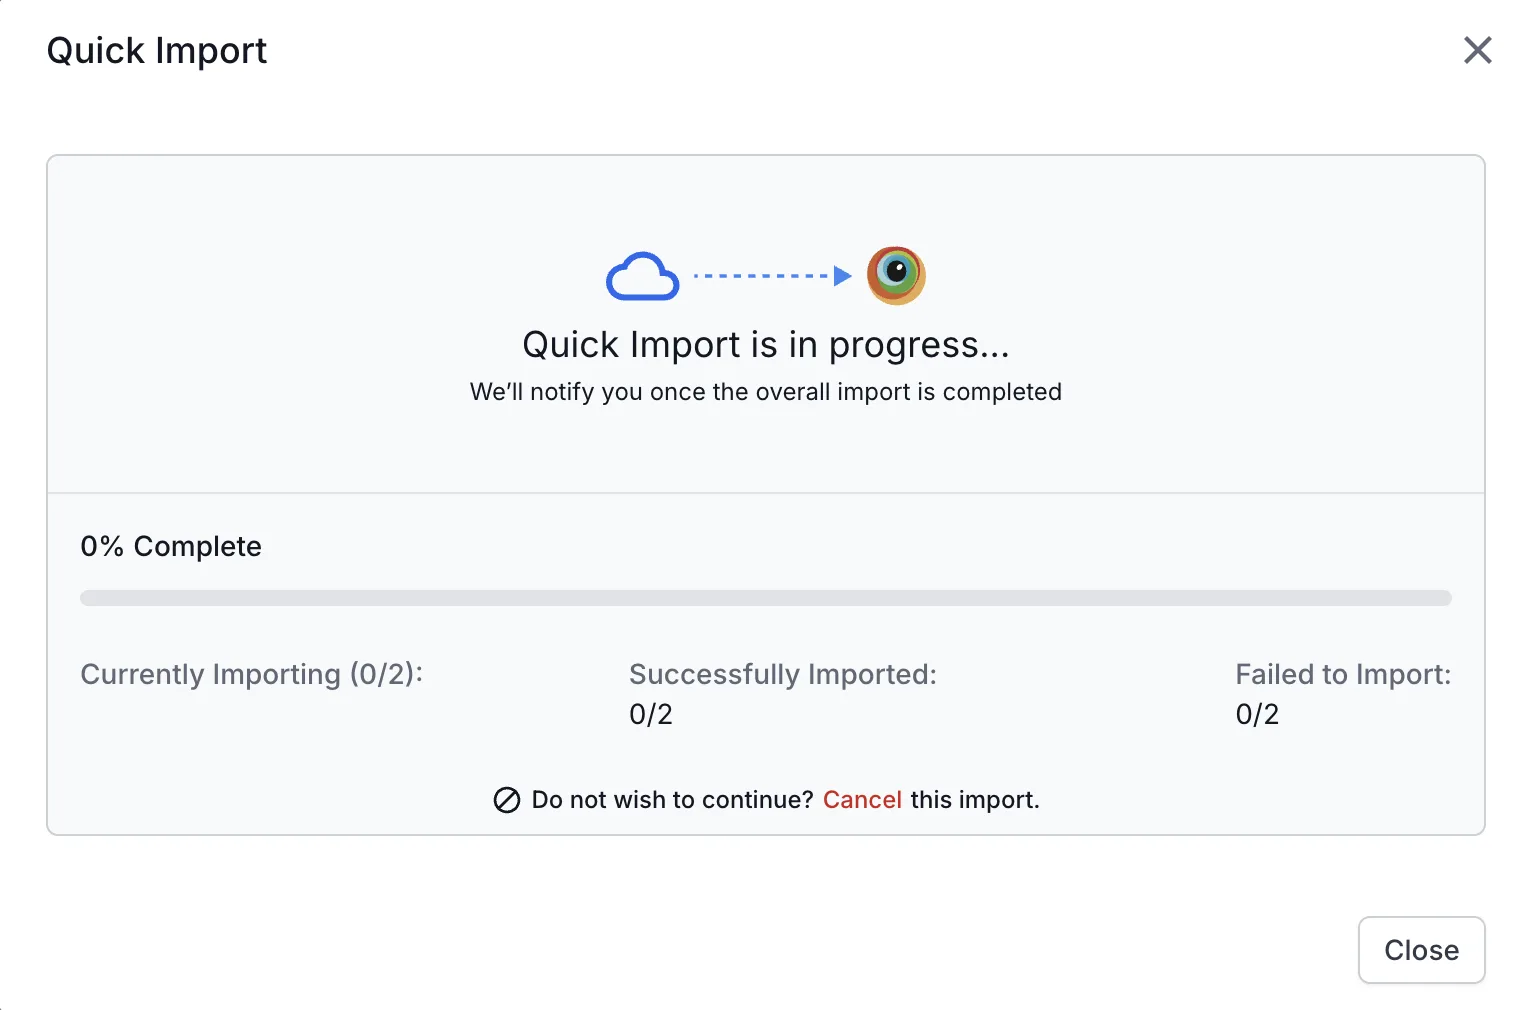
When the import starts, a progress dialog shows the percent complete and how many projects imported or failed.
You can close the dialog without stopping the import. Test Management notifies you when the import finishes. To stop an import, select Cancel in the dialog.
Review past imports in the import logs
Every import appears in the Import Logs tab, so you can track current and past imports in one place. Each entry shows:
- Status: whether the import is running, complete, or failed.
- Imported data: the number of test cases and projects imported, with any associated test runs and test plans.
- User and time: who started the import, and when.
- Actions: open the three-dot menu to view the report or retry a failed import.
Quick Import saves the email addresses of unregistered users. When they sign up or log in to Test Management, it assigns their test cases and test runs to them automatically.
Next steps
Your projects and test cases are now in Test Management. Next, you can:
- Create and organize test cases.
- Create manual test runs.
- Review and resolve duplicate test cases.
- For import errors, see Test Management for Jira troubleshooting.
We're sorry to hear that. Please share your feedback so we can do better
Contact our Support team for immediate help while we work on improving our docs.
We're continuously improving our docs. We'd love to know what you liked
We're sorry to hear that. Please share your feedback so we can do better
Contact our Support team for immediate help while we work on improving our docs.
We're continuously improving our docs. We'd love to know what you liked
Thank you for your valuable feedback!