
 Join our Discord
Create a report
Create any Test Management for Jira report from the Reports page, then schedule, edit, or delete it.
All six report types share the same setup. You pick a report type, choose what to include, and optionally schedule automatic delivery. This page covers that shared flow, then how to edit or delete a report after you create it.
Create a report
- Go to your project and click Reports in the left navigation.
- Click Create Report. To generate a report with default settings instead, click the tile for that report type at the top of the page.
-
In the Create Report window, select a report from the Type of Report dropdown.
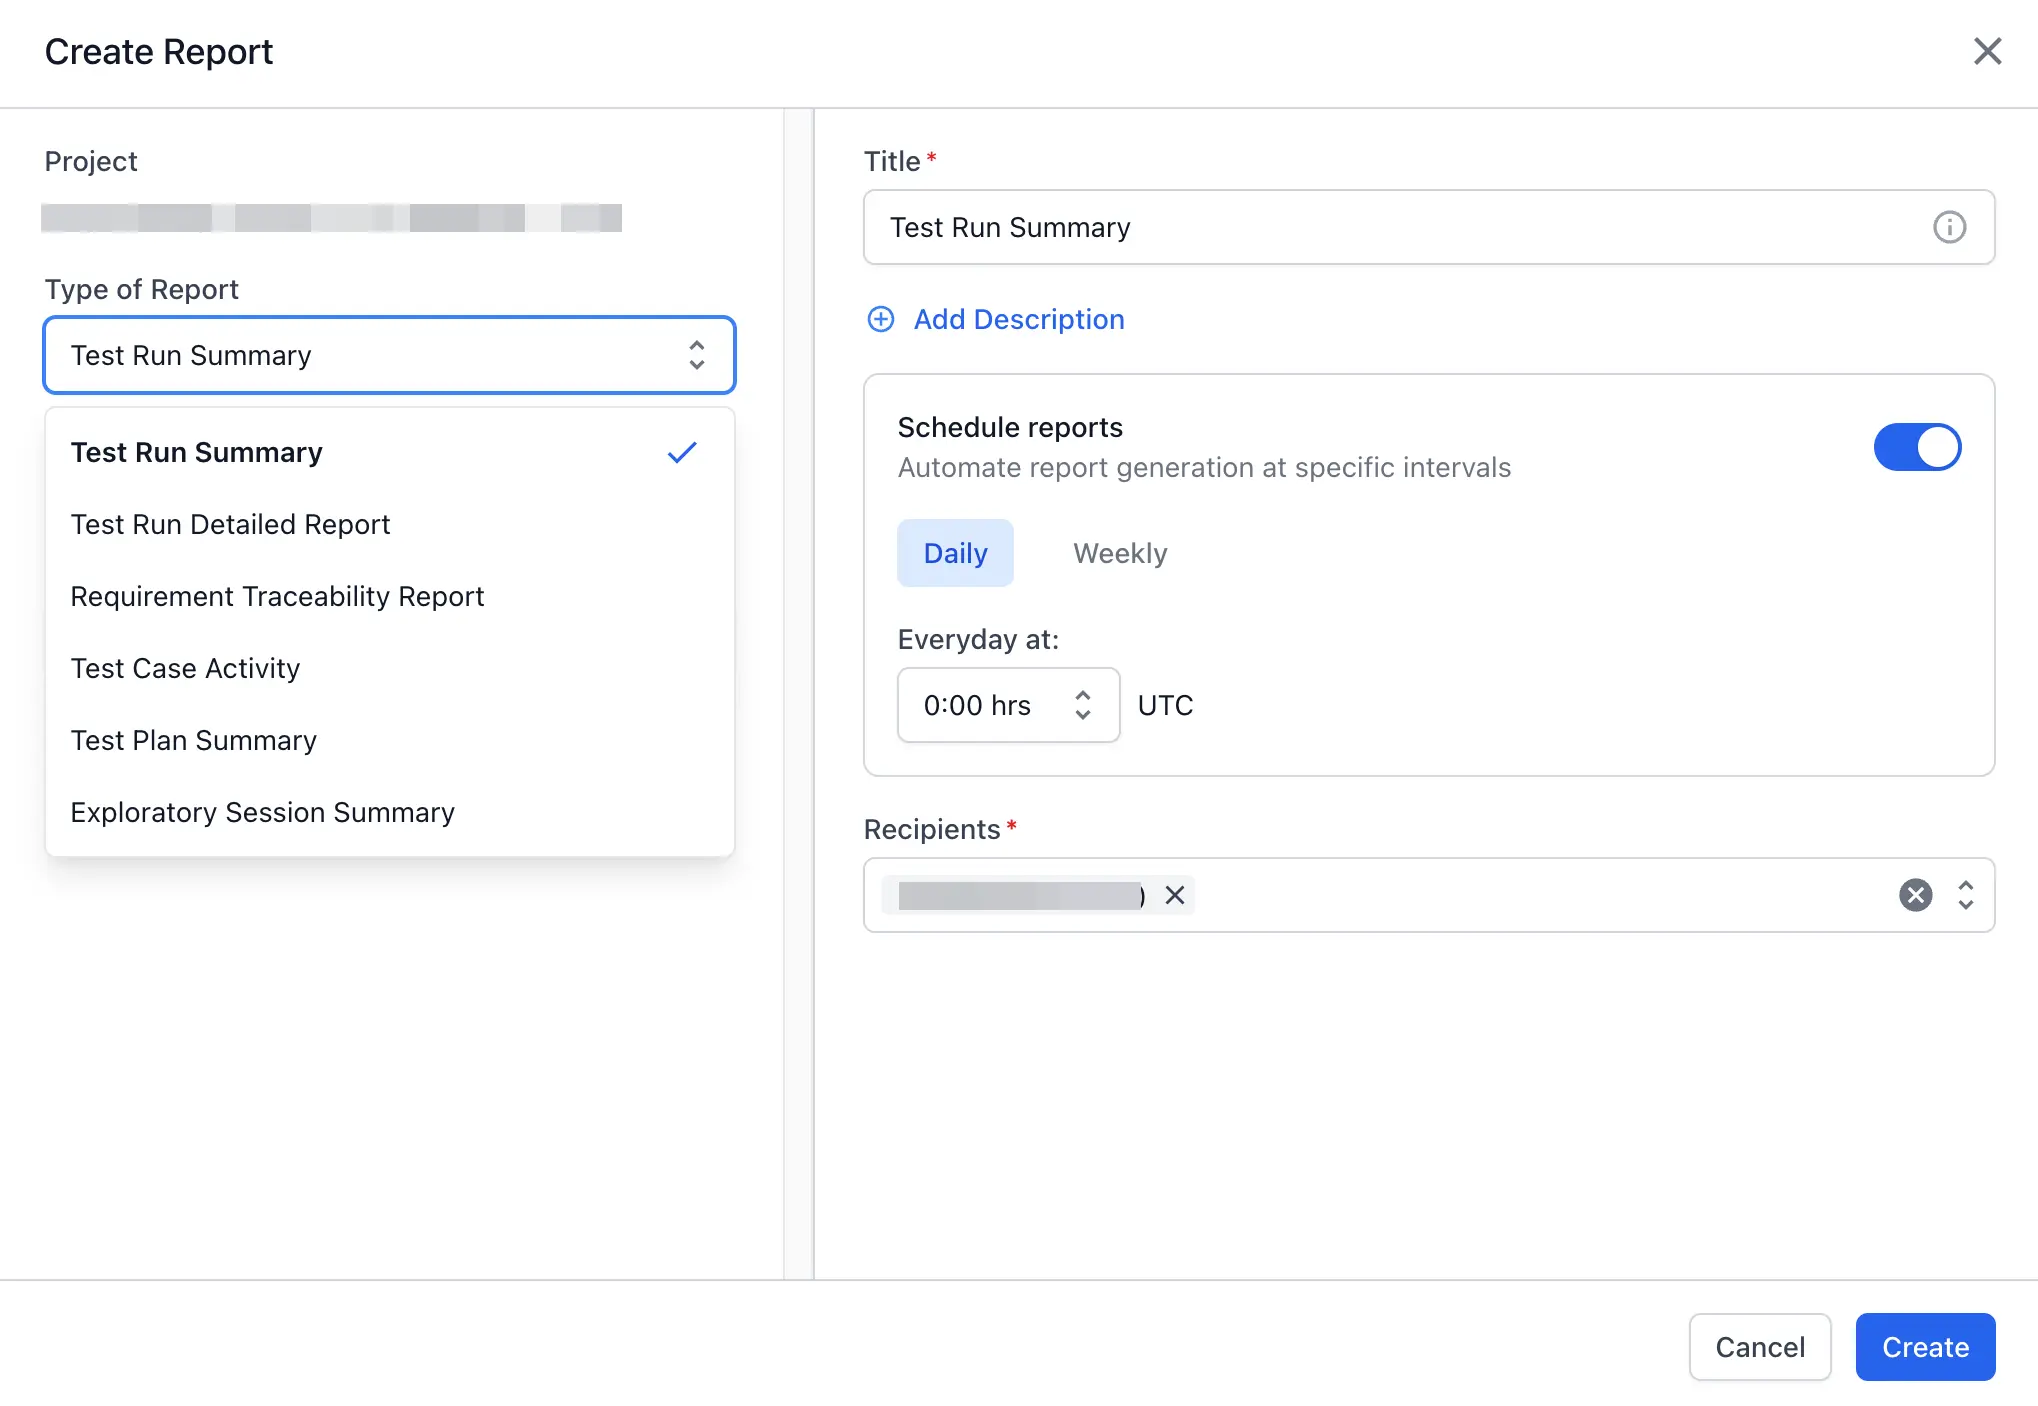
- Choose which items the report covers:
- Creation Time: include items created in a range, such as Last 24 hours, Last 1 week, Last 1 month, or Custom.
- Specific items: click Add or Update, select the test runs, test cases, test plans, or requirements you want, then save.
The exact labels depend on the report type. See what each report includes.
- Optional: Expand Advanced Filters to narrow the data further. Learn how to use advanced filters.
- Enter a Title. To add context, click Add Description.
-
Schedule reports is on by default. Choose the frequency:
- Select Daily, then set the time in UTC.
- Select Weekly, then set the day and the time in UTC.
To generate the report once, turn off Schedule reports.
- In Recipients, add the people who receive the report.
-
Click Create.
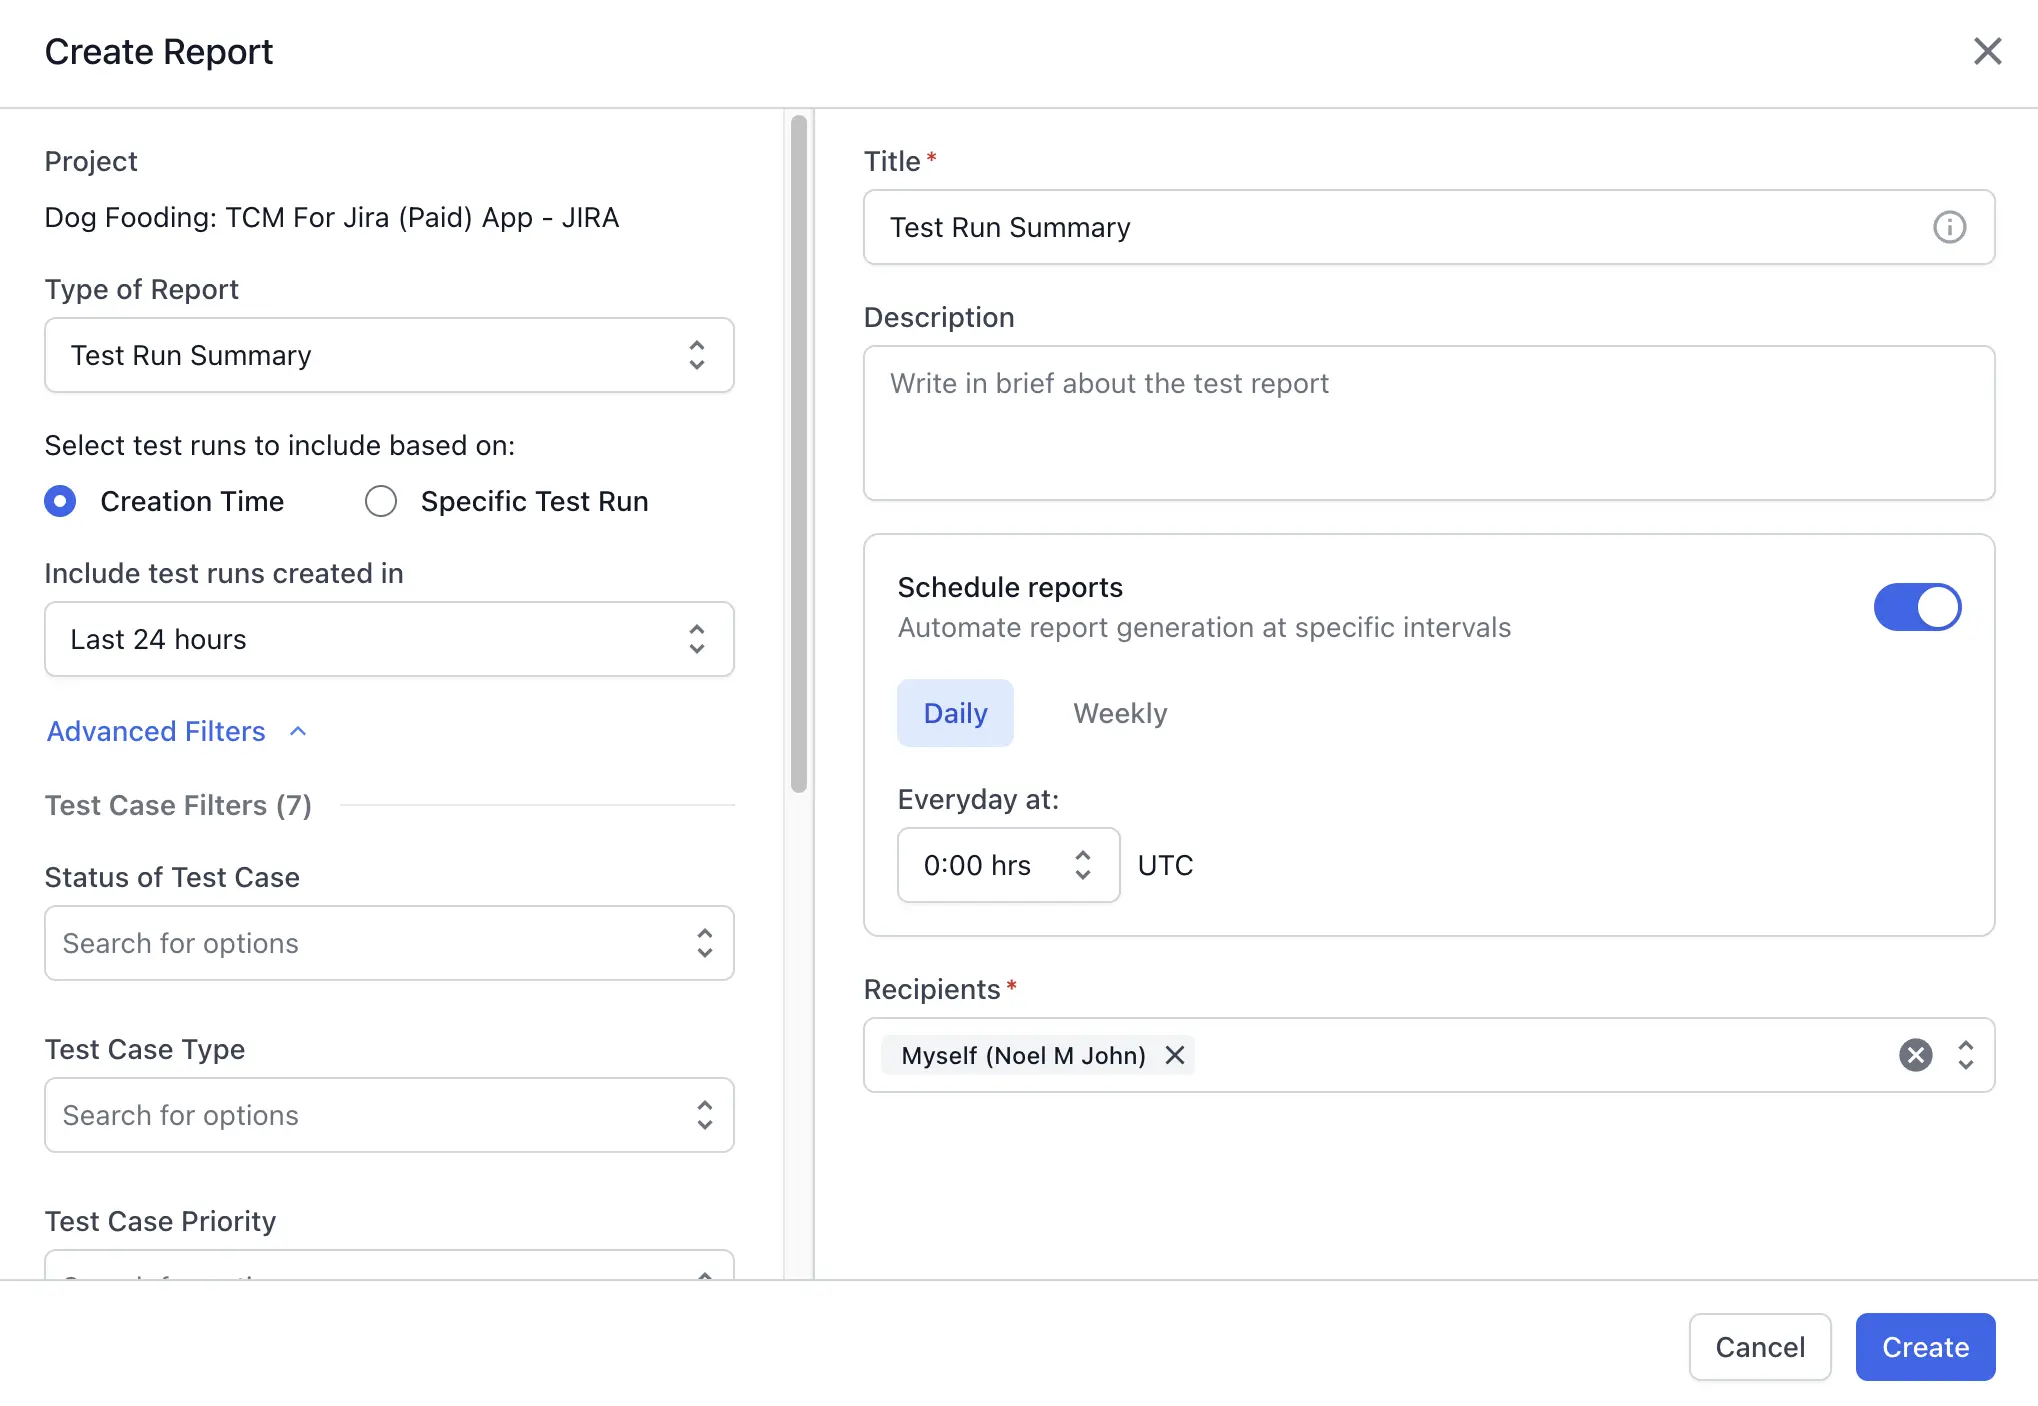
After the report generates, a confirmation appears. The report then opens in its own view. Any report you schedule also appears in the Scheduled Reports list on the Reports page.
What each report includes
The left side of the Create Report window changes with the report type. Use the following table to see how to select items for each report:
| Type of Report | Include options | Picker |
|---|---|---|
| Test Run Summary | Creation Time, or Specific Test Run | Add Test Runs to Report |
| Test Run Detailed Report | Creation Time, or Specific Test Run | Add Test Runs to Report |
| Requirement Traceability Report | Specific Requirement IDs, or Requirements from Projects / Test Cases / Test Runs | Requirements field, or the Include from list |
| Test Case Activity | Creation Time, or Specific Test Case(s) | Add Test Cases to Report |
| Test Plan Summary | Creation Time, or Specific Test Plans | Add Test Plans to Report |
| Exploratory Session Summary | Creation Time, or Specific Session(s) | Add Sessions to Report |
When you choose a specific-items option, a picker opens where you search, filter, and select the items to add. For example, the Add Test Runs to Report picker lists your runs with their status and test count:
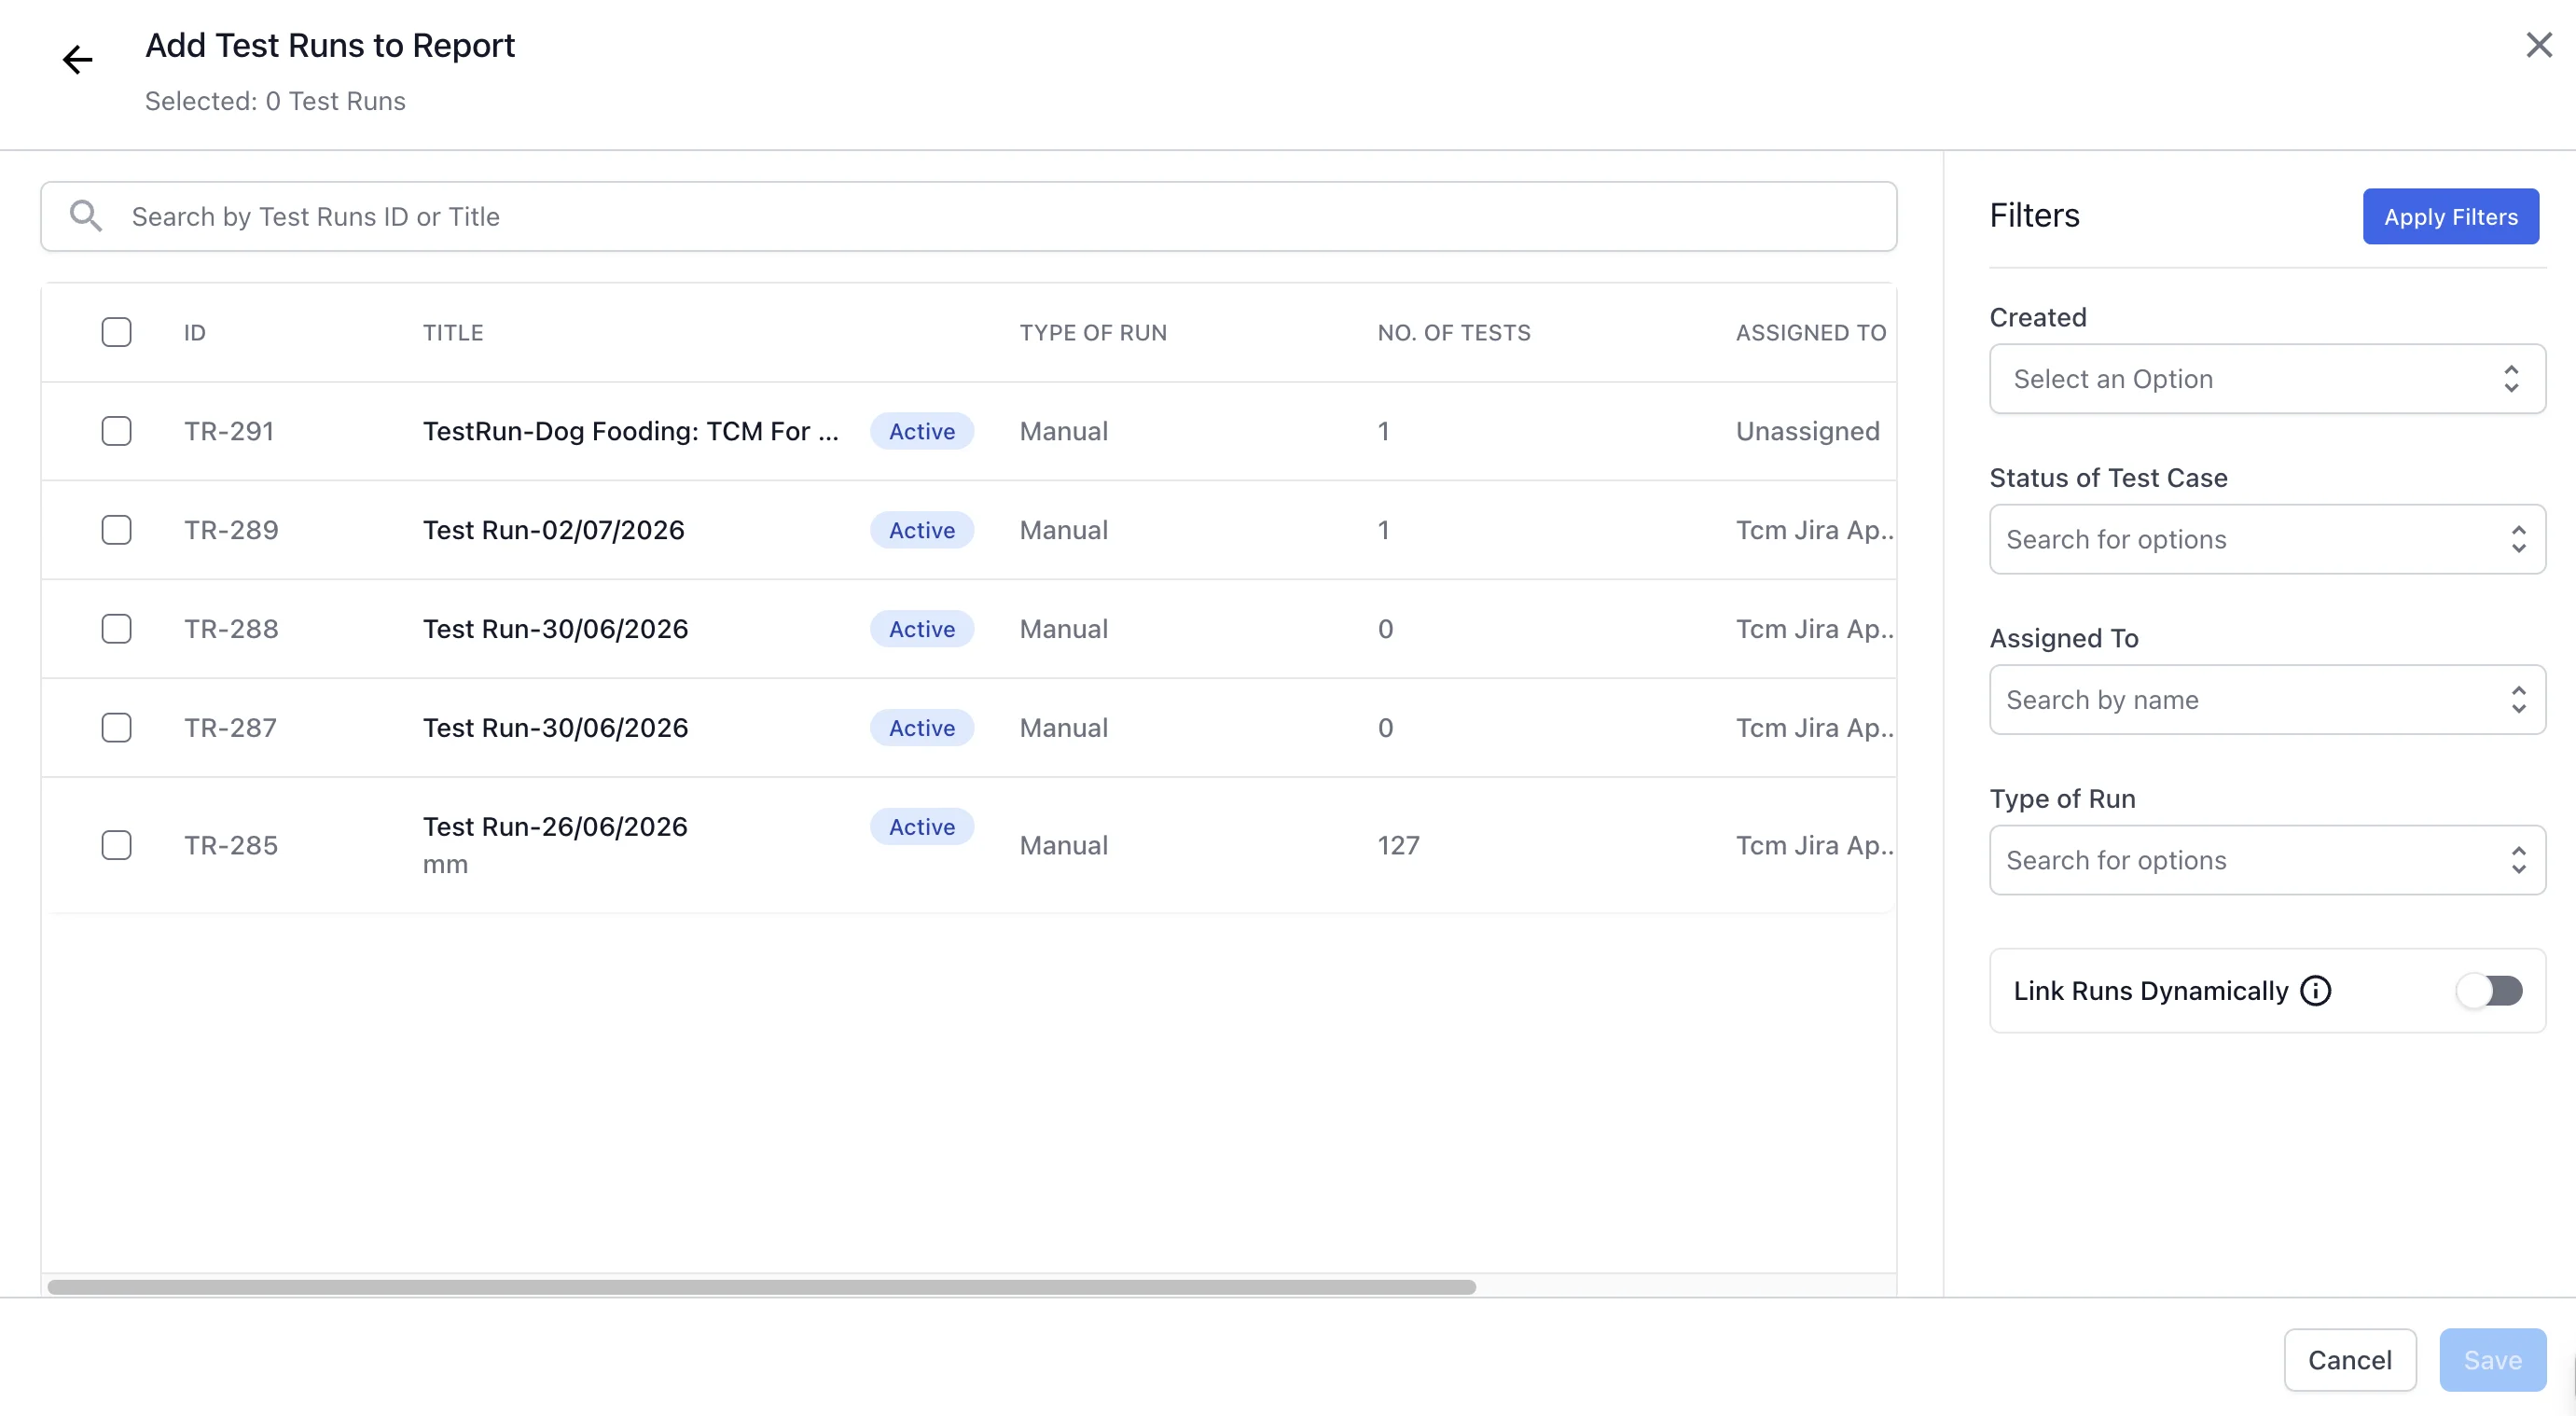
In the Filters panel, turn on Link Runs Dynamically to include current and future runs that match your filters. This toggle does not work with the Created filter.
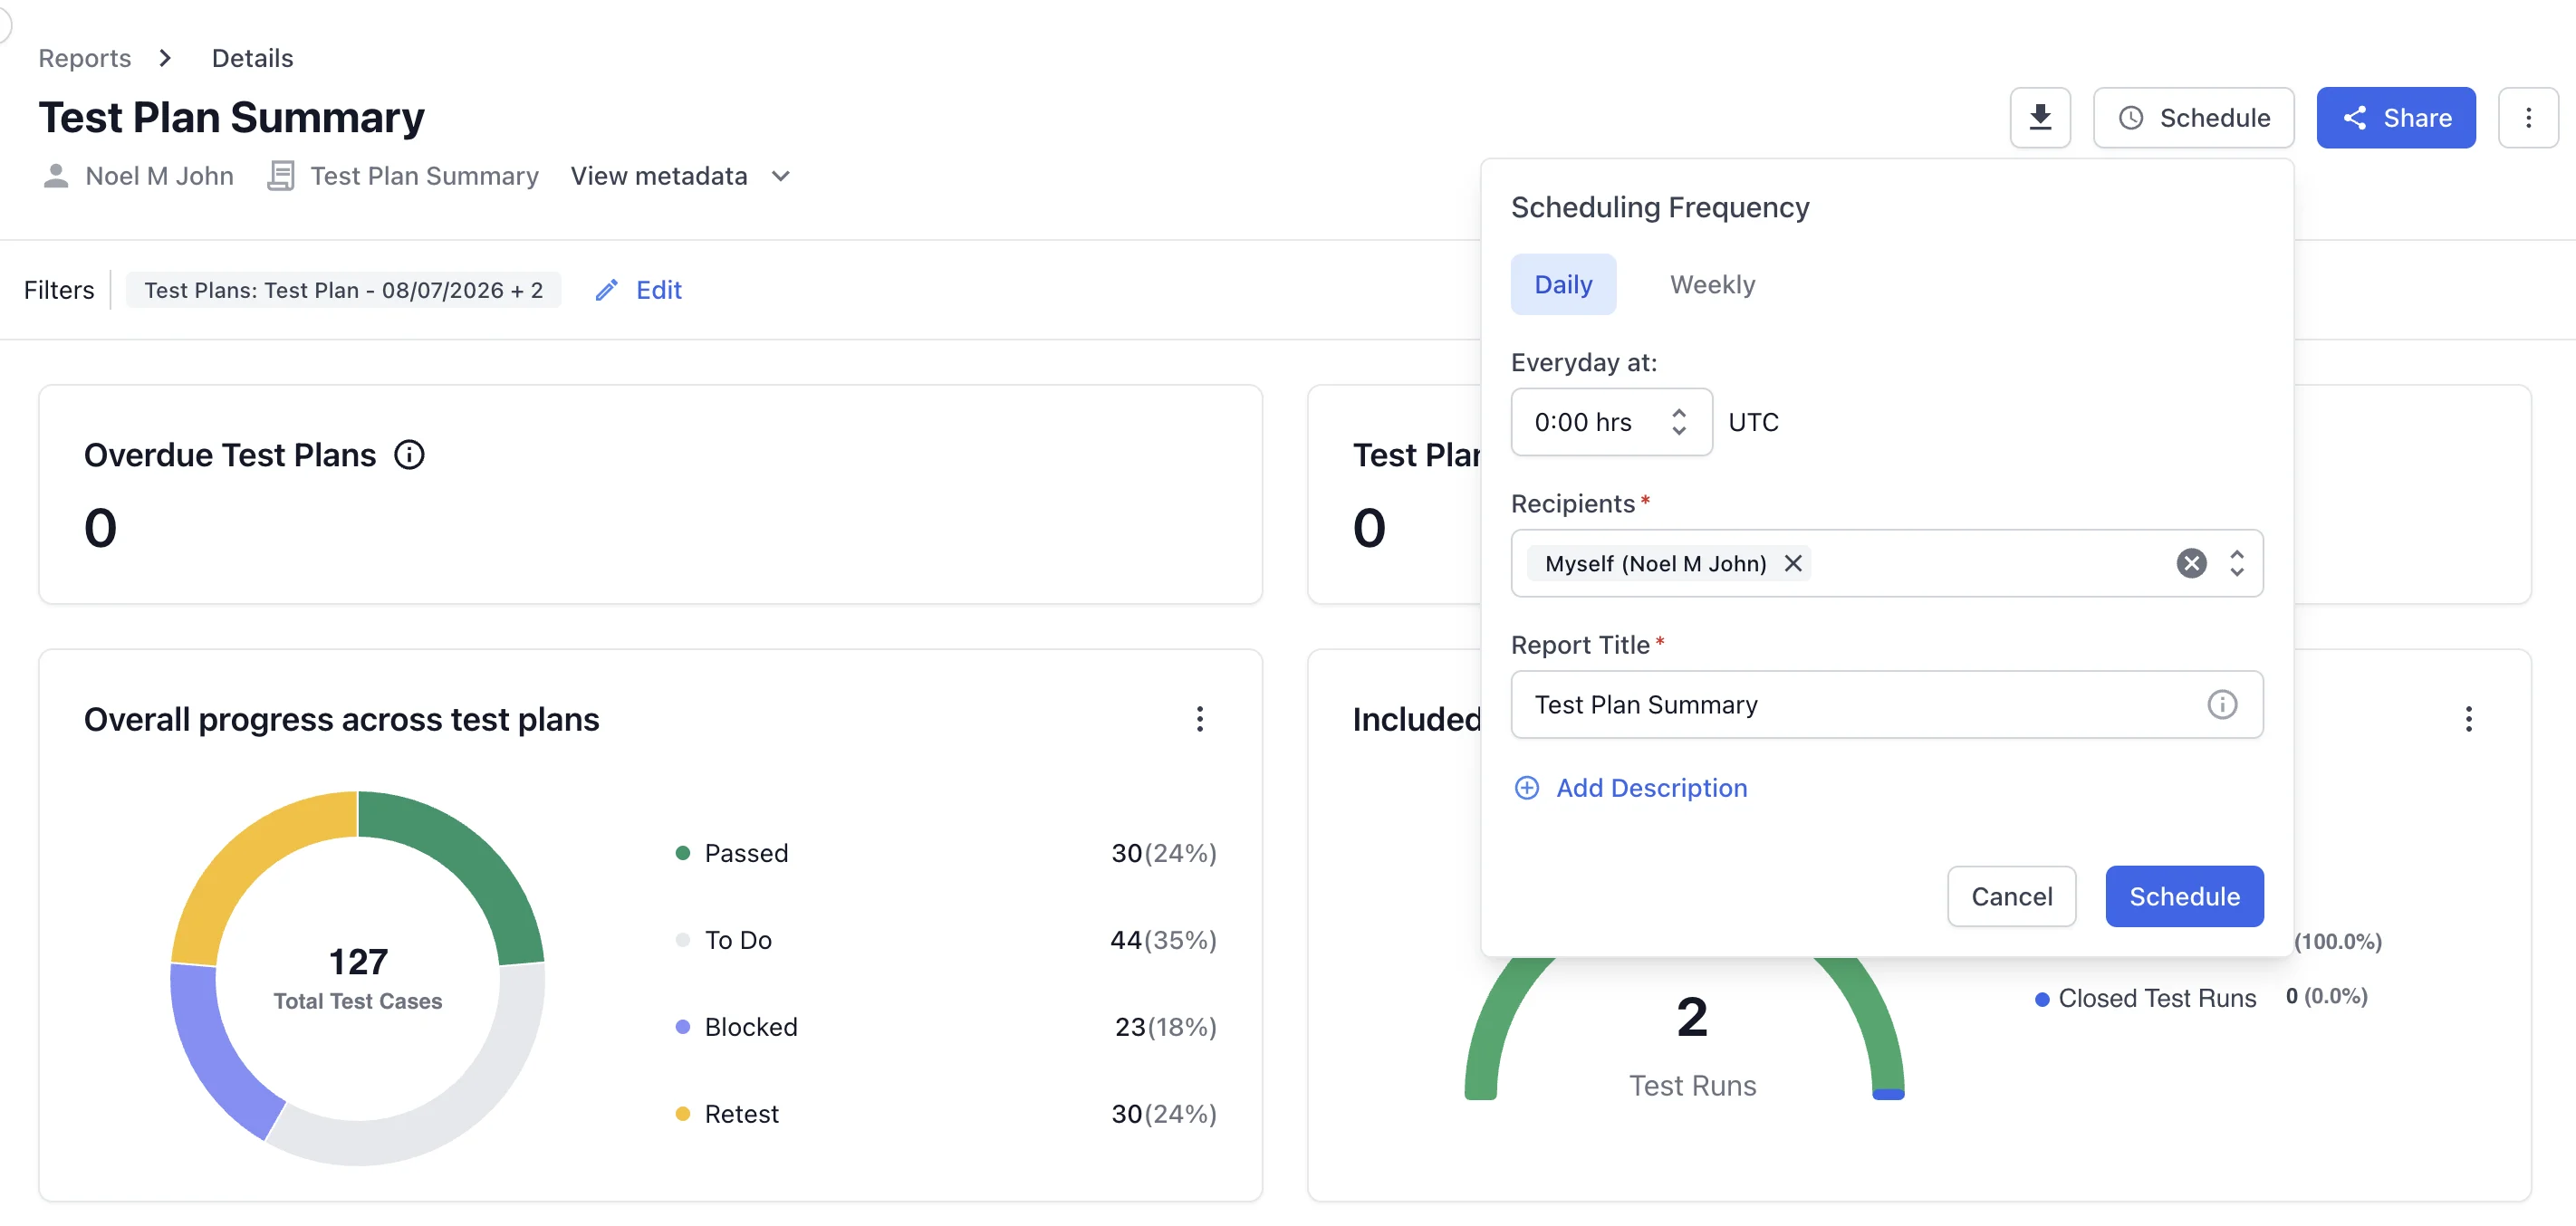
Schedule an existing report
You can schedule a report you already created, or change its schedule:
-
Open the report and click Schedule.
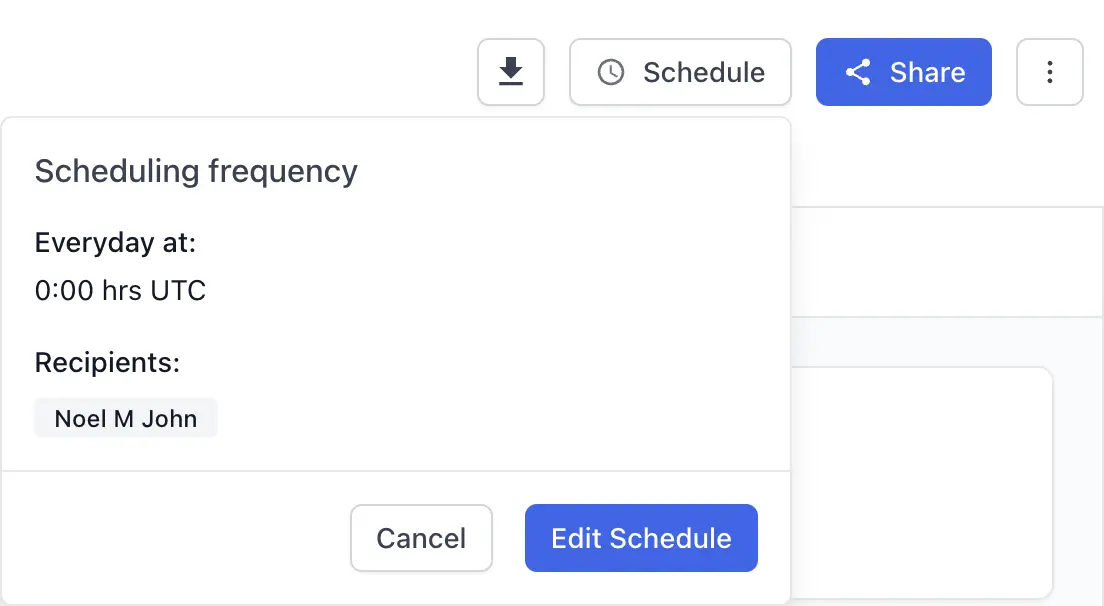
- Click Edit Schedule.
- Choose Daily or Weekly, then set the time in UTC.
- In Recipients, add the people who receive the report.
- Check the Report Title. To add context, click Add Description.
-
Click Schedule.
Edit a report
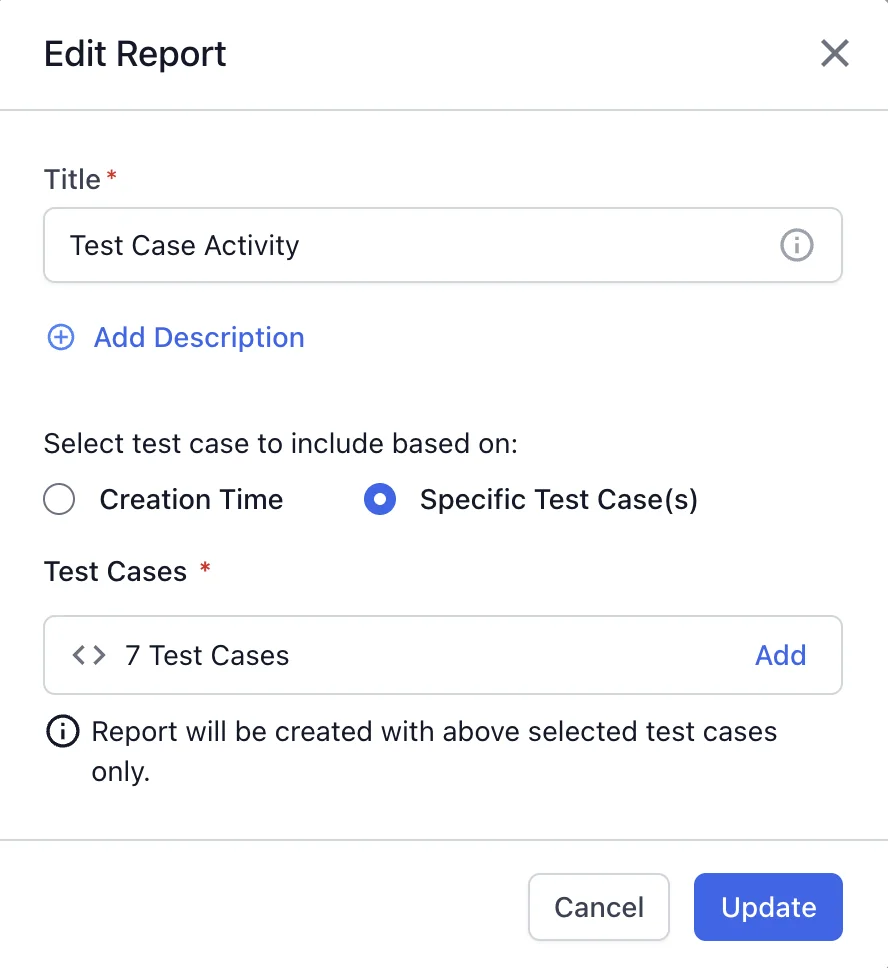
-
Open the report, click the more options (three-dots) icon, then click Edit Report.

- Update the title, the description, or the items the report includes.
-
Click Update.
Delete a report
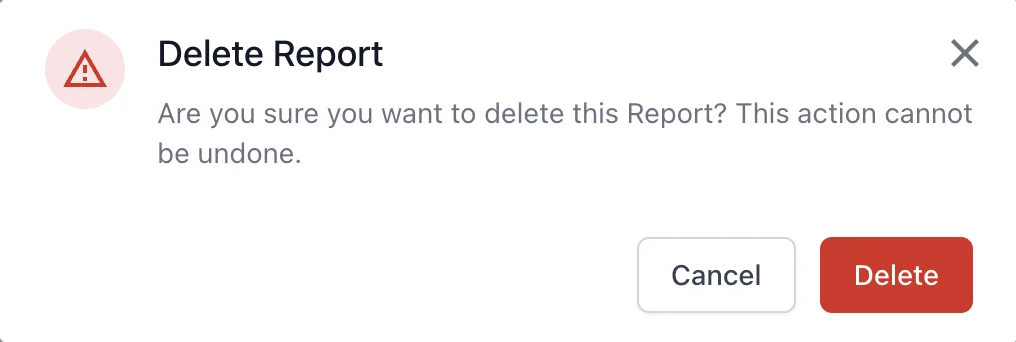
Deleting a report is permanent. You cannot undo this action.
-
Open the report, click the more options (three-dots) icon, then click Delete.
-
In the confirmation dialog, click Delete.
Next steps
- Choose the right report for your goal.
- Use advanced filters to refine a report.
- Share and download reports with your team.
We're sorry to hear that. Please share your feedback so we can do better
Contact our Support team for immediate help while we work on improving our docs.
We're continuously improving our docs. We'd love to know what you liked
We're sorry to hear that. Please share your feedback so we can do better
Contact our Support team for immediate help while we work on improving our docs.
We're continuously improving our docs. We'd love to know what you liked
Thank you for your valuable feedback!