Visual Regression Testing ensures that visual elements of a web application remain consistent after changes, such as UI updates or code modifications. Identifying visual discrepancies early helps maintain the integrity of the user experience.
Overview
Why Report Bugs During Visual Regression Testing?
Visual regression testing helps ensure that UI changes remain consistent and error-free. Bug reporting strengthens this process by enabling teams to quickly identify, track, and resolve visual issues.
Steps to Report Bugs During Visual Regression Testing
- Capture baseline snapshots before making any UI or code changes.
- Run tests after changes to generate new snapshots.
- Compare baseline vs updated visuals to spot differences.
- Report issues with a clear description, expected vs actual result, and screenshots.
- Log and track the bug in your issue-tracking tool.
This article focuses on how to efficiently report bugs discovered during visual regression testing.
What Does Visual Regression Testing Bug Reporting Focus on?
Bug reporting in visual regression testing focuses on detecting and documenting any unintended visual changes that appear after code updates. The goal is to compare baseline screenshots with updated ones and identify issues such as:
- Layout shifts, spacing changes, or misaligned elements
- Missing, hidden, overlapped, or incorrectly rendered components
- Styling inconsistencies involving fonts, colors, or margins
- Cross-browser and cross-device differences in how the UI displays
A good report includes environment details, the triggering commit or build, and clear visual evidence to help teams reproduce the issue and confirm it is unintended.
Must Read: Visual Regression Testing Tools Compared
Steps to Report Bugs During Visual Regression Testing
Reporting bugs during visual regression testing follows a clear process that helps teams identify and resolve issues quickly.
Here are the steps to follow during the process:
- Review snapshots to identify any unexpected visual changes.
- Compare the snapshot with the baseline to confirm the difference is not part of an approved update.
- Verify the regression by checking environments such as browser, viewport, OS, and build or commit details.
- Document the issue with clear visuals, affected elements, and concise steps to reproduce.
- Share the report with the development or design team through your communication or issue-tracking tool.
- Use integrations like Percy with Slack to streamline notifications and reduce manual effort.
A structured reporting process ensures faster resolution and keeps teams aligned throughout the visual review cycle.
Integrating Percy with Slack for Reporting Visual Regression Bugs
Consider Percy by BrowserStack as an example, which is a cloud-based visual validation tool providing features such as
- Centralized review
- Showcasing Image diffs side by side
- Multi-browser support
- Proprietary snapshot stabilization technology
- Integration to Azure DevOps, Bitbucket, Gitlab, Slack, etc.
- Seamless integration into existing CI/CD workflow
Reporting visual bugs becomes easier when we integrate Percy with Slack.
Note:
- If you are setting up a Percy Slack integration for a private channel, you will need to invite the Percy bot as a member of the channel first
- To authorize Slack, you must be both an admin of your Percy organization and have permission to your Slack workplace to install apps. Check your workspace permissions settings at https://yourdomain.slack.com/apps/manage/permissions
Pre-Requisites:
- Ensure at least one Percy Project is available
- Ensure you have installed Slack App on your device (Recommended)
- Create a Channel for Percy Notifications (Optional, Recommended)
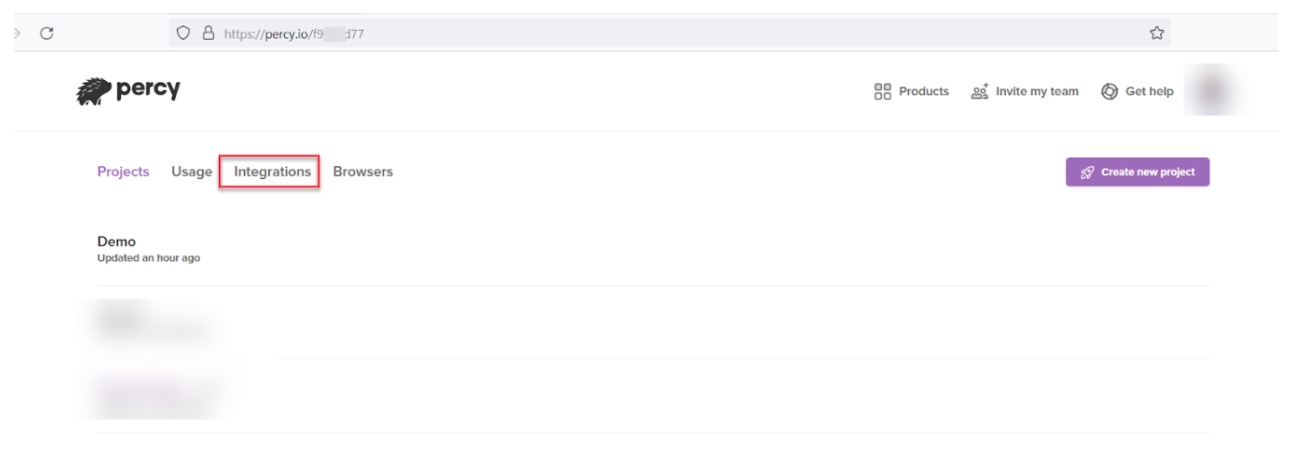
Step 1 – Navigate to Integrations Tab
- Login to Percy using your credentials
- Navigate to the Integrations Section
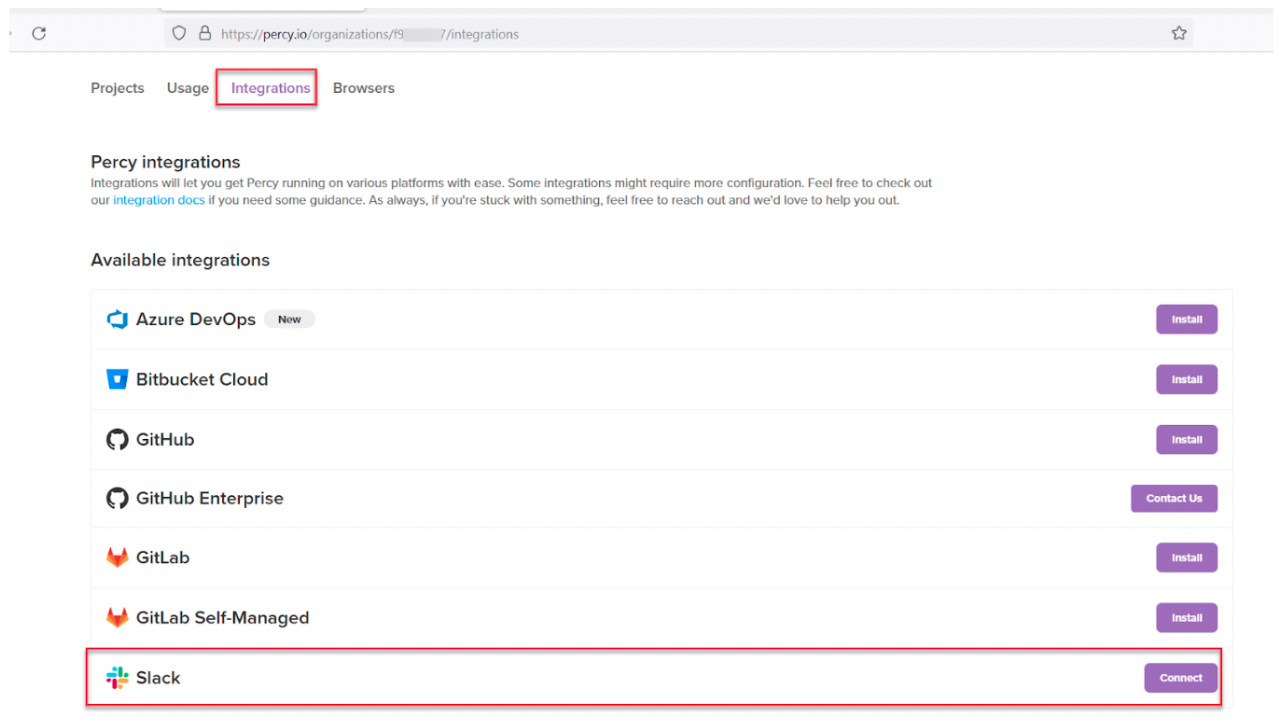
Step 2 – Click on Connect for Slack
Once you click on Integration you will all different types of available integration click on Slack Connect
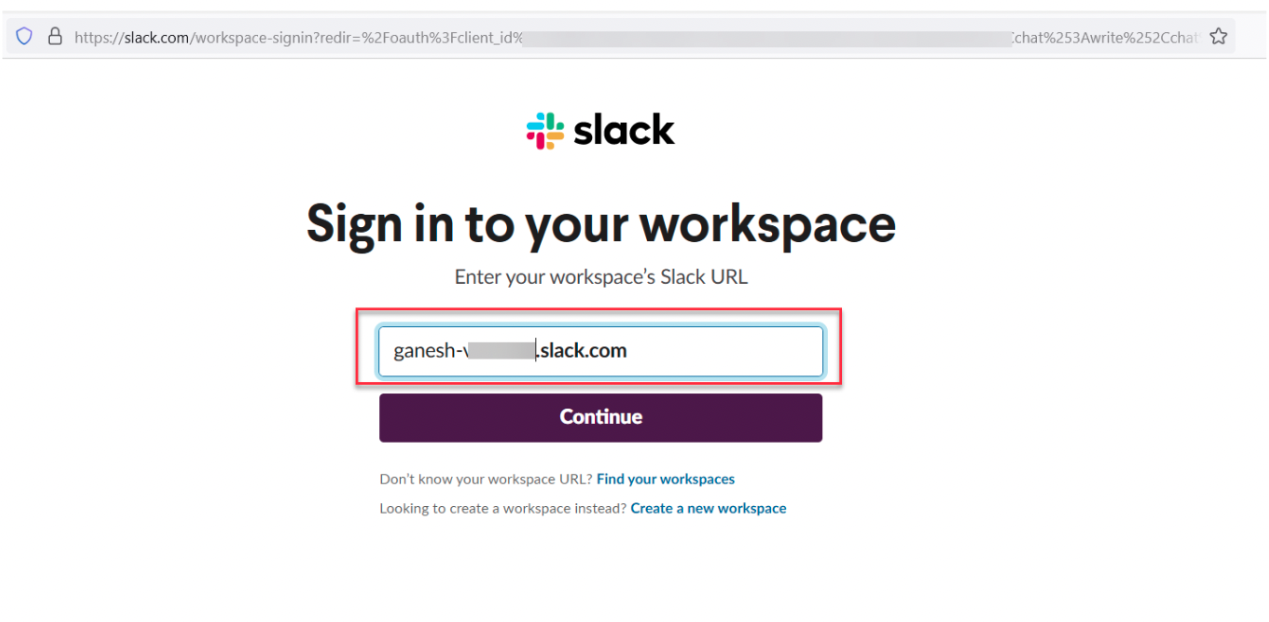
Step 3 – Enter Slack workspace to sign in to Slack
If you have already signed into slack this step will not be shown. If you are presented with this step enter the slack workspace name.
Click on Continue
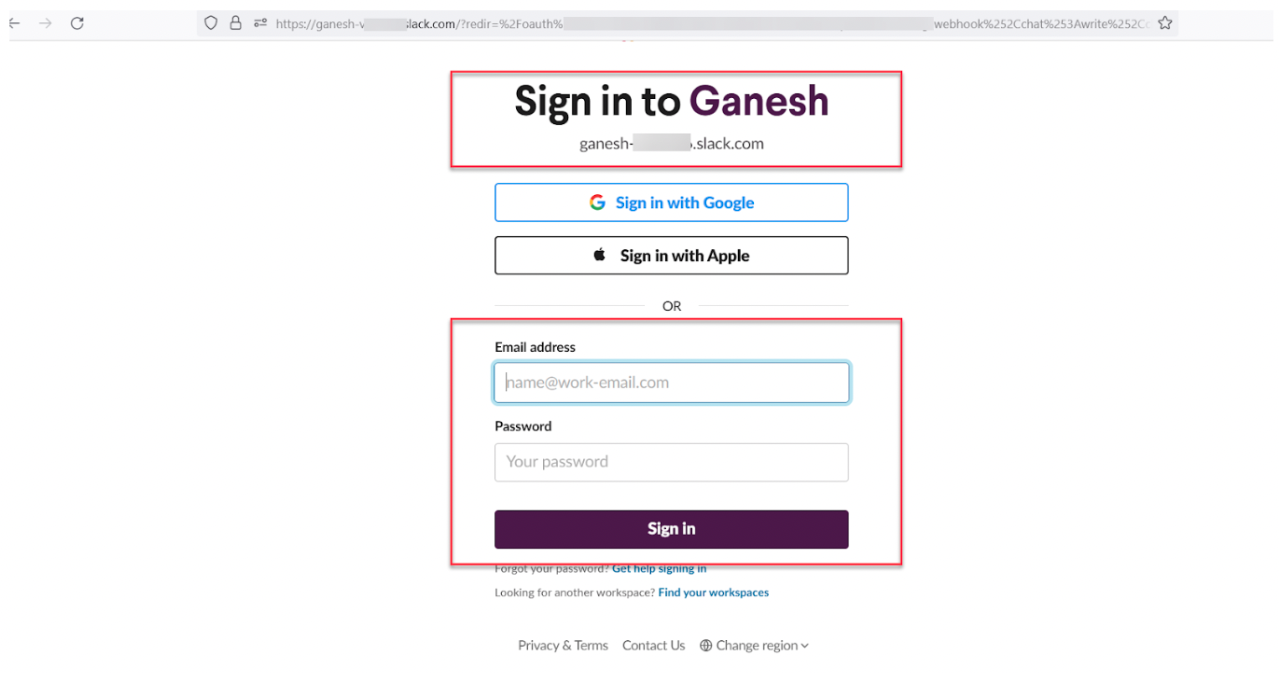
Step 4 – Enter your Slack workspace credentials
If you are presented with the Sign-in page enter the credentials and click on Sign in.
Note: If you have already signed in skip this step.
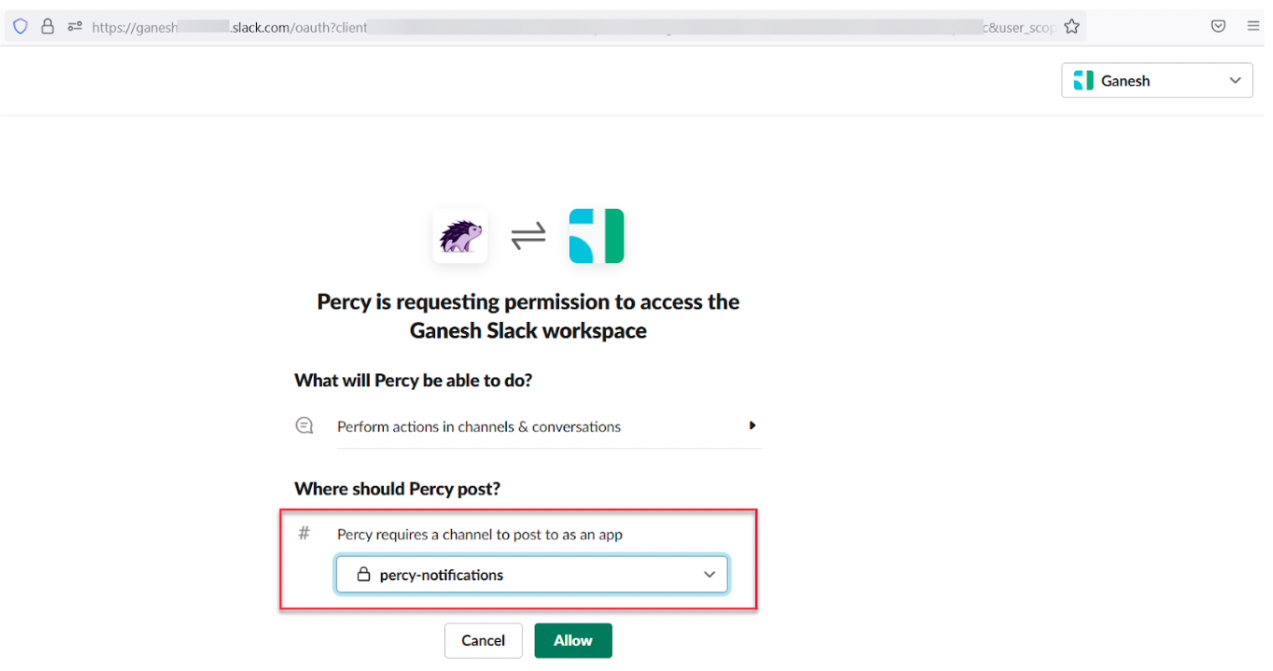
Step 5 – Choose the Slack Channel Name
As mentioned in the pre-requisite here we have already created a channel name as percy-notification
You can specify the channel name of your wish. Click Allow to Continue
Step 6 – Customize Notification
Percy allows you to customize the Notification,
- You can choose Specific Project or All
- You can choose when to trigger notifications such as Unreviewed & Changes requested,No changes, Auto-approved, Approved
- Click on Save configuration to Continue
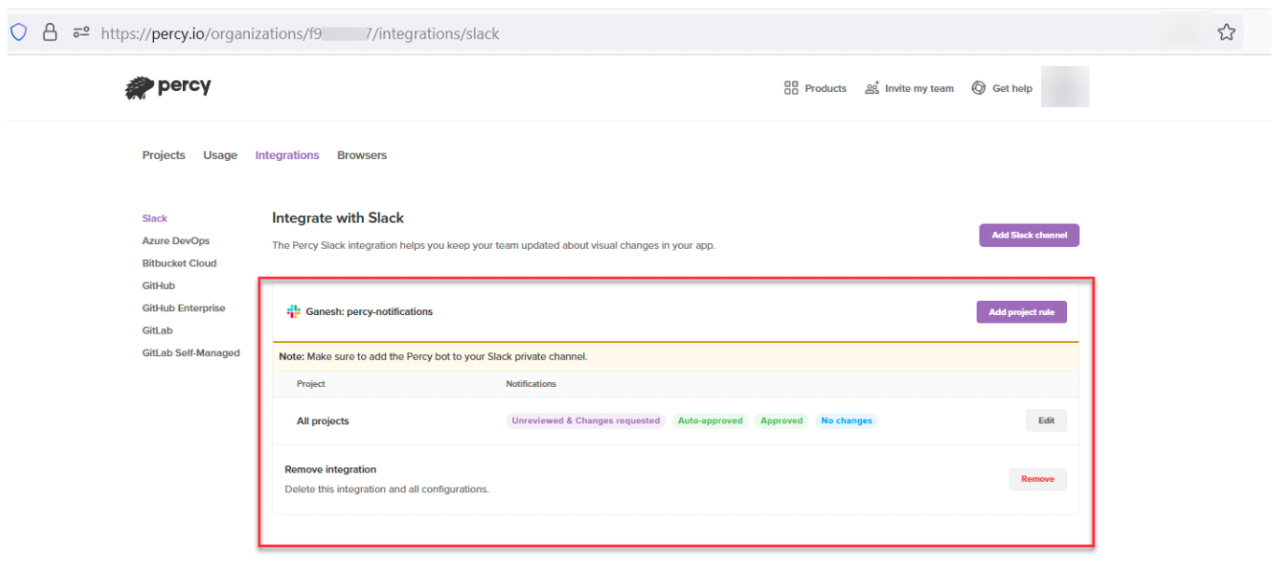
Step 7 – Verify Saved Integration settings
Once you click on Save Configuration, it displays configuration settings.
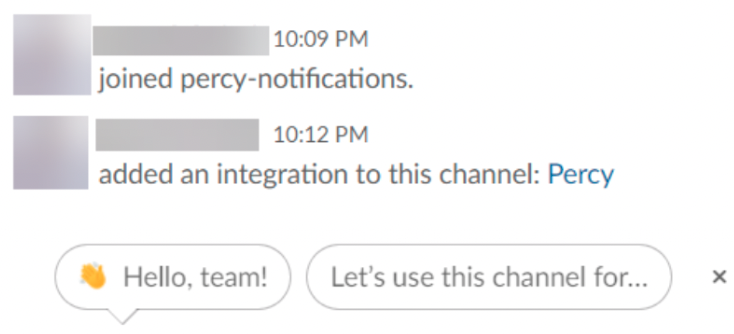
You will also get notifications in your Slack channel
Step 8 – Ensure Percy Bot is added to Your Private Channel
Note: If you have already added Percy Bot to your Slack channel, Skip this step
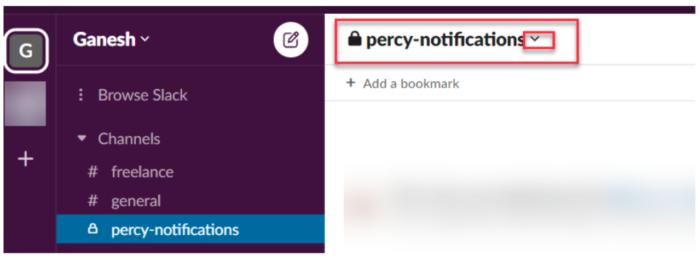
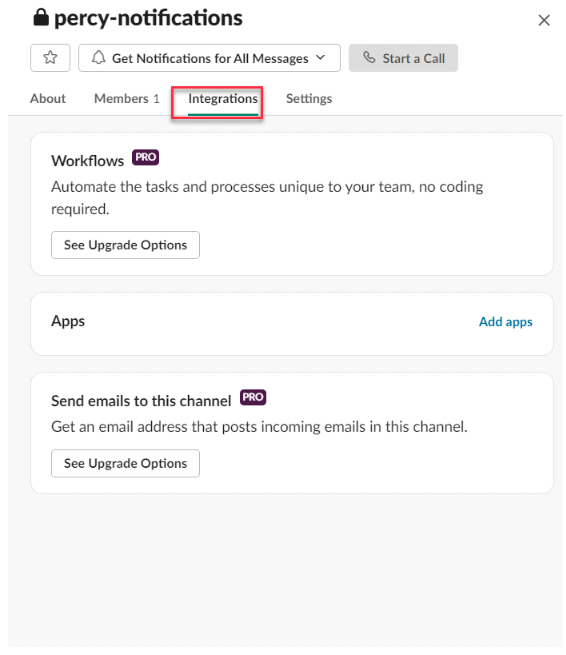
In the Slack App, Click on the Channel Name Drop Down
Click on Integrations
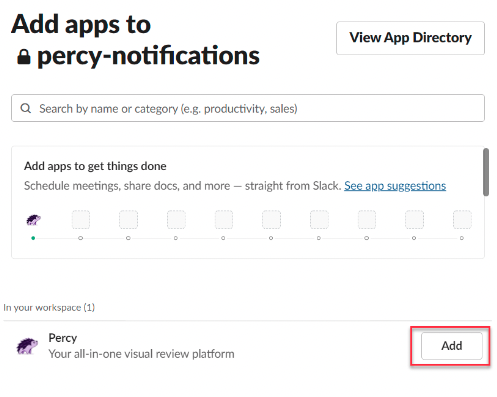
Click on Add apps, Search For Percy and Click on Add
Step 9 – Trigger Sample Build to verify the notification
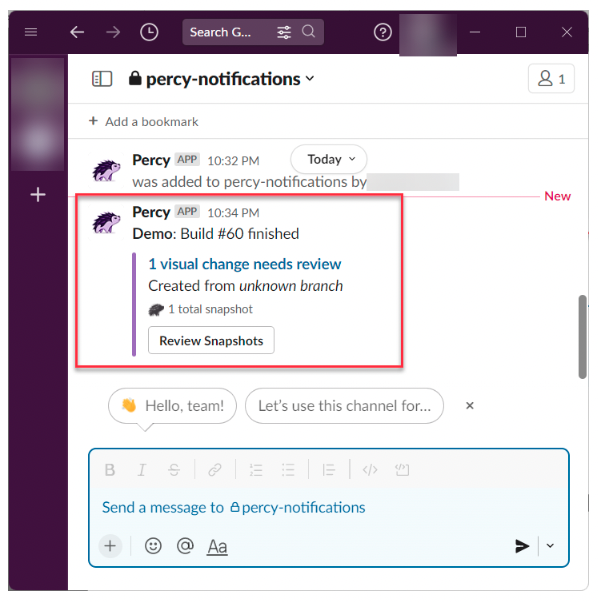
If you have completed all the required steps, as soon as the build finishes, you will start getting a notification.
It is difficult to monitor every build; however, Percy Slack integration provides instant notifications, which helps to activate the items as and when available. Also, the embedded link helps you navigate specific builds so that you can review, reject or approve the builds.
Percy integration is not limited to Slack. It can be integrated with many tools such as Azure DevOps, Bit Bucket, GitLab, Github, etc., making the Visual Regression testing process far easier and effortless. If you’re looking to adopt a smoother visual regression testing workflow and team task allotment, Percy is your answer.
Here’s what you can get started with:
- 5000 screenshots/month for visual testing with Percy
- Testing on internal development environments
Get Started with Percy for Free
Why Use Percy for Visual Regression Testing?
Teams running visual regression tests often need a reliable way to spot meaningful changes quickly and keep review cycles efficient.
Percy by BrowserStack addresses this exact need as an AI-powered visual testing platform designed to automate visual regression testing for web applications. It helps teams maintain consistent and reliable user interfaces on every code commit.
Integrated into CI/CD pipelines, Percy identifies meaningful layout shifts, styling issues, and content changes with advanced AI. The platform reduces false positives and shortens review cycles, which supports faster and more confident releases.
- Effortless Visual Regression Testing: Integrates into CI/CD pipelines with a single line of code and works alongside functional test suites, Storybook, and Figma for shift-left testing.
- Automated Visual Regression: Captures screenshots on every commit, compares them against baselines, and flags visual regressions such as broken layouts, styling shifts, or component-level issues.
- Visual AI Engine: Uses advanced algorithms and AI Agents to filter out visual noise from dynamic banners, animations, anti-aliasing, and other unstable elements. The engine surfaces only meaningful changes that affect the user experience. Features like “Intelli ignore” and OCR help distinguish impactful changes from minor pixel-level differences, reducing false positives.
- Visual Review Agent: Highlights important changes with bounding boxes, provides human-readable summaries, and speeds up review workflows by up to 3x.
- No-Code Visual Monitoring: Visual Scanner enables rapid setup with no installation. It can scan and monitor thousands of URLs across 3500+ browsers and devices, trigger scans on demand or on schedule, ignore dynamic content regions, and compare staging, production, or other environments instantly.
- Flexible and Comprehensive Monitoring: Supports hourly, daily, weekly, or monthly scans. Offers historical analysis and environment comparison, including local testing and authenticated pages, ensuring earlier detection of issues before release.
- Broad Integrations: Works with major frameworks and CI tools and provides SDKs for quick onboarding and scalable workflows.
Pricing Details of Percy:
- Free Plan: Includes up to 5,000 screenshots per month and is suitable for small projects or initial evaluations.
- Paid Plan: Starts at $199 for advanced features, with custom pricing for enterprise needs.
Conclusion
Reporting bugs during visual regression testing is a critical step in maintaining the visual integrity of web applications. By following structured bug-reporting practices, leveraging the right tools, and ensuring clear communication, teams can quickly address visual discrepancies and prevent issues from affecting the end-user experience.
This approach not only enhances the quality of the product but also fosters collaboration between QA and development teams, leading to faster resolution times and more efficient workflows. With consistent and accurate bug reporting, visual regression testing becomes a powerful tool for ensuring seamless and consistent UI performance across all changes.
Useful Resources for Visual Testing
- How to capture Lazy Loading Images for Visual Regression Testing in Cypress
- How to Perform Visual Testing for Components in Cypress
- How to run your first Visual Test with Cypress
- How Visual Diff Algorithm improves Visual Testing
- How is Visual Test Automation changing the Software Development Landscape?
- How does Visual Testing help Teams deploy faster?
- How to perform Visual Testing for React Apps
- How to Run Visual Tests with Selenium: Tutorial
- How to reduce False Positives in Visual Testing?
- How to capture Lazy Loading Images for Visual Regression Testing in Puppeteer
- How to migrate your Visual Testing Project to Percy CLI
- Why is Visual Testing Essential for Enterprises?
- Importance of Screenshot Stabilization in Visual Testing
- Strategies to Optimize Visual Testing
- Best Practices for Visual Testing
- Visual Testing Definitions You Should Know
- Visual Testing To Optimize eCommerce Conversions
- Automate Visual Tests on Browsers without Web Drivers
- Appium Visual Testing: The Essential Guide
- Top 17 Visual Testing Tools
Frequently Asked Questions
1. How can teams determine if a visual change is intentional or a regression?
Visual changes are checked against the approved baseline and recent design or development updates. Any difference that does not match planned UI changes or design specifications should be treated as a regression. Reviewing associated commits or pull requests also helps confirm intent.
2. What details should a visual regression bug report include?
A complete report includes the browser, device or viewport, environment, and the snapshot showing the visual discrepancy. Keeping notes on the affected elements and steps to reproduce provide essential clarity. Linking to relevant builds or code changes supports faster investigation.
3. How does integrating Percy with Slack improve the bug reporting workflow?
Percy’s Slack integration delivers visual updates directly to team channels. Screenshots, diffs, and summaries are posted automatically, eliminating manual documentation and sharing. This creates faster visibility into visual changes and streamlines triage.
4. Can visual regression testing scale with frequent releases or large teams?
Visual regression testing scales effectively when automated. Percy captures and compares snapshots on every commit and distributes results instantly. This supports consistent UI verification even as release cycles speed up or teams expand.


