Create a load test by recording a browser journey
Record clicks, form fills, and navigation in a real browser, then run that journey as a load test across thousands of virtual users.
Load Testing integrates with Low Code Automation so that you can record any user journey and run the same flow across thousands of virtual users, without writing a script.
About Low Code Automation
Low Code Automation (LCA) is the BrowserStack product that powers the recording flow. To learn how recording works in LCA, see What is Low Code Automation?. LCA comes in two forms:
- LCA desktop app: Create tests and run them on a local browser. You need this app to record a load test journey.
- LCA web app: View tests you have already created. It does not record.
You need the LCA desktop app to record a journey. The LCA web app only lets you view tests you have already created. It cannot record.
Record your first journey
Follow these steps to record a journey and turn it into a browser load test.
Start a browser load test recording
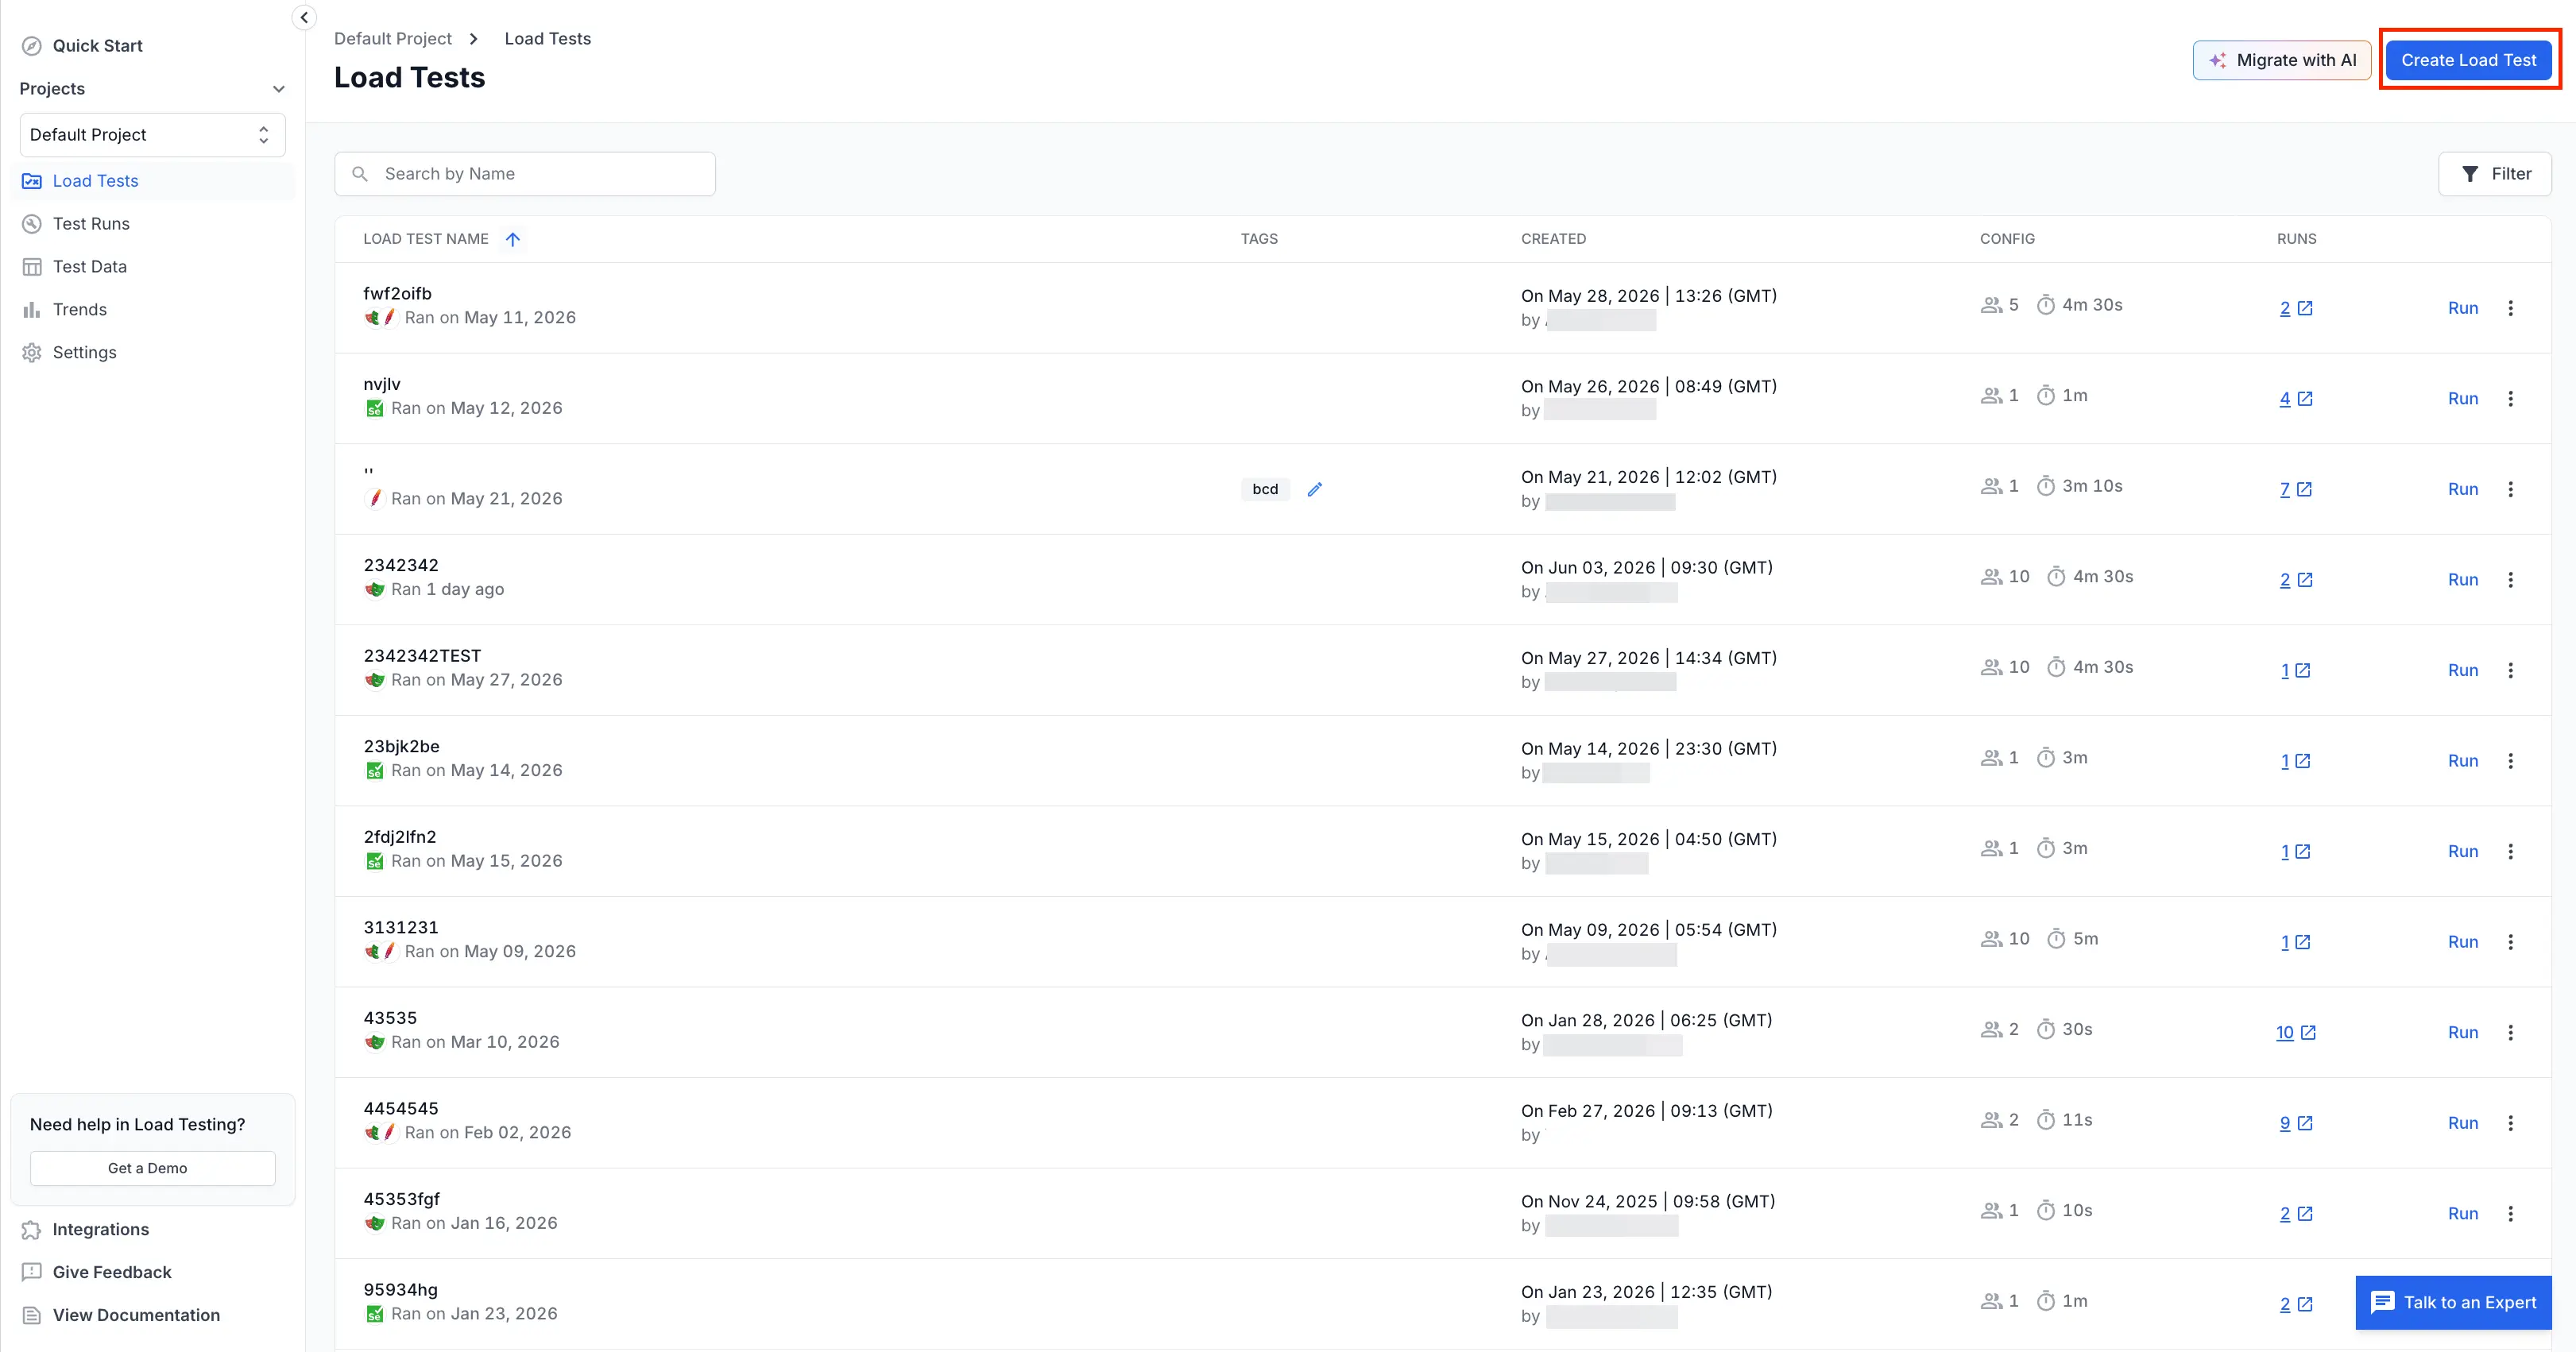
Open your Load Testing project on the Load Testing dashboard and click Create Load Test.
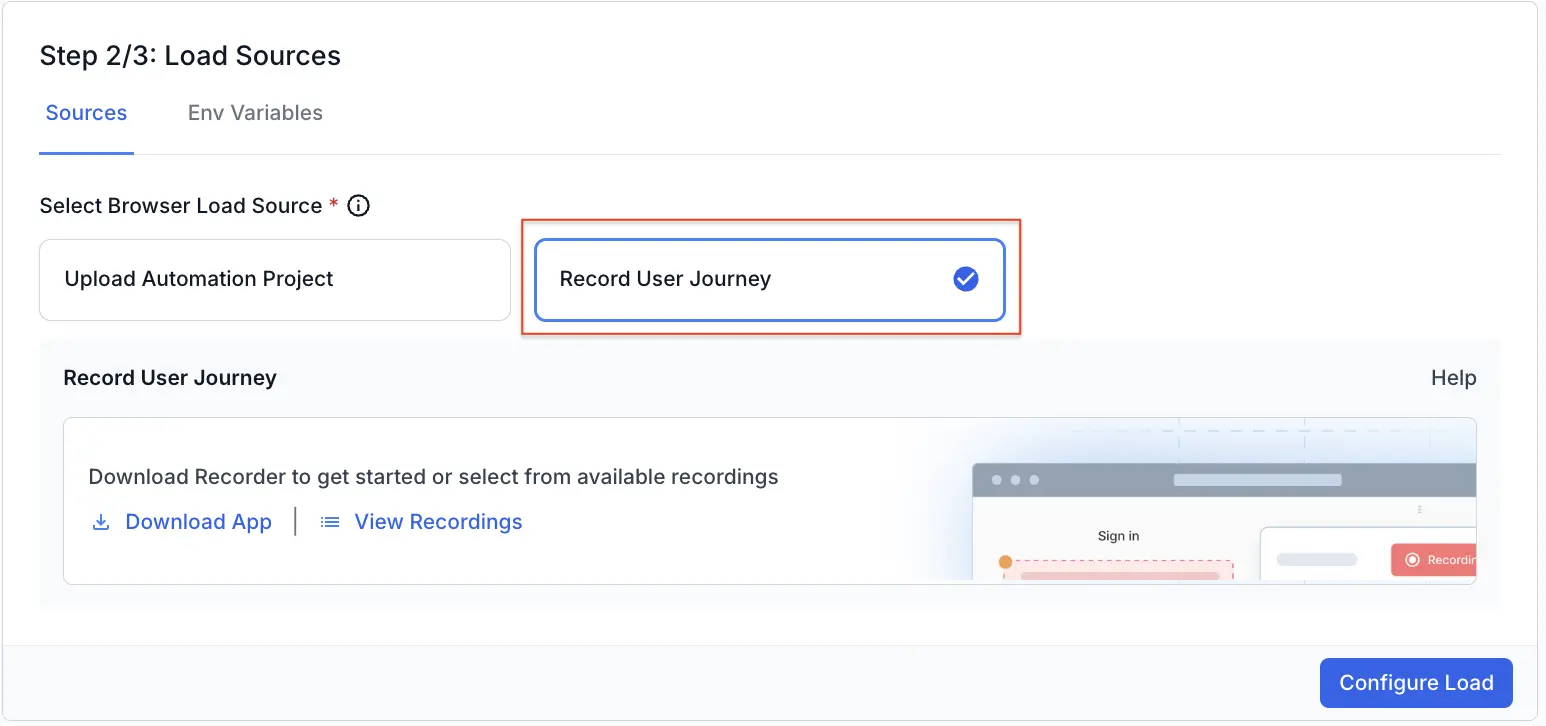
On the Load Sources step, under Select Browser Load Source, select Record User Journey. The first time you record, the panel prompts you to download the recorder. Click Download App, install the recorder, and return to the Load Sources step. You complete this setup only once.
Start a new recording
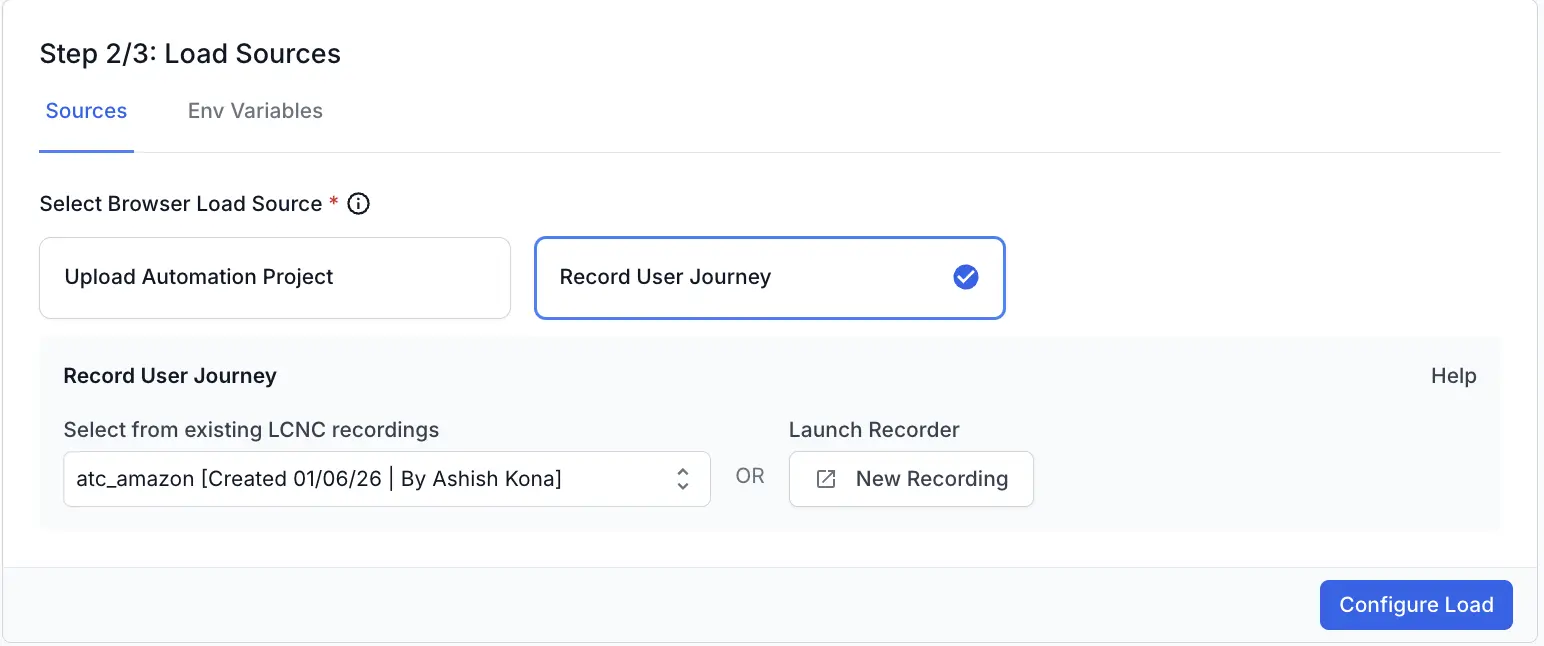
With the recorder installed, select Record User Journey on the Load Sources step. Under Launch Recorder, click New Recording to open the recorder. To reuse a journey you recorded earlier, pick it from the Select from existing LCNC recordings dropdown instead.
Enter the target URL
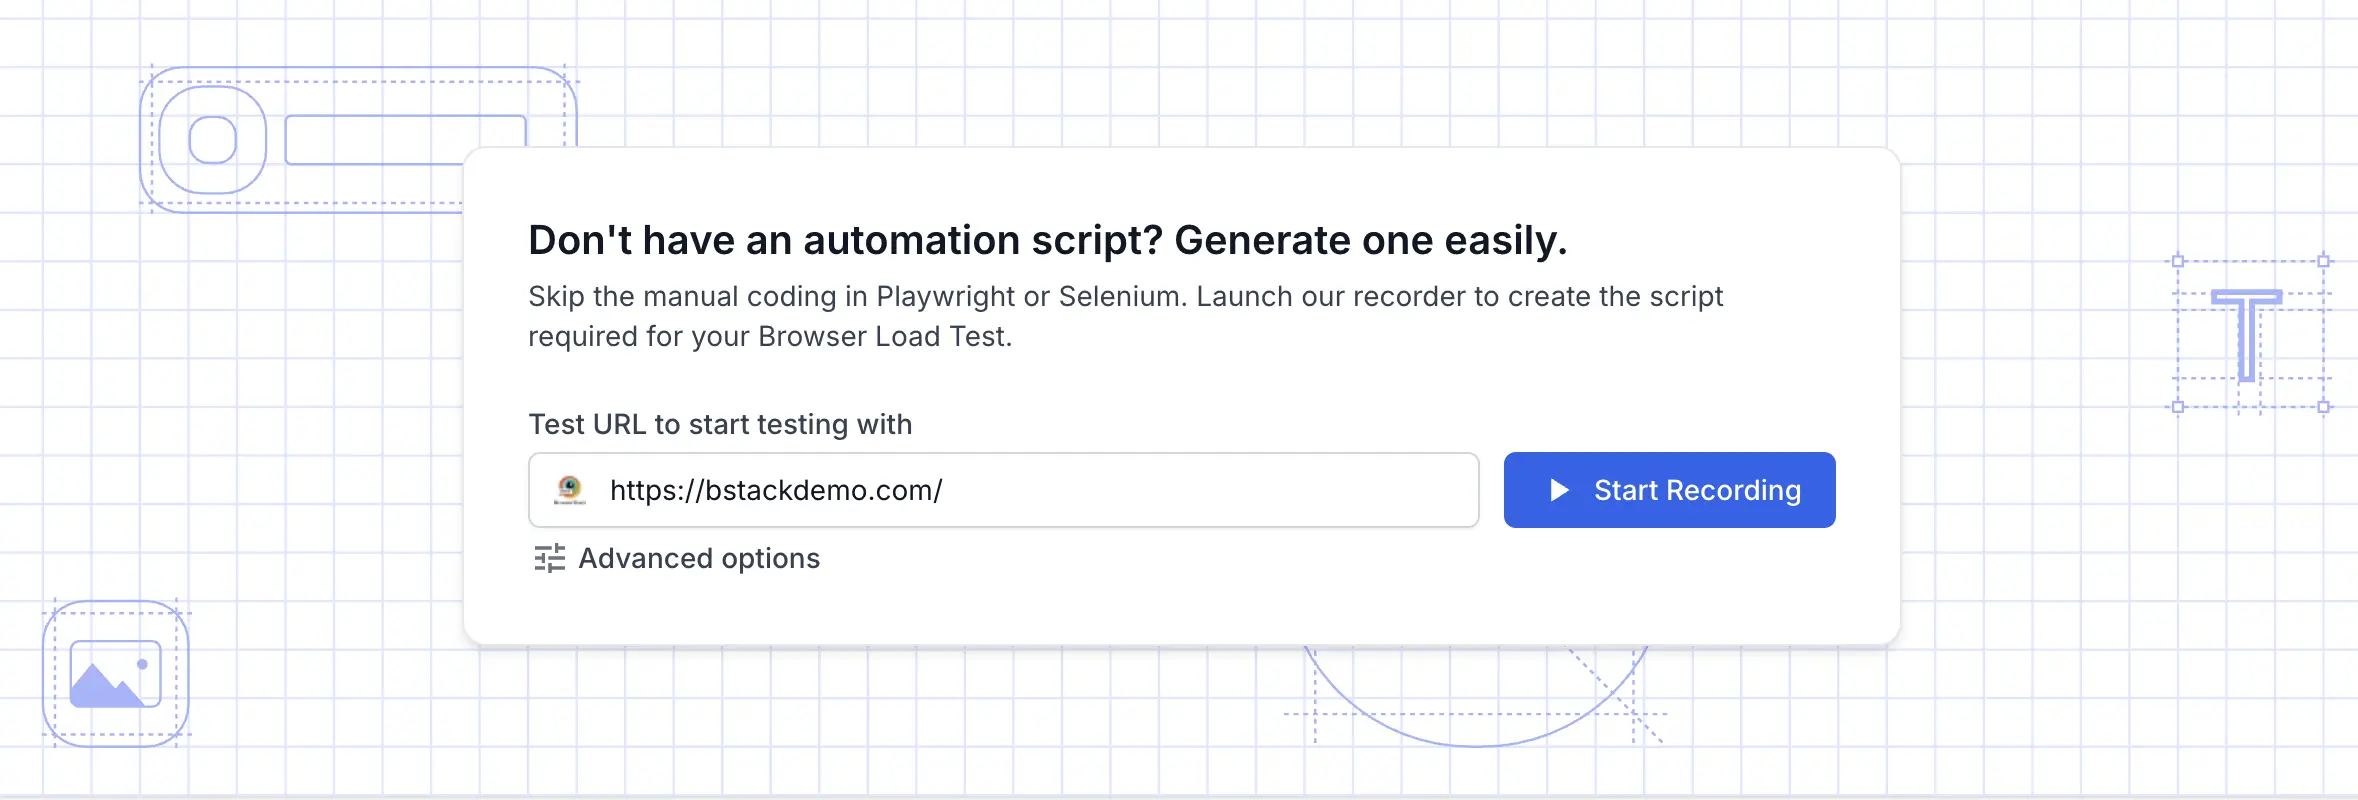
In the recorder, enter the page where your journey starts in the Test URL to start testing with field, such as https://bstackdemo.com/. To set the viewport size that matches your real users, expand Advanced options and choose a resolution. For more about these settings, see Configure device profile and resolution.
Record your journey
Click Start Recording. The recorder opens a browser session pointed at your URL and captures every interaction.
Walk through the journey like a real user. Click links, fill forms, submit, and navigate. The recorder turns each action into a step in the script.
Keep the journey focused. Two 15-step recordings are easier to maintain than a single 30-step checkout flow.
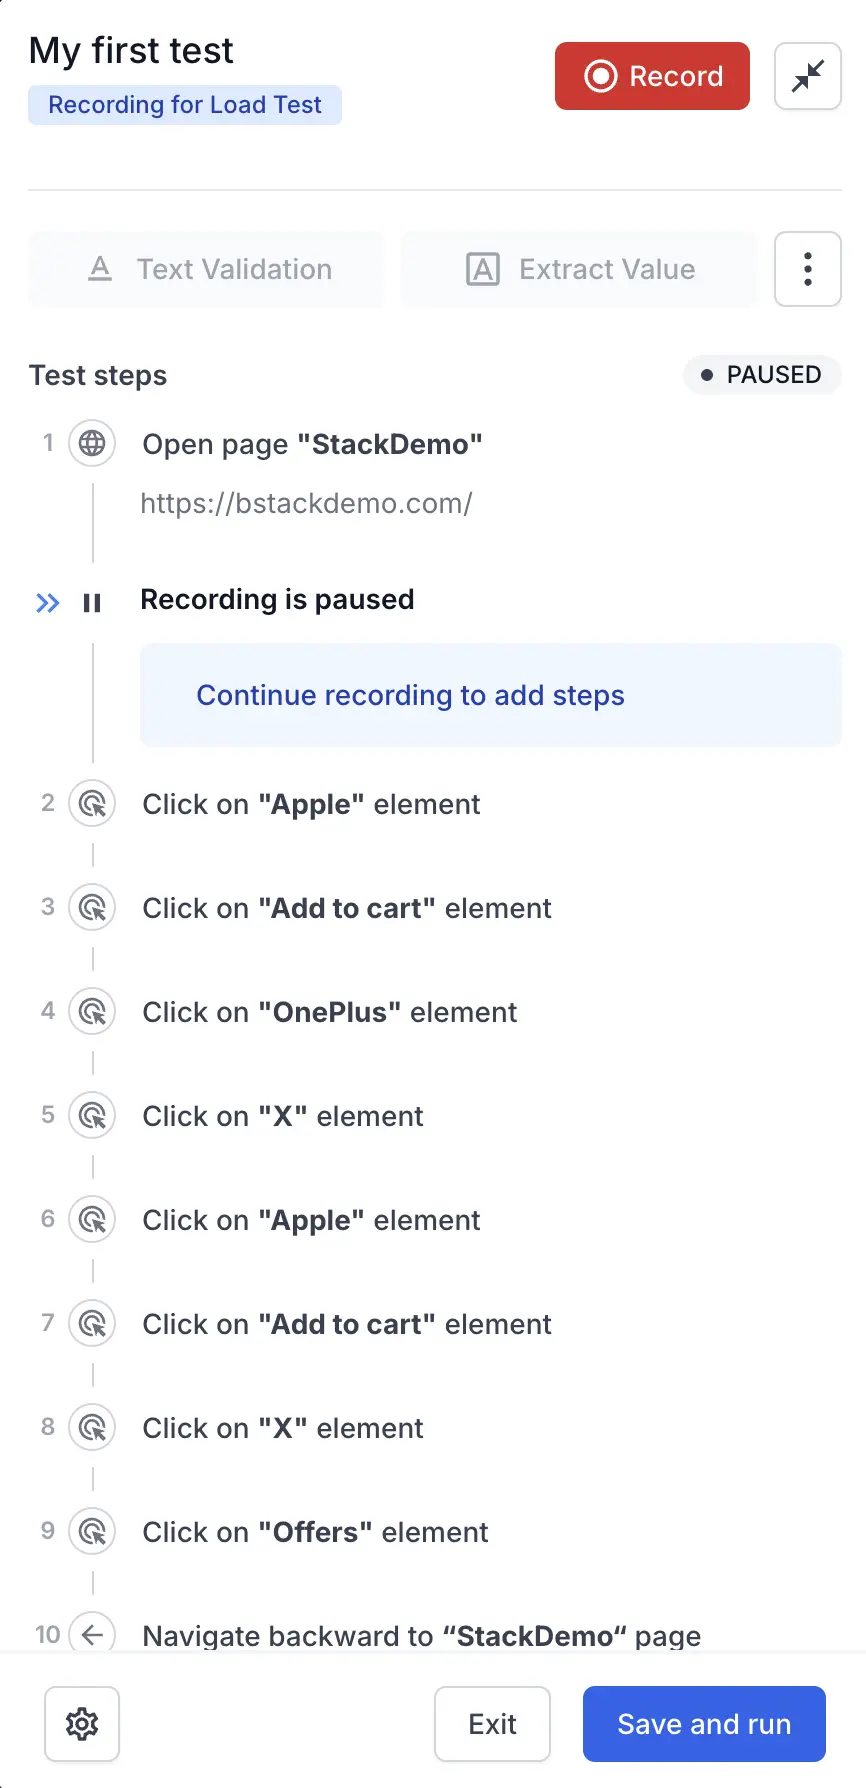
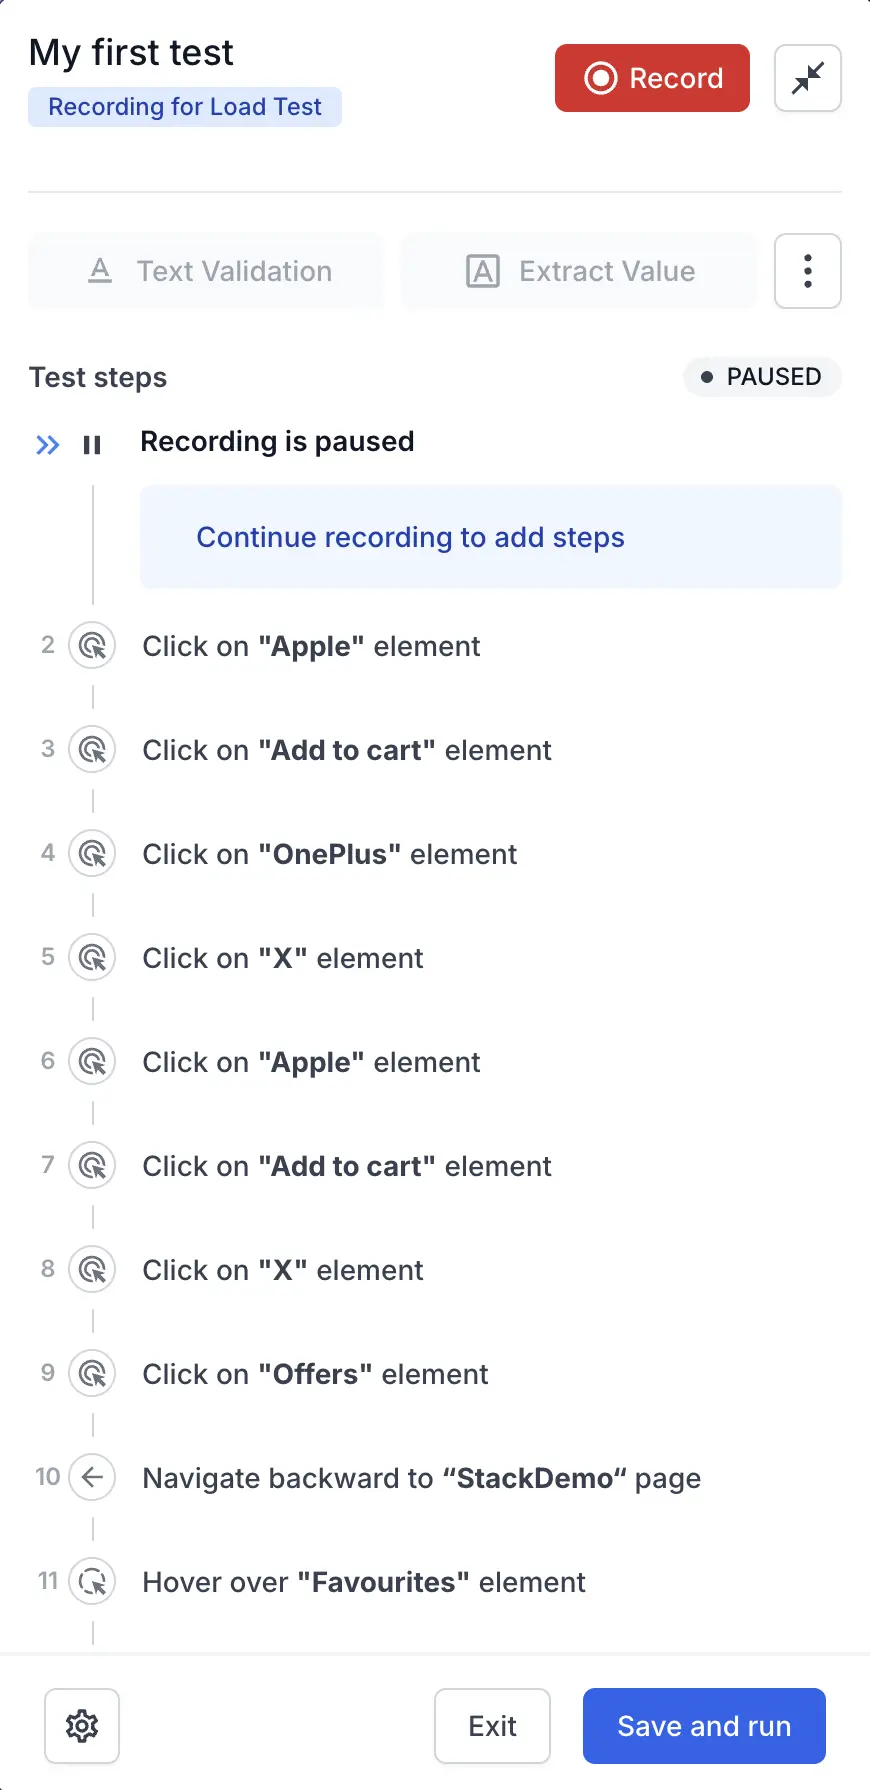
Review your recorded steps
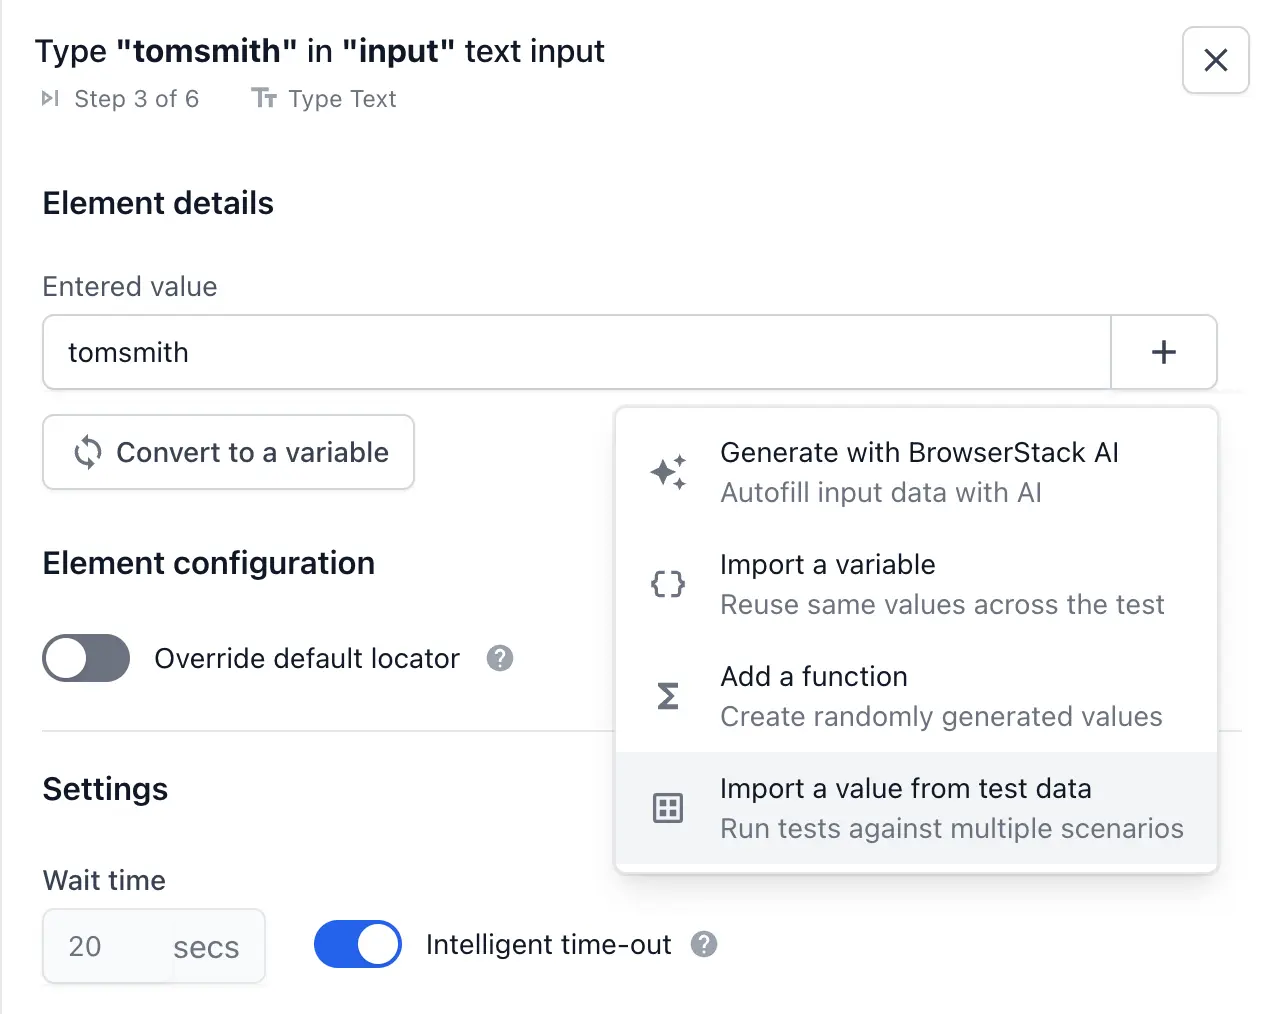
The recorder lists each captured action under Test steps as you go. Click Record to pause, then review the steps the recorder captured. While paused, you can add a Text Validation, extract a value with Extract Value, or continue recording to add more steps.
Save the recording
When your journey is complete, click Save and run. The recorder saves the test, tags it as a Load Testing test, and attaches the generated script to your load test.
Configure load and run
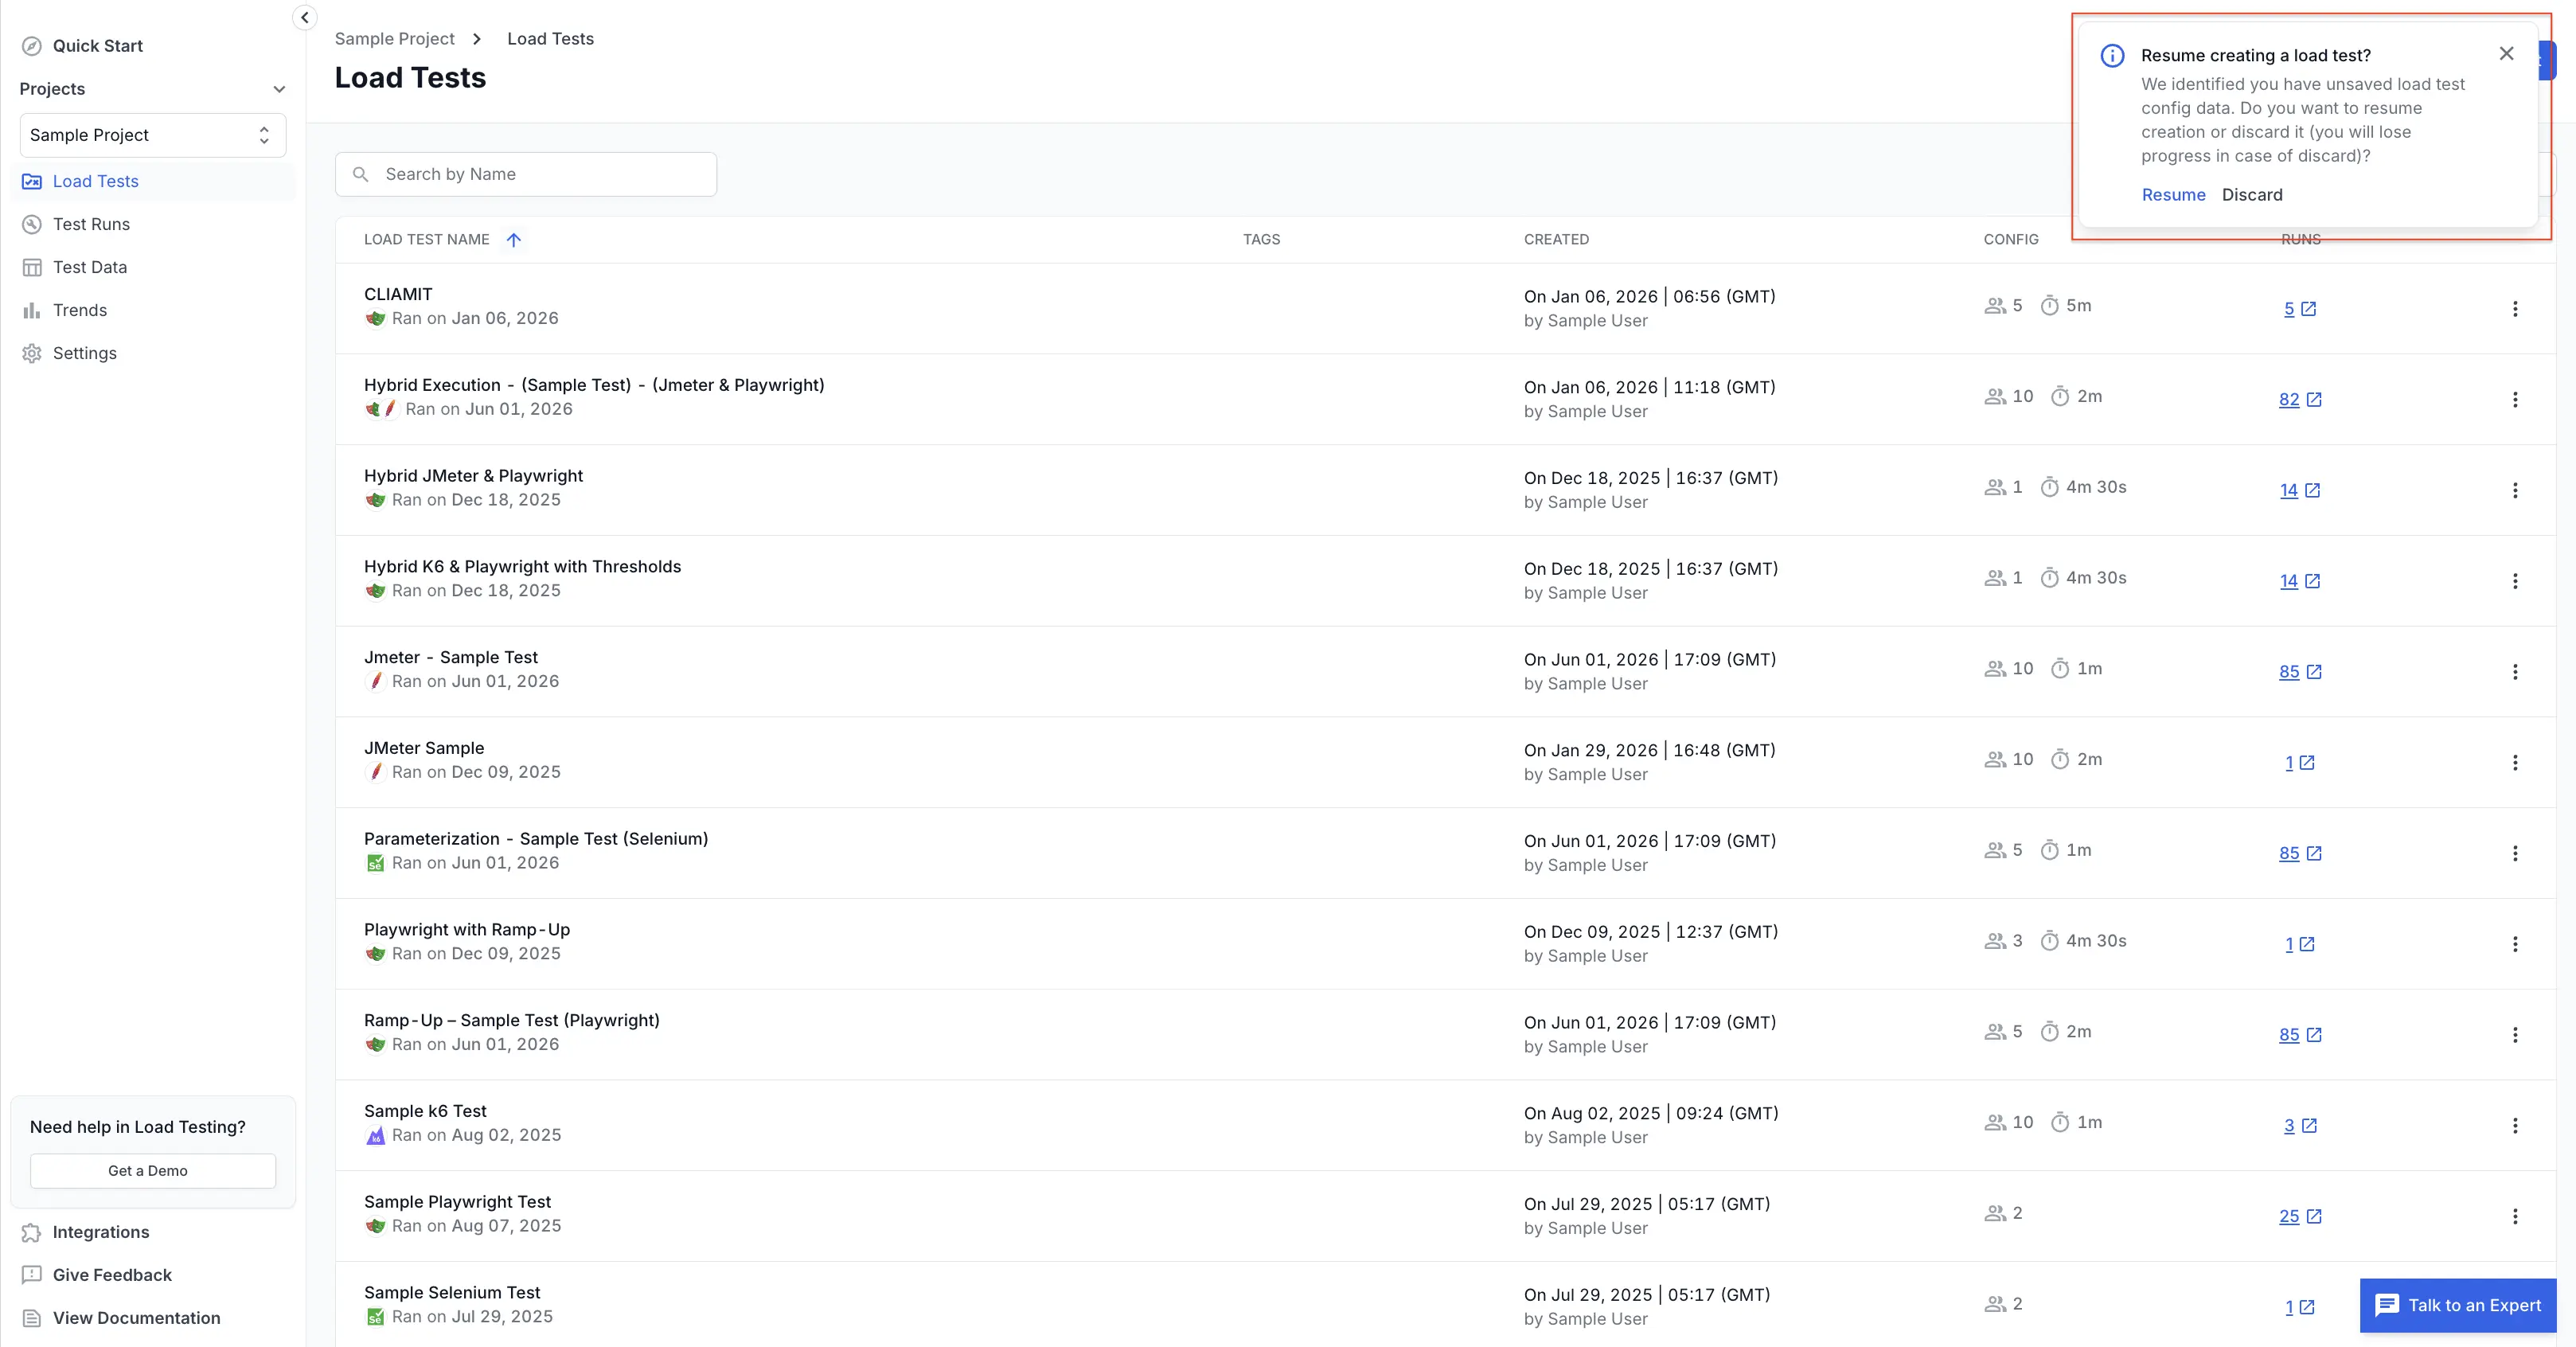
Back on the Load Testing dashboard, a Resume creating a load test? prompt appears with your saved configuration. Click Resume to continue setting up your load test, or Discard to start over.
Set your load parameters, such as virtual users, load zones, ramp profile, and duration, then run the test. For details on each option, see Configure load parameters.
Run load tests as an existing Low Code Automation user
If you already use LCA to author and run automated tests, you can create browser load tests from the same app, with no separate tool or project. Switch the test type in the recording panel to move between automated testing and load testing.
Enable load testing for your account
Open the Load Testing dashboard and give consent to enable load testing in your Low Code Automation app. This is a one-time step. After you opt in, the load testing option stays available in your LCA app.
Choose your test type
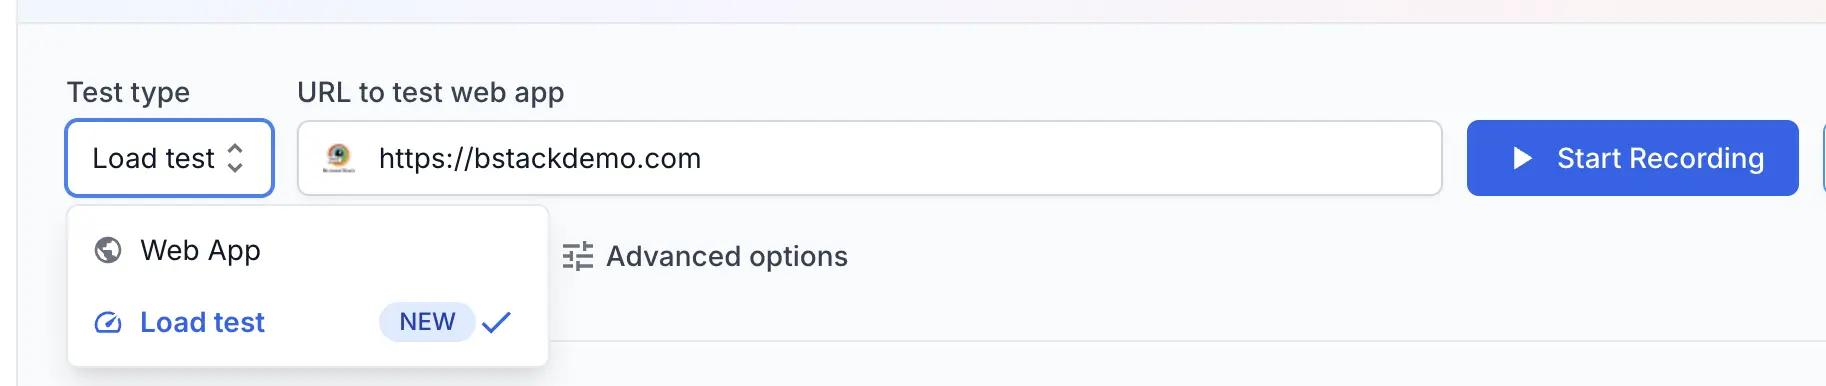
Open your Low Code Automation app. In the recording panel, the Test type dropdown shows two options:
- Web App: Your existing Low Code Automation flows. Keep authoring and running automated tests as before.
- Load test: Record a journey to use as a browser load test.
Both flows live in the same app. Switch the Test type to move between automated and load testing.
Record the load test
Set Test type to Load test and enter the page where your journey starts in the URL to test web app field, such as https://bstackdemo.com/. Click Start Recording and walk through your journey like a real user, then review and save your steps. The recording experience is the same as for a standard journey.
After you save, configure your load parameters and run the test, as described in Record your first journey.
Edit a recorded journey
You can update a recorded journey at any time in the LCA desktop app. Your edits sync back to Load Testing automatically, so the load test always runs the latest version of the journey. For details on changing a recorded test, see Edit a test.
What you can record
The recorder captures standard browser interactions and translates them into executable scripts. For the full set of interactions LCA supports, see Record actions. Supported actions include:
- Navigate to a URL.
- Click and double-click.
- Type into input fields.
- Select from dropdowns.
- Wait for an element or wait for a page to load.
- Standard assertions, such as element visible or text matches.
Correlate dynamic values with variables
Some values in a journey change between runs, such as session tokens, generated IDs, or a price shown on the page. Store these in variables so the journey reuses the right value instead of a hardcoded one. While recording, you can create a variable in two main ways:
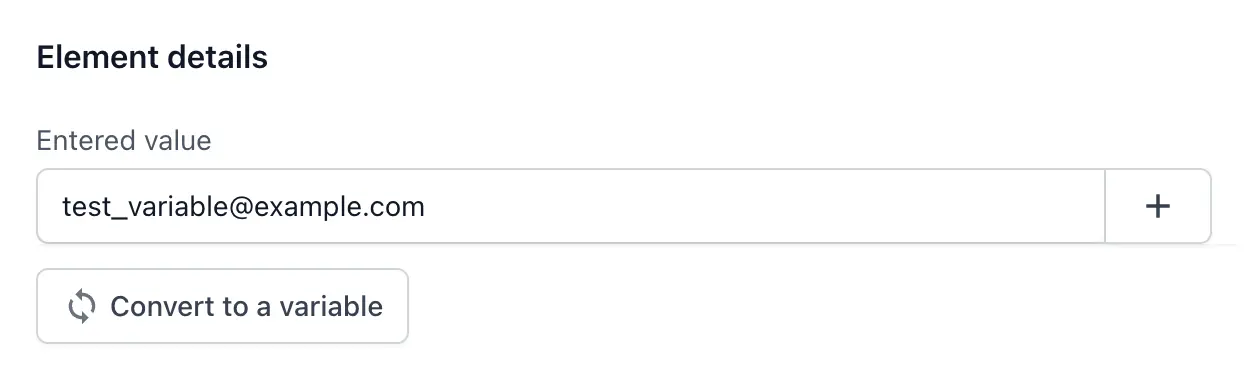
- Convert an input to a variable: Open a step that takes an input value, click Convert to variable, and give it a meaningful name.
- Extract a value from the page: Use Extract Value to capture dynamic on-screen text, such as a price or confirmation number, into a variable.
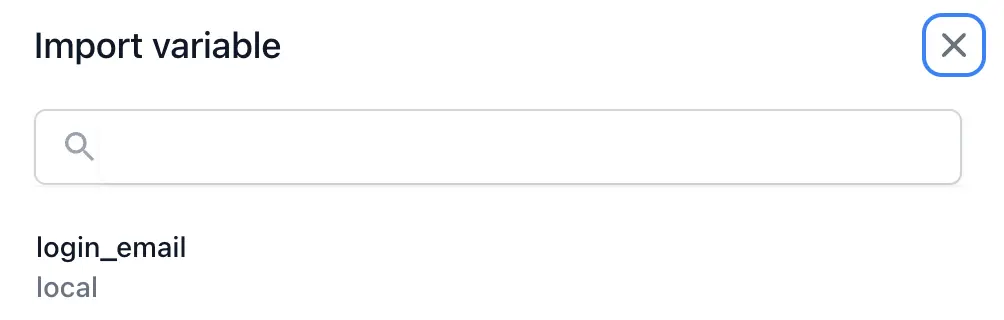
To reuse a variable, open a later input or text-validation step, click Import a variable, and select the one you need.
For more ways to create variables, including custom JavaScript and API responses, see Variables.
Parameterize with test data
To run the same journey against many input combinations, link it to a test dataset built from a CSV file. To set this up, follow these steps:
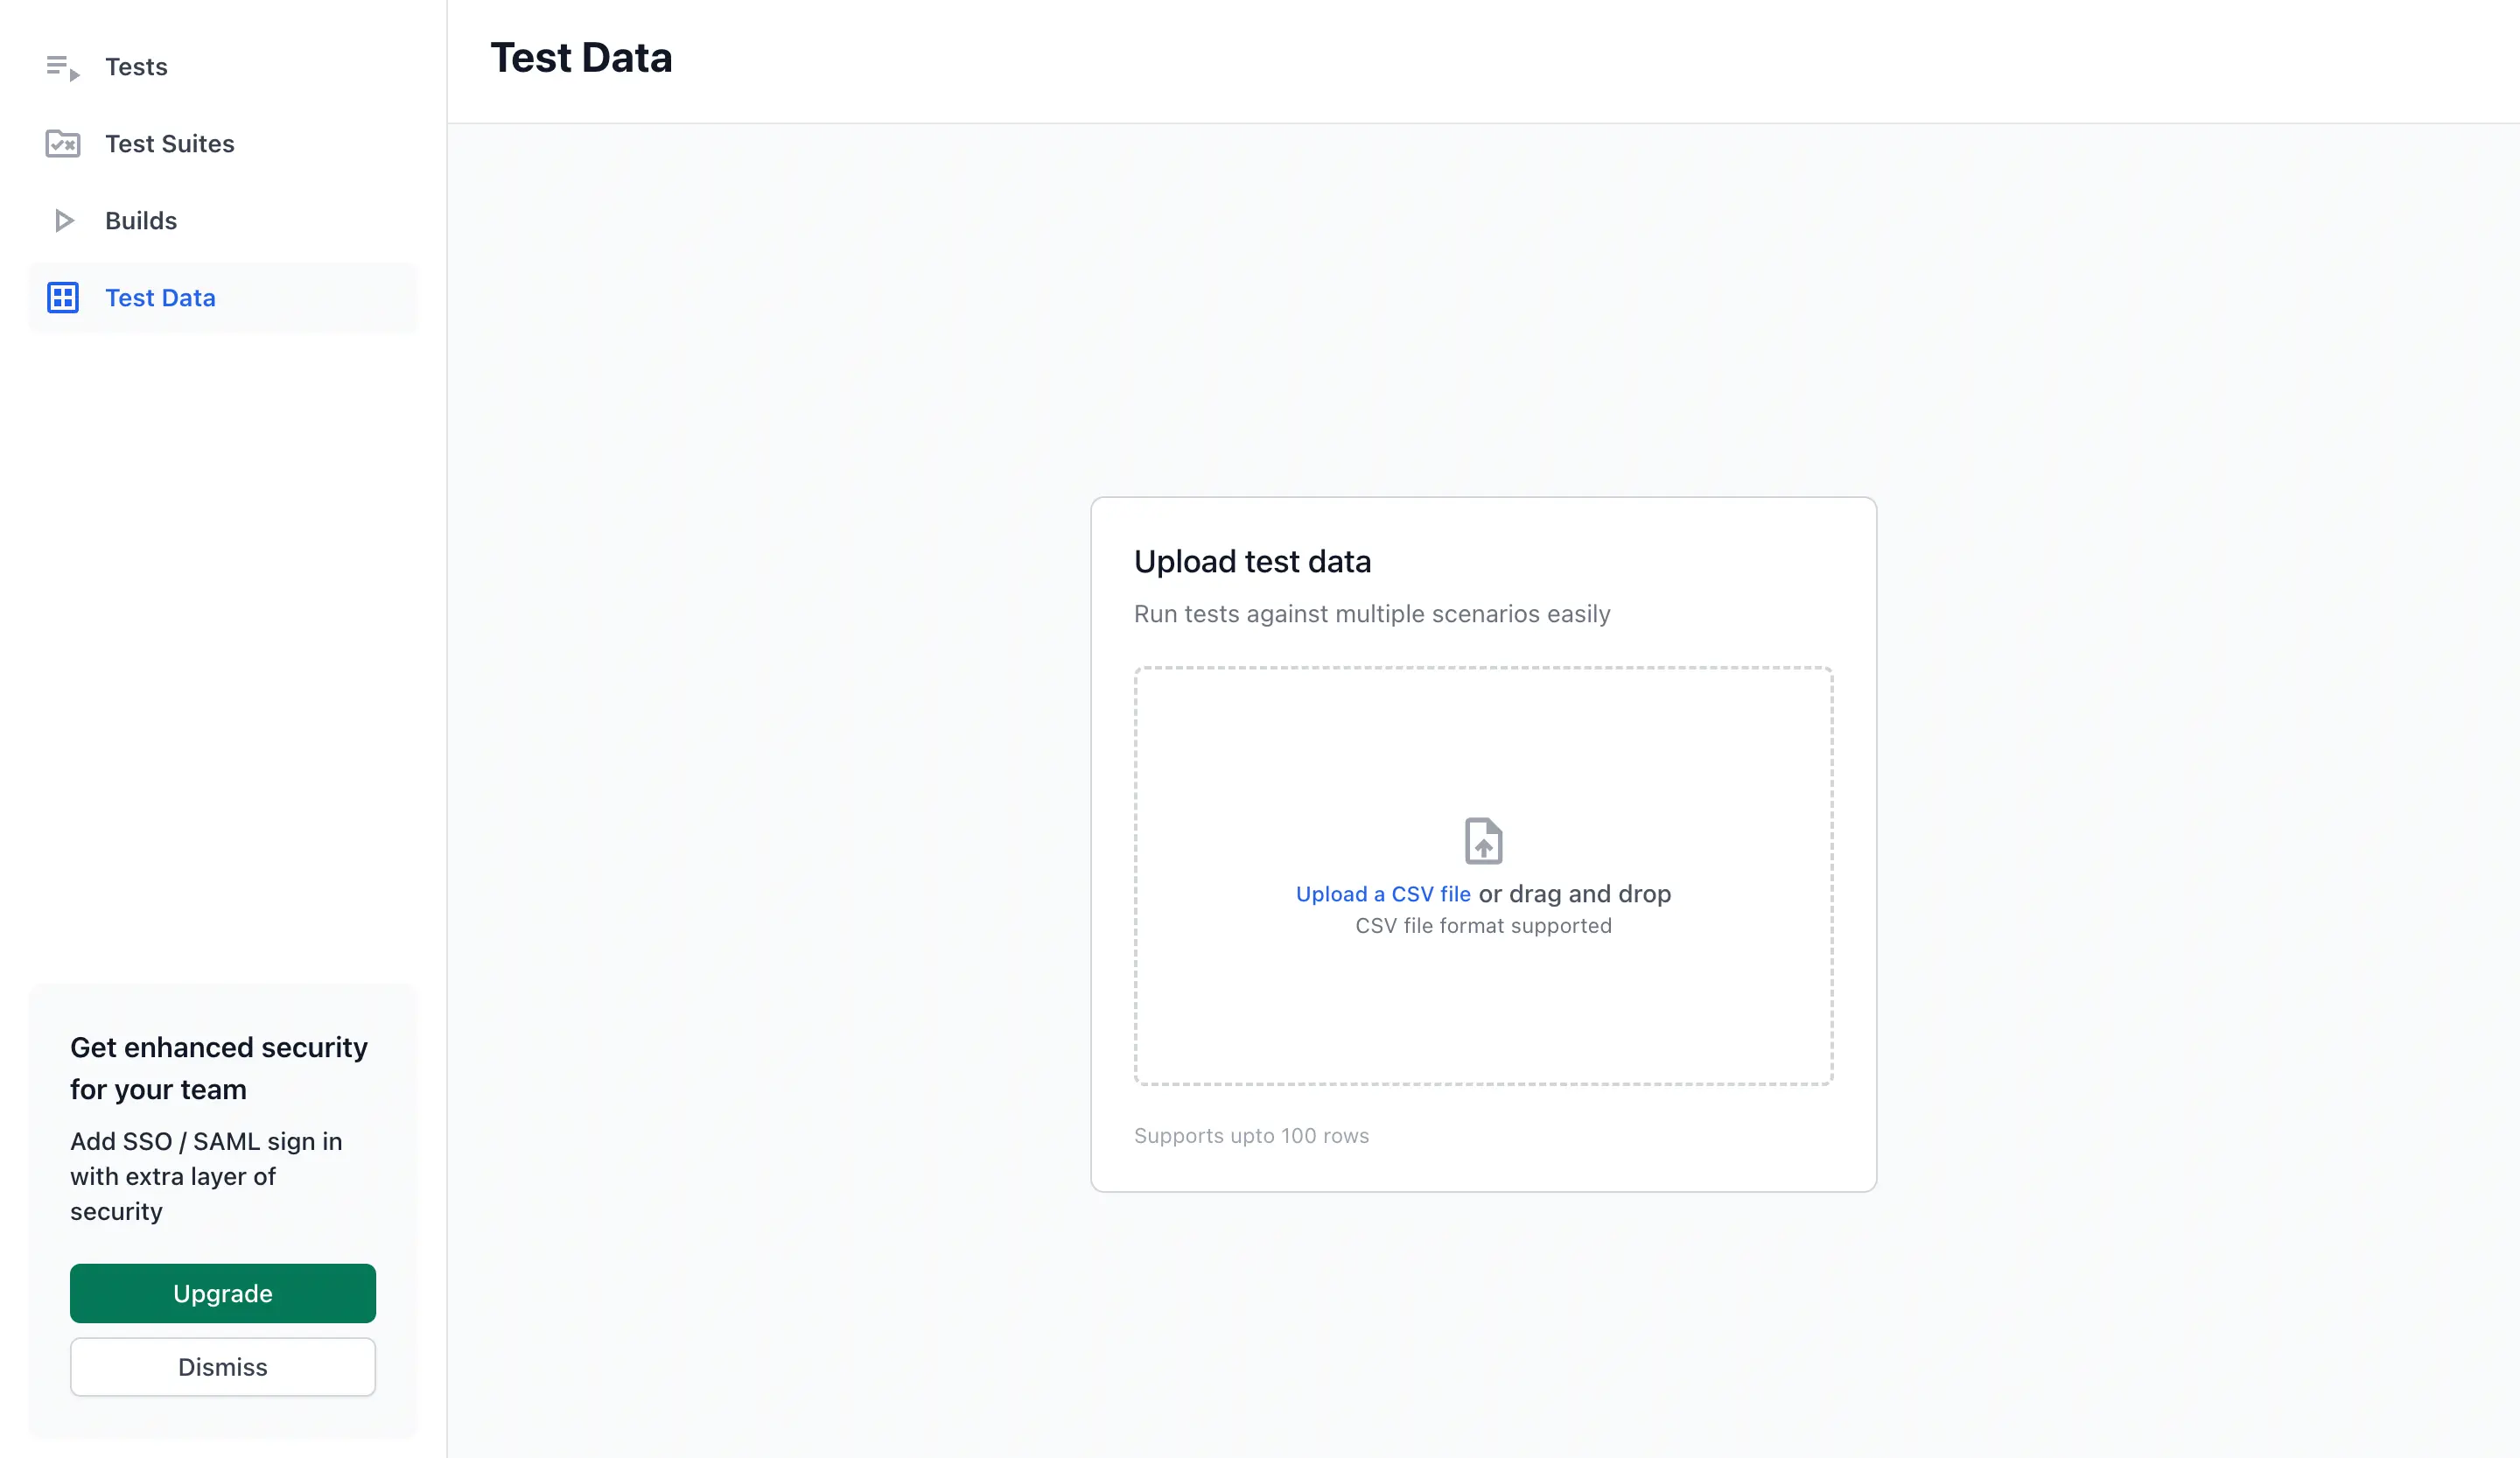
- In the recorder, expand Data configuration and click Test dataset.
- Click Add Test Dataset, select your CSV file, and give the dataset a unique name.
- Open the step where you want to use the data, click the + button, and choose Import a value from test data.
- Select the dataset, then choose the column to link to the step.
For dataset requirements and row-selection options, see Data driven testing.
Related topics
- What is Low Code Automation? - Learn how the LCA recording flow works.
- Record actions - See every interaction the recorder can capture.
- Get started with Browser Load Testing - Other ways to create and run a browser load test.
- Configure load parameters - Set virtual users, load zones, ramp profiles, and thresholds.
We're sorry to hear that. Please share your feedback so we can do better
Contact our Support team for immediate help while we work on improving our docs.
We're continuously improving our docs. We'd love to know what you liked
We're sorry to hear that. Please share your feedback so we can do better
Contact our Support team for immediate help while we work on improving our docs.
We're continuously improving our docs. We'd love to know what you liked
Thank you for your valuable feedback!