Mobile settings
Set how Test Companion handles mobile sessions, including permission dialogs, network and orientation, device bypasses, camera media injection, and diagnostics capture.
Mobile sessions involve more than running the app. They trigger system permission dialogs. They run under specific network and orientation conditions. Some need biometric, passcode, or certificate bypasses. Many should capture diagnostics like logs and video. Left unhandled, a permission dialog can block a test. Mobile settings lets you set defaults for all of these, so every new session starts in a known state. You can override any setting in the panel before you save.
Configure mobile settings
To configure mobile settings:
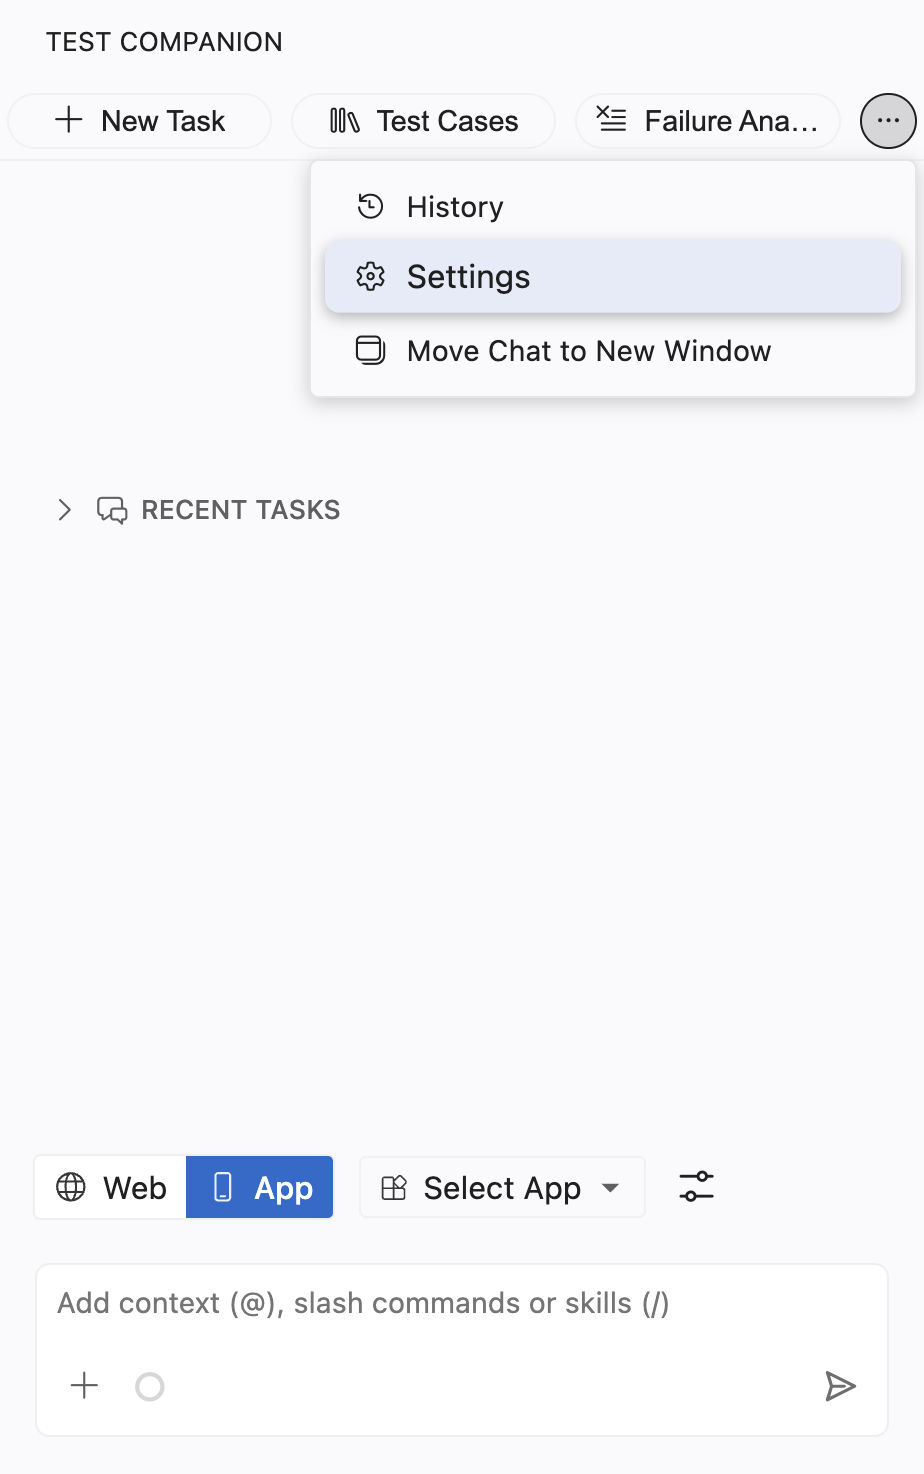
Click the ... (more options) button at the top-right corner of the Test Companion panel, then select Settings.
Click the Mobile Settings tab in the sidebar.
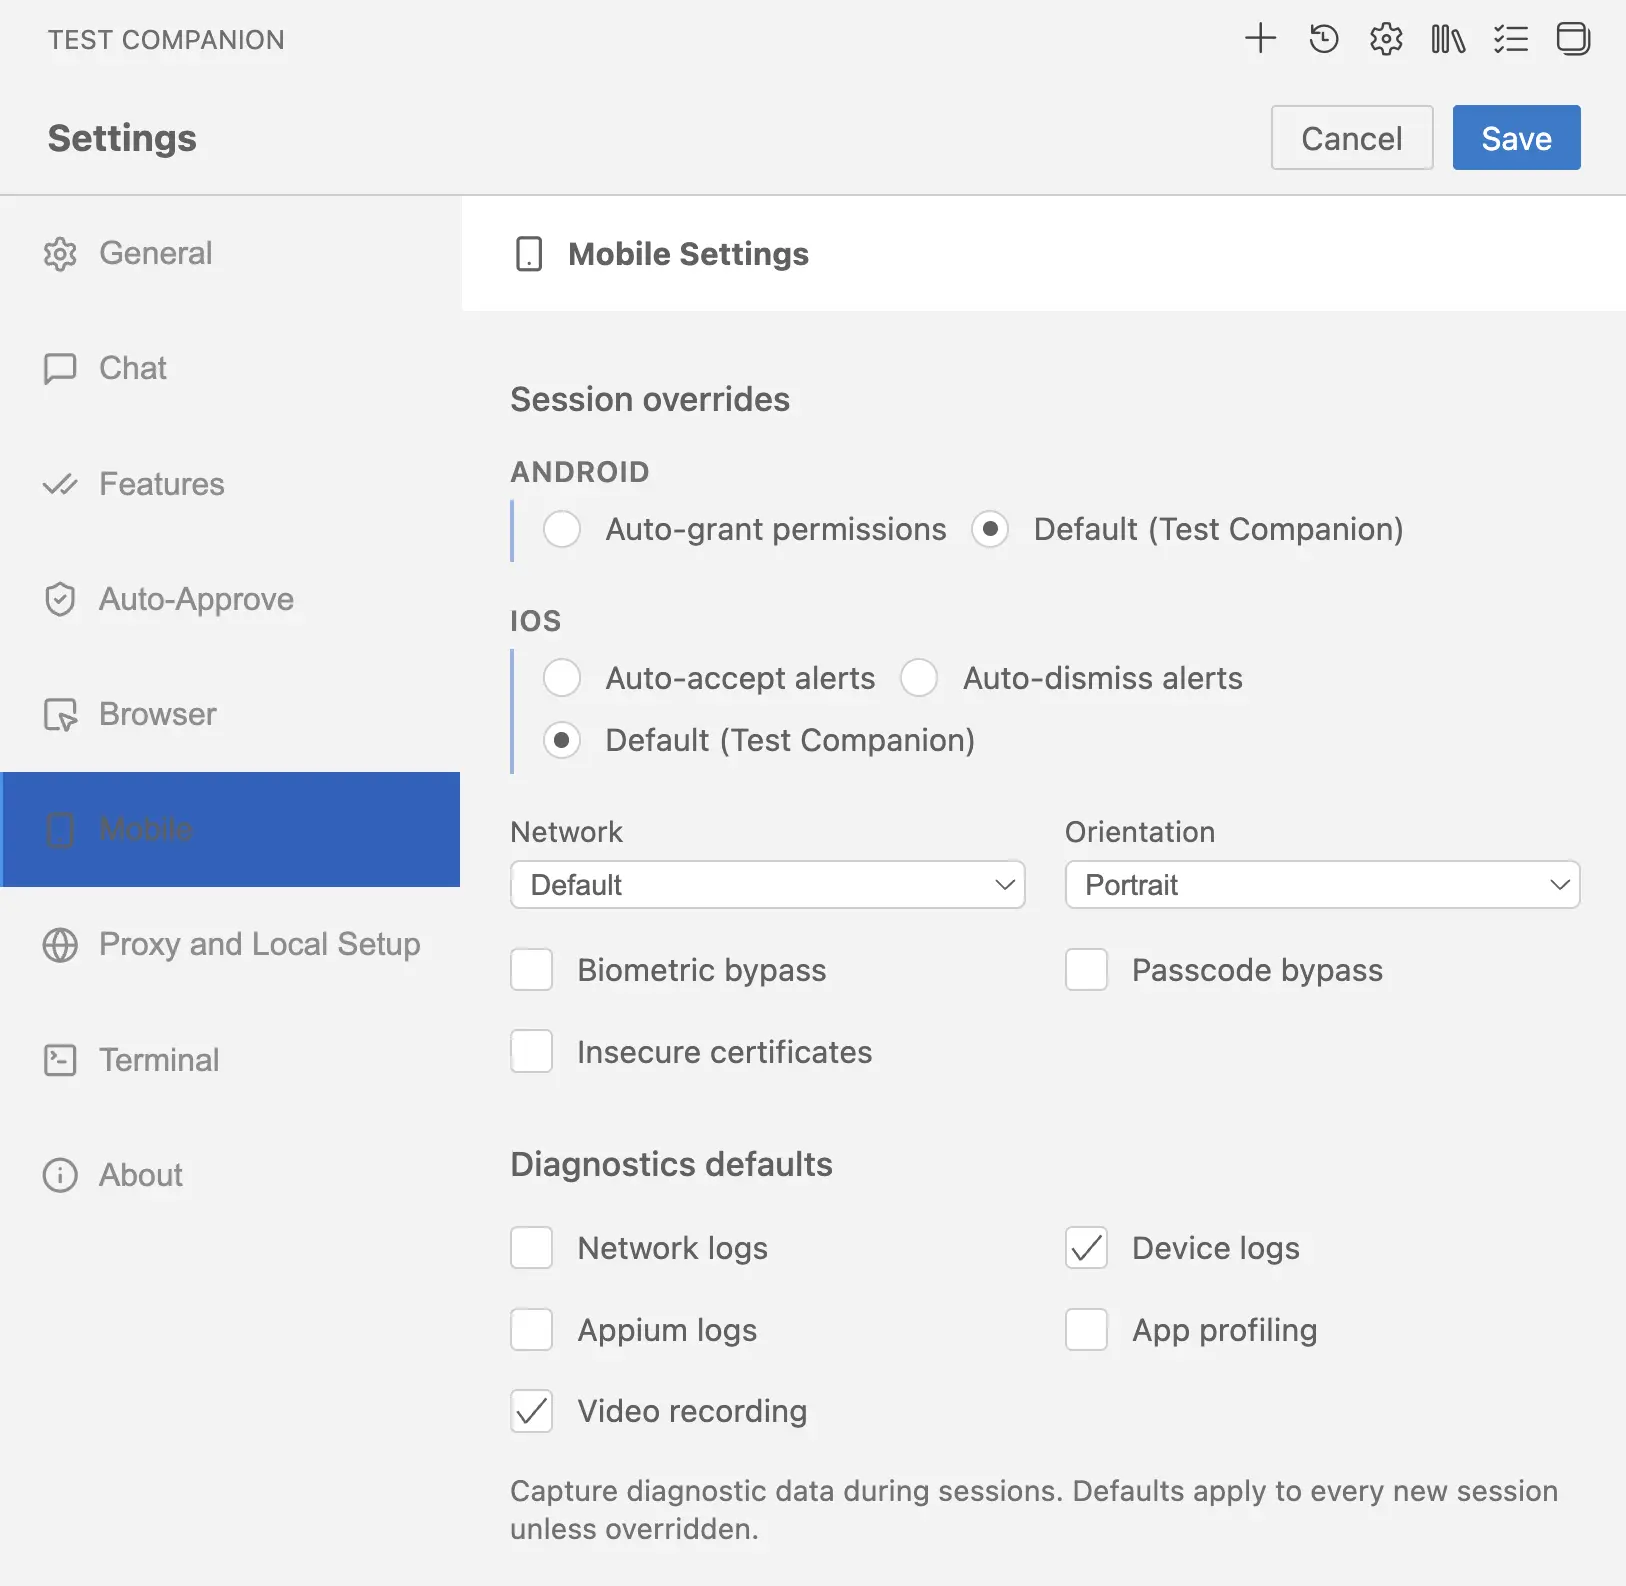
Configure the session overrides you need, then click Save.
The panel has two regions:
- Session overrides apply at the start of every new session. They control Android and iOS system dialogs, network conditions, device orientation, biometric, passcode, and certificate bypasses, and camera media injection.
- Diagnostics defaults control which logs and recordings Test Companion captures during every new session.
Session overrides
Session overrides apply once when each new session starts. They stay in effect for the full session unless your test script changes them at runtime.
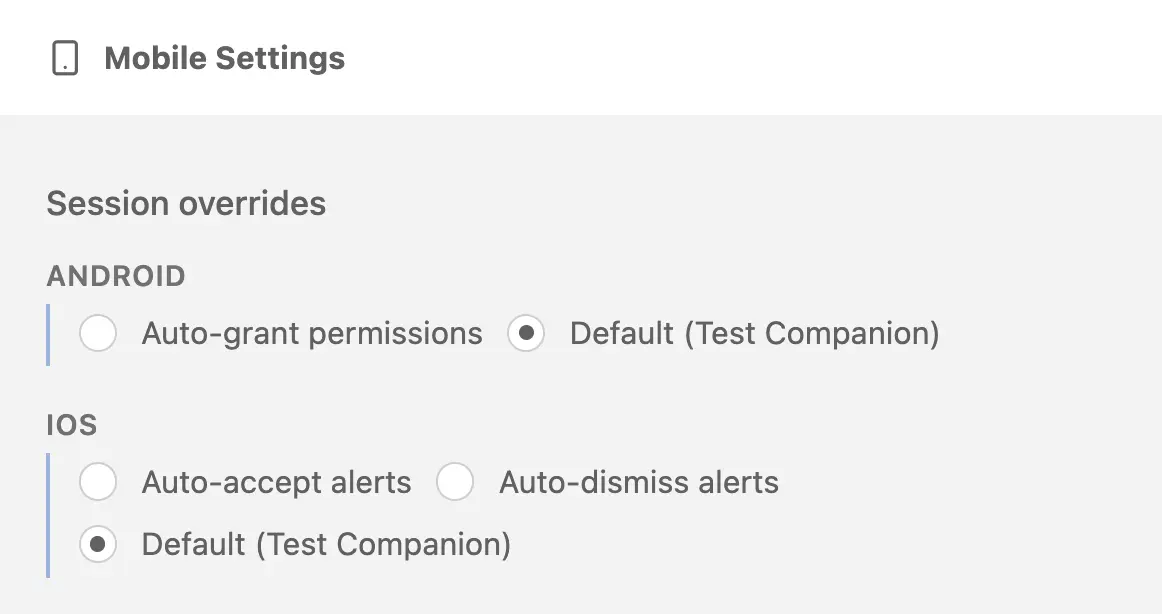
Android permission handling
Android apps trigger runtime permission dialogs for capabilities like camera, location, and storage. Choose how Test Companion handles these dialogs.
-
Auto-grant permissions: Test Companion grants every Android runtime permission automatically. Permission dialogs do not appear during the session. Use this when your tests do not need to validate permission denial flows, and you want uninterrupted execution.
-
Default (Test Companion): Test Companion takes no action when a permission dialog appears. The dialog renders on the device exactly as it would for a real user. Whatever drives the session, your test script or a manual tester, must tap Allow or Don’t allow itself. Use this when your tests need to validate both granted and denied permission flows.
Default is selected when you first open the panel.
iOS alert handling
iOS distinguishes between accepting and rejecting system permission alerts, so iOS offers one more option than Android.
-
Auto-accept alerts: Test Companion accepts every iOS system permission alert automatically. Alerts for camera, location, notifications, and similar capabilities do not interrupt the session. Use this when your tests assume permissions are granted, and you want to eliminate alert handling from the script.
-
Auto-dismiss alerts: Test Companion dismisses every iOS system permission alert automatically, which is equivalent to denying the permission. Use this when you need to verify that your app handles permission denials correctly. For example, testing the fallback when a user denies camera access.
-
Default (Test Companion): Test Companion takes no action when an alert appears. The alert renders on the device exactly as it would for a real user. Whatever drives the session must tap the alert button itself. Use this when your tests need to validate both acceptance and denial on a case-by-case basis.
Default is selected when you first open the panel.
Network conditions
Apply a predefined network profile to simulate real-world conditions like 2G, lossy 4G, or no connectivity. The selected profile applies for the full session.
The dropdown contains three categories of options:
- Default uses the device’s unrestricted Wi-Fi connection. Selected by default.
- No Network disables the network on the device, equivalent to airplane mode.
- 15 measurable profiles simulate specific bandwidth, latency, and packet loss combinations. The full list and values are below.
| Profile | Bandwidth down/up (Kbps) | Latency (ms) | Packet loss (%) |
|---|---|---|---|
| 2G GPRS (Good) | 50 / 30 | 500 | 1 |
| 2G GPRS (Lossy) | 30 / 20 | 650 | 2 |
| EDGE (Good) | 250 / 150 | 300 | 0 |
| EDGE (Lossy) | 150 / 100 | 500 | 1 |
| 3G UMTS (Good) | 400 / 100 | 100 | 0 |
| 3G UMTS (Lossy) | 200 / 50 | 200 | 1 |
| 3.5G HSPA (Good) | 1800 / 400 | 100 | 0 |
| 3.5G HSPA (Lossy) | 900 / 200 | 190 | 1 |
| 3.5G HSPA+ (Good) | 7000 / 1500 | 100 | 0 |
| 3.5G HSPA+ (Lossy) | 2000 / 600 | 130 | 1 |
| 4G LTE (Good) | 18000 / 9000 | 100 | 0 |
| 4G LTE (High Latency) | 18000 / 9000 | 3000 | 0 |
| 4G LTE (Lossy) | 7000 / 3000 | 120 | 1 |
| 4G LTE Advanced (Good) | 25000 / 18000 | 80 | 0 |
| 4G LTE Advanced (Lossy) | 15000 / 10000 | 70 | 1 |
Network conditions map to the networkProfile capability and are not supported for proxy-unaware applications.
Orientation
Lock the device to Portrait or Landscape for the full session. Test Companion sets this once at session start and does not rotate the device automatically during the session.
Portrait is selected when you first open the panel. Orientation maps to the deviceOrientation capability.
Biometric bypass
Select Biometric bypass to test app flows that rely on Touch ID, fingerprint sensors, or Face ID. Test Companion injects a sensor instrumentation layer that replaces the real biometric prompt with a Pass / Fail / Cancel control your test script can drive. Use this when your tests need to verify what happens after biometric success, failure, or cancellation.
Biometric bypass maps to the enableBiometric capability.
Biometric bypass is incompatible with Auto-grant permissions (Android) and Auto-accept alerts or Auto-dismiss alerts (iOS). If you select any of those options, the Biometric bypass checkbox stays unselected and a warning appears at the top of the panel listing the conflicting setting. To enable Biometric bypass, switch the conflicting Android or iOS option back to Default (Test Companion).
Passcode bypass
Select Passcode bypass to run sessions on a passcode-protected device. BrowserStack devices are not passcode-protected by default. When you enable this option, the device is provisioned with a passcode that your test script can use to validate flows like banking app login or payment confirmation.
The default passcode is 1234 on Android and 123456 on iOS. Your test script must enter the passcode through the keyboard. Passcode bypass maps to the testPasscode capability.
Insecure certificates
Select Insecure certificates to allow the session to trust self-signed and otherwise invalid SSL/TLS certificates. Use this when your app connects to a development or staging server that does not use a publicly trusted certificate. With this option off, the session rejects untrusted certificates and HTTPS calls fail.
Insecure certificates maps to the acceptInsecureCerts capability.
Camera media injection
Select Camera media injection to feed an image into the device camera instead of using the live camera. You provide the image yourself. When a task needs camera input, Test Companion asks you to upload an image in the chat. It then passes that image to App Automate, which injects it into the camera feed for the session. Use this when your tests need consistent, repeatable camera input, for example to validate QR code scanning, barcode scanning, or document capture.
Diagnostics defaults
Diagnostics defaults control which logs and recordings Test Companion captures during every new session. Each option is independent. Turn on only what you need, because some captures add overhead to the session.
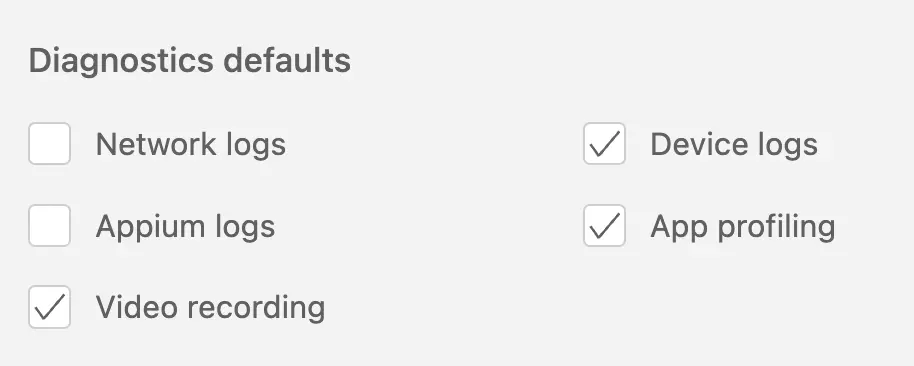
When you first open the panel, Device logs and Video recording are selected. The other three options are off.
-
Network logs: Captures all HTTP and HTTPS requests and responses made by the app during the session, exported in HAR format. Use this to inspect timing, headers, payloads, and status codes for every network call. It maps to the
networkLogscapability. -
Device logs: Captures Logcat output on Android and the system console on iOS. Use this to debug crashes, ANRs, and runtime errors that the app surfaces through standard device logging. It maps to the
deviceLogscapability. -
Appium logs: Captures the raw Appium server logs for the session. Use this to debug issues with locator strategies, command timeouts, or the test framework itself. It maps to the
appiumLogscapability. -
App profiling: Captures CPU, memory, battery, and network usage metrics during the session. Use this to identify performance regressions, memory leaks, or battery drain caused by your app. Maps to the
appProfilingcapability. -
Video recording: Captures a full-session video of the device screen. Use this to reproduce visual bugs, review test failures, and share session playback with your team. It maps to the
videocapability.
We're sorry to hear that. Please share your feedback so we can do better
Contact our Support team for immediate help while we work on improving our docs.
We're continuously improving our docs. We'd love to know what you liked
We're sorry to hear that. Please share your feedback so we can do better
Contact our Support team for immediate help while we work on improving our docs.
We're continuously improving our docs. We'd love to know what you liked
Thank you for your valuable feedback!