Manage test cases
Organize, review, edit, and act on your test cases from the Test Cases panel in your IDE.
The Test Cases panel is your central hub for all test-case activity in Test Companion. Any generated test case appears here. You can review and edit fields inline, organize tests into scenarios and folders, set priorities and statuses, add custom metadata, and push everything to your test management system. All of this happens without leaving the IDE.
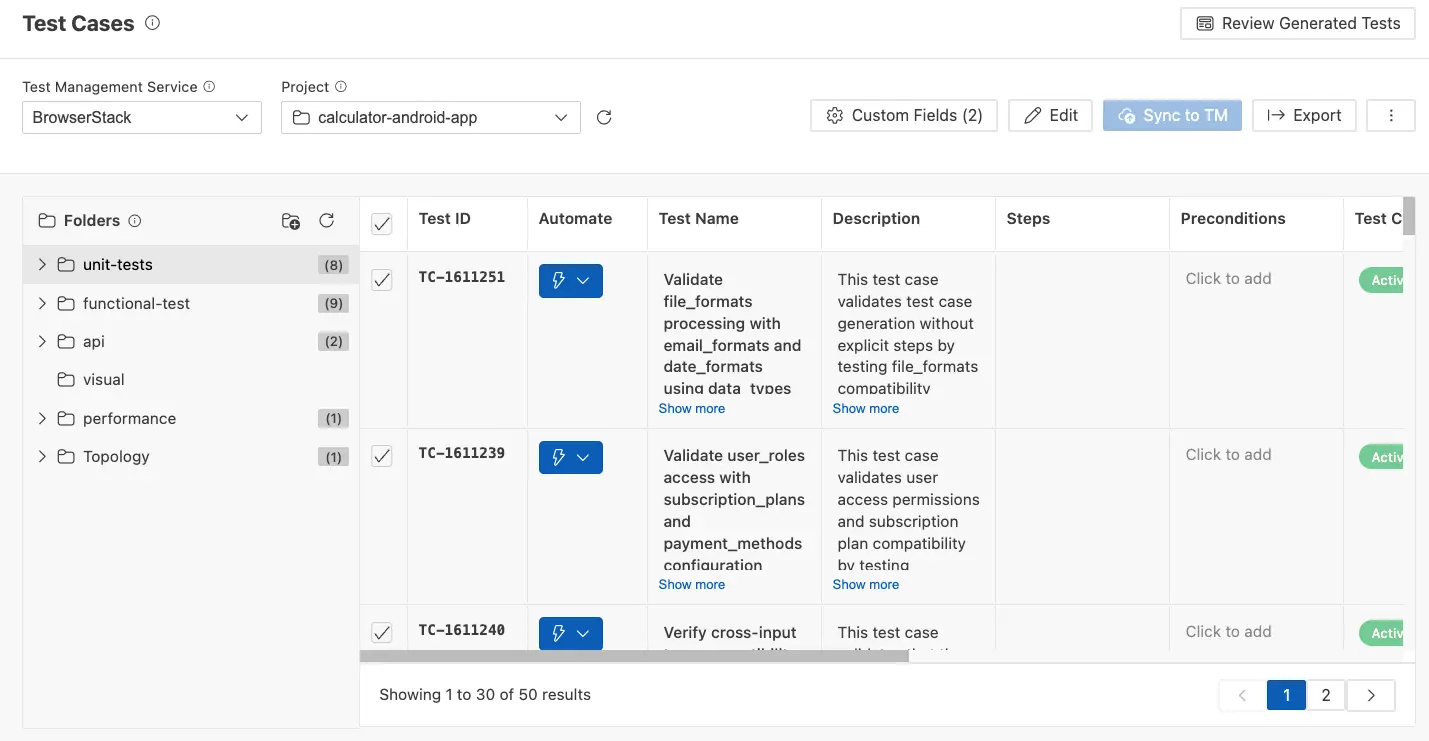
Test cases panel
After generating test cases, a Test Cases tab opens on the right side of your IDE. At the top, you’ll find controls for the test management service, project, and folder. Below this, a toolbar provides actions: Custom Fields, Edit, Sync to TM, Export, and a three-dot menu (⋮) for additional options like Delete Permanently.
Test case structure
Each test case has the following fields, all editable directly in the panel:
| Field | Description |
|---|---|
| Test ID | A unique identifier assigned when the test is synced to your test management system. |
| Automate | Sends the test case to the automation generator, which creates an executable script for it. |
| Test Name | A short title describing what the test verifies. |
| Description | A detailed explanation of what the test covers. Click Show more to expand. |
| Steps | A numbered sequence of actions, each with its expected result. Click Show more to view all steps. |
| Preconditions | Conditions that must be met before the test starts. In BDD format, this field is labeled “Background.” |
| Priority | The importance level: High, Medium, or Low. |
Scenarios and folders
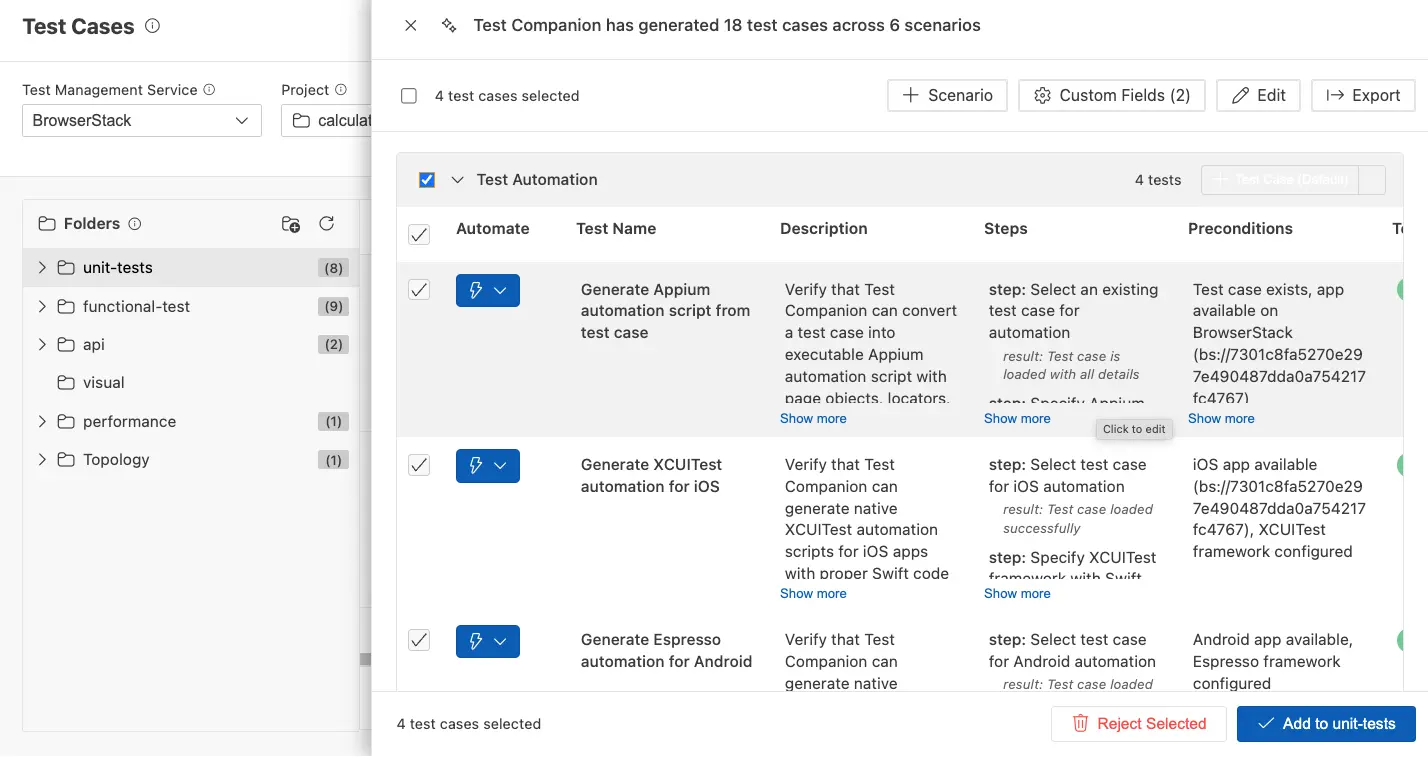
Test cases are organized into scenarios, which are logical categories based on your requirements or exploration findings. For example, generating tests for a checkout feature might produce scenarios like Cart Management, Shipping Address, Payment Processing, and Order Confirmation.
Use the Folders panel on the left to arrange test cases into a folder hierarchy. This structure syncs to your test management system. You can create, rename, and move folders.
Edit test cases
- Inline editing: Click directly on any field in the panel (name, description, steps, preconditions) to modify it.
- Bulk editing: Select multiple test cases using their checkboxes, then click Edit in the toolbar. Update Test Case Status, Automation Status, and Priority across all selected tests at once.
- Manual creation: Click + Scenario in the toolbar to create a new scenario grouping. At the bottom of each scenario, click New Test Case to manually add a test case.
Key actions
The following table outlines the primary operations you can perform on your test cases:
| Action | Description |
|---|---|
| Sync to TM | Push all new or updated test cases to BrowserStack Test Management. Sync to test management |
| Export | Download selected test cases as a CSV for sharing with stakeholders. Export test cases |
| Custom Fields | Add metadata (build version, sprint number, environment) as name/value pairs. Custom fields |
| Delete | Remove selected test cases. Available from the three-dot menu (⋮) in the toolbar. |
Next steps
- Sync to test management: Push your test cases to BrowserStack Test Management.
- Export test cases: Download for offline sharing.
- Custom fields: Add metadata before syncing.
- Automate tests: Convert your test cases into executable automation scripts.
We're sorry to hear that. Please share your feedback so we can do better
Contact our Support team for immediate help while we work on improving our docs.
We're continuously improving our docs. We'd love to know what you liked
We're sorry to hear that. Please share your feedback so we can do better
Contact our Support team for immediate help while we work on improving our docs.
We're continuously improving our docs. We'd love to know what you liked
Thank you for your valuable feedback!