NightwatchJS is a popular Node.js-based framework for end-to-end testing, known for its simplicity, cloud integration, and clean syntax. One of its standout features is headless browser testing, which allows tests to run without rendering the UI, making them faster and more efficient.
Overview
What is Headless Browser Testing in NightwatchJS?
- Headless testing executes browser actions without rendering the UI, saving resources.
- NightwatchJS supports headless execution in both Chrome and Firefox, making it ideal for quick validations in CI/CD pipelines.
Why Use Headless Testing with NightwatchJS?
- Speed: Runs faster than UI-based (headed) tests.
- CI/CD Ready: Lightweight and integrates well into pipelines.
- Cost Efficiency: Consumes fewer resources, supports multiple parallel runs.
- Scalability: Same infrastructure can run many more tests simultaneously.
What Are the Limitations of Headless Testing?
- Debugging Challenges: No UI makes it harder to visually spot issues.
- Not a Replacement: Cannot fully simulate real user behavior.
- No UI Validation: Unsuitable for tests focused on design or visual elements.
How to Run Headless Tests in NightwatchJS?
- Option 1: Modify Configuration File
- Add headless arguments in desiredCapabilities.
- Works for both Chrome (chromeOptions) and Firefox (moz:firefoxOptions).
- Option 2: Use CLI Flag
- Append –headless when running tests.
- Requires zero configuration changes.
This article covers what headless testing is, why it’s useful, its limitations, and how to run NightwatchJS headless tests using config files or CLI flags in Chrome and Firefox.
What is Headless Browser Testing?
Headless browser testing or simply headless testing is an automated way of testing the application without displaying its visual elements. Typically, the applications are tested using a browser by rendering all visual elements and components. Headless testing still tests the components but doesn’t render all the visual display parts. This saves time and resources.
Advantages of Headless Browser Testing
- Speed: Since headless testing doesn’t render the visual aspect of the webpage, the headless tests are much faster than the headed (tests with UI component rendered) tests.
- CI/CD Integration: The headless test is most helpful in CI/CD integration, as it doesn’t consume much memory you can run many tests. On the other hand, headless testing is much faster. So you get a faster report even when you are running the pipeline in a remote environment.
- Cost Effective: The GUI part of any application takes a lot of memory to render in turn increases the resource. Since headless testing doesn’t render visual elements, tests usually consume less memory, So the same infrastructure can be used for running many tests.
- Parallel Testing: Unlike headed testing, the headless testing consumes less memory and other resources the tests don’t need costly infrastructure, the infrastructure can be used for running multiple parallel tests parallely to achieve a faster outcome.
Learn More: What is Parallel Testing?
Disadvantages of Headless Browser Testing
- Difficult to debug: The headless browser testing is faster, it loads the page and performs the actions faster than headed browser testing, this feature makes debugging difficult and one has to rely on only console logs.
- Not a replacement for real user testing: Typically automation testing is a simulation of real users in the presence of GUI but the headless browser testing doesn’t render all the UI components and doesn’t simulate the real user behavior.
- Cannot evaluate the GUI: If the test is written to evaluate the UI elements then the headless browser testing is not the right choice.
Follow-Up Read: Role of Automation Testing in CI/CD
How to Perform Headless Browser Testing with NightwatchJS
Now that you know about the advantages and disadvantages, let’s get into the practicalities of running headless browser testing using NightwatchJS framework on Chrome and Firefox.
Prerequisite: NightwatchJS installation
Note: We are assuming, you have already written a set of automated test cases, you can use the same.
If you are still exploring, you can use the below test cases as an example:
//headless-demo.js

describe('Nightwatch Headless demo', function () {

  it('Navigate to Browserstack home page', async function (browser) {

    await browser

      .navigateTo('https://www.browserstack.com')

      .assert.visible('#logo')

  });


  it('Verify Browserstack create a free account page', async function (browser) {

    await browser

      .waitForElementVisible('#signupModalButton', 20000)

      .click('#signupModalButton')

      .waitForElementPresent('h1[class="heading"]')

      .assert.textContains('h1[class="heading"]', 'Create a FREE Account')

      .end();

  });

});
NightwatchJS Headless Mode Testing in Chrome browser
The NightwatchJS provides multiple options to run in headless mode
- Modifying NightwatchJS configuration file settings
- Using CLI option
Headless Browser testing by modifying NightwatchJS configuration file
Step 1: Modify Configuration
Navigate to nightwatch.conf.js file, located in your project root folder.
Note: the nightwatch.conf.js will be created by default during your project setup.
Under test_settings look for desiredCapabilities,
By default, you will see the one of the below settings
      desiredCapabilities: {

        browserName: 'firefox'

      },
Or
      desiredCapabilities: {

        browserName: chrome

      },
To execute the NightwatchJS tests in headless chrome, change the desiredCapabilities option below
      "desiredCapabilities": {

        "browserName": "chrome",

        "chromeOptions": {

          "args": ["headless"]

        }

      },
Step 2: Execute the tests
Execute the NightwatchJS with the execution command
npx nightwatch <path_to_test_file.js>
Example:
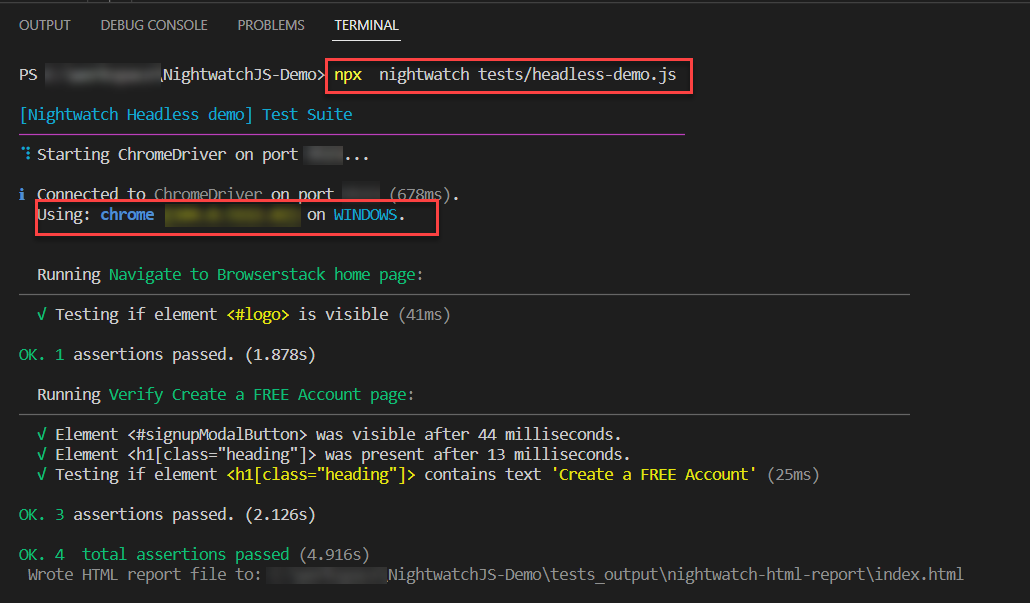
npx nightwatch tests/headless-demo.js
Once the Execution is complete you will see the output as shown in the image
NightwatchJS Chrome Headless testing using CLI
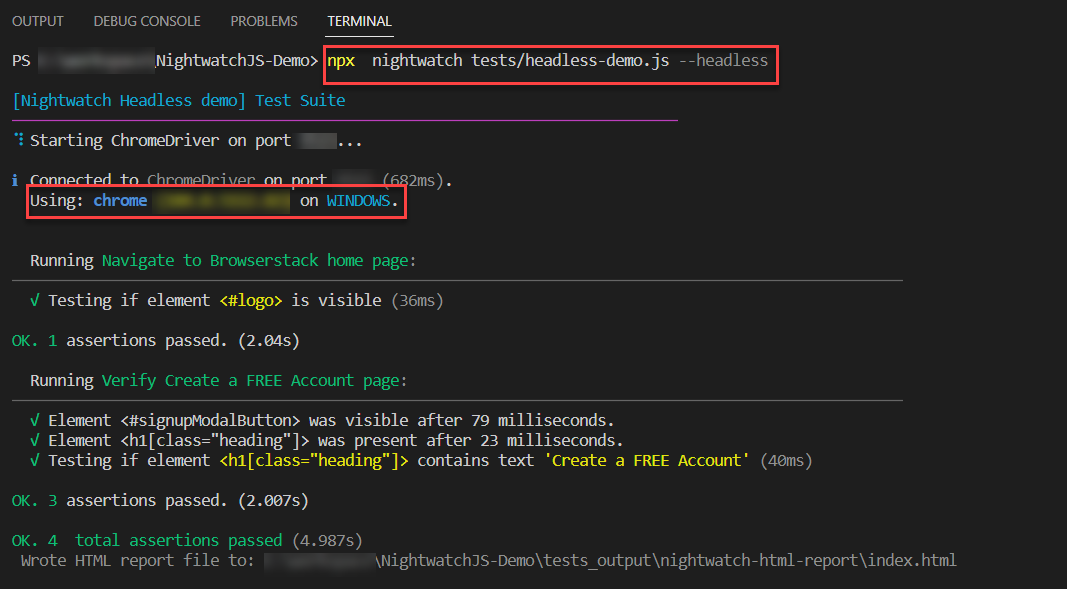
This is the simplest way to execute the NightwatchJS tests in headless mode. This option requires zero configuration to execute headless automation tests. In this method you just need to add one CLI option that is –headless, the rest will be taken care of by NightwatchJS
As mentioned it is zero configuration, so you don’t have to do any changes in the nightwatch.conf.js. The nightwatch.conf.js stays as configured before or default settings like below.
      desiredCapabilities: {

        browserName: 'chrome'

      },
Syntax:
npx nightwatch <path_to_test_file.js> --headless
Example:
npx nightwatch tests/headless-demo.js --headless
NightwatchJS Headless Mode using Firefox browser
Like Chrome headless, the NightwatchJS also supports Firefox headless mode. Firefox headless mode in NightwatchJS can be configured using two option
- Modifying the configuration file options
- Passing CLI parameter
Firefox NightwatchJS headless testing by modifying the configuration file settings
Navigate to nightwatch.conf.js file, located in your project root folder.
Note: the nightwatch.conf.js will be created by default during your project setup.
Under test_settings look for desiredCapabilities,
By default, you will see one of the below value
      desiredCapabilities: {

        browserName: 'firefox'

      },


Or


      desiredCapabilities: {

        browserName: chrome

      },
To execute the NightwatchJS tests in headless firefox, change the desiredCapabilities option below
      "desiredCapabilities": {

        "browserName": "firefox",

        "acceptInsecureCerts": true,

        "moz:firefoxOptions": {

          "args": ["--headless"]

        },

},
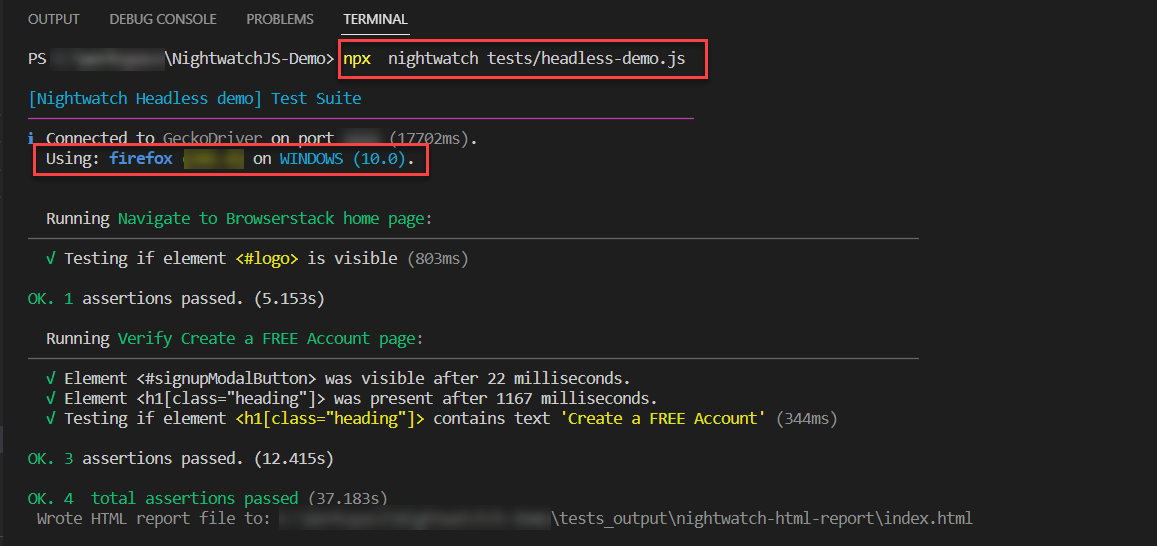
Step 2: Execute the tests
Execute the NightwatchJS with the execution command.
npx nightwatch <path_to_test_file.js>
Example:
npx nightwatch tests/headless-demo.js
Execute NightwatchJS Firefox headless tests using CLI
This is the simplest way to execute the NightwatchJS tests.
In this method you just need to add one CLI option that is –headless, the rest will be taken care of by NightwatchJS.
Since the headless option is specified in the command line options, there is no change required in nightwatch.conf.js file. The desiredCapabilities remain as is unless you have customized that option the desiredCapabilities look is below.
      desiredCapabilities: {

        browserName: 'firefox'

      },
Syntax:
npx nightwatch <path_to_test_file.js> --headless
Example:
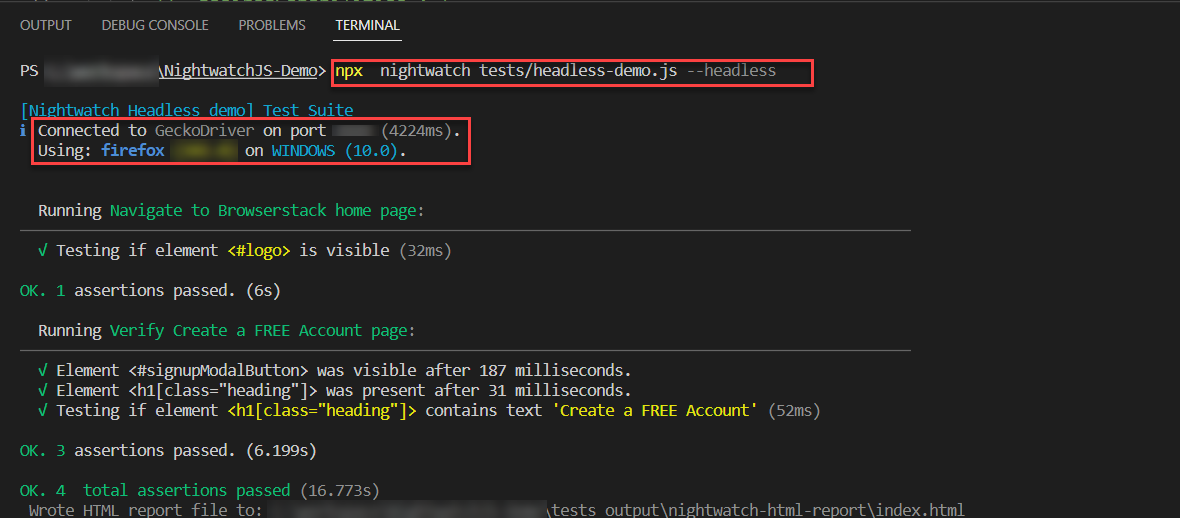
npx nightwatch tests/headless-demo.js --headless
Once you execute the test using the CLI option, the generated output looks as below.
Closing Notes
One of the many reasons why NightwatchJS is the most popular Javascript automation is that headless automation executes the tests faster by consuming less resources. Apart from the basics:
- The NightwatchJS test automation framework is easy to set up.
- NightwatchJS tests can be executed parallely using BrowserStack.
- It requires minimal configuration and provides clear syntax, CI/CD integration, Page Object model support
- Can be easily integrated with BrowserStack real device cloud for web and mobile application testing


