Visual regression testing is essential to catch unexpected changes in a website’s appearance after updates. Minor UI issues like layout shifts or color changes can harm user experience and brand trust. NightwatchJS makes it simple to automate these checks by capturing and comparing screenshots in your test workflow.
Overview
NightwatchJS is a powerful end-to-end testing framework for web applications. It simplifies writing automated tests and integrates well with visual comparison tools, making it easier to catch UI issues through visual regression testing within your existing test suite.
Best Practices for Visual Regression Testing with NightwatchJS
- Organize screenshots and test cases clearly to avoid confusion
- Integrate visual tests into your continuous integration pipeline for early detection
- Regularly update baseline images only after verifying intentional UI changes
- Minimize flaky tests by stabilizing test environments and screen sizes
- Use clear naming conventions for tests and screenshot files to improve maintainability.
This article covers two methods to perform visual regression testing in NightwatchJS: using the built-in Nightwatch tools and integrating with Percy.
Visual Regression Testing in NightwatchJS
Visual regression testing focuses on identifying unintended changes in a web application’s user interface by comparing screenshots taken at different stages of development.
Unlike functional testing, which verifies if features work as expected, visual regression testing ensures that the look and feel of the application remains consistent across code updates.
NightwatchJS, a widely used end-to-end testing framework, supports visual regression testing by integrating with tools that capture and compare screenshots. This enables teams to efficiently automate visual differences detection as part of their testing workflow.
By using NightwatchJS, developers and testers can write maintainable test scripts that verify functionality and monitor UI stability, reducing the risk of visual bugs slipping into production.
Advantages and Disadvantages of Visual Regression Testing in NightwatchJS
Below are some key advantages and disadvantages to consider when performing visual regression testing using NightwatchJS.
Advantages
- Seamless Integration: Combines UI verification with functional tests in one framework.
- Automation Ready: Easily integrates into automated test suites and CI/CD pipelines.
- Early Visual Bug Detection: Quickly identifies unintended UI changes before release.
- Supports Component-Level Testing: Allows testing specific elements or full pages.
- Open Source Ecosystem: Works well with popular visual comparison tools and plugins.
- Improves UI Consistency: Ensures design uniformity across updates.
Disadvantages
- Initial Setup Complexity: Configuring visual testing in NightwatchJS requires time and effort.
- False Positives: Minor rendering differences can cause unnecessary test failures.
- Maintenance Overhead: Baseline images must be updated regularly after intentional UI changes.
- Increased Test Duration: Screenshot capturing and comparison add extra time to test runs.
- Environmental Variability: Differences in browsers or screen resolutions may affect test reliability.
For teams looking to simplify and enhance visual regression testing in NightwatchJS, BrowserStack Percy offers a seamless integration that automates screenshot comparisons with powerful visual review workflows.
Percy helps reduce false positives, effortlessly manages baseline updates, and provides detailed visual diffs across multiple browsers and devices. Integrating Percy into NightwatchJS tests can accelerate UI testing while improving accuracy and collaboration across your team.
Performing Visual Regression Testing using nightwatch-visual-testing package
Pre-Requisite: Set up Nightwatch JS
Step 1: Install the nightwatch-visual-testing package
The NightwatchJS doesn’t support Visual Testing out of the box, so you need to install the third-party package
Use the below command to install the package.
npm install nightwatch-visual-testing
Step 2: Configure NightwatchJS for Visual Testing
Open the nightwatch.conf.js file in your project, and add the configuration below.
- Add the custom_commands_path
Look for the variable custom_commands_path in nightwatch.conf.js add an additional value to that.
custom_commands_path: ['./node_modules/nightwatch-visual-testing/commands'],
- Add the custom_assertions_path
Look for the variable custom_assertions_path in nightwatch.conf.js add an additional value to that.
custom_assertions_path: ['./node_modules/nightwatch-visual-testing/assertions'],
- Add the Screenshot configurations
Search for the default: { inside the test_settings: { block and add the screenshot folder locations
 globals: {
visual_regression_settings: {
outputDir: './tests_output',
threshold: 0.5
},
},
The threshold is the tolerance of pixels when comparing the two screenshots; the higher the value lower the sensitivity.
Step 3: Create a Nightwatch Visual Test
Create a fresh javascript file inside your desired folder ( ex: tests/demoVRT.js) and write the simple code to test.
Here is an example of testing the BrowserStack home page at https://www.browserstack.com/
Example Code Snippet:
//demoVRT.js
describe('Nightwatch Visual Test Demo', function () {
it('Nightwatch Visual Test', async function (browser) {
await browser
.navigateTo('https://www.browserstack.com/')
.assert.compareScreenshot('First test', 'Screenshot captured!')
.end();
});
});
Step 4: Execute the Test
Execute Nightwatch Visual Validation test using the below command\
Syntax:
npx nightwatch <path_to_test_file>
Example:
npx nightwatch tests/demoVRT.js
Note: The baseline screenshot is captured, when you execute the test the first time, so to get an actual comparison test needs to be executed at least 2 times.
Step 5: View the result
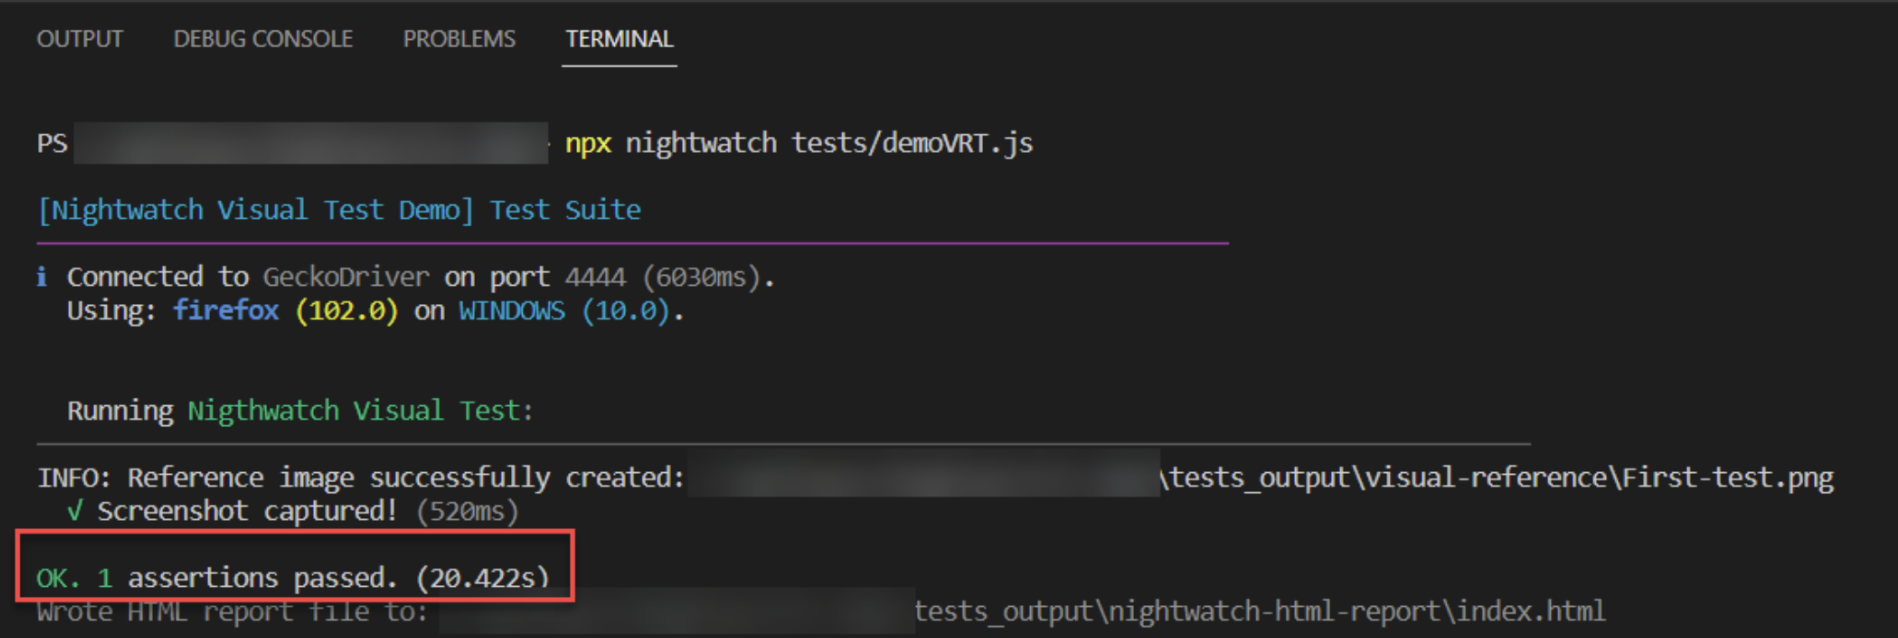
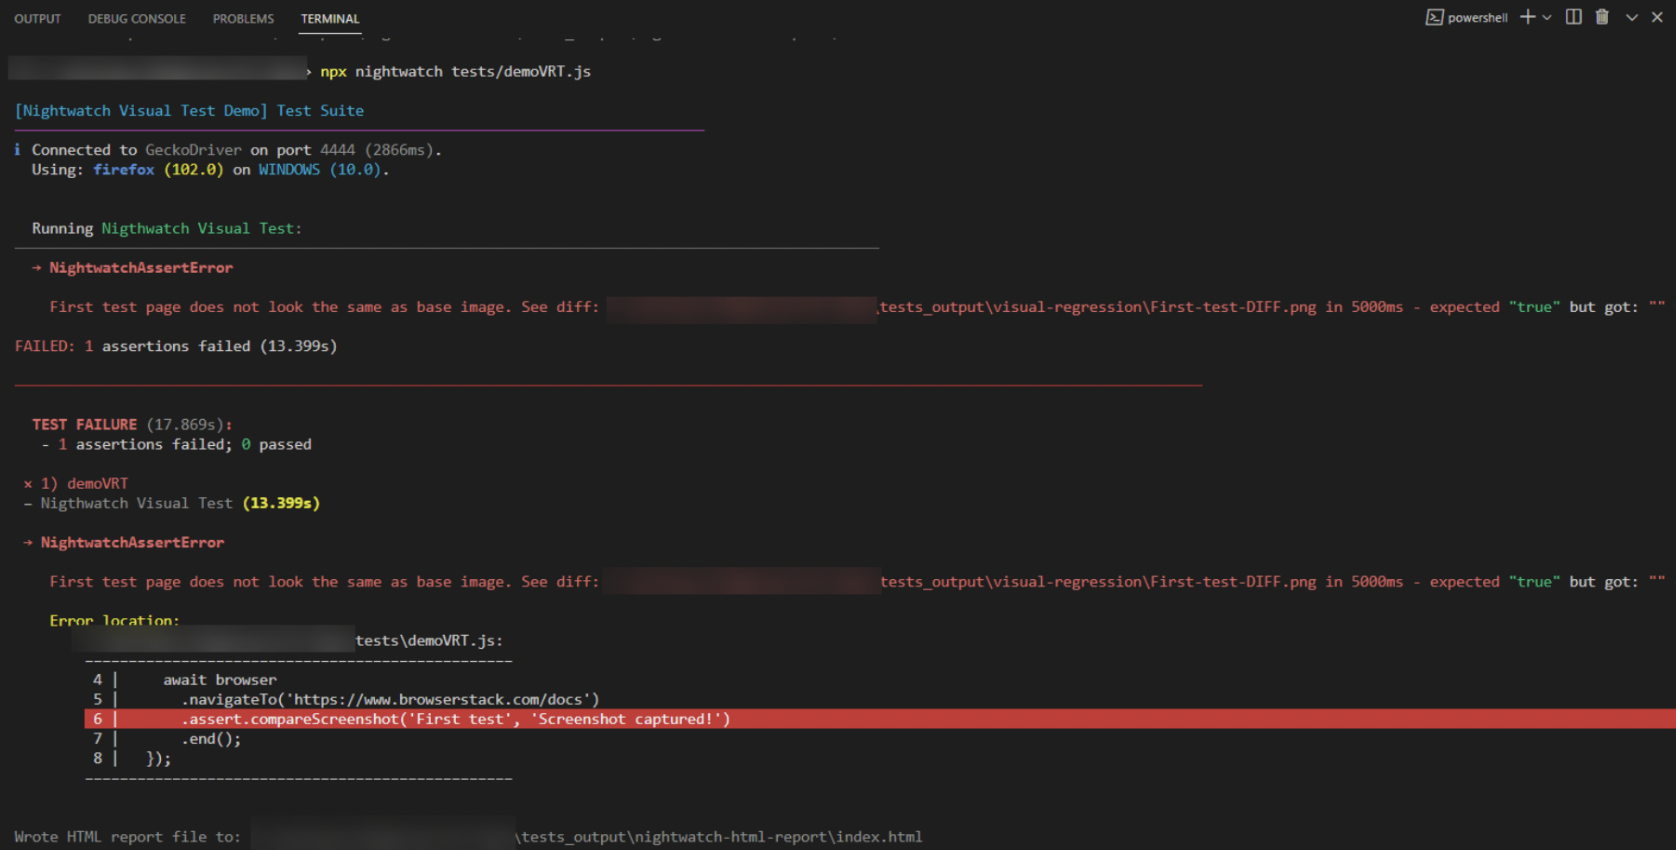
Once you execute the script the output will be shown in the command line terminal.
If there is no difference in the screenshots, then the test will be marked as Pass.
If there is any difference in the image, then the test fails
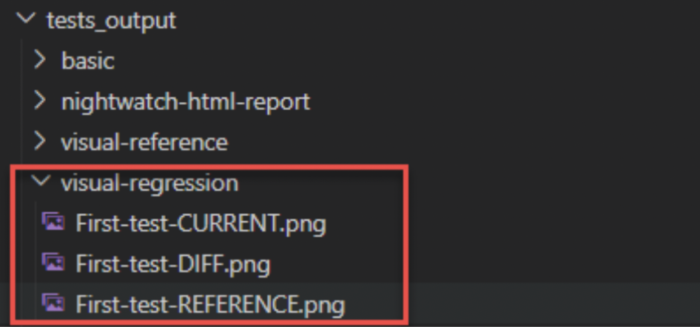
The folder tests_output/visual-regression contains multiple images, the actual image, the base image, and the difference between the actual and base image.
Visual Testing for Single HTML Element
The plugin also supports Visual Testing for a single HTML element with the command compareElementScreenshot().
Syntax:
compareElementScreenshot('<selector>', '<name', 'message')Example code Snippet:
//demoVRT.js
describe('Nightwatch Visual Test Demo', function () {
it('Nightwatch Visual Test', async function (browser) {
await browser
.navigateTo('https://www.browserstack.com/docs')
.assert.compareElementScreenshot('#product-menu-toggle','First test', 'Screenshot captured!')
.end();
});
});
Performing Nightwatch Visual Regression Testing with Percy
Percy is a popular visual testing tool that supports the visual testing of multiple browsers. It provides a dedicated build dashboard for each build, which helps the users view the test results online, and also provides functions such as Review, Accept and Reject the build. Percy supports both Manual and Automated visual testing.
Advantages of Percy
- Percy’s visual testing reports can be viewed online.
- One can perform a review online and take action such as accept, reject or request changes.
- Percy has an inbuilt comparison mechanism for all browsers so rendered screenshots can be viewed for multiple browsers
- Percy supports both component and Page based visual testing.
- Percy allows you to adjust the diff sensitivity (same as screenshot threshold)
Read More: Introducing Percy Visual Engine
A step-by-step guide to Performing Visual Regression testing Nightwatch and Percy
Pre-Requisite: Set up Nightwatch JS
Step 1: Instal Required Percy packages
The Percy packages need to be installed to use the Percy commands in your project
Command to install Percy packages.
npm install --save-dev @percy/cli @percy/nightwatch
The above command installs the two packages @percy/cli and @percy/nightwatch. The @percy/nightwatch provides the custom commands for visual comparison and @percy/cli provides functionality to execute the test and upload to Percy infrastructure.
Step 2: Configure Percy for Nightwatch
- Import the Percy package
Open the nightwatch.conf.js file and add the required statement
const percy = require('@percy/nightwatch');Note: The above require statement should be before module.exports
- Add the custom command
In your nightwatch.conf.js file search for custom_commands_path: and add the Percy command like below.
custom_commands_path: [percy.path],
Step 3: Create a simple Percy Nightwatch script
//demoVRT.js
describe('Nightwatch Visual Test Demo', function () {
it('Nightwatch Visual Test', async function (browser) {
await browser
.navigateTo('https://www.browserstack.com/docs')
.percySnapshot('Demo snapshot')
.end();
});
});
In the above code, we are navigating to the BrowserStack Documentation page and taking the screenshot for visual comparison.
The percySnapshot(‘Demo snapshot’) command saves the screenshot with the name ‘Demo snapshot’
Step 4: Copy the PERCY_TOKEN
- Login to Percy (If you don’t have an account, create one by Signing Up)
- Create a New Project
- Navigate to Project Settings
- Copy the PERCY_TOKEN
Step 5: Set the PERCY_TOKEN environment variable
Based on the command-line tool you are using, you can set the environment variable as below.
# Unix
$ export PERCY_TOKEN="<your-project-token>"

# Windows
$ set PERCY_TOKEN="<your-project-token>"

# Powershell
$ $Env:PERCY_TOKEN="<your-project-token>"
Step 5: Execute Percy Test
Use the below command to execute your Percy NightwatchJS script.
npx percy exec -- nightwatch <testscript_path>
Example:
npx percy exec -- nightwatch tests/demoVRT.js
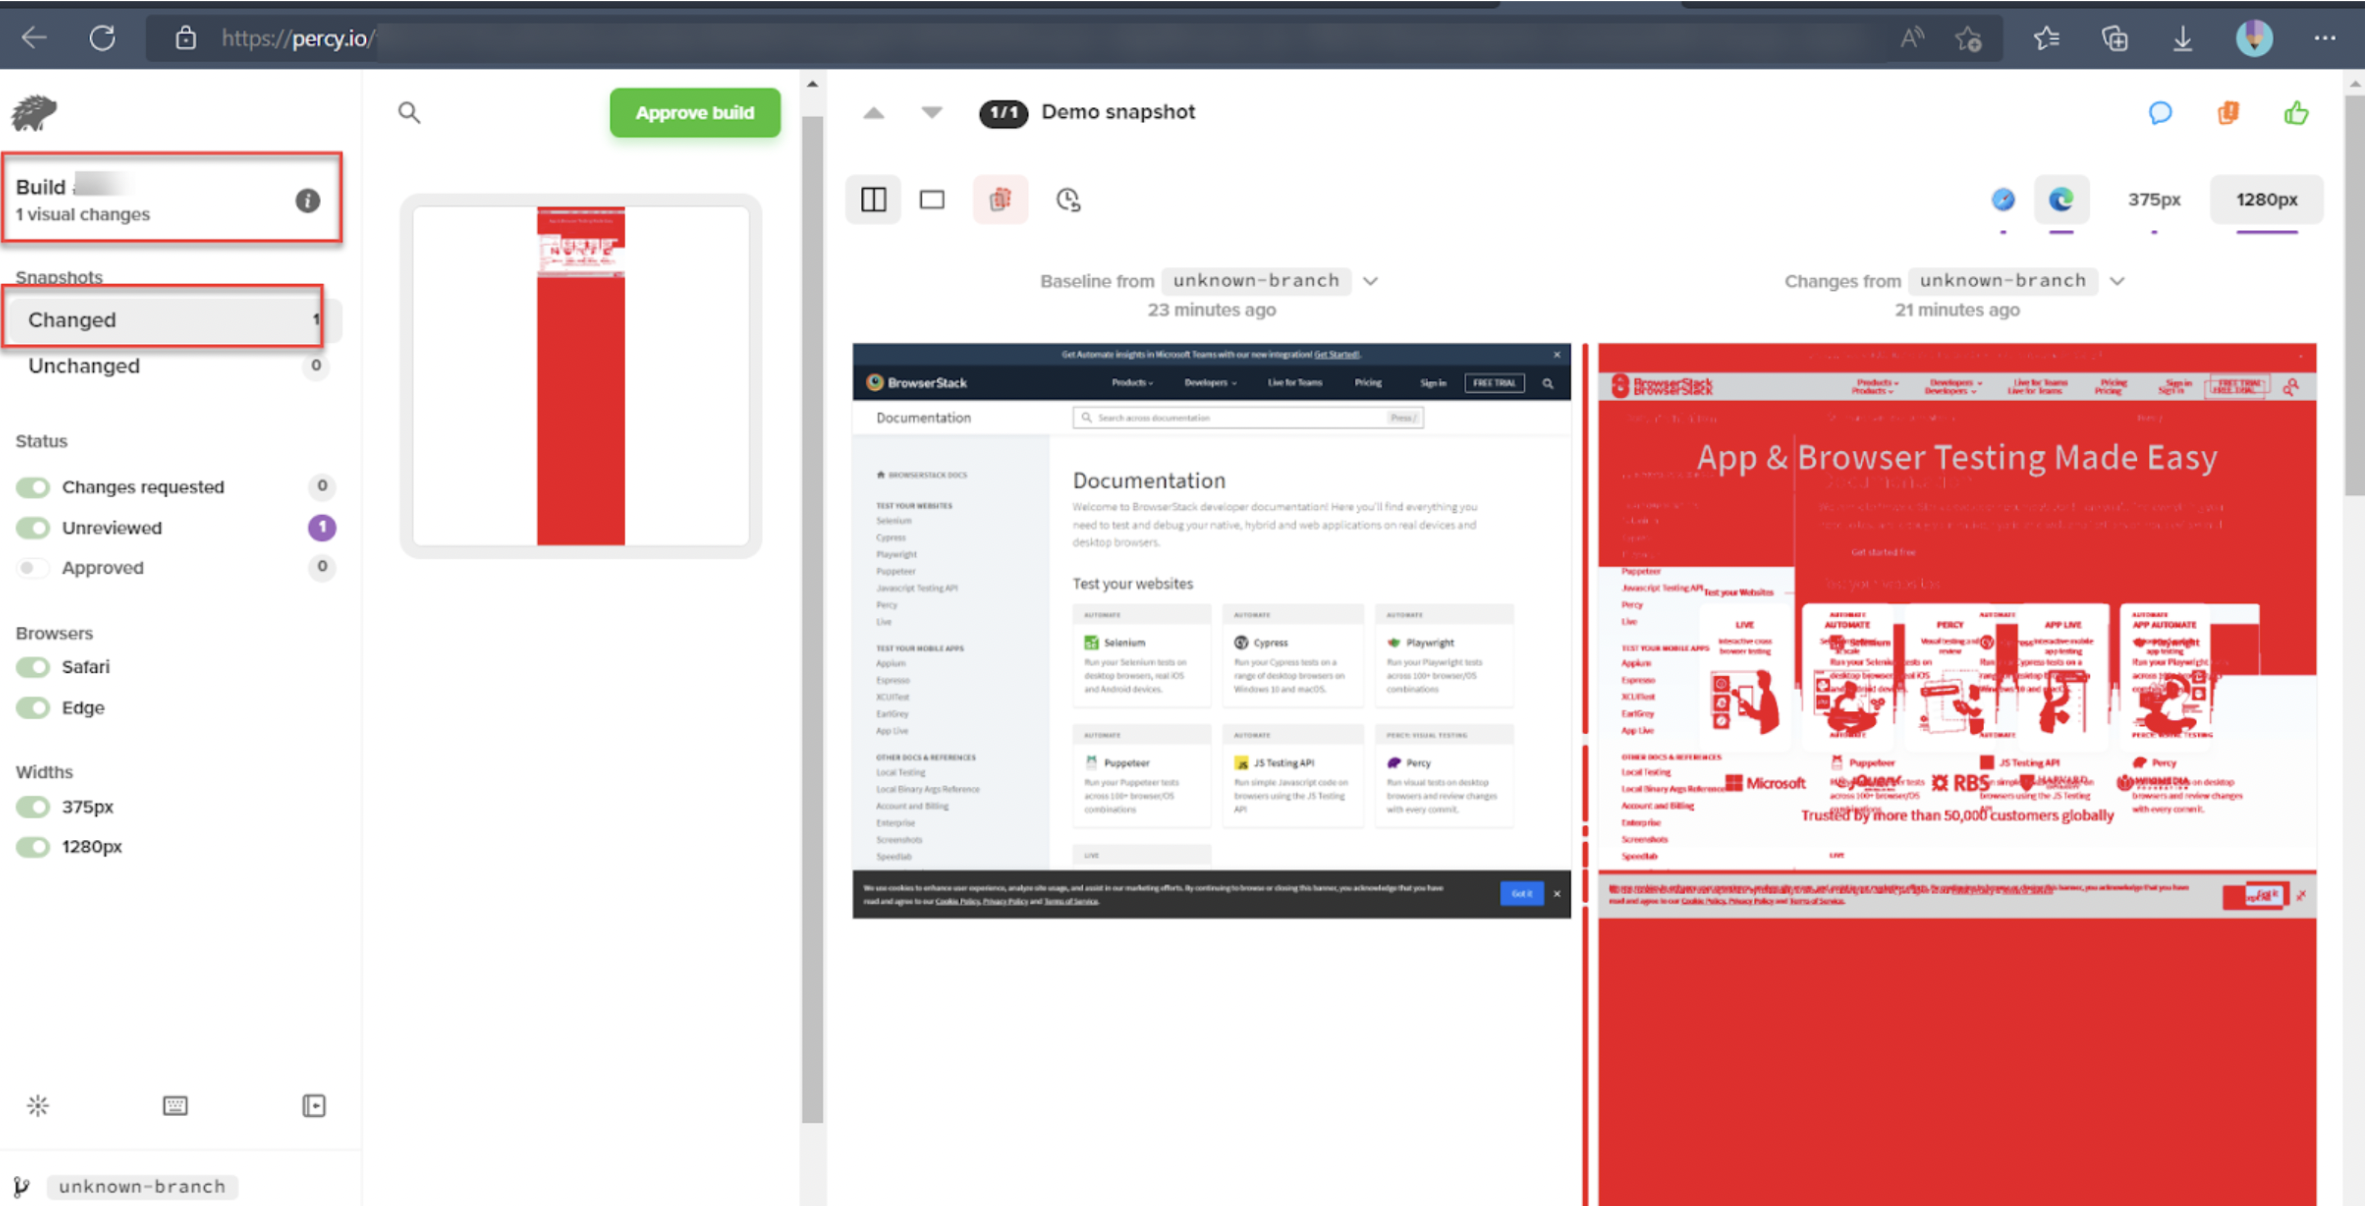
Step 6: View The Result
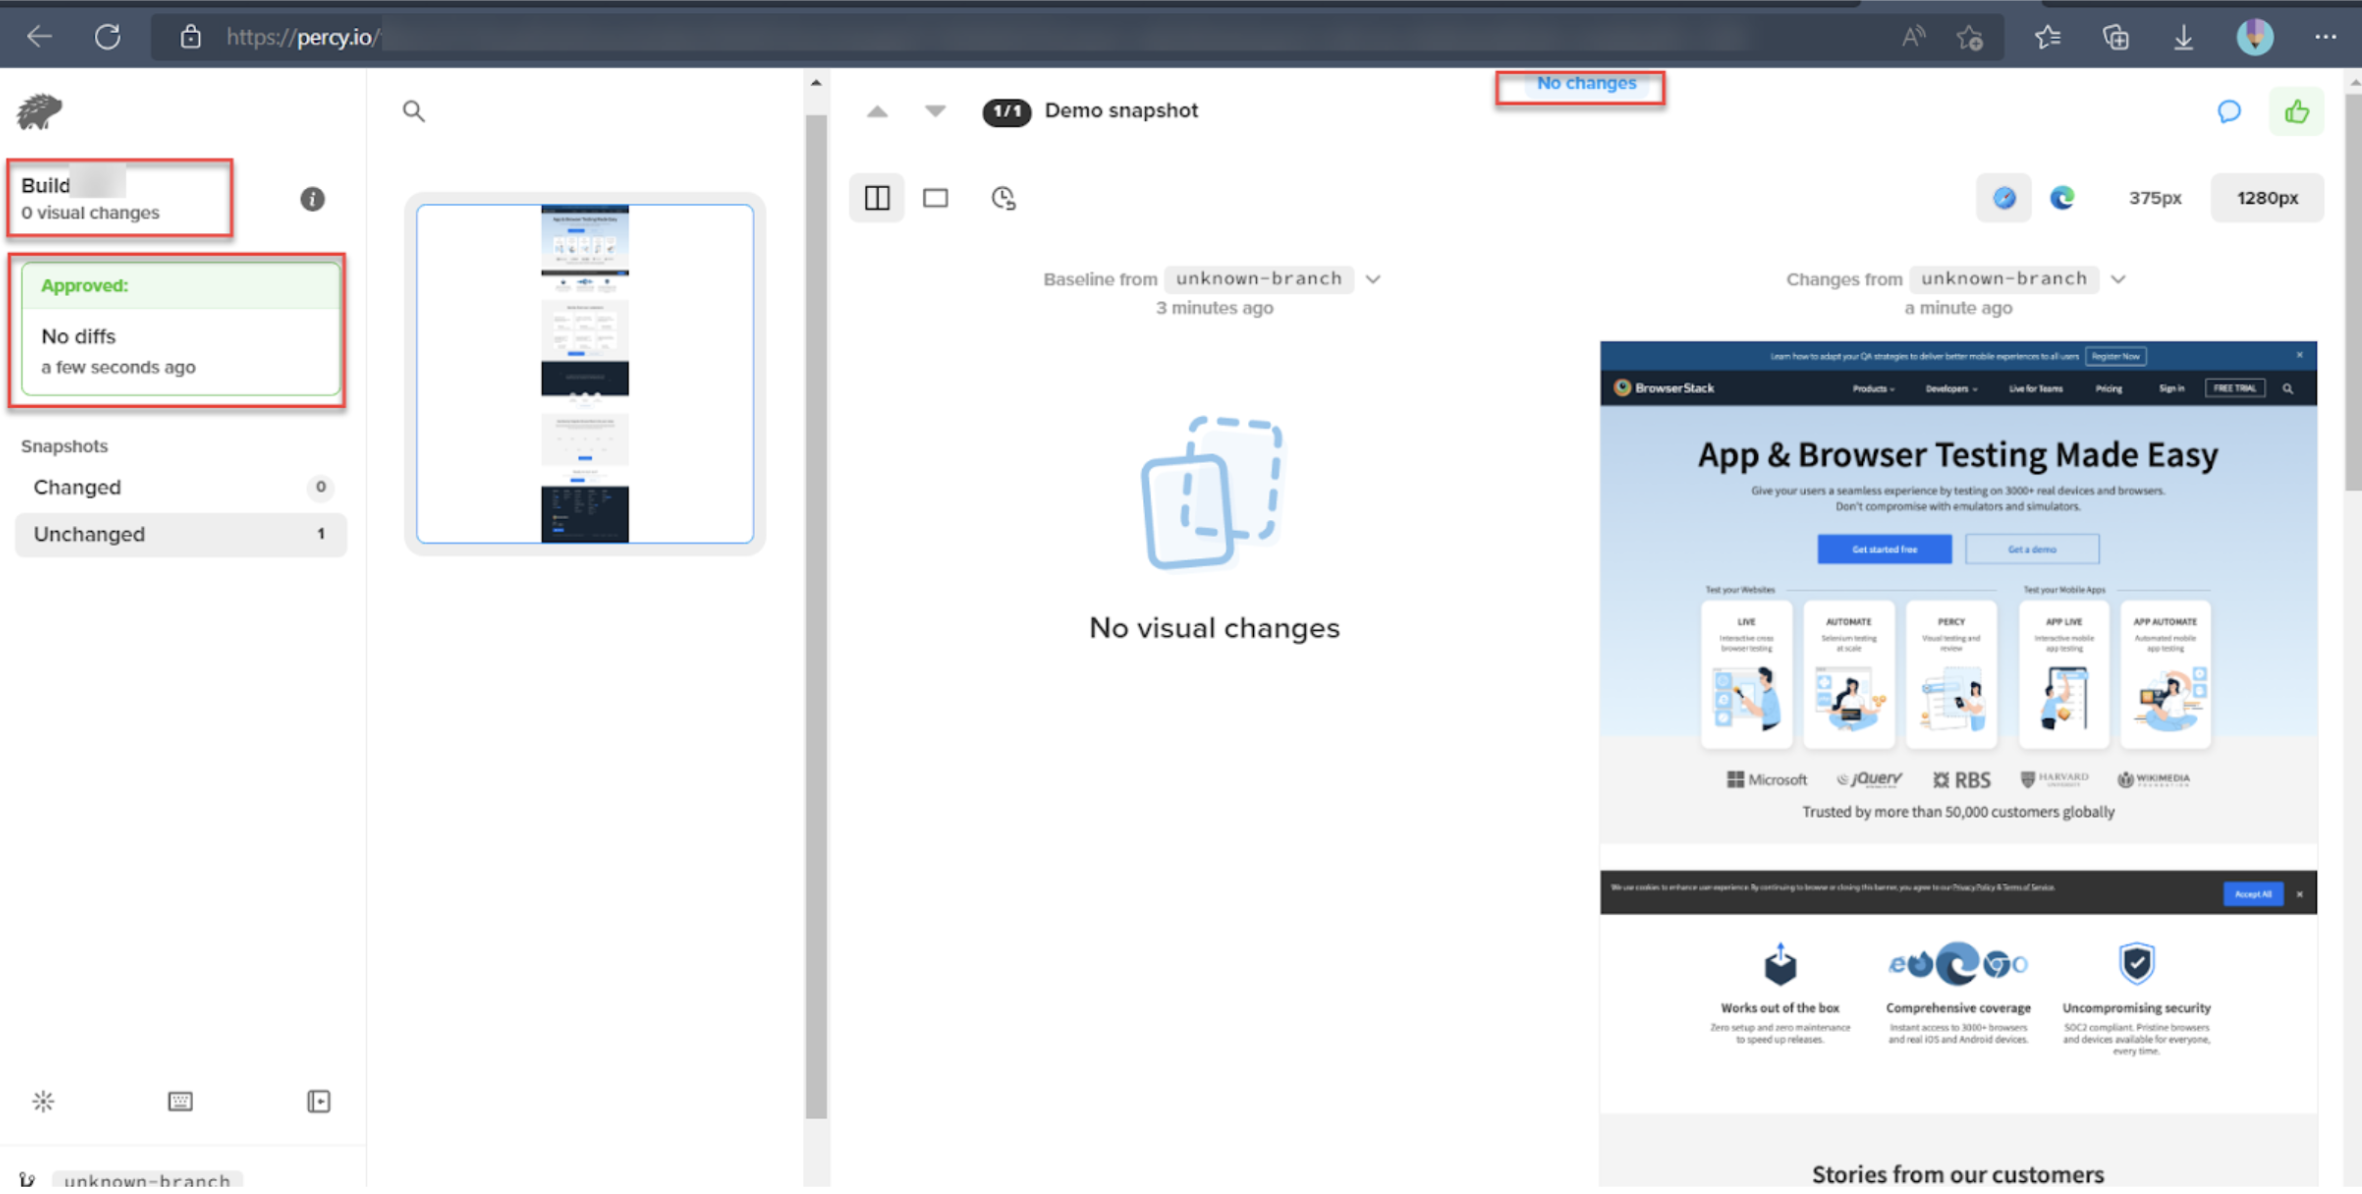
Once the execution is completed, the command line tool provides the output with Percy build URL. You can easily navigate to the build using the build URL to see the visual validation result.
If there are no changes, then Percy shows the message “No Changes”
If there is a difference between the baseline screenshot and the actual screenshot when Percy shows the side-by-side difference
HTML Element Visual Testing using Percy
Percy can also help you to capture and compare individual HTML elements. Instead of capturing the entire page you can capture the snapshot of the required element and perform visual testing.
The scope option in percySnapshot() command can help to capture the HTML element
Example Code:
//demoVRT.js
describe('Nightwatch Visual Test Demo', function () {
it('Nightwatch Visual Test', async function (browser) {
await browser
.navigateTo('https://www.browserstack.com')
.percySnapshot('Single Element Snapshot', { scope: '#product-menu-toggle' })
.end();
});
});
In the above code, the selector is specified in the scope option instead of capturing the entire page.
.percySnapshot(‘name’, { scope: ‘#product-menu-toggle’ }) : The HTML element which matches the selector with id product-menu-toggle will be captured and used for Visual Validation.
Percy NightwatchJS Best Practices
Using Percy with NightwatchJS enhances visual regression testing by automating screenshot comparisons and streamlining visual reviews. To maximize the effectiveness of this integration, consider the following best practices:
- Use Visual Testing Commands Consistently: Run visual snapshot commands on every application’s critical page or UI component to ensure comprehensive visual coverage.
- Schedule Frequent Builds and Reviews: Automate and run builds regularly to catch unintended visual changes early. Frequent reviews reduce the risk of unnoticed regressions reaching production.
- Adjust Diff Sensitivity Settings: Use Percy’s diff sensitivity modes, strict, sensitive, or relaxed, based on the UI element being tested. This helps fine-tune comparisons and minimize noise from minor visual changes.
- Enable Responsive Visual Testing: Validate the UI across multiple screen sizes to detect layout or design issues. Percy supports responsive testing directly from the dashboard by allowing users to select different viewport resolutions.
- Test Across Multiple Browsers: Ensure cross-browser consistency by enabling multiple browser options in Percy’s project settings. This verifies that the application renders correctly across the required environments.
Conclusion
Visual regression testing with NightwatchJS ensures that web applications maintain a consistent and reliable user interface through automated screenshot comparisons. When integrated with Percy, this process becomes even more powerful, enabling responsive testing, multi-browser coverage, and streamlined visual reviews.
By following best practices like targeted snapshots, sensitivity tuning, and frequent build analysis, teams can catch UI bugs early, improve collaboration, and deliver a polished user experience with every release.
