Developing and deploying iOS apps just got easier with Xcode Cloud – a new service that automates the process of building, testing, and distributing your app. As a new addition to the Xcode suite of tools, Xcode Cloud offers a streamlined workflow for developers, eliminating the need for manual build processes and allowing for faster iterations.
This article explores the features and benefits of Xcode Cloud and how it can help streamline your app development process.
What is Xcode Cloud?
Xcode Cloud is a cloud-based service provided by Apple that integrates with and extends the Xcode development environment for building, testing, and deploying iOS, iPadOS, macOS, WatchOS, & tvOS apps. Xcode Cloud is a set of cloud-based tools built directly into Xcode and the Apple Developer ecosystem, which automates and simplifies parts of the development workflow like building, testing, and distributing apps.
- Xcode Cloud streamlines the app development process by automating building and testing to distributing and releasing.
- With continuous integration and delivery, developers can confidently make code changes, knowing that Xcode Cloud will automatically build, test, and deploy their updates to a test environment.

Xcode is a free Integrated Development Environment (IDE) provided by Apple for developing software for iOS, iPadOS, macOS, watchOS, and tvOS. It is the primary tool Apple developers use to create platform apps.
Apple’s Illustration for Xcode Cloud
Features of XCode Cloud
Xcode provides a complete set of tools for developing and debugging apps. Some of its key features include:
- Code editor: Xcode provides a powerful code editor with syntax highlighting, useful controls, and code folding.
- Interface Builder: A graphical tool for designing user interfaces for apps.
- Debugger: Xcode includes a debugger that allows developers to find and fix issues in their code.
- Simulator: A simulator allows developers to test their apps on virtual devices without needing physical devices.
- Instruments: Xcode provides performance analysis and debugging tools that help developers optimize their app’s performance.
- Source Control: Xcode integrates with popular source control systems like Git, allowing developers to manage and collaborate on code changes.

Difference between Xcode and Xcode Cloud
Xcode and Xcode Cloud are related but distinct products.
While Xcode is an Integrated Development Environment (IDE). It is used for local development and debugging. On the other hand, Xcode Cloud is a cloud-based service that integrates with Xcode to automate the build, test, and distribution process for app development teams.
Here are some of the key differences between Xcode and Xcode Cloud:
- Local vs. Cloud-based: Xcode is a desktop application that runs locally on a developer’s Mac, while Xcode Cloud is a cloud-based service that runs on Apple’s servers.
- App Development vs. App Delivery: Xcode is primarily used for developing apps, while Xcode Cloud is used for automating the app delivery process, including building, testing, and distributing apps.
- Collaboration: While Xcode provides some collaboration features, Xcode Cloud is designed from the ground up to facilitate collaboration between team members working on the same project. Xcode Cloud provides features like code review, commenting, shared test results, and integrated notifications to help team members work together more efficiently.
- New Vs Old: Xcode is an already established, much loved, and highly evolved product, whereas Xcode Cloud is a new entry into the Apple Developer Ecosystem.
- Pricing: Xcode is free to download and use, while Xcode Cloud is a subscription-based service that requires a paid Apple Developer Program membership.
What is Xcode used for?
Here are the use cases of XCode Cloud:
1. Continuous Integration: Xcode Cloud automates the integration process by building every committed code change and notifying your team if any issues arise. This feature can save valuable time by catching bugs early in development.
2. Automated Testing: Xcode Cloud allows you to run automated tests in parallel, ensuring your app runs smoothly on various device configurations. This feature can help you catch issues quickly and ensure your app is ready for release.
3. Building and Distributing Apps: Xcode Cloud streamlines the app building and distribution process, making delivering high-quality apps to testers and users easier. This feature can save you time and effort by automating the build process and simplifying the distribution process.
4. Analyzing Performance and Diagnostics: It provides detailed performance metrics and diagnostic information, helping you identify and fix issues quickly. This feature can help you improve your app’s performance and enhance the UX.
5. Collaborating with Teams: Xcode Cloud makes collaborating with other team members easy by providing a shared development, testing, and distribution environment.
6. Beta Testing: Xcode Cloud Beta provides a seamless way to distribute pre-release versions of apps to internal and external testers. This allows developers to gather feedback from real users before releasing their apps to the public, improving the app quality.
7. Scalability: It provides a scalable and flexible infrastructure that allows developers to build and test their apps across multiple devices and platforms simultaneously.
8. Security: Xcode Cloud ensures the security of the developer’s code and app data by providing a secure build and distribution infrastructure and ensuring that the developer’s data is always protected.
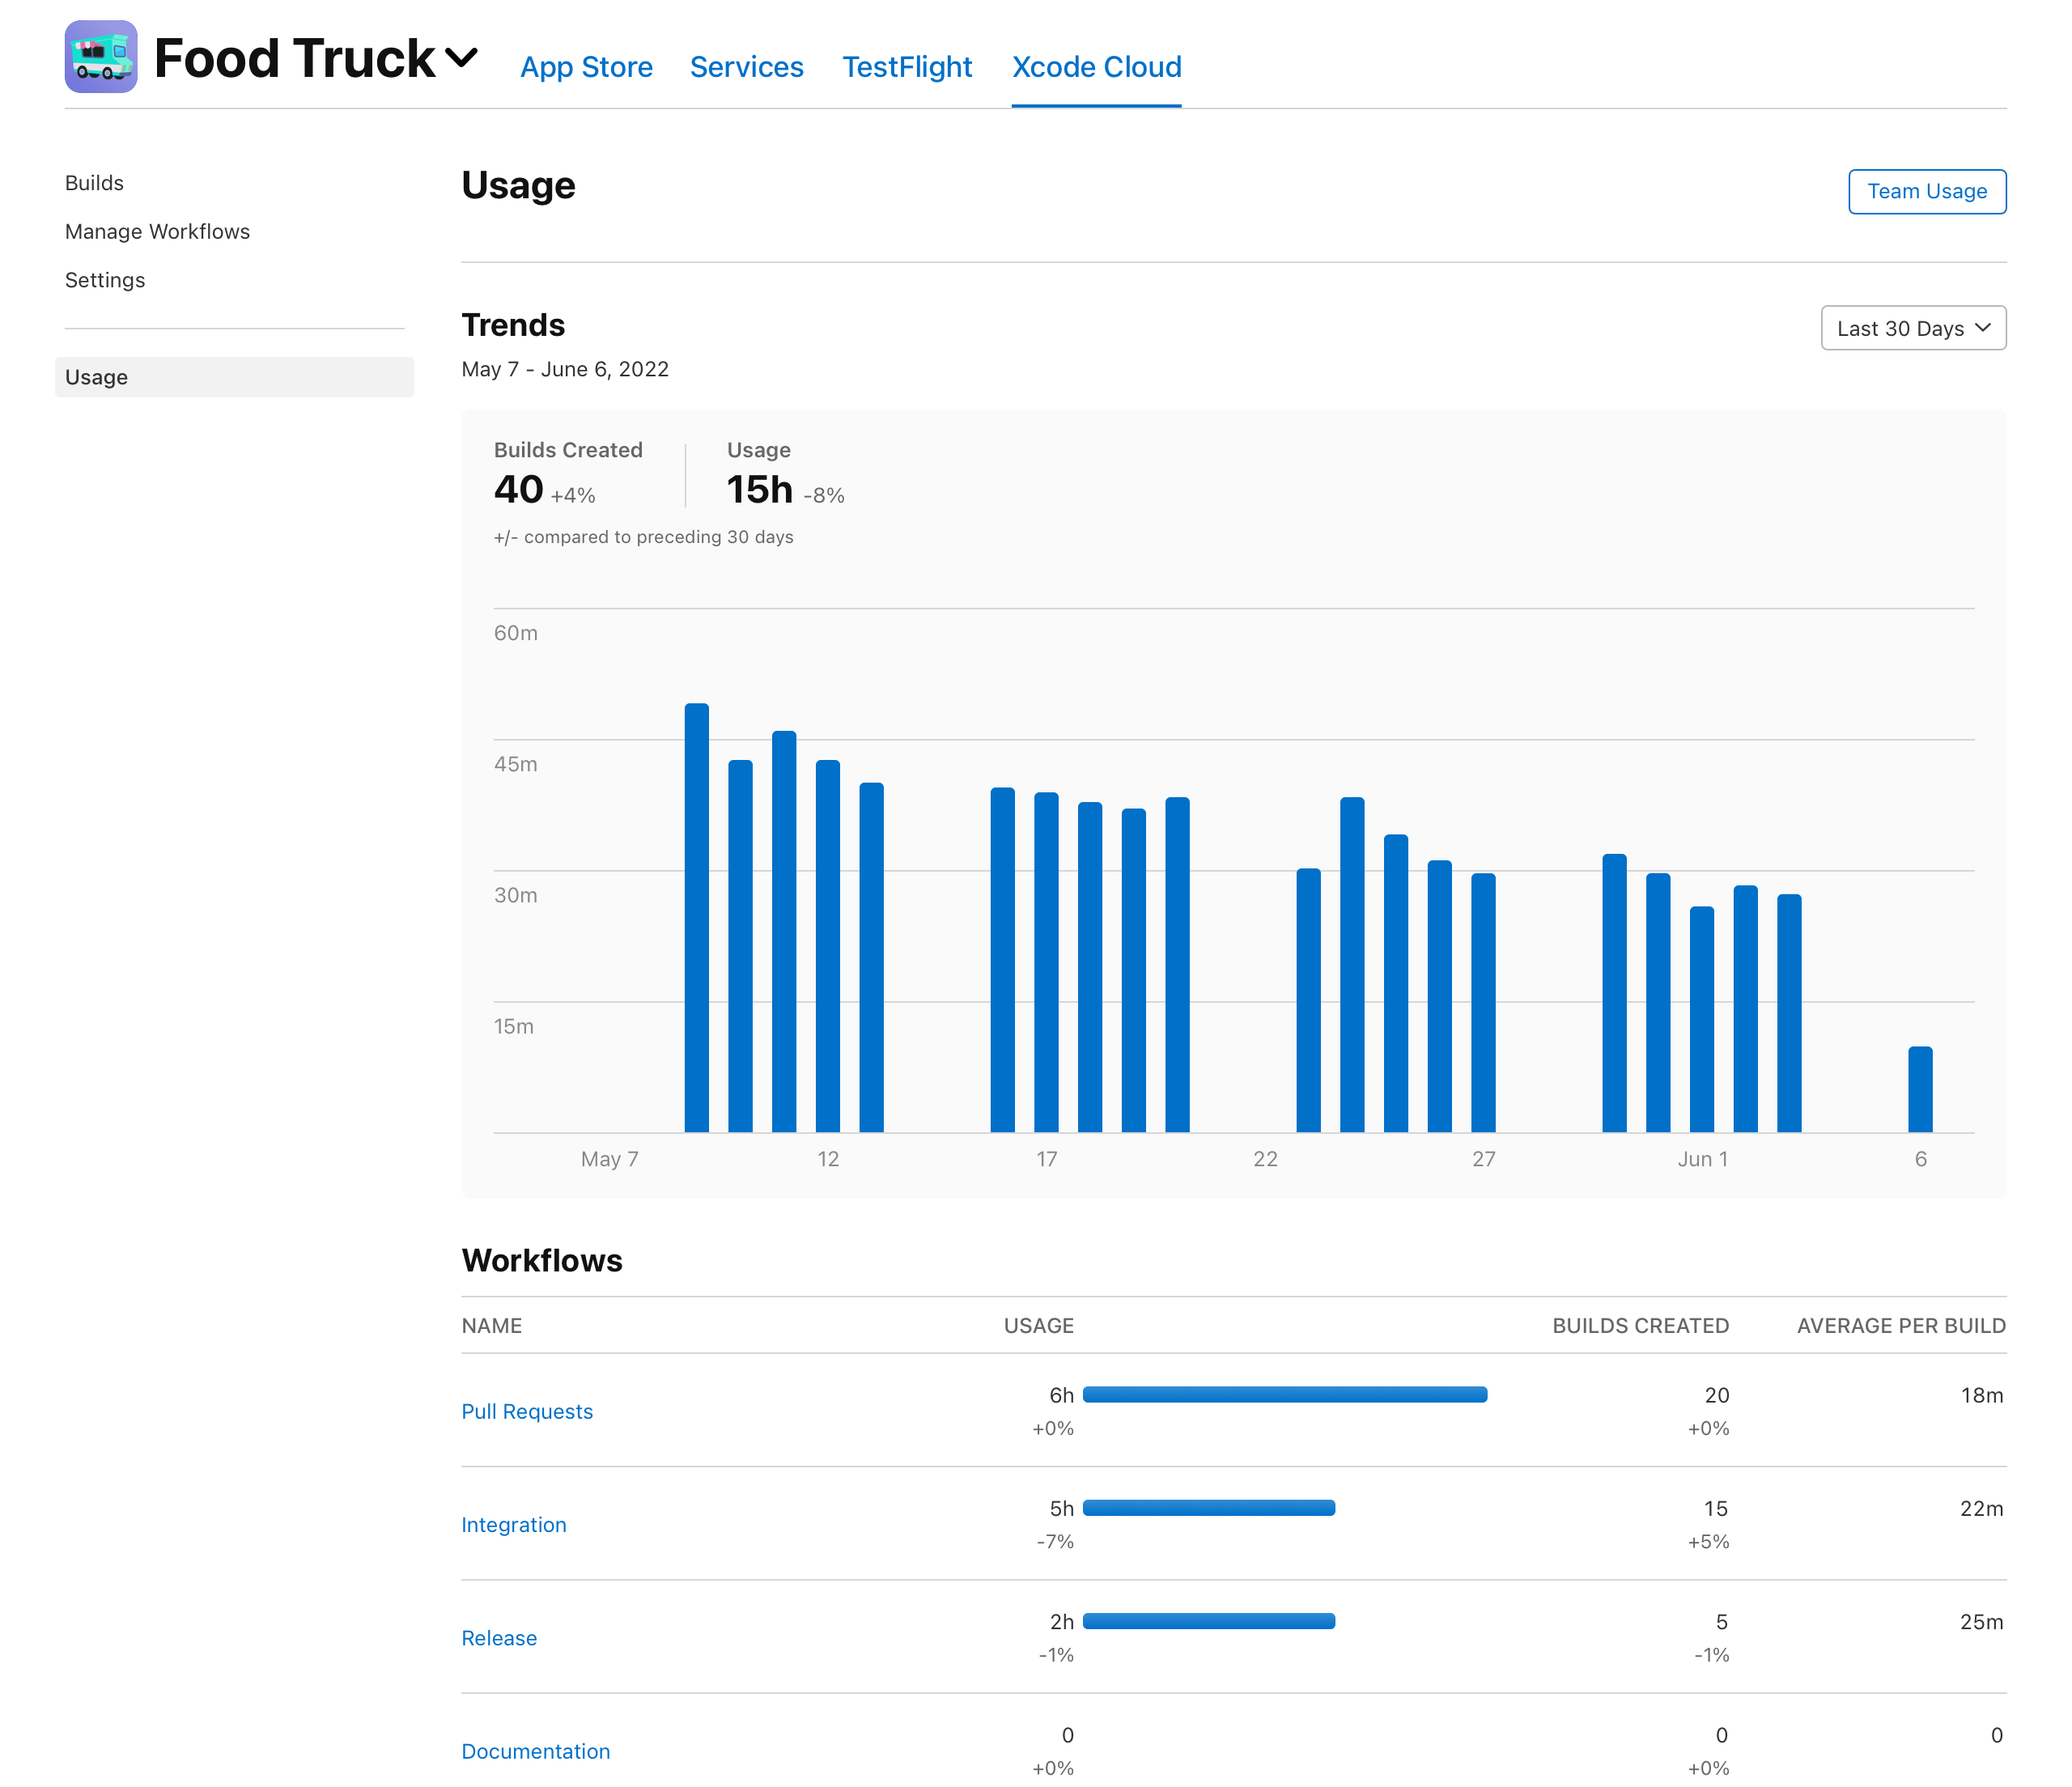
Monitor usage on App Store Connect
Setting Up Xcode Cloud
If you’re wondering, “Does Xcode Cloud have any system requirements?” or “What are the prerequisites for Xcode Cloud?” we’ve covered it in the following sections to clear your doubts.
Prerequisites:
Developer account:
- Be enrolled in the Apple Developer Program.
- Add their Apple ID under Accounts in Xcode settings.
- Have an app record for their app in App Store Connect or have the required role or permission to create one.
Project and workspace:
- Use a consistent Xcode project or workspace.
- Xcode 13.4.1 or later.
- Use Xcode’s new build system.
- Make dependencies and additional third-party tools available to Xcode Cloud.
- Use automatic code signing.
Source control:
- Use Git for source control.
- Ensure that their Git server is accessible to Xcode Cloud.
- Have permission or role in connecting to the chosen source code management provider.
Note that Xcode Cloud requires a consistent Xcode project or workspace that is always present, and using third-party tools that dynamically generate or edit it may cause configuration and build failures.
Enroll in Xcode Cloud as an Apple Developer
- Sign in with your Apple ID on the Apple Developer website (developer.apple.com). You must create an Apple Developer account if you don’t have one.
- Once you have an Apple Developer account, enroll in the Xcode Cloud beta program by visiting the Xcode Cloud page and clicking the “Enroll” button.
- Follow the prompts to accept the terms and conditions and complete the enrollment process.
Connect Xcode to Xcode Cloud
- Open Xcode on your Mac computer, go to “Xcode” in the menu bar, then select “Preferences”. In the Preferences window, click the “Accounts” tab and sign in with your Apple ID associated with your Apple Developer account.
- Once you are signed in, click the “+” button at the bottom of the window to add a new Apple ID.
- Follow the prompts to add the Apple ID you used to enroll in Xcode Cloud.
- After adding the Apple ID, go to your Xcode project and select the project navigator from the left sidebar.
- Click on your project name, then go to “Signing & Capabilities” in the top menu bar.
- Under “Signing & Capabilities,” click the “+” button to add a new capability.
- Select “Xcode Cloud” from the list of capabilities, and follow the prompts to enable Xcode Cloud for your project.
- Once you have enabled Xcode Cloud for your project, you can configure your build settings and set up your CI/CD pipeline.
Creating your First Xcode Workflow
- To start with Xcode Cloud, you’ll need to create a workflow in Xcode. Here are the steps to follow:
- Open Xcode and select “File” > “New” > “Workspace” from the menu.
- Give your workspace a name and save it in a location of your choice.
- In the workspace, select “File” > “New” > “Project” from the menu.
- Choose the type of project you want to create (e.g. iOS app, macOS app, etc.) and click “Next”.
- Choose a template for your project and click “Next”.
- Enter your project’s name and other details, and choose a location to save it.
- In the project navigator, select the project and then select the “Build Phases” tab.
- Click the “+” button and select “New Run Script Phase” from the menu.
Enter a name for the script phase and enter the following script:
xcodebuild -scheme [Your Scheme] -destination [Your Destination] test
- Replace “[Your Scheme]” and “[Your Destination]” with the appropriate values for your project.
- Click “Close” to save the script phase.
- Select “Product” > “Archive” from the menu.
- After the archive is created, select “Window” > “Organizer” from the menu.
- Select the archive you created in the Organizer and click “Distribute App”.
- Choose the method of distribution you want to use (e.g. App Store Connect, Ad Hoc, etc.) and follow the prompts.
- Finally, from the menu, select “Product” > “Xcode Cloud” > “Create Workflow”
You can now configure your workflow, including setting up continuous integration, automated testing, and building and distributing your app.
Please note that Xcode Cloud is a recent release and is yet to be widely adopted and tested. So the UI inside Xcode and these steps will likely change with future versions.
Explaining the general settings
When creating a workflow in Xcode Cloud, there are several general settings that you can configure to customize your workflow. These settings include:
- Workflow Name: This is the name of your workflow, which you can change at any time.
- Branch: This is the Git branch that Xcode Cloud will monitor for changes. You can specify a specific branch or use the default branch.
- Schedule: This setting lets you specify how often the workflow should run. You can run it manually or on a schedule (daily, weekly, or monthly).
- Triggers: Triggers define when the workflow should run. For example, you can configure a trigger to run the workflow when changes are pushed to the specified Git branch.
- Build Configuration: This setting specifies the build configuration that should be used for the workflow. You can choose from Debug, Release, or Custom.
- Scheme: The scheme determines which targets and build configurations are used for the workflow. You can specify a custom scheme or use the default.
- Device: This setting allows you to specify the device(s) on which the app will be built and tested. You can choose from a range of simulators or physical devices.
- Build Options: This setting allows you to customize the build options, such as enabling or disabling bitcode, or specifying additional build settings.
- Environment Variables: This setting allows you to specify environment variables that your build scripts can access.
- Actions: This is where you specify the workflow’s steps. Actions can include running tests, generating archives, and distributing apps.
Setting up Automated Testing for the project
- To set up automated testing for your project in Xcode Cloud, follow these steps:
- Click on the “Project Settings” icon in the toolbar at the top of the Xcode window.
- Select the “Xcode Cloud” tab in the project settings.
- Under the “Testing” section, select “Enable automated testing”.
- Choose the testing scheme you want to use from the dropdown menu.
- Select the devices you want to run your tests on.
- Choose the test plan you want to use.
- Click on the “Configure” button to set up your tests.
- Once you have set up your automated tests, Xcode Cloud will automatically run them whenever you push changes to your project’s source code repository.
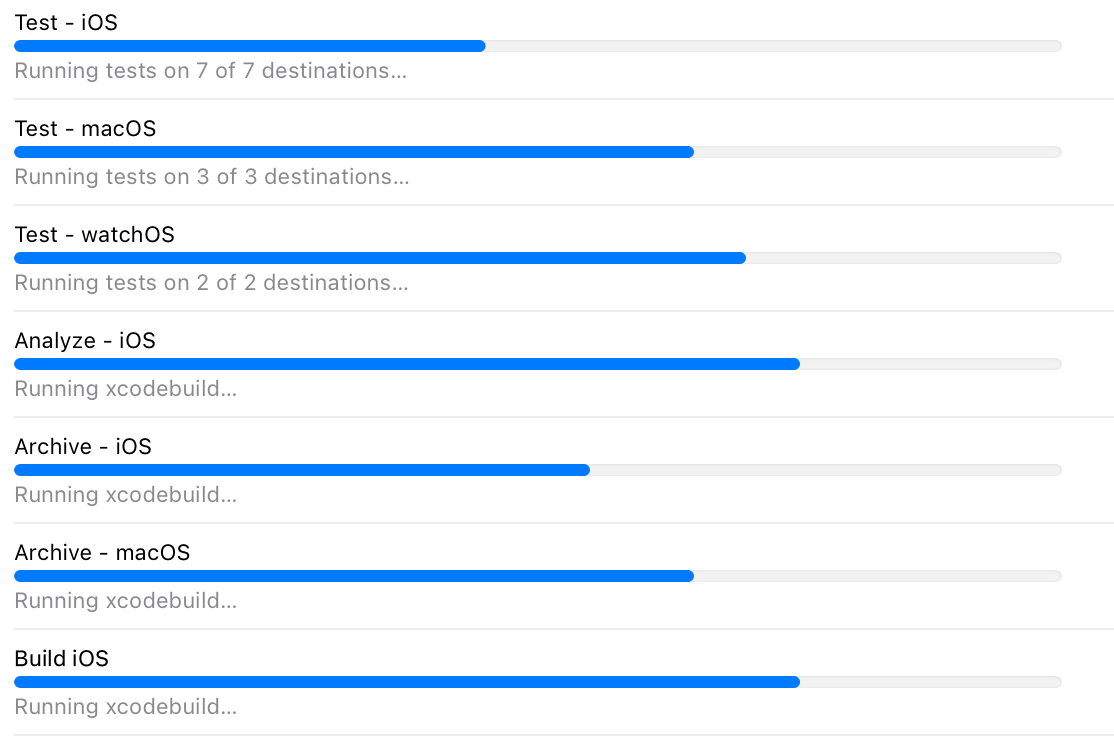
You can monitor the results of your tests in the Xcode Cloud dashboard, which will display any test failures or errors. You can also view logs and detailed reports to help diagnose any issues.
Building and Distributing the app using Xcode Cloud
Building and distributing the app using Xcode Cloud is a straightforward process that can save developers significant time and effort. Once you have set up your workflow and added automated tests, the next step is to build and distribute your app.
- To do this, you can select the “Archive and Distribute App” action in your workflow. This will create an archive of your app and upload it to App Store Connect. From there, you can use App Store Connect to distribute your app to users.
- Xcode Cloud also provides several options for customizing your app’s build settings. For example, you can specify which devices and versions of iOS your app supports and choose whether to enable or disable certain features, such as background app refresh or push notifications.
- Additionally, Xcode Cloud makes it easy to manage multiple app builds. You can view the build history for each app, including information about the build settings, automated test results, and any errors or warnings generated during the build process.
How to test your Xcode Cloud Workflow?
You can test your Xcode Cloud workflow in a few different ways.
- You can perform a dry run of your workflow by selecting the “Dry Run” option in the editor. This will simulate a build and allow you to see if any issues arise without building and distributing your app.
- You also use the “Test” option in the editor to test your workflow on a small scale before running it on a larger scale. This will allow you to catch any issues before they become bigger problems.
You can create a test project specifically for this purpose or use an existing project you’ve already built. Once you’ve run your workflow on a project, you can see how it performs in a real-world setting and make any necessary adjustments.
App Store Connect can also monitor test and build results for your app.
Follow-Up Read: How to enable Xcode Code Coverage?
Conclusion
Xcode Cloud is a powerful continuous integration and delivery service built into Xcode, designed specifically for Apple developers, which streamlines the development and deployment process, promising faster and more efficient workflows. Overall, Xcode Cloud is an exciting development for the future of Apple developers.
- While the verdict is still out on how veteran developers will receive it, integrating test plans on BrowserStack Real Device Cloud with Xcode Cloud can ensure your app performs on the metrics that matter most to you.
- Access various flagship or legacy Apple devices that you can use to execute automation scripts.
- Although Xcode allows for testing on any device using simulated test environments, actual devices are always preferable for the best results.
Also Read: How to test Apps on iPhone using Xcode?


