Integrate BrowserStack Automate with GitLab CI/CD
Learn how to integrate GitLab CI/CD with the BrowserStack device cloud for running your Cypress tests.
GitLab CI/CD is a continuous integration tool that integrates your test suites to allow for continuous testing, build, and deployment of iterative code changes. The use of CI/CD tools helps detect and mitigate failures before they reach the production stage.
The information in this section applies to GitLab CI/CD implemented as part of GitLab SaaS offering and requires some knowledge of GitLab. Check out GitLab documentation before configuring BrowserStack.
In this guide, you will learn how to:
If you are new to BrowserStack, take some time to check out the getting started guides to learn about integrating BrowserStack with your existing Cypress test scripts.
Integrate an existing Cypress test suite
Integrating BrowserStack with existing test cases involves the following steps:
- Setting up BrowserStack credentials as environment variables.
- Adding the required configurations to integrate with BrowserStack.
Prerequisites
Before you can start integration, ensure that the following tasks are complete.
- GitLab account and the relevant project is accessible
-
.gitlab-ci.ymlfile exists for your project - You are a maintainer or owner of the project
- Access to the BrowserStack account credentials, namely Access Key and Username
Setting up BrowserStack credentials as environment variables
BrowserStack recommends you encrypt variables like username and access key. Gitlab enables the user to secure environment variables via their web interface. For more details on setting environment variables please refer to their documentation. This functionality allows you to keep the contents of the secure variable private.
Set up the credentials using the following steps:
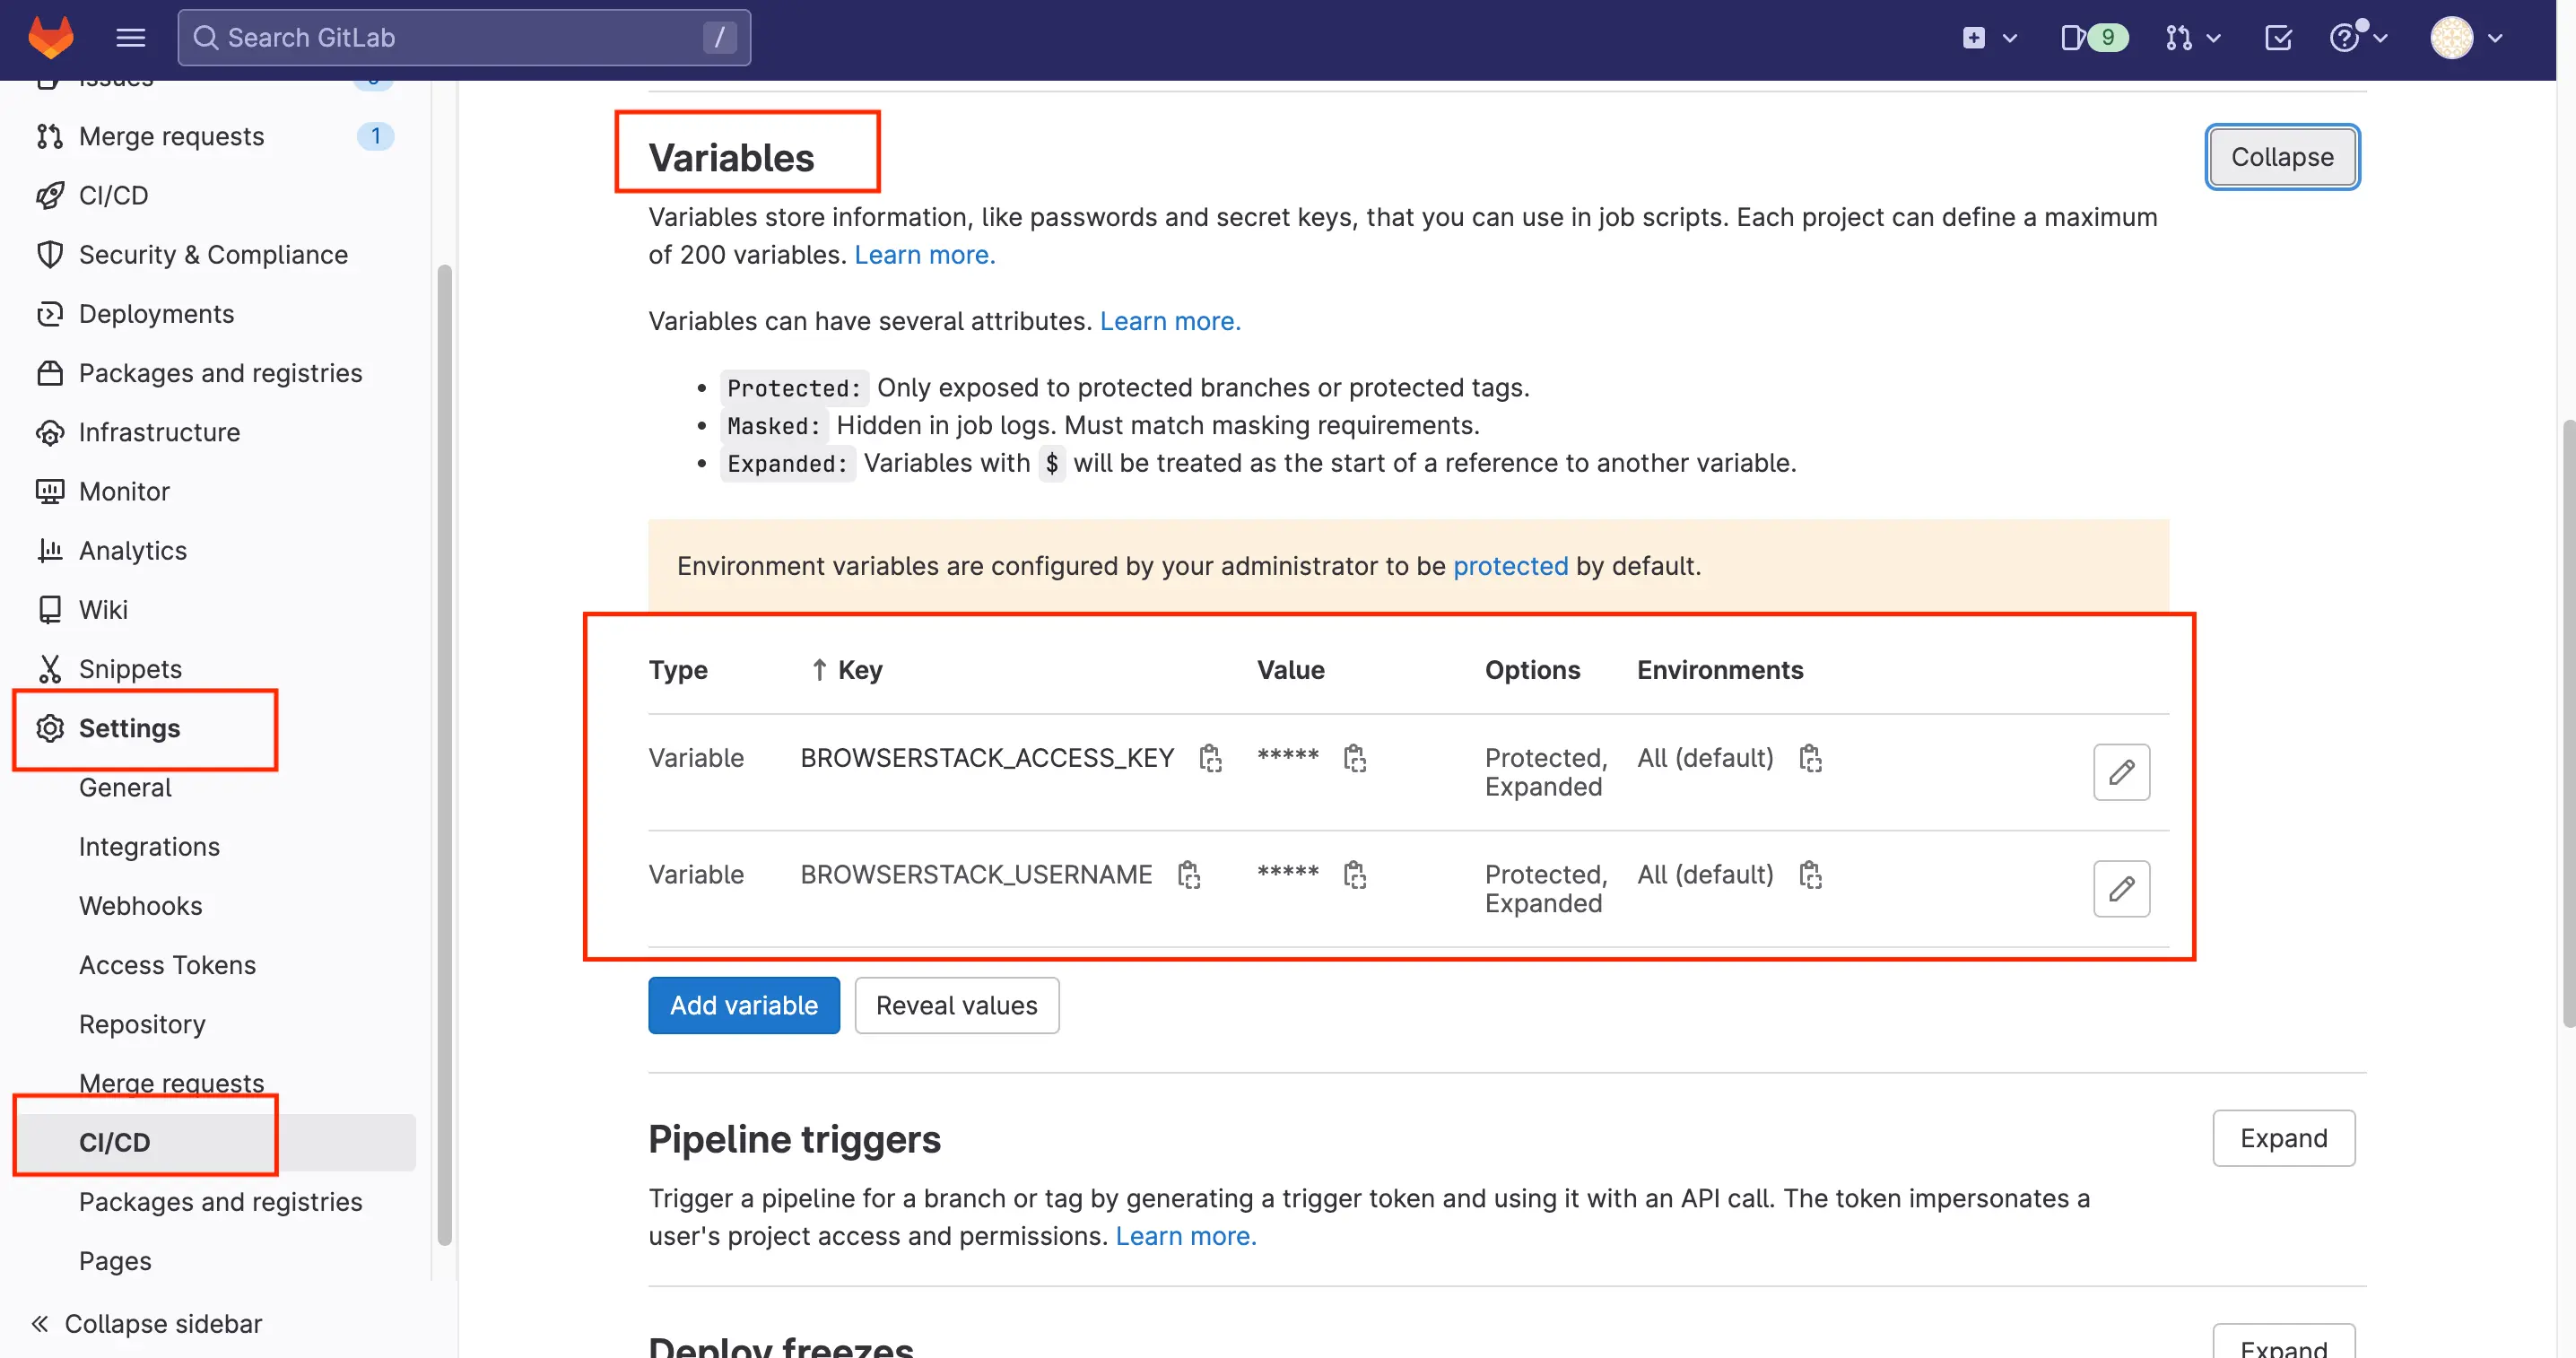
- Log in to GitLab CI.
- Click Settings -> CI/CD.
- In the Variables row, click Expand to add variables.
- Add BrowserStack Access Key as a variable.
a. Click Add Variable.
b. Set the variable name, such as BROWSERSTACK_ACCESS_KEY, as Key.
Note: The variable name set in Key is used in the test scripts that you want to integrate with BrowserStack. - Enter the value, which is your Access Key.
Note: The Access Key is found in the BrowserStack Automate dashboard. - Repeat step 4 to add BROWSERSTACK_USERNAME as a variable.
The example below shows how BROWSERSTACK_USERNAME & BROWSERSTACK_ACCESS_KEY variables along with others are added to the .gitlab-ci.yml file
variables:
  BROWSERSTACK_USERNAME: "YOUR_USERNAME"
  BROWSERSTACK_ACCESS_KEY: "YOUR_ACCESS_KEY"
  # Set to true when using Local.
  BROWSERSTACK_LOCAL: "false"
  # Set when using multiple Local instances.
  BROWSERSTACK_LOCAL_IDENTIFIER: "IDENTIFIER_NAME"
  # Set an appropriate build name as a best practice. This helps group tests under the same name for better visibility in the Automate dashboard.
  BROWSERSTACK_BUILD_NAME: "BUILD_NAME"
Adding Configurations to integrate with BrowserStack
Create and configure the browserstack.json file within your cypress project which contains configurations, such as BrowserStack credentials, capabilities, etc., that are required for running the tests.
Check out how to run your first Cypress test on BrowserStack.
GitLab Project Setup:
- Sign in to GitLab
- Click Create New project
- Select Import Project(This documentation is based on migrating your data from an external source like GitHub, Bitbucket, or another instance of GitLab. You can choose other project options as well)
- (Github is chosen in this setup) Import your preferred repository and Go to Project
- Select Set up CI/CD from the options
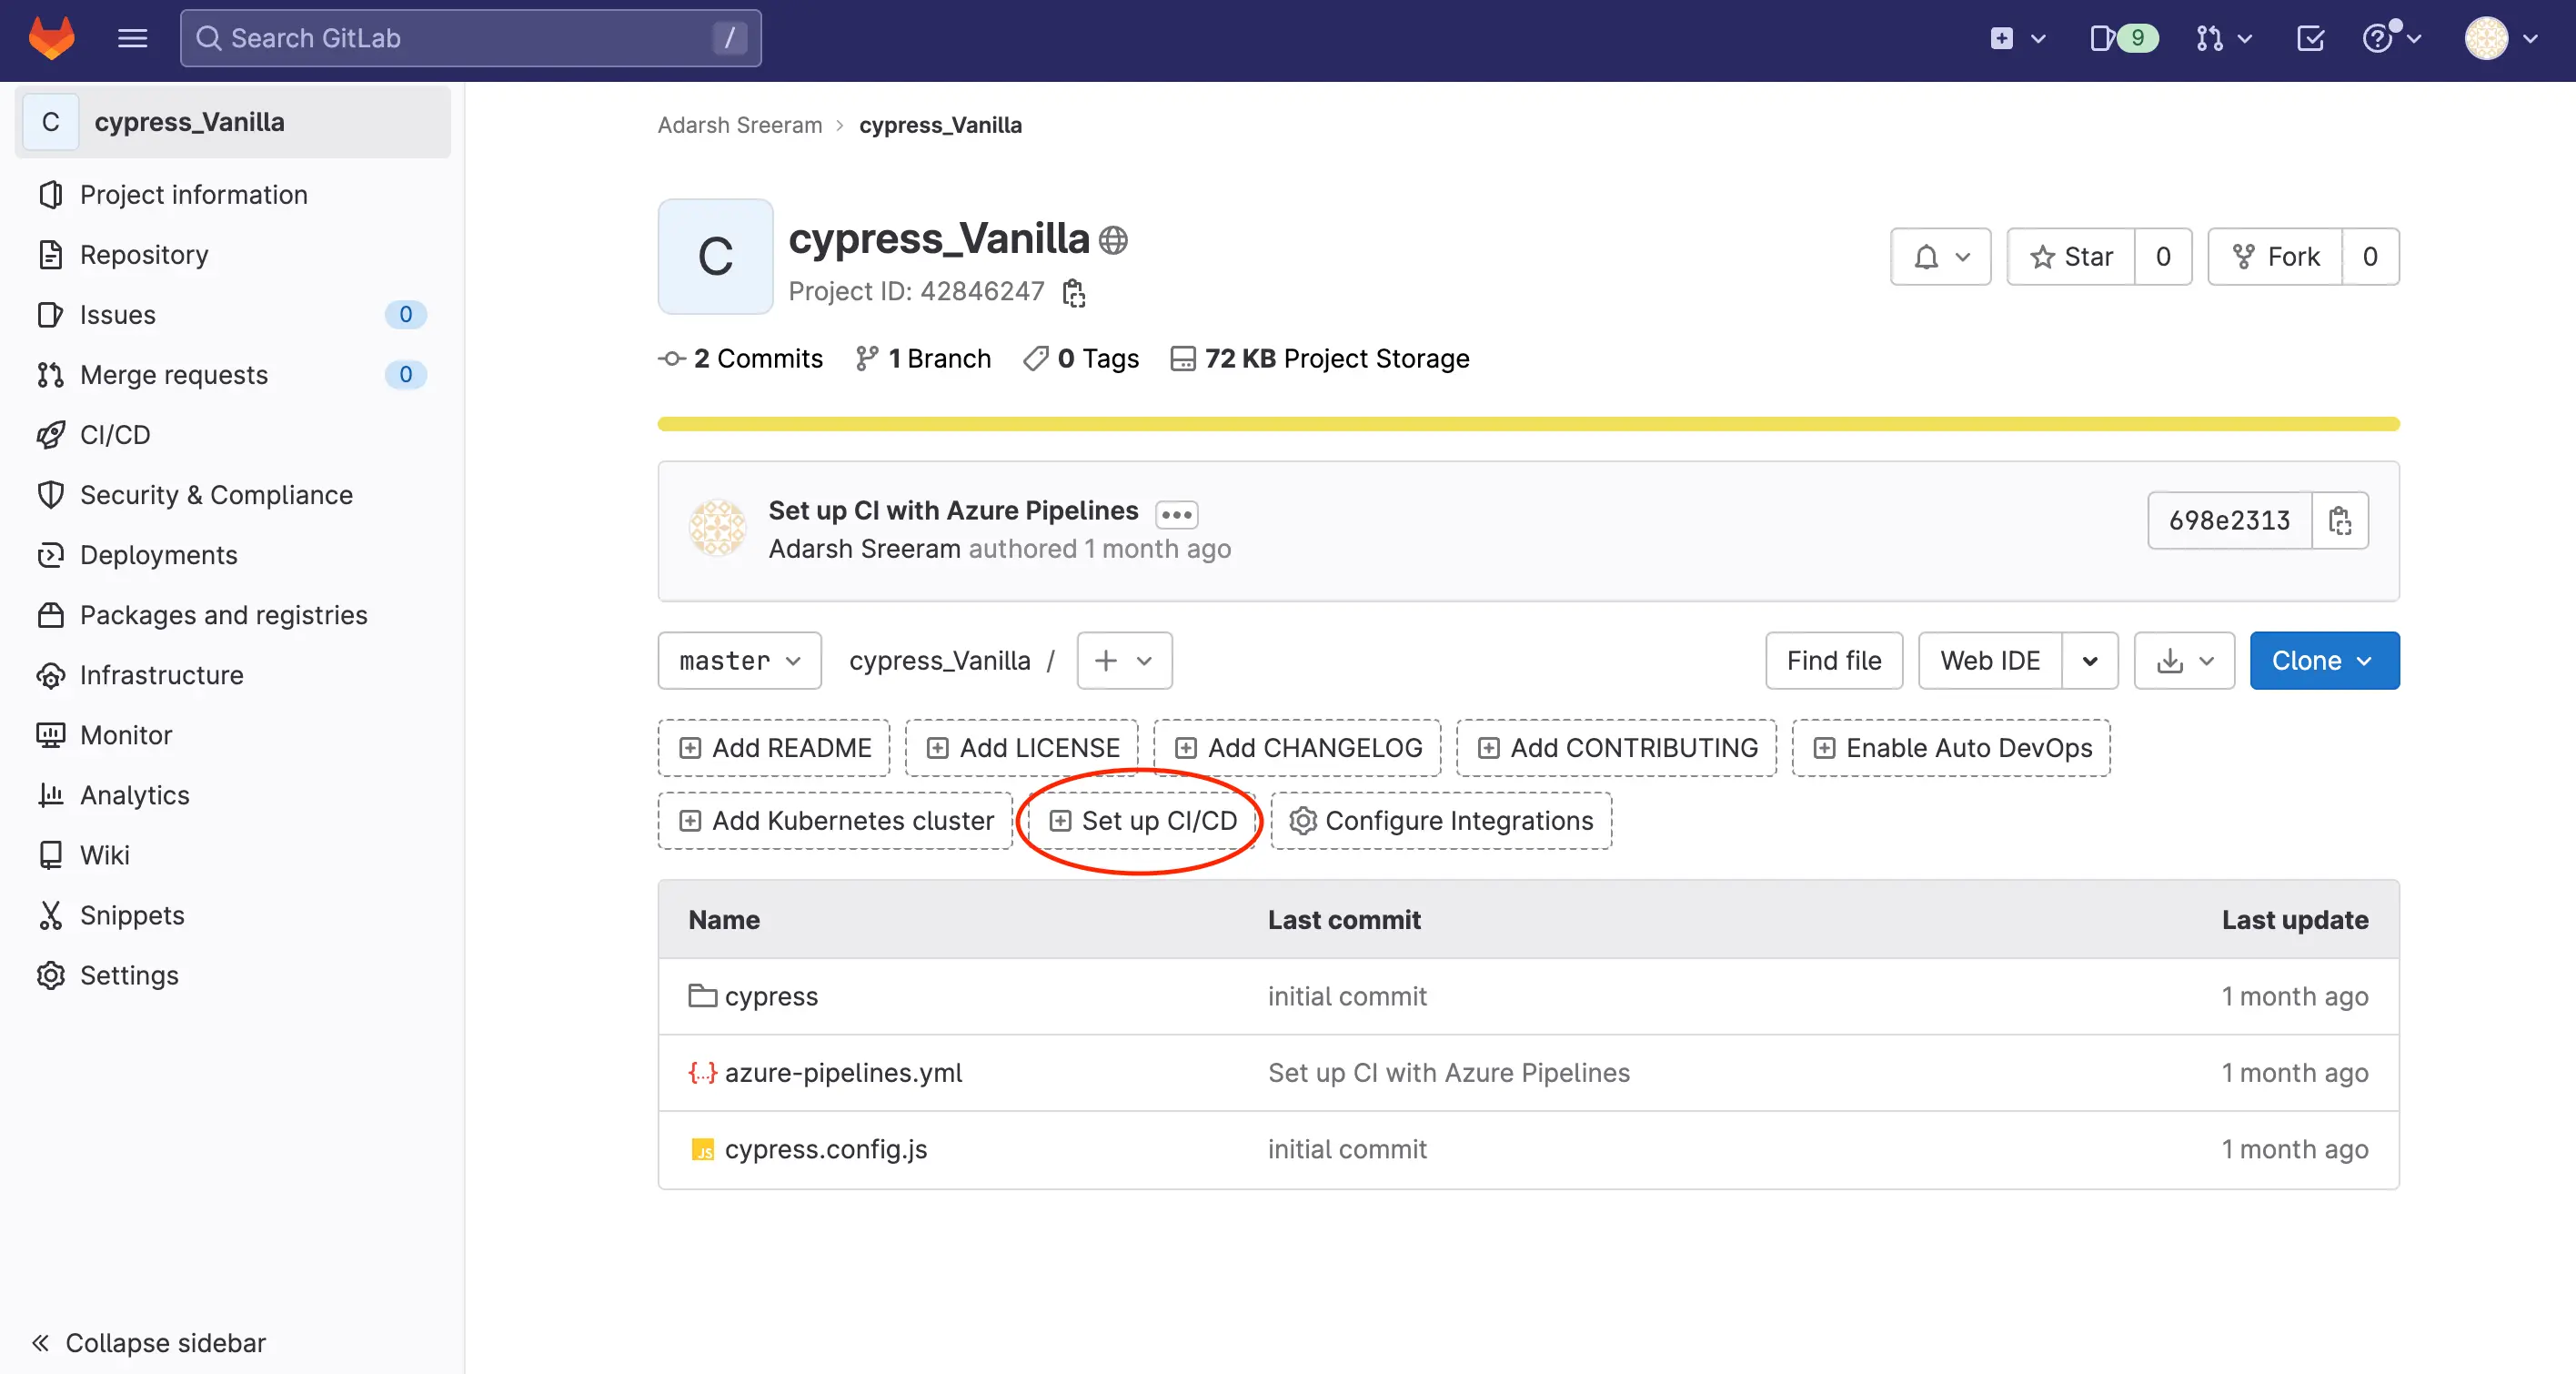
- Configure Pipeline as a new
.gitlab-ci.ymlfile.
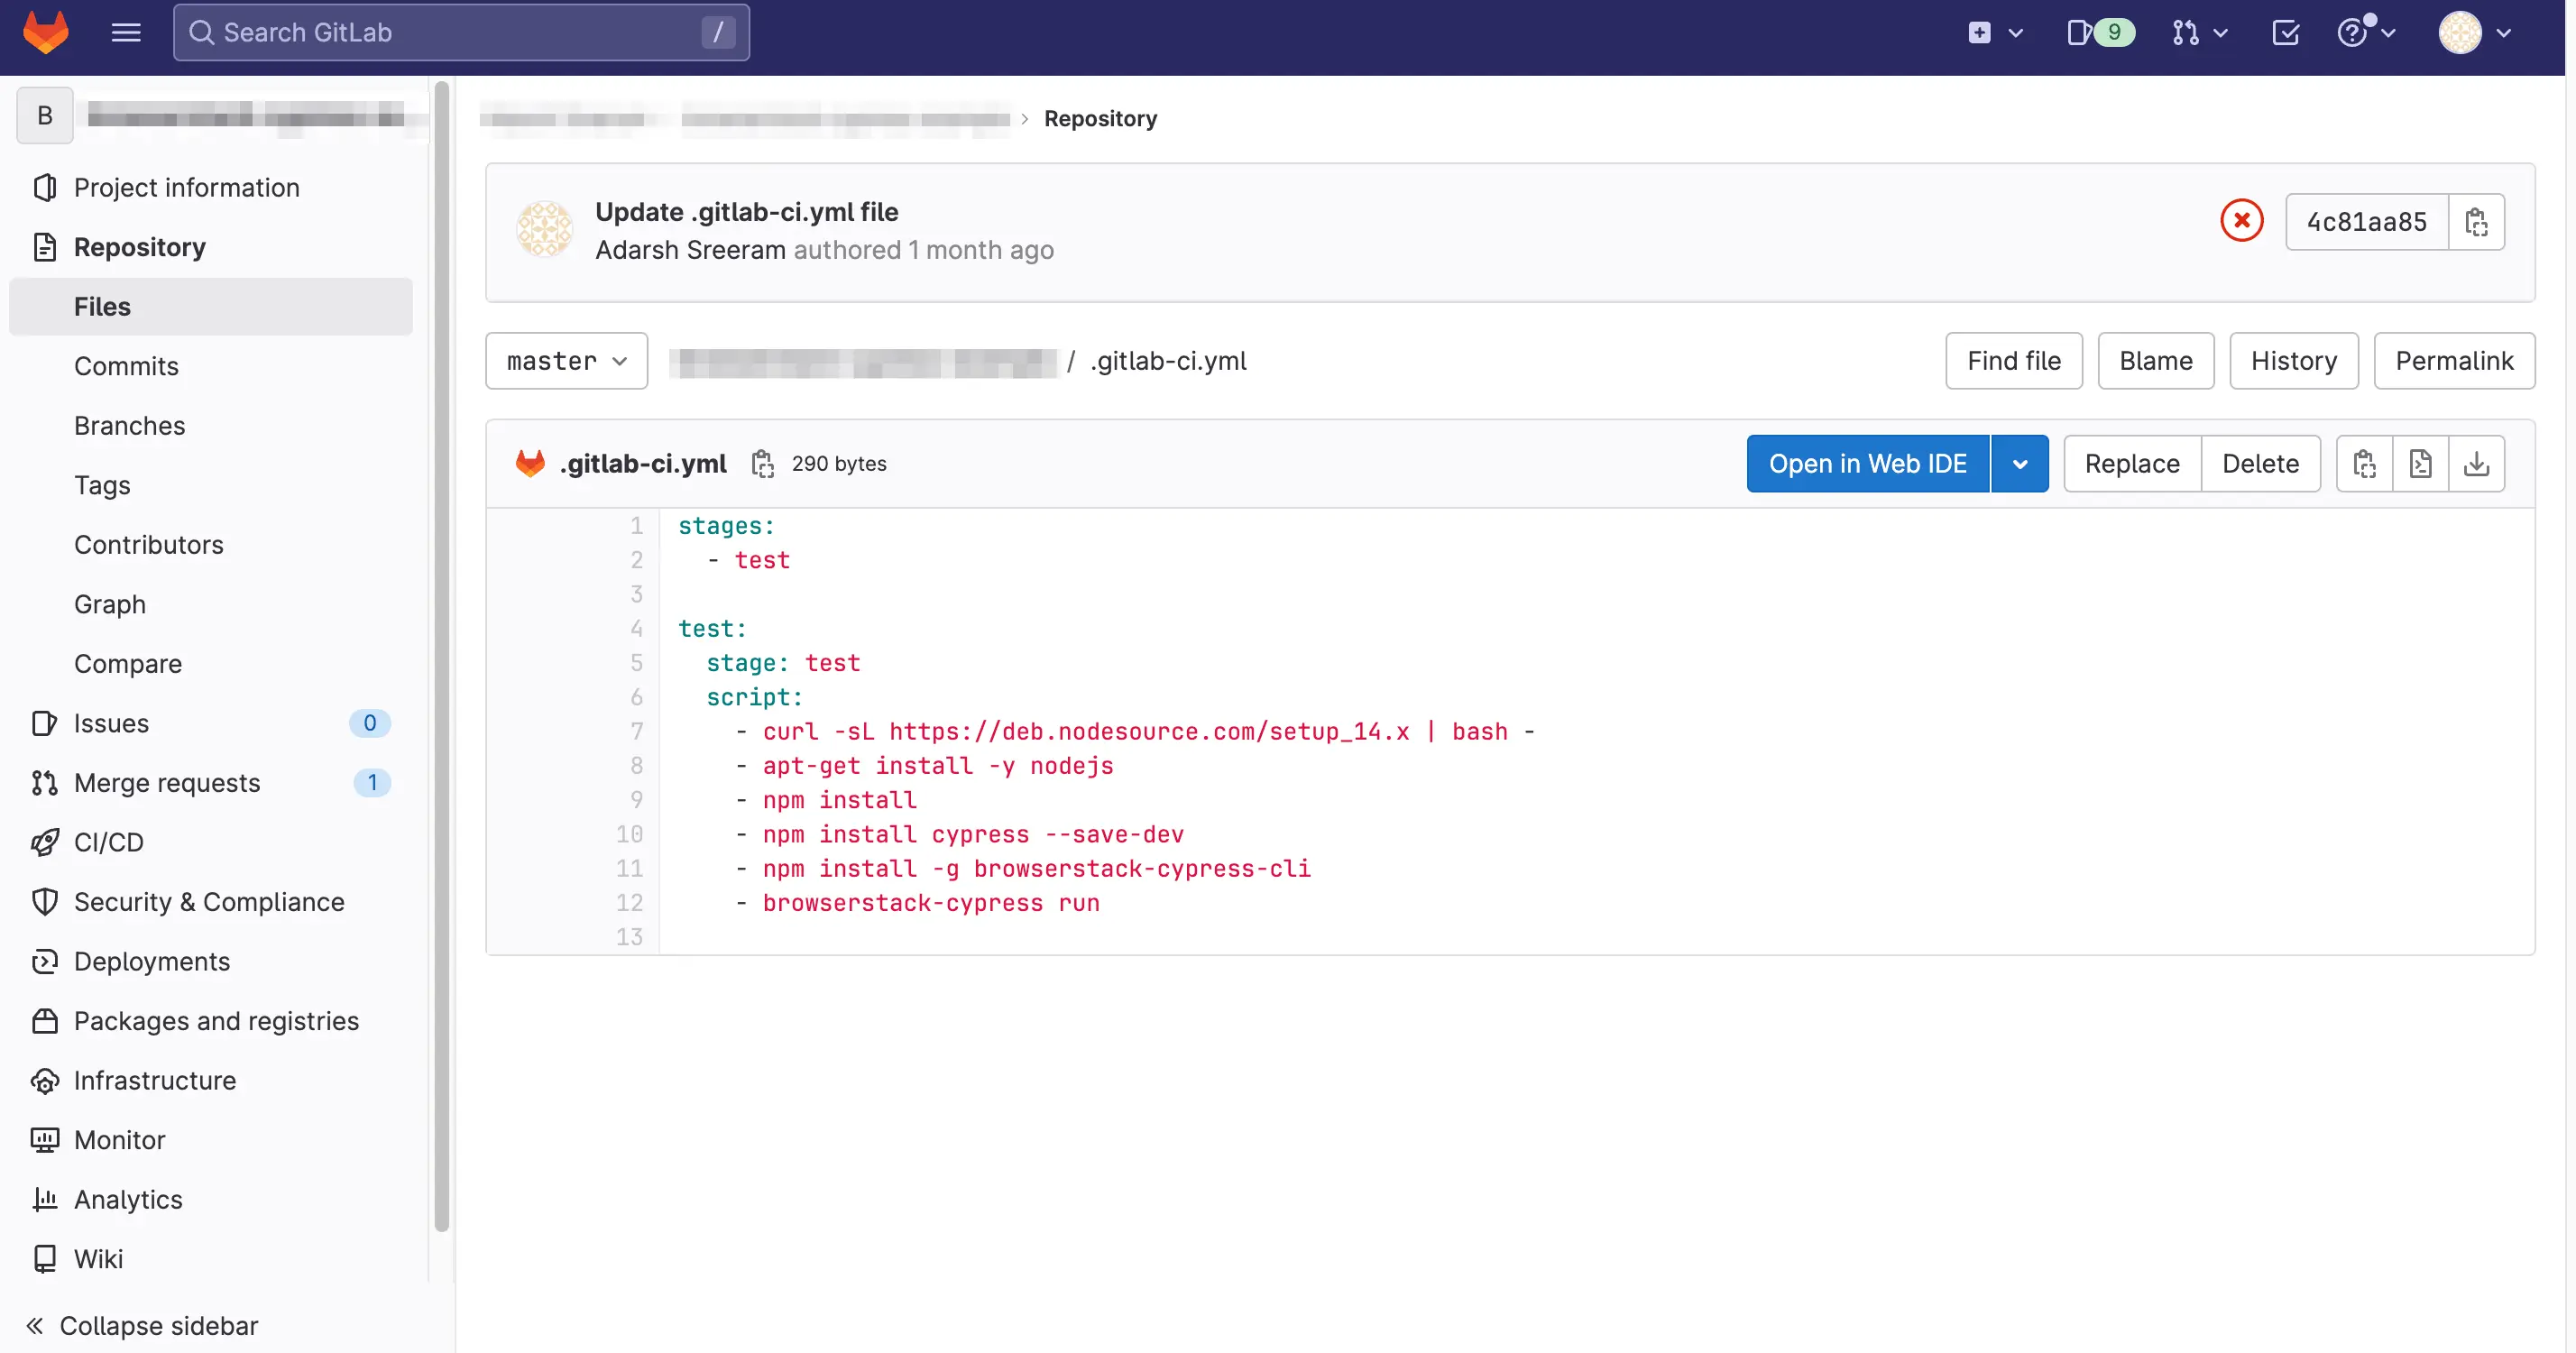
Refer to the following image for a sample .gitlab-ci.yml file setup:
- After your pipeline has completed successfully, navigate to the CI/CD section of your project in GitLab. You will notice that the build has passed.
- You can view the executed test results on the BrowserStack Automate Dashboard.
You should be able to run your existing Cypress tests on BrowserStack Automate after completing the configurations.
Test locally hosted websites:
Use BrowserStack Local Testing to test your web applications hosted on private, development, and internal servers. With the BrowserStack Local Testing binary, you can create a secure, private connection between the BrowserStack Selenium Grid and your internal servers.
To set up Local testing with BrowserStack, set the local key to true within connections_settings in the browserstack.json file.
The following code snippet shows the sample configuration file:
...
{
  "connection_settings": {
    "local": true,
    "local_mode": "always-on"
  }
}
...
The local_mode key is set to always-on in the example above, ensuring that the local connection remains active thus speeding up your tests.
Check out our documentation on how to run tests on localhost and staging websites.
If you want to use an existing BrowserStack Local instance on your machine, add the local key and the local_identifier key to the browserstack.json file.
...
{
  "connection_settings": {
    "local": true,
    "local_identifier": <your-local-identifier-string>
  }
}
...
After these configurations, you should be able to run Cypress tests on your locally hosted websites on BrowserStack Automate.
We're sorry to hear that. Please share your feedback so we can do better
Contact our Support team for immediate help while we work on improving our docs.
We're continuously improving our docs. We'd love to know what you liked
We're sorry to hear that. Please share your feedback so we can do better
Contact our Support team for immediate help while we work on improving our docs.
We're continuously improving our docs. We'd love to know what you liked
Thank you for your valuable feedback!