Add execution details
Plan who runs each test case and when, directly inside a manual test run.
After a test run is created, you still need to decide who executes each test case and by when. Execution details capture that plan against the test cases inside the run, so the workload is visible before anyone starts testing. You can set them on one test case at a time, or on several at once.
Before you begin
Do the following before you add the execution details:
- A manual test run exists in the project. See Create manual test runs documentation.
- Test cases are added to the run. Empty runs have nothing to plan against.
- You have access to the project.
When to add execution details
Add execution details after you create the run, before testers begin executing. The two fields answer two scheduling questions a test lead repeats every cycle.
- Who owns this test case?
- When should it be done?
You can revisit execution details at any point while the run is Active.
Open a test run
Both entry points start from the test run detail page.
- In the left navigation, click Test Runs.
-
On the Active Runs tab, click the run you want to plan.
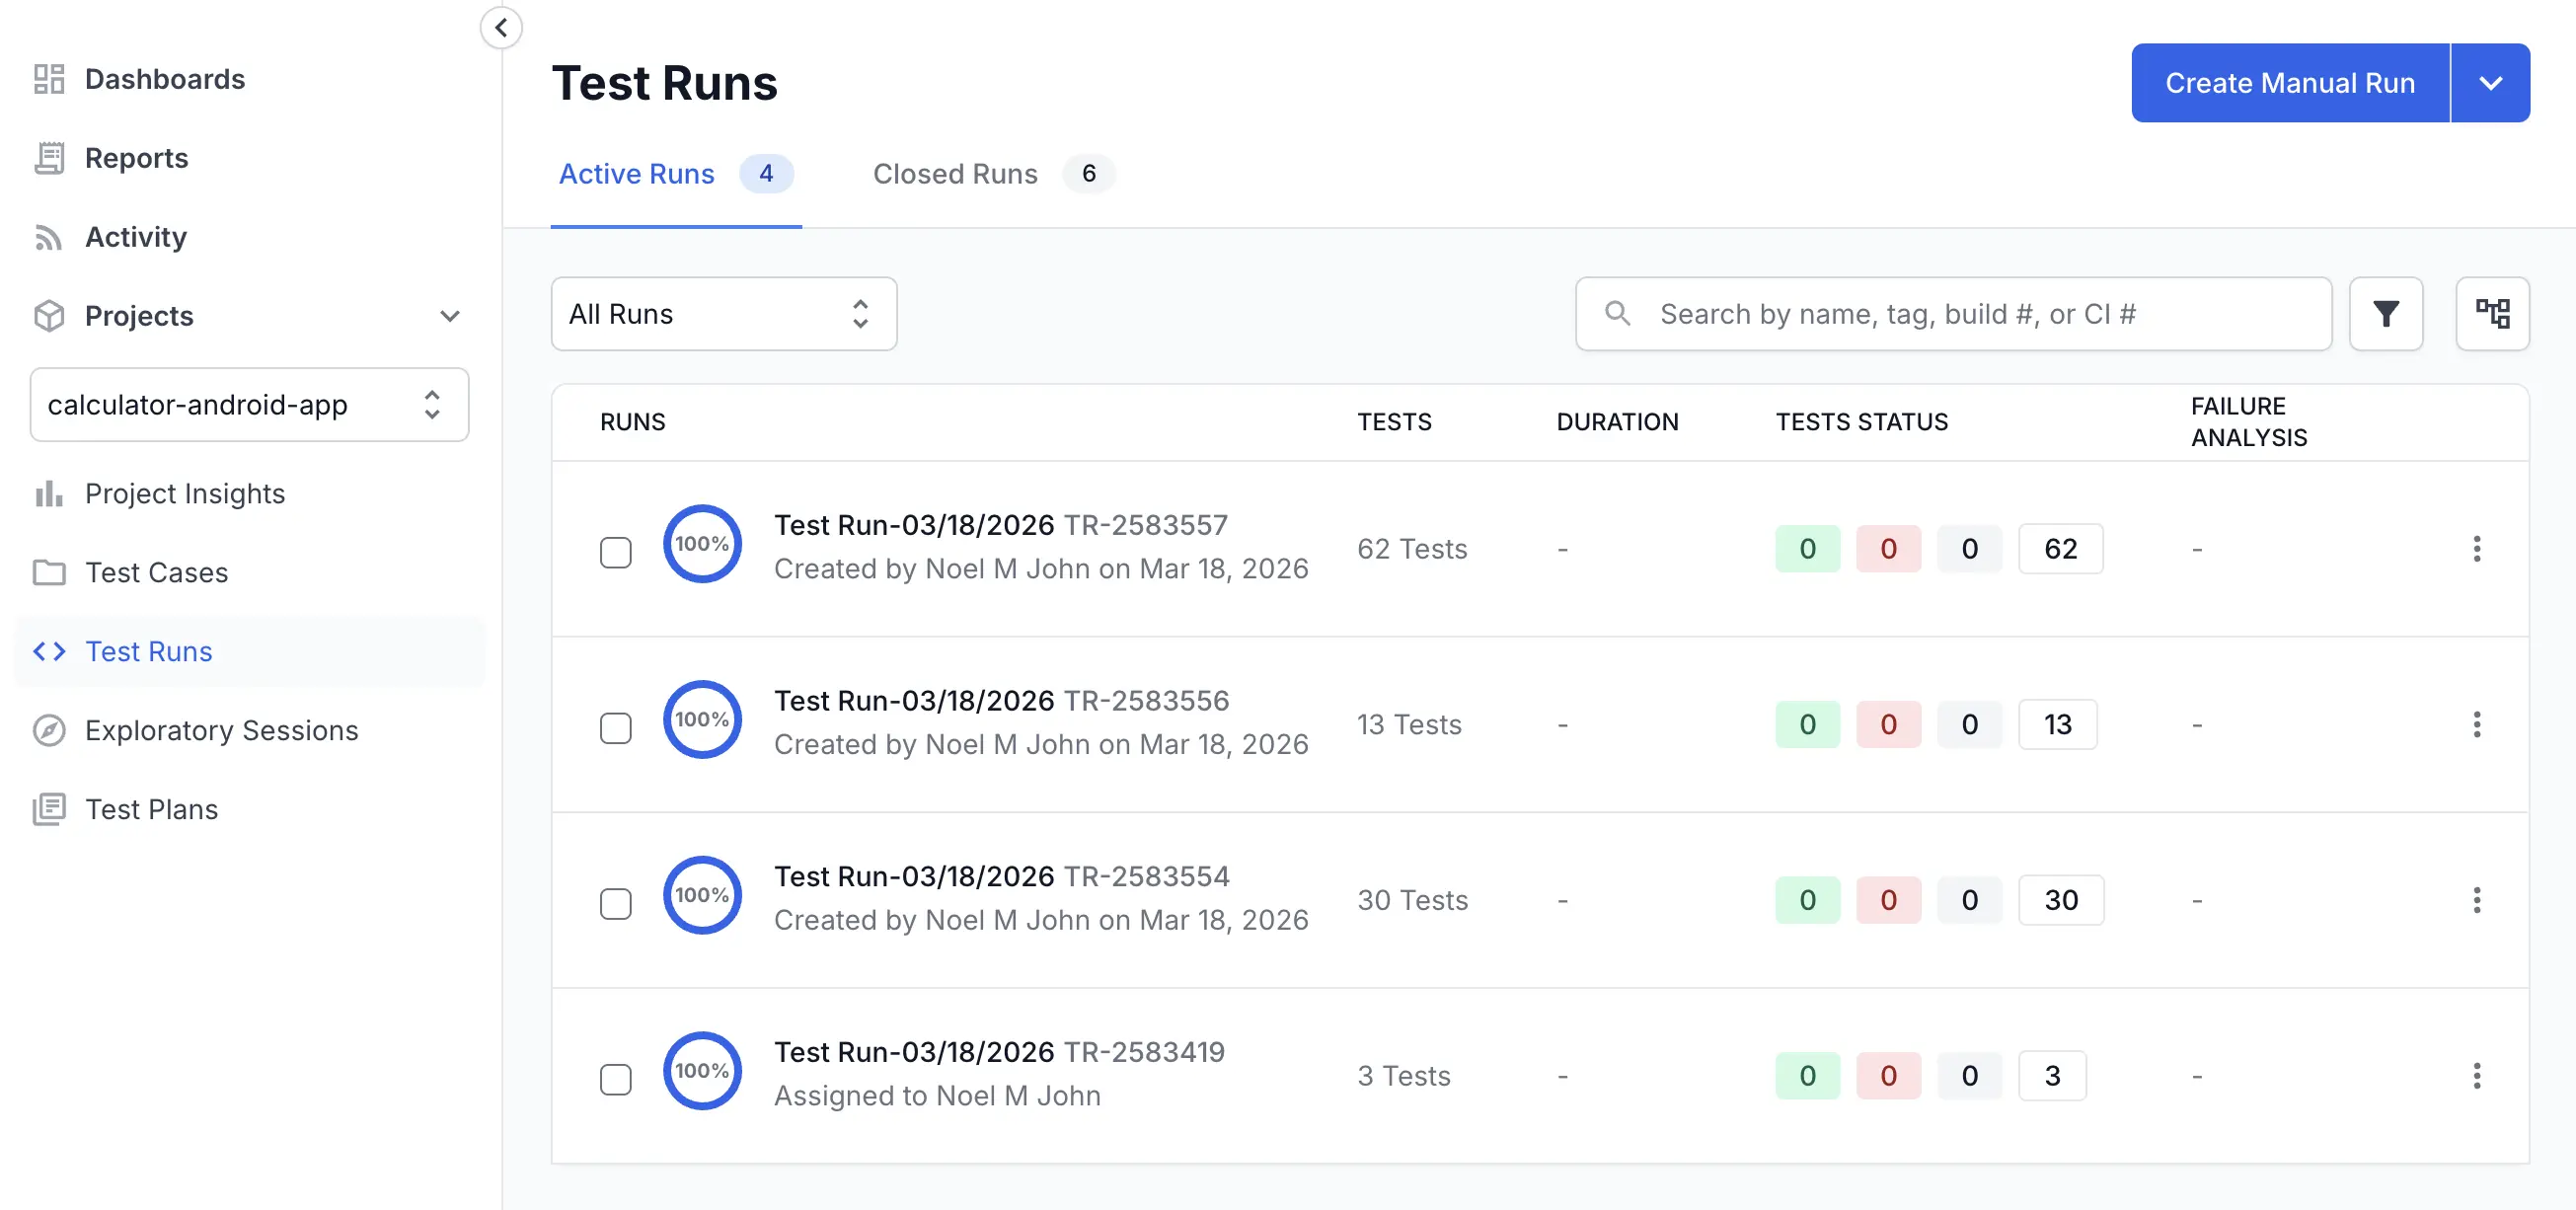
The test case list opens with All Test Cases selected by default.
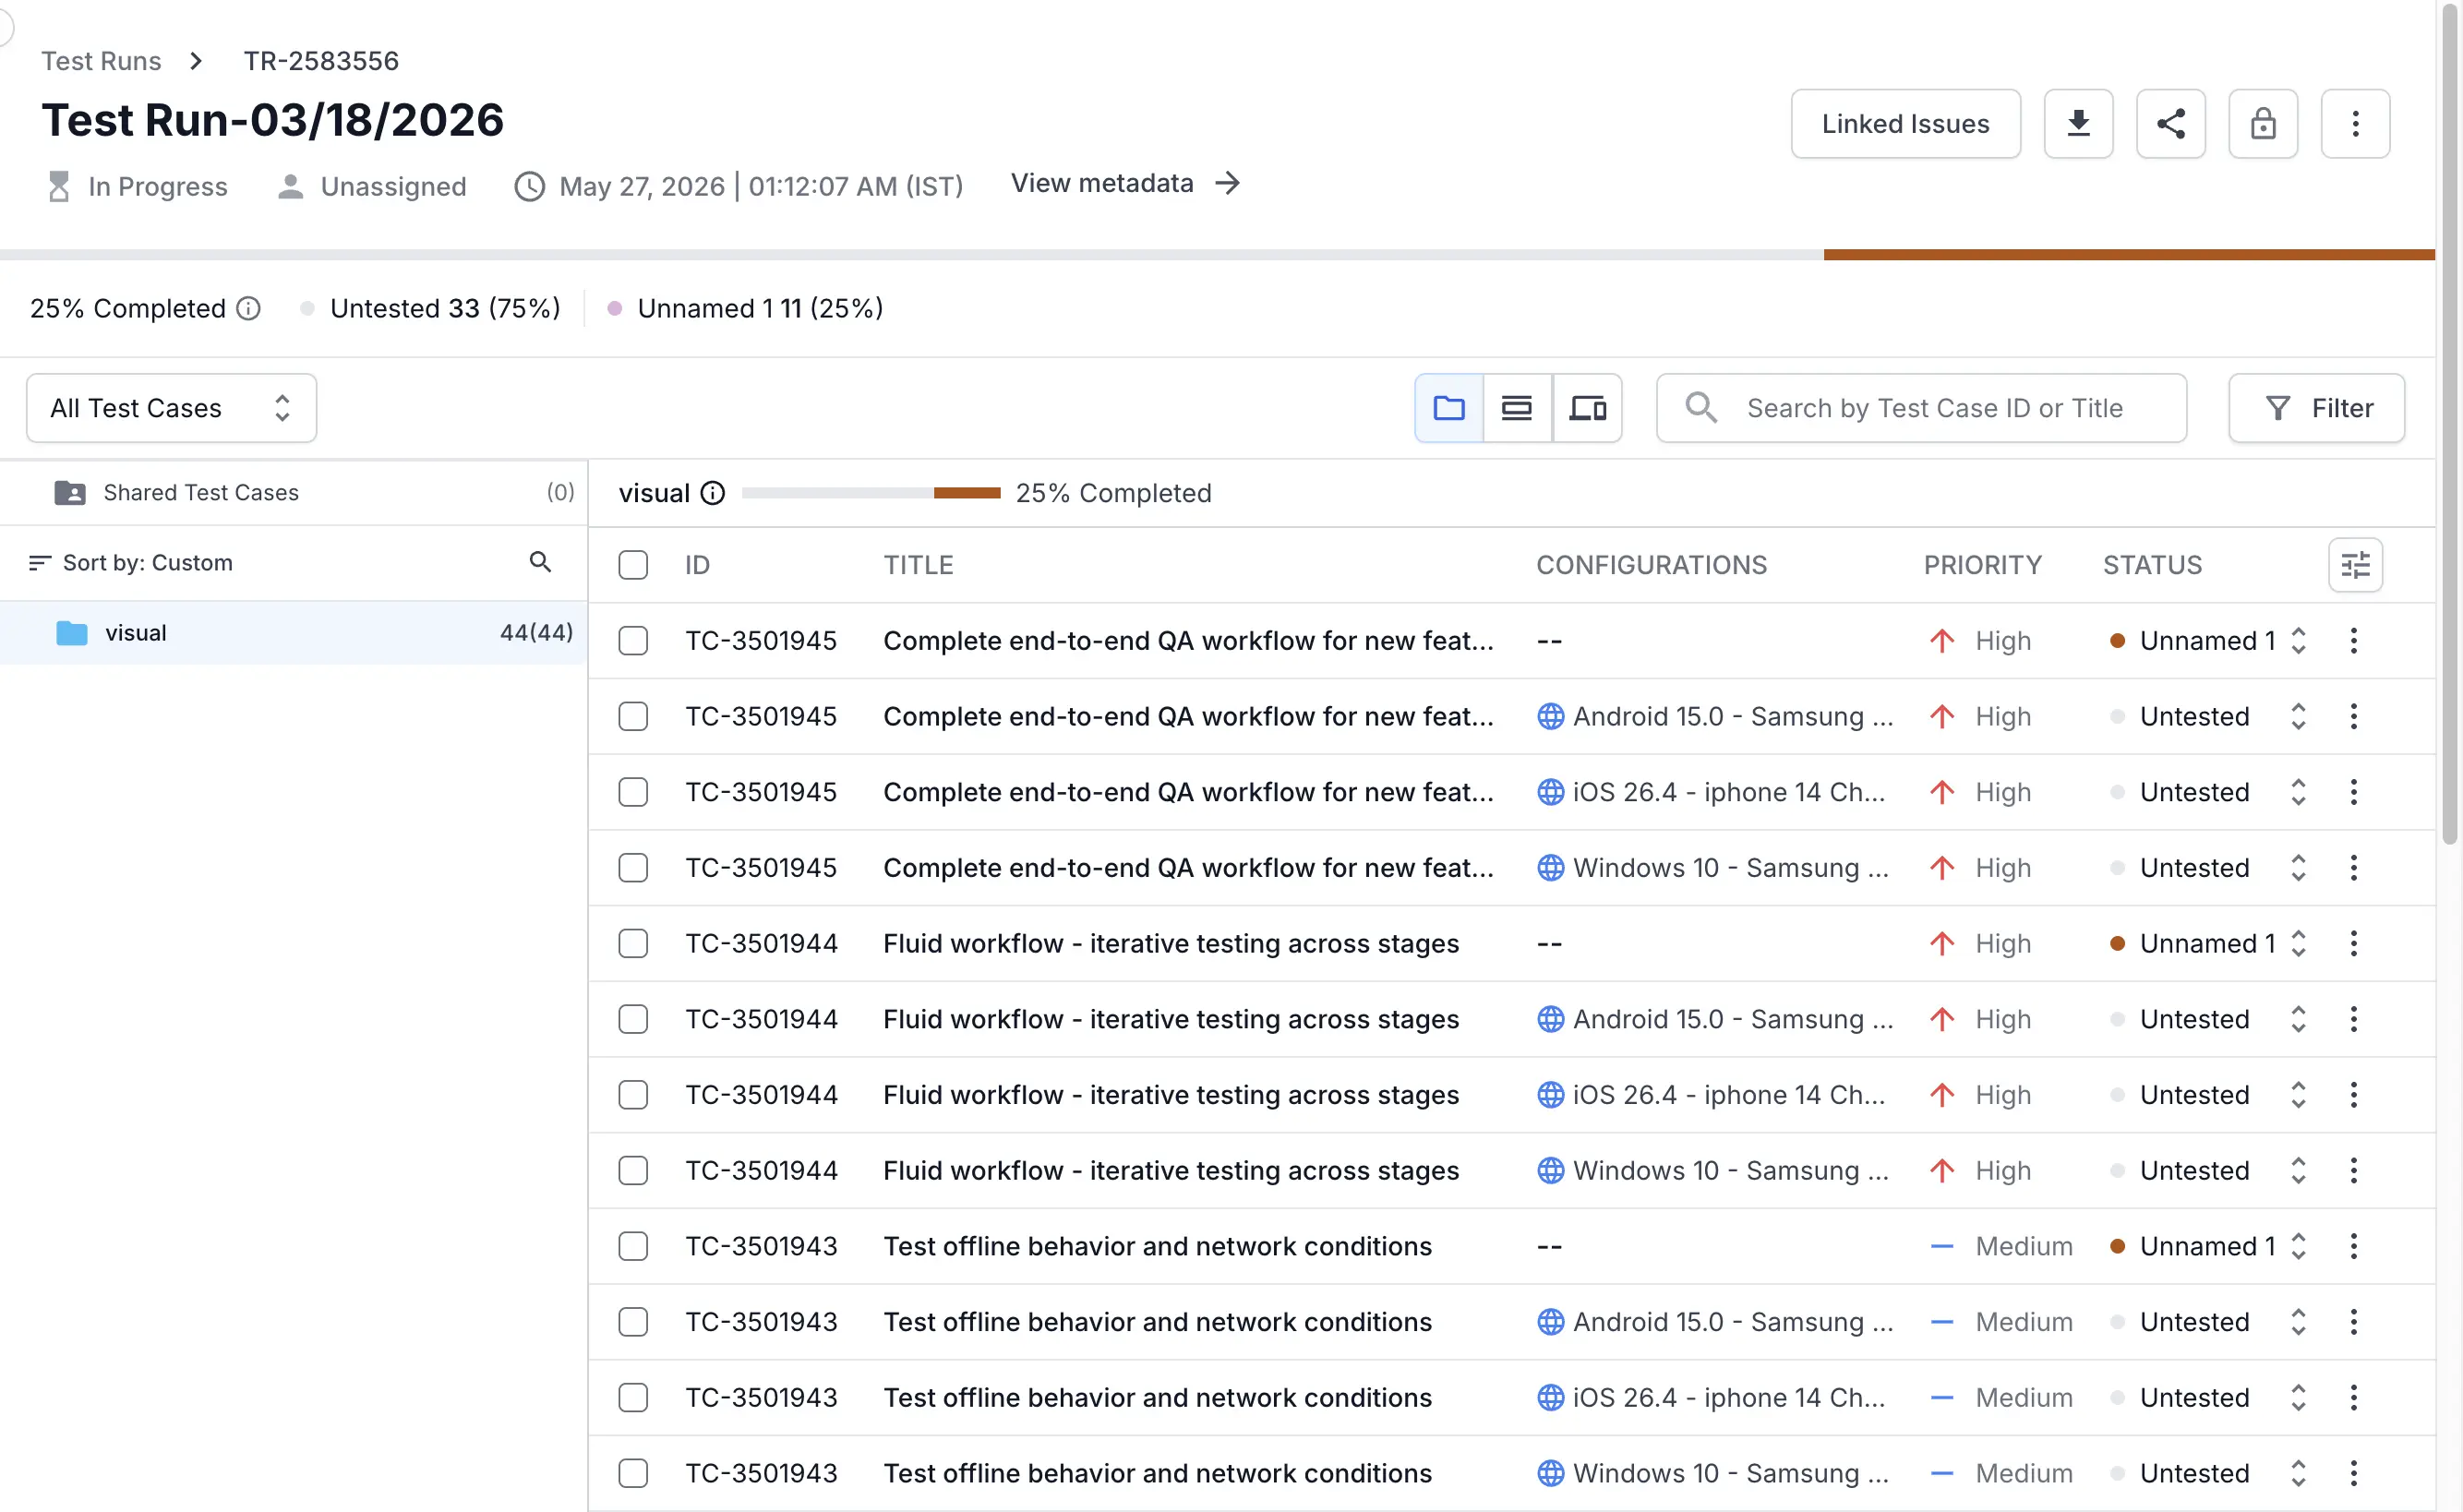
Add execution details to one test case
Use this path when you want to assign a single test case.
- In the test case list, find the row for the test case.
- Click the three-dot menu at the end of the row.
-
Select Add execution details.
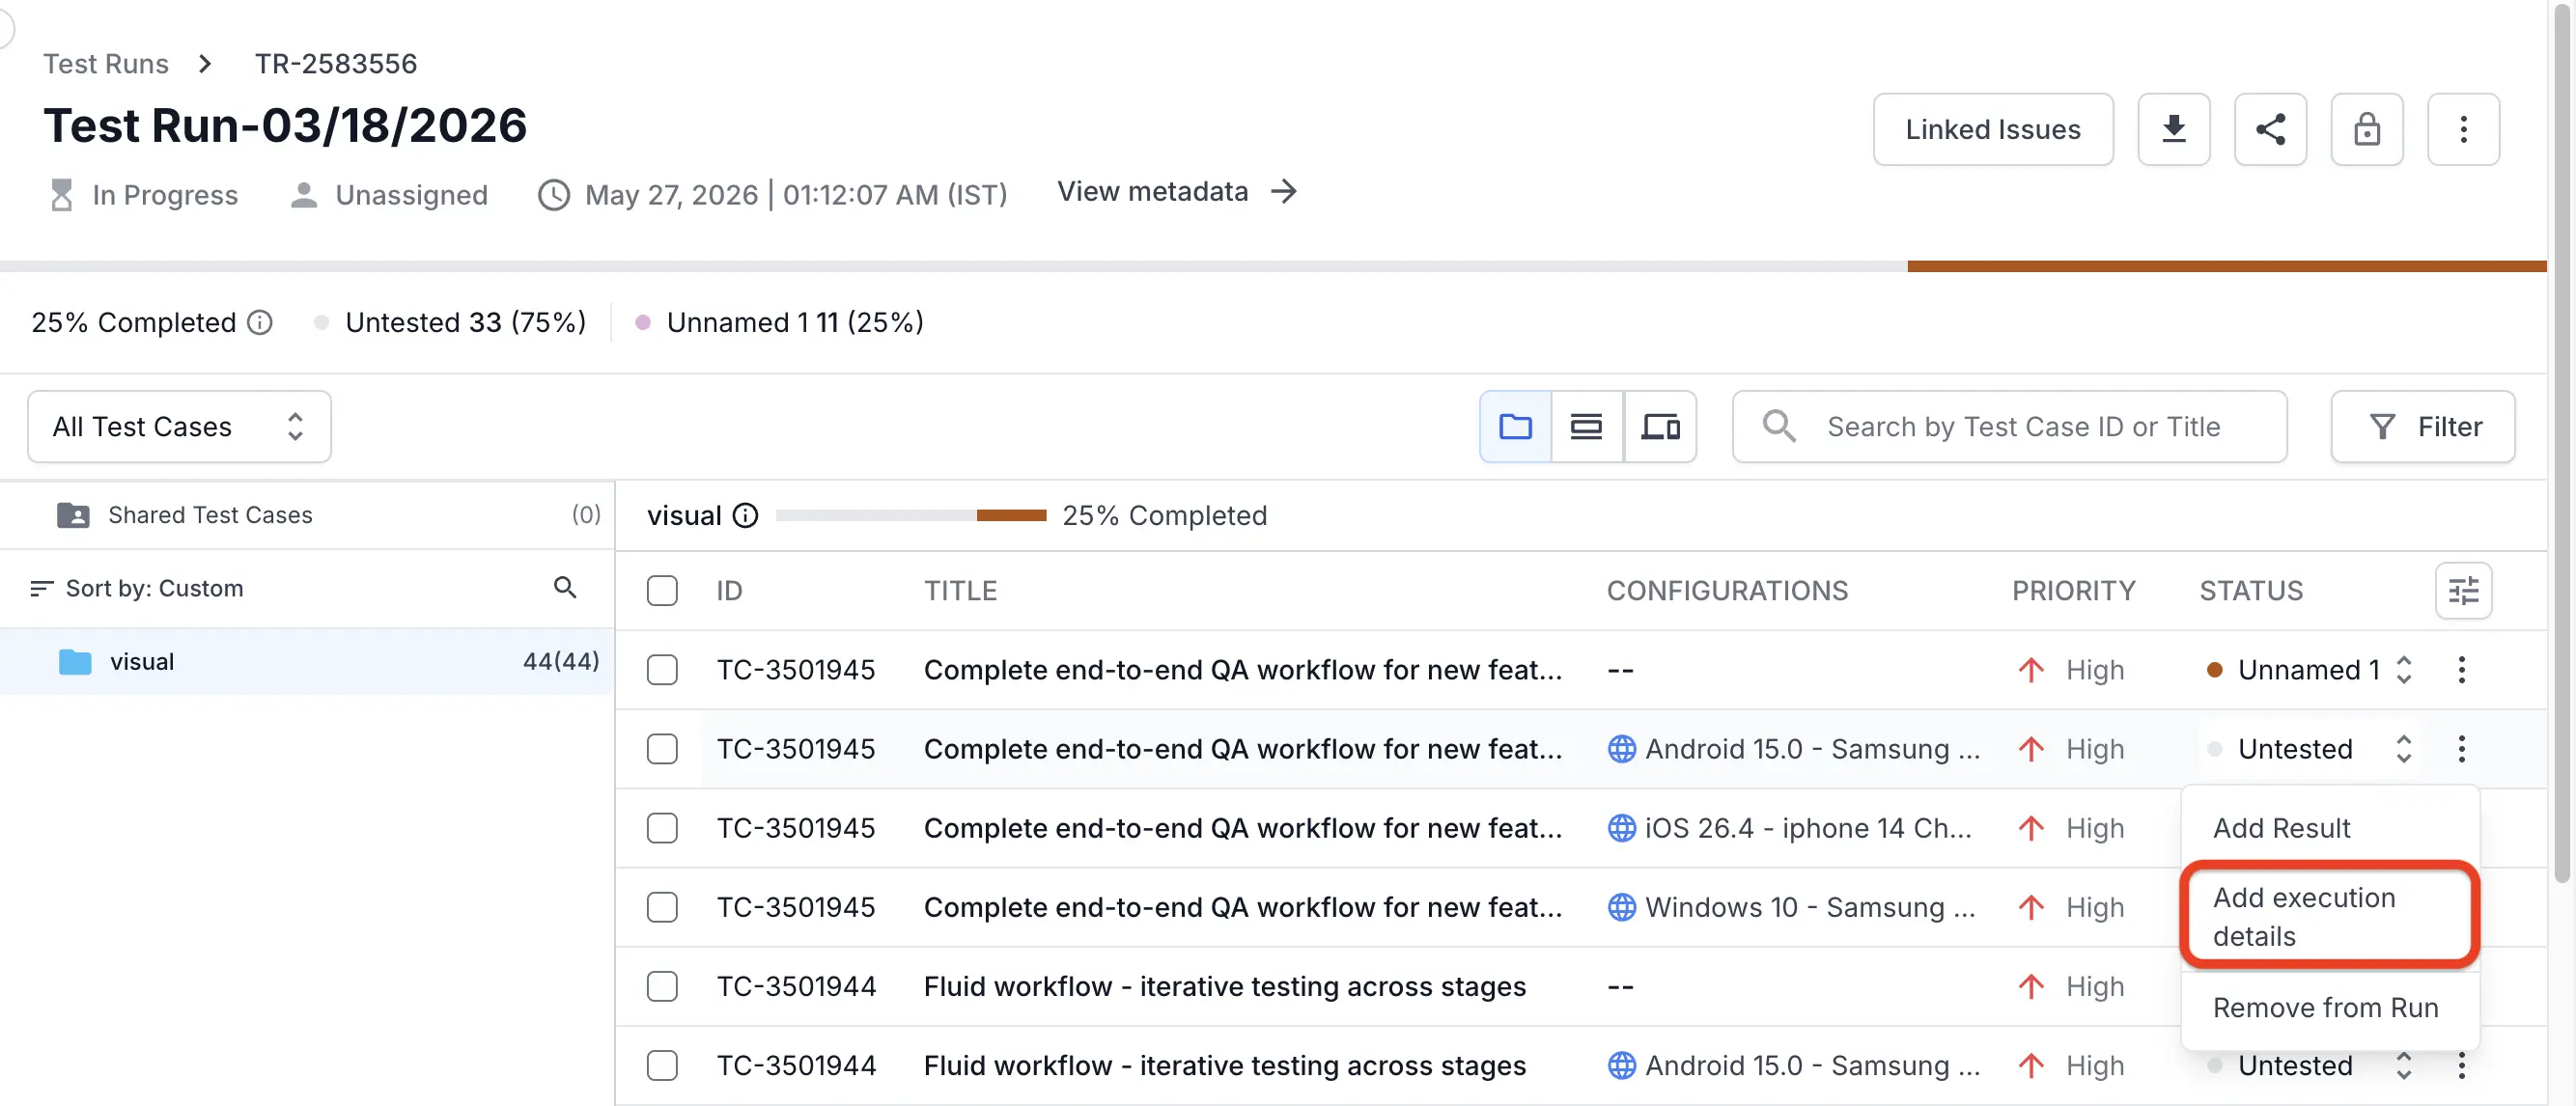
The Add Execution Details modal opens.
-
From Assign to, select a project member.
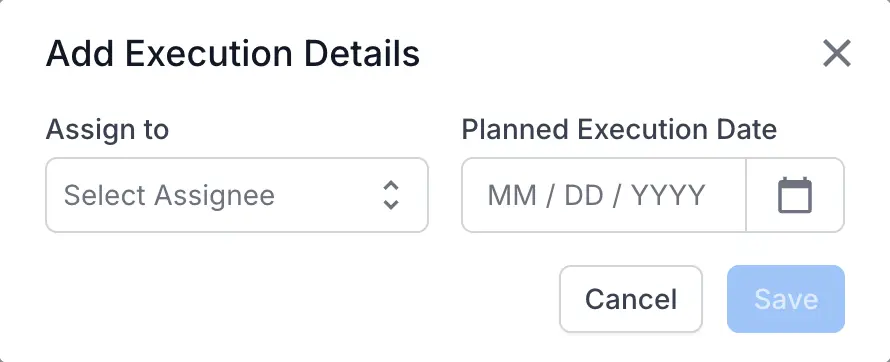
The top of the list contains Myself (your name) and Unassigned. Below them, project members appear alphabetically.
- In Planned Execution Date, pick the date in the calendar. The field accepts
MM / DD / YYYY. - Click Save.
The dialog closes, and your selections are stored against that test case. To discard changes, click Cancel or the close icon in the modal header.
Add execution details to several test cases at once
Use this path when you want to assign a batch of test cases in one action.
- In the test case list, select the checkbox for each test case you want to plan. You can use the column header checkbox to select every test case on the page.
-
In the bulk action bar at the top of the list, click Add execution details.
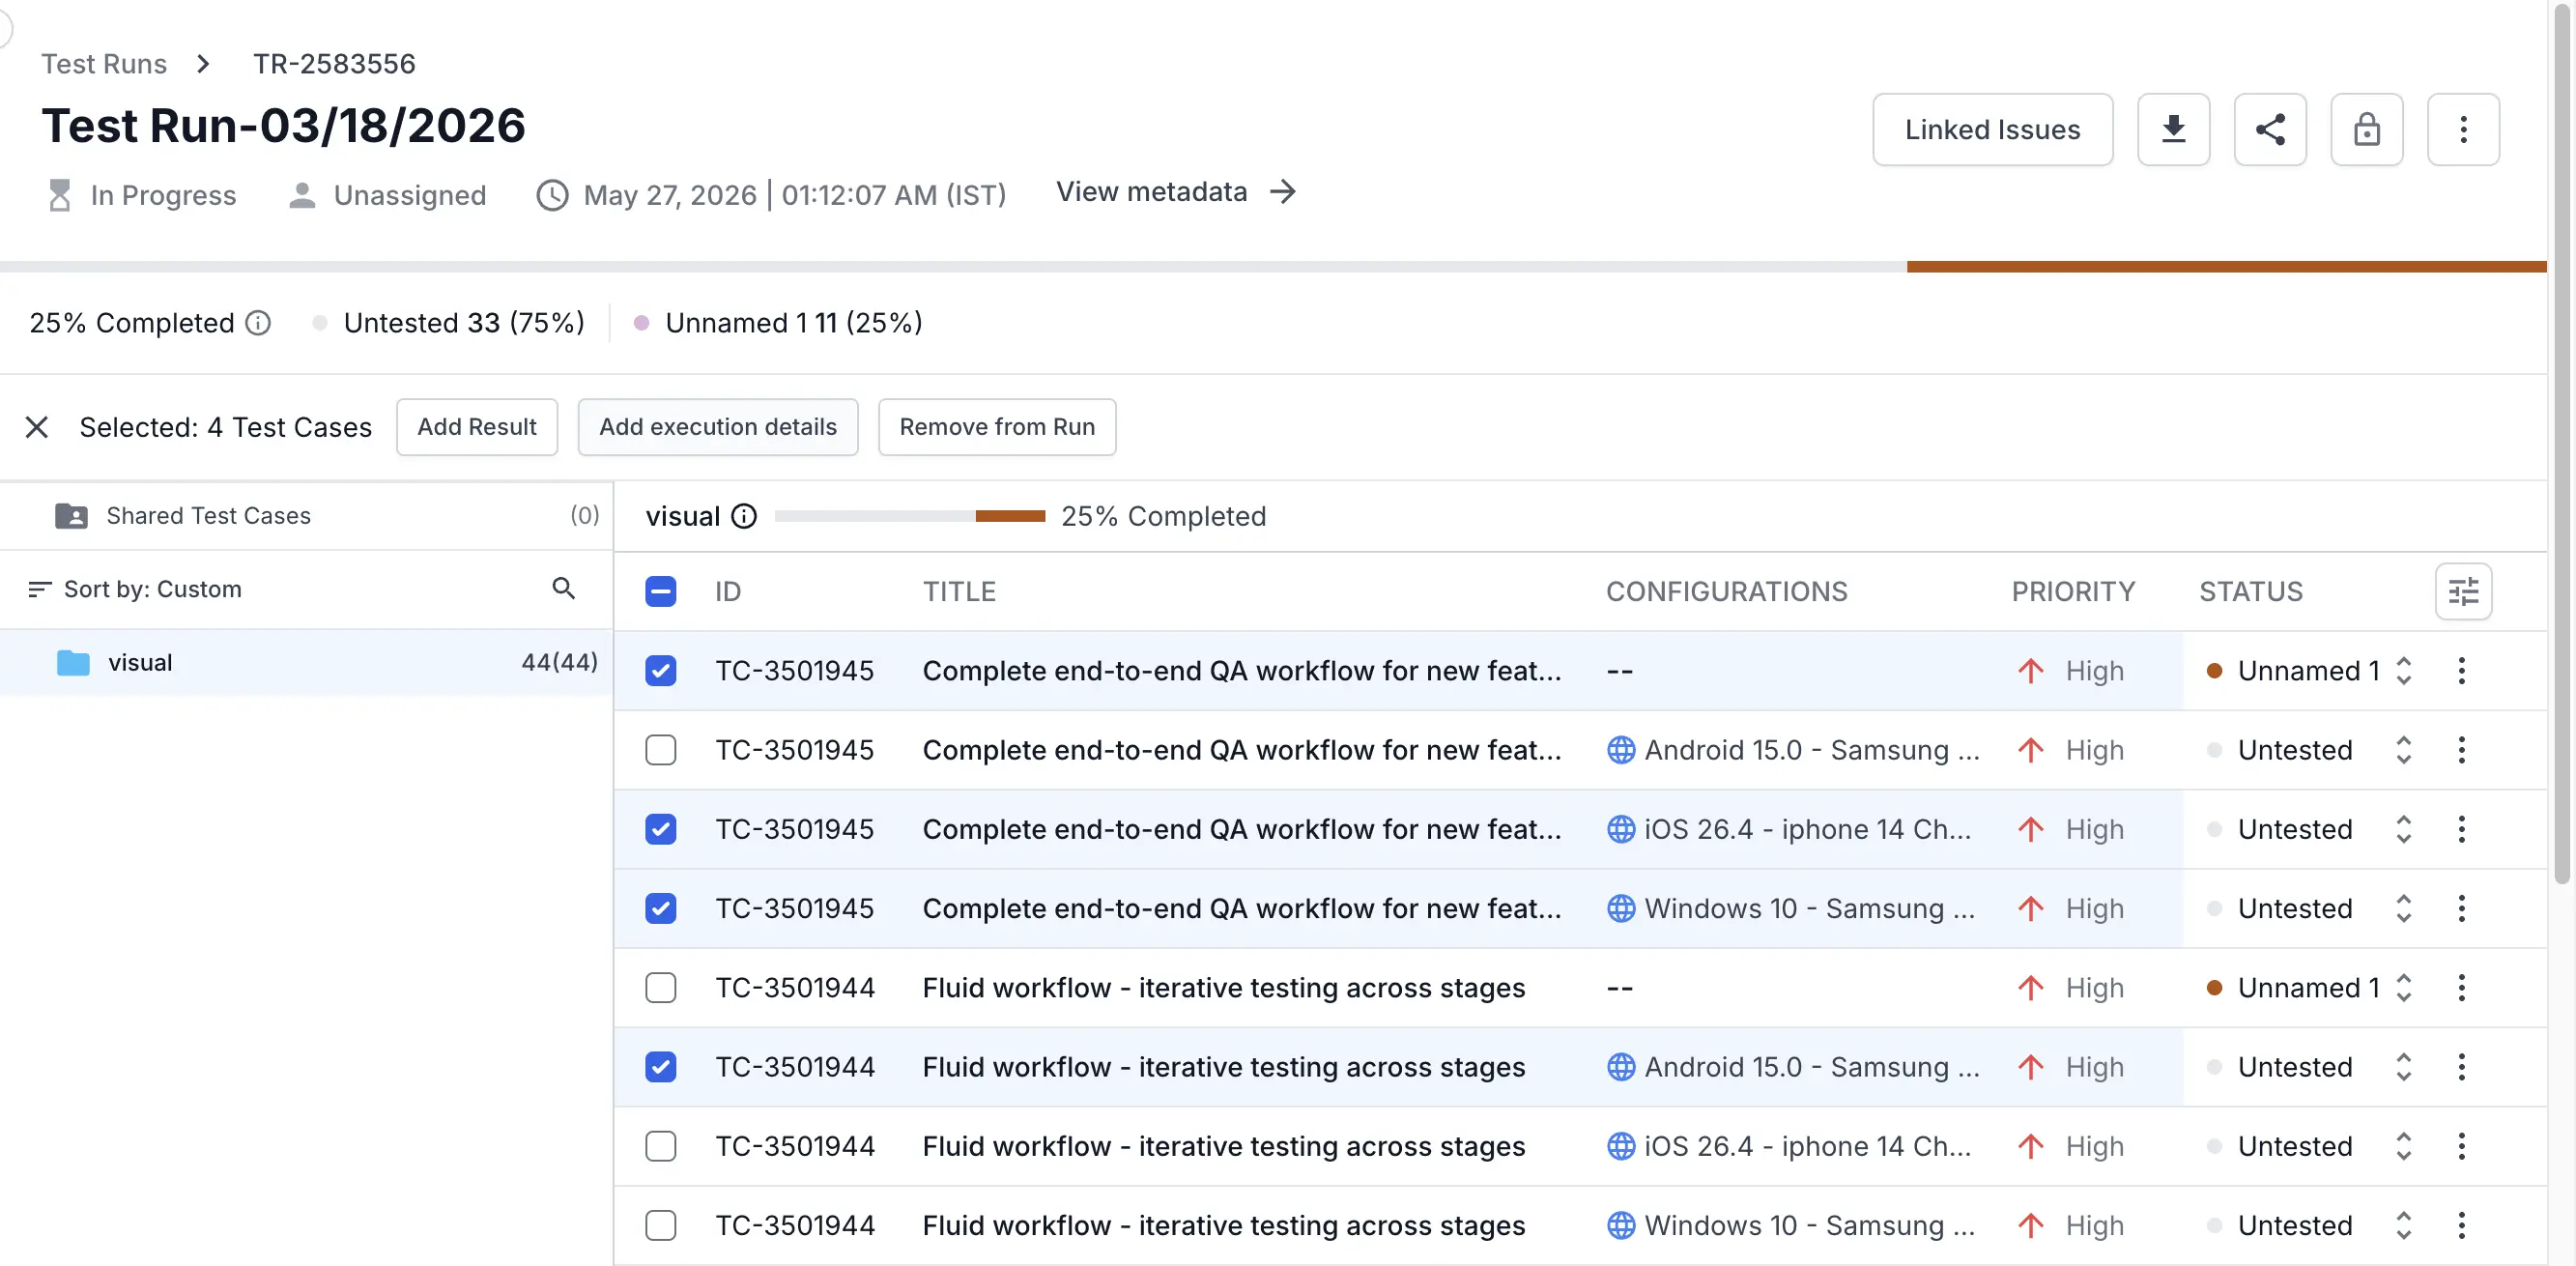
The same Add Execution Details modal opens.
-
Set Assign to and Planned Execution Date.
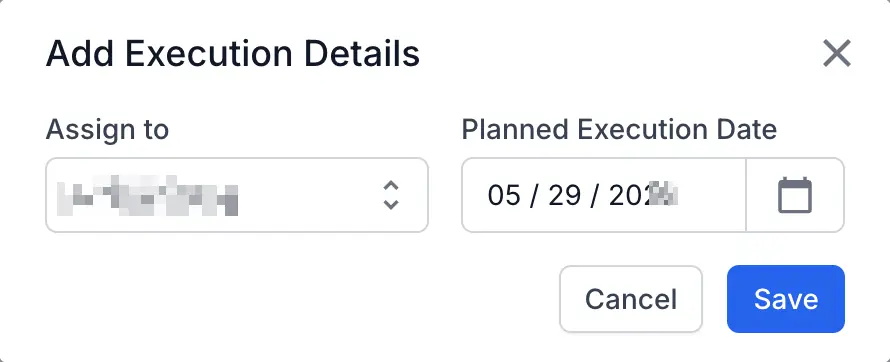
- Click Save.
The values you set apply to every selected test case.
Fields you can set
Following are the fields you can set:
| Field | What it does | Notes |
|---|---|---|
| Assign to | Sets the person responsible for executing the test case. | The list shows project members. Myself and Unassigned appear at the top. [Placeholder: confirm whether non-members of the project can be selected.] |
| Planned Execution Date | Sets the target date for executing the test case. | Format is MM / DD / YYYY. [Placeholder: confirm whether past dates are allowed and whether the field accepts typed input in addition to the picker.] |
Next steps
- Capture results once execution begins. See Add a result documentation.
- Add context to those results. See Add notes and attachments documentation.
- Link defects from your issue tracker to each step. See Add defects and custom fields in step results documentation.
- Finalize the run when execution is complete. See Manage test run state documentation.
We're sorry to hear that. Please share your feedback so we can do better
Contact our Support team for immediate help while we work on improving our docs.
We're continuously improving our docs. We'd love to know what you liked
We're sorry to hear that. Please share your feedback so we can do better
Contact our Support team for immediate help while we work on improving our docs.
We're continuously improving our docs. We'd love to know what you liked
Thank you for your valuable feedback!