A user-friendly website is inevitable for any business to flourish. The number of mobile users is greater than desktop users, as the penetration of mobile phones is more compared to computers.
Mobile companies are releasing new models with new designs, screen resolutions, and processors every year to attract buyers. Hence, testing mobile applications have always been challenging due to device fragmentation, however, it is an indispensable part of mobile development.
Let’s understand how to streamline the testing by opting for mobile browser automation using Selenium.
Selenium for Mobile Browser Automation
Selenium is a popular automation suite for browser automation and Appium is the best when it comes to automating mobile applications. To test web applications in mobile browsers, Selenium can be used with the Appium framework.
In Selenium 3, JSON Wire protocol is used to communicate with the web browsers while the web browsers work on W3C (World Wide Consortium) protocol. This leads to APIs encoding and decoding at the client level.
- WebDriver APIs in Selenium 4 follow the W3C in its implementation. All the popular browsers such as Chrome, Firefox, Safari, and IE are W3C compliant.
- And as Selenium 4 is using W3C, automation tests run consistently across all the W3C-compliant web browsers.
- Selenium supports many languages such as Java, C#, Python, and Ruby.
- With Selenium 4, the tests can directly communicate with the web browser as JSON Wire Protocol is eliminated.
Appium is an open-source tool for automating native, mobile web, and hybrid applications on iOS, Android, and Windows. It is a server written on node.js that works on client-server architecture. According to the client-server architecture, the client connects to the server to avail of any service hosted on the server. Any communication between the client and server is in the form of responses and requests.
Like Selenium, Appium also supports multiple languages such as Java, Objective-C, JavaScript, PHP, Ruby, Python, and C#.
Getting Started with Mobile Browser Automation Testing
Selenium Mobile Browser Automation
- Install and Configure Android SDK
- Install Node.js and Appium Server
- Write Mobile Web Browser Automation Test Script and Execute
To get started with mobile web browser automation testing, you first need to install Android SDK, Node.js, and Appium.
1. Install and Configure Android SDK
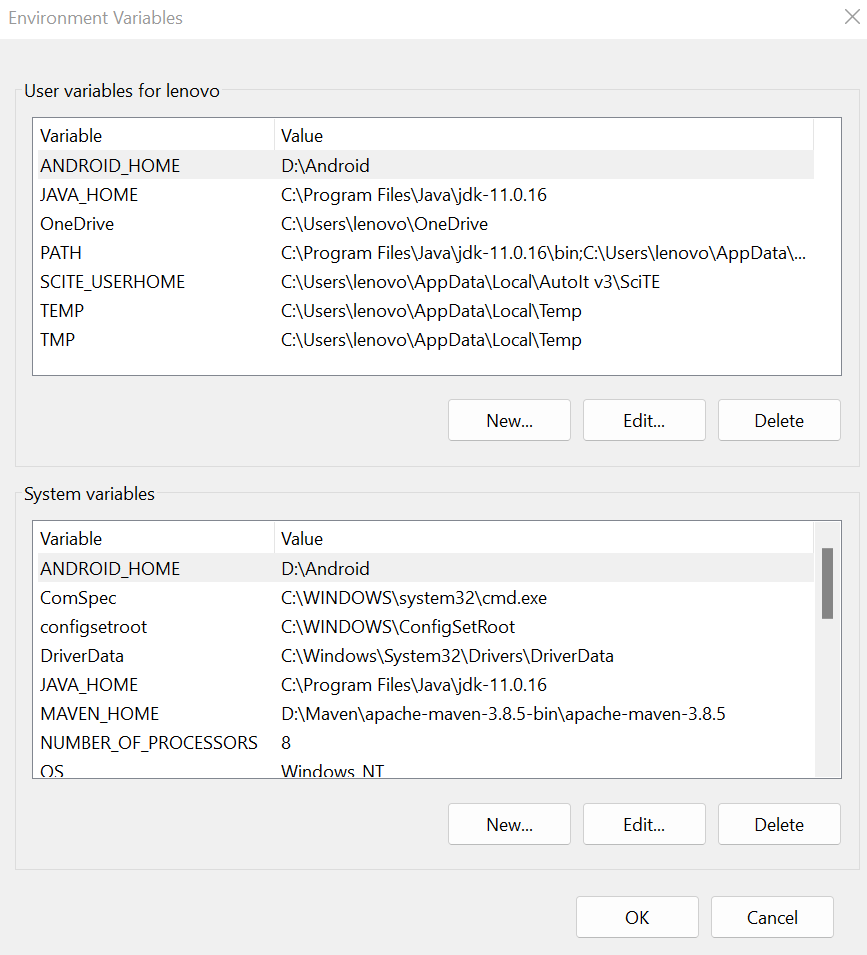
Download Android SDK and set “ANDROID_HOME” path in System Environment Variables by following the below steps:
Step 1– Download Android SDK command-line tools from Android Studio official page for Windows/iOS.
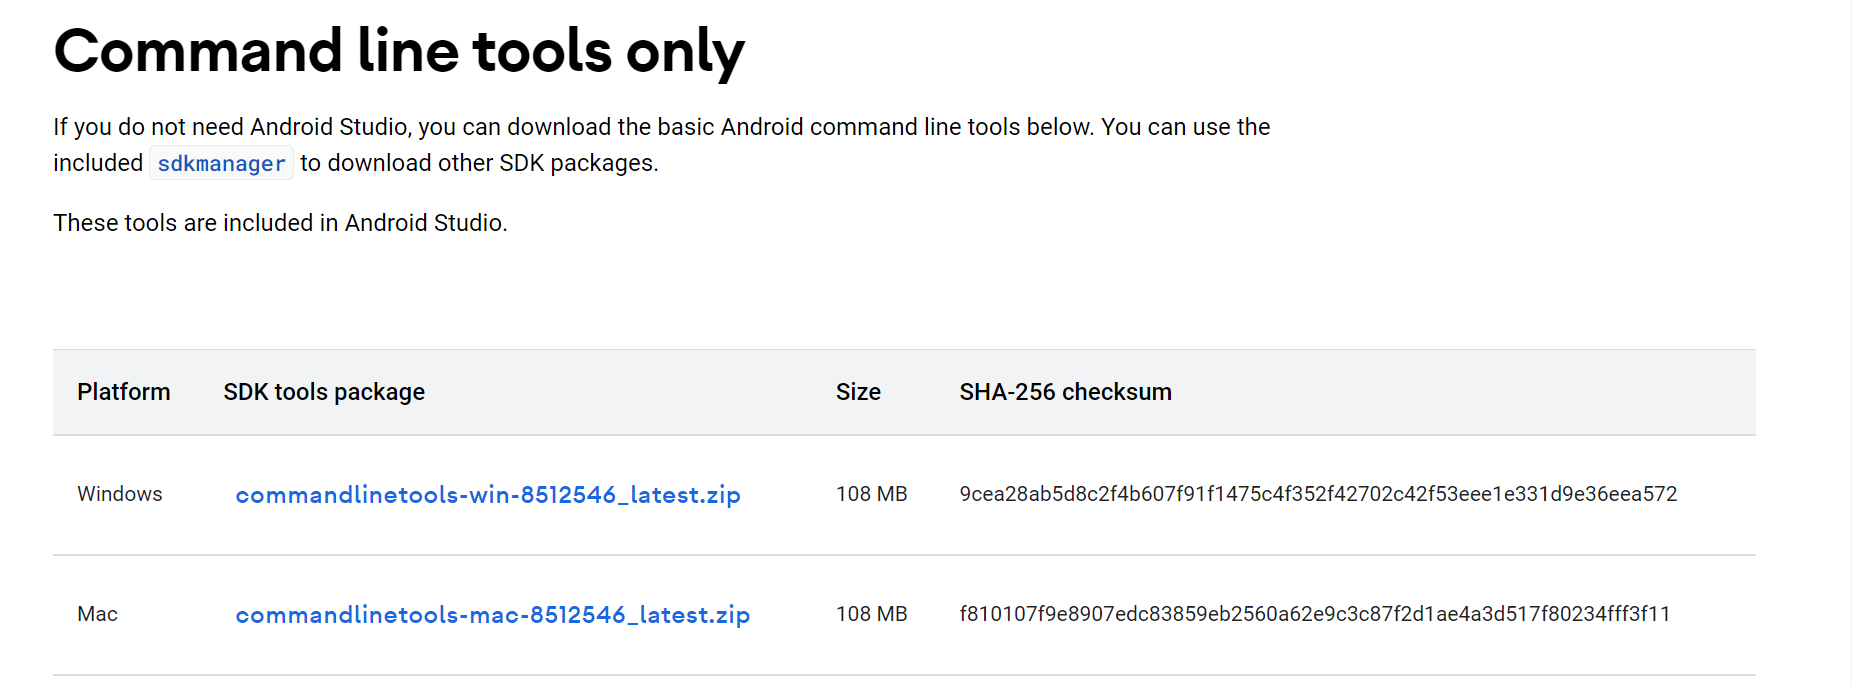
Step 3– Within the “Android” folder, create a new folder “cmdline-tools”. And under “cmdline-tools” folder, create a “tools” folder.
Step 4– Now, move the extracted content to the “Tools” folder. Final contents of “tools” folder should look like below.
Step 5– Navigate to the bin folder and open the command prompt. Type “sdkmanager –list”. This will show a list of installed, valid packages as well as those that can be updated.
Step 6– To install the platform tools type below command in command prompt
sdkmanager “platform-tools” “platforms;android-33”
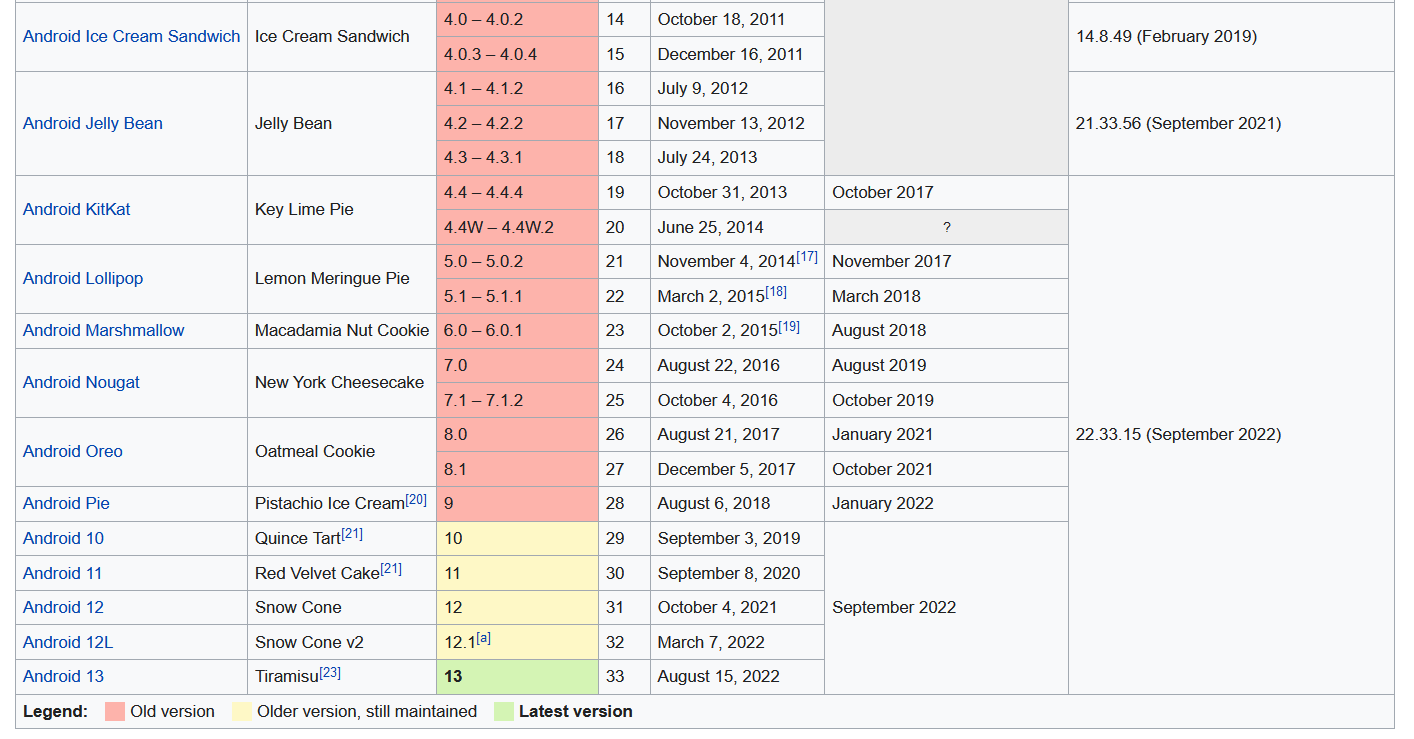
“33” is the latest Android API version. To choose an API version of the Android device under test, refer Android version history Wikipedia page.
Step 7– After the platform tools are downloaded, “platforms” and “platform-tools” folders should be populated under “Android folder”. “platform-tools” contains “adb.exe” which helps in detecting the Android device when connected to the system.
Step 8– Set “ANDROID_HOME” path in the system environment variables.
Step 9– Go to Settings in the Android phone under test and enable the “Developer Options” so that system can detect the phone when connected.
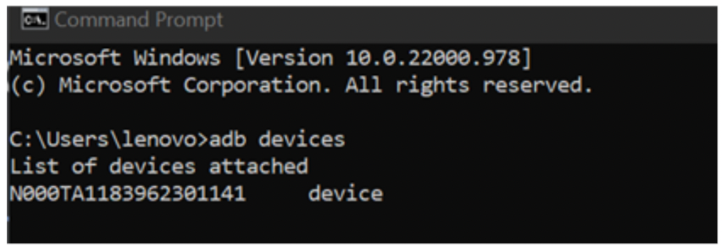
Step 10– Connect the phone via USB cable, open the command prompt in the system, and type the command as “adb devices” to get the list of devices attached.
2. Install Node.js and Appium Server
Step 1– Download Node.js from its official page. Once downloaded, run the installer. This will install node.js and npm and will be available under the “C:\Program Files\nodejs” folder in the system.
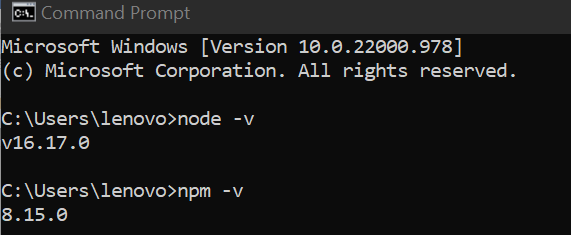
Step 2– To check whether node is installed open a new command prompt and type.
node -v
Step 3– To check whether node is installed type
npm -v
Step 4– To install Appium enter below command on the command prompt.
npm install -g appium
Step 5– Once downloaded, check that Appium is installed by typing the command
appium -v
Step 6– Type “appium” and hit Enter. The Appium server should start on localhost port 4723 which is the default port for Appium. To stop the Appium server press “Ctrl+C”.
The device is connected to the system, listed via adb and the Appium server is also running.
Now you can start with the first Mobile web browser automation script.
3. Write Mobile Web Browser Automation Test Script
Step 1– In any Java editor, create a Maven project and add Selenium Java, Java client and TestNG dependencies under <dependencies> tag in pom.xml.
 <dependencies>

     <dependency>

     <groupId>org.seleniumhq.selenium</groupId>

     <artifactId>selenium-java</artifactId>

     <version>4.5.0</version>

     </dependency>

     <dependency>

     <groupId>io.appium</groupId>

     <artifactId>java-client</artifactId>

     <version>8.2.0</version>

     </dependency>

     <dependency>

     <groupId>org.testng</groupId>

     <artifactId>testng</artifactId>

     <version>7.6.1</version>

     <scope>compile</scope>

     </dependency>

    </dependencies>
Step 2– Under “src/test/java” create a package and under that package, create a class as “AndroidChromeTest”.
Step 3– Create a WebDriver instance as we do in Selenium Web automation.
WebDriver driver;
Step 4– Create a ChromeOptions instance to set Chrome Driver and Android device details.
ChromeOptions options=new ChromeOptions();
Step 5– Create a URL class instance to store the address of Appium server.
URL url=new URL("http://localhost:4723/wd/hub");Step 6– Create AndroidDriver instance and pass Appium remote server address and Desired Capabilities instance.
driver = new AndroidDriver(url, options);
Step 7– Below code set the desired details for the Android device and Chrome browser present in Android device
@BeforeMethod

    public void setUp() throws MalformedURLException {

     options.setPlatformName("Android");

     options.setAndroidDeviceSerialNumber("N000TA1183962301141");

     options.setBrowserVersion("106");

     //Appium server details

     url = new URL("http://localhost:4723/wd/hub");

     driver = new AndroidDriver(url, options);

    }
Step 8– This completes the setup and we are good to start interacting with the browser. Below code launches BrowserStack official website, and verifies that the title is as expected or not.
@Test
public void verifyTitle() throws MalformedURLException {
driver.get("https://www.browserstack.com/");
Assert.assertEquals(driver.getTitle(), "Most Reliable App & Cross Browser Testing Platform | BrowserStack");
}
Above program demonstrates testing of Mobile Chrome browser in Android Phone. To test in any other OS or browser Desired Capabilities should be set accordingly.
Why is Cross Browser testing necessary?
Websites are built using different technologies such as HTML, Javascript, CSS, PHP, etc. Every browser has its own engine to render web pages. With this, it is evident it will load, behave, and appear slightly different in different browsers. Cross-browser testing verifies that the website is rendered properly across multiple browsers and is crucial for ensuring that the product experience is consistent.
In the parallel world, Web Browser companies are releasing new versions of browsers very frequently. Again, testing websites against new browser versions is obligatory.
Selenium for Cross-Browser Testing
Implementing cross-browser testing manually seems impossible as there is a pool of mobile device type, platforms (Android/ iOS), browser types (Chrome/ Firefox/ Safari), and browser versions available in the market. Selenium cross-browser testing along with the TestNG framework can be used by passing browser values from testing.xml file and with the help of @Parameters annotation.
Using BrowserStack to achieve Cross Browser Testing
BrowserStack real device cloud leverages testing of mobile/web services by providing 3000+ real devices and browsers for comprehensive testing of the websites and mobile applications for functionality, performance, and visual appeal to release bug-free software faster and at scale.
Testers can easily switch between devices, platforms, browsers, and browser versions thereby achieving cross-platform and cross browser testing.
How to Test Mobile Web Browsers on BrowserStack Real Device Cloud
BrowserStack Automate offers 3500+ real browsers and devices to test on using its Cloud Selenium Grid. Testing on real device cloud helps you get accurate test results. Here are the steps to test mobile web browsers on BrowserStack Automate:
Step 1– Sign up on BrowserStack and create a free account. After successful account creation, you can view the Authentication and Security details under the Summary tab.
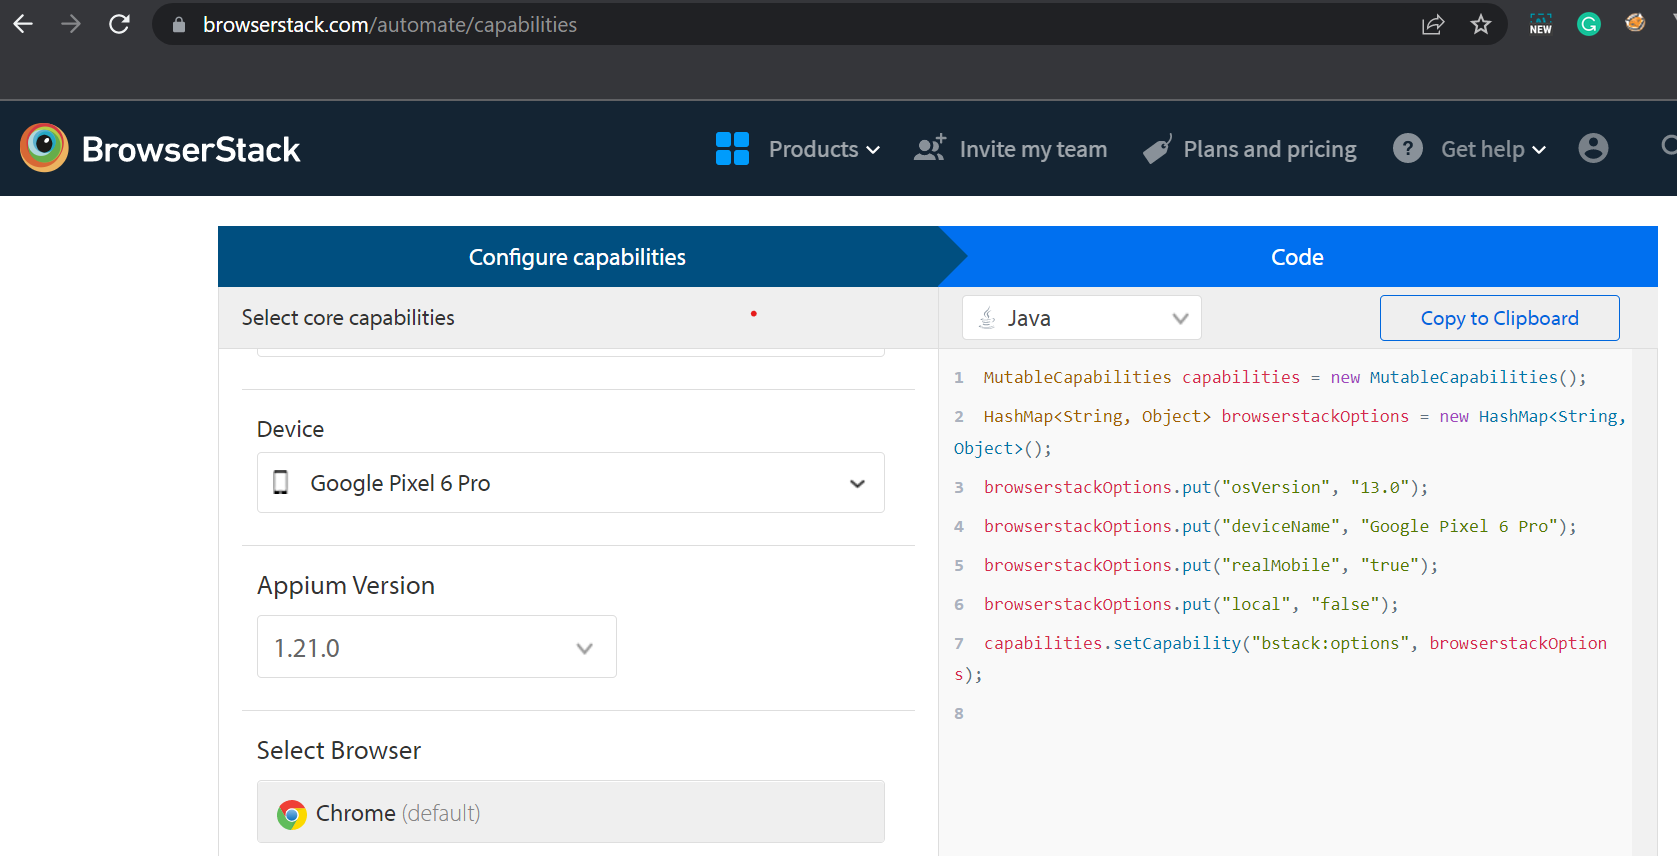
Step 2– Navigate to Capabilities Generator page to select from a comprehensive set of options.
Step 3– Choose your desired combination of device-browser from thousands of available combinations. In the below example, Android Google Pixel 6 Pro, OS 13 with Chrome browser are selected.
Step 4– In any java editor, create a Maven project and add Selenium Java and Java client dependencies.
<dependencies>
<dependency>
<groupId>org.seleniumhq.selenium</groupId>
<artifactId>selenium-java</artifactId>
<version>4.5.0</version>
</dependency>

<dependency>
<groupId>io.appium</groupId>
<artifactId>java-client</artifactId>
<version>8.2.0</version>
</dependency>

<dependency>
<groupId>org.testng</groupId>
<artifactId>testng</artifactId>
<version>7.6.1</version>
<scope>compile</scope>
</dependency>
</dependencies>
Below program showcases the Chrome browser testing on Google Pixel 6 Pro on the real device cloud.
public class AndroidTestBS {
public static String username = "<browserstack_username>";
public static String accesskey = "<browserstack_accesskey>";
public static final String URL = "https://" + username + ":" + accesskey + "@hub-cloud.browserstack.com/wd/hub";
WebDriver driver;
String url = "https://www.browserstack.com/";
MutableCapabilities capabilities = new MutableCapabilities();
HashMap<String, Object> browserstackOptions = new HashMap<String, Object>();

@BeforeMethod
public void setUp() throws MalformedURLException {
browserstackOptions.put("browserName", "chrome");
browserstackOptions.put("deviceName", "Google Pixel 6 Pro");
browserstackOptions.put("realMobile", "true");
browserstackOptions.put("osVersion", "13");
capabilities.setCapability("bstack:options", browserstackOptions);
driver = new RemoteWebDriver(new URL(URL), capabilities);

}

@Test(priority = 1)
public void verifyTitle() {
driver.get(url);
System.out.println(driver.getTitle());
Assert.assertEquals(driver.getTitle(), "Most Reliable App & Cross Browser Testing Platform | BrowserStack");
}

@Test(priority = 2)
public void verifyDashboard() {
driver.get(url);
WebElement getStarted = driver.findElement(By.cssSelector("a#signupModalButton"));
getStarted.click();
Assert.assertEquals(driver.getTitle(),
"Get Started For Free & Access 3000+ Mobile Devices & Browsers | BrowserStack");
}

@AfterMethod
public void tearDown() {
driver.quit();
}
}
Below program illustrates Safari browser testing on iPhone 11 the real device cloud.
          @BeforeMethod

    public void setUp() throws MalformedURLException {

     browserstackOptions.put("browserName", "safari");

     browserstackOptions.put("deviceName", "iPhone 11");

     browserstackOptions.put("realMobile", "true");

     browserstackOptions.put("osVersion", "14");

     capabilities.setCapability("bstack:options", browserstackOptions);

     driver = new RemoteWebDriver(new URL(URL), capabilities);

    }
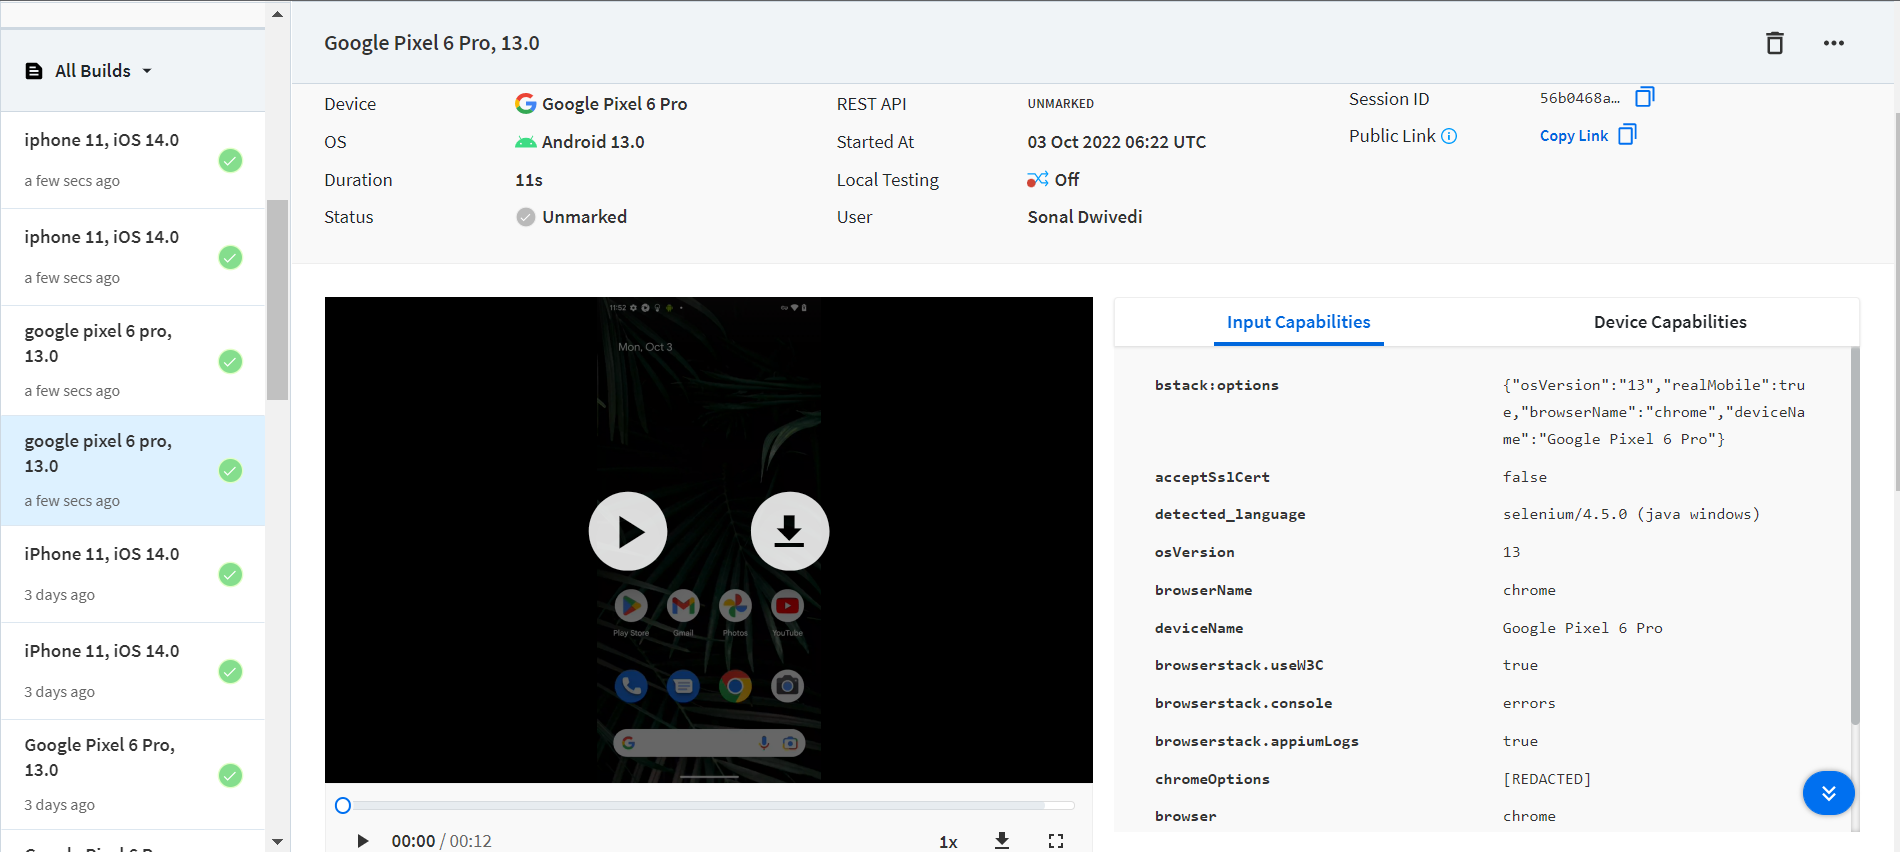
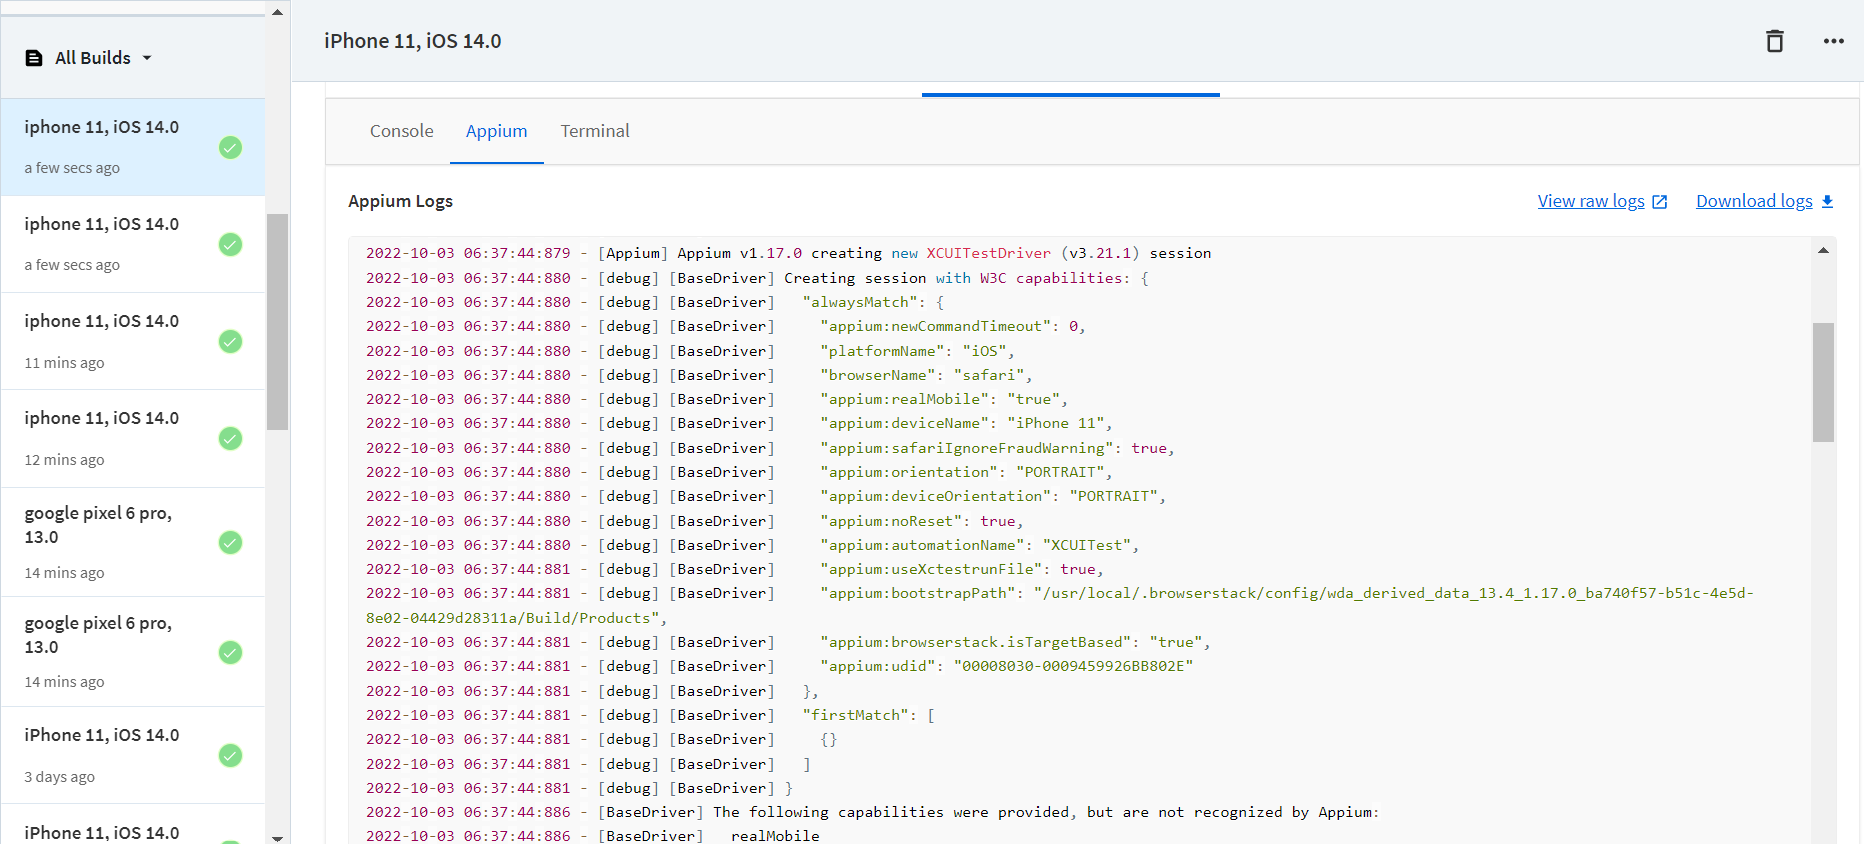
After running the above programs, you can check the result on the Automate Dashboard page. You also get to see the execution video. You can have access to text, network, and other logs. And it captures Appium logs too!
In short, all the environment details and desired capabilities are available for each run on the Automate dashboard page.
After seeing the above implementation it’s quite evident that BrowserStack facilitates QA teams to execute test scenarios on multiple browsers to make sure the build meets browser compatibility benchmarks. It eliminates the complexity of downloading Android SDK, Appium, and Node to achieve web mobile automation testing in a traditional way.
Why use BrowserStack Automate to run Selenium Tests?
You should run Selenium Java Tests on a real device cloud like BrowserStack Automate for below reasons:
- Realistic Testing Conditions: Real device clouds provide access to a broad spectrum of devices and environments, ensuring tests reflect actual user conditions accurately.
- Enhanced Security: Maintained with high security standards, real device clouds offer secure, isolated testing environments, minimizing data breach risks.
- Broad Browser and OS Coverage: Helps identify compatibility issues across various browsers and operating systems, enhancing user experience.
- Performance Insights: Real devices yield authentic performance data essential for optimizing application responsiveness.
- Scalability and Accessibility: Facilitates scalable and accessible testing, suitable for distributed teams.
- CI/CD Integration: Integrates smoothly with CI/CD pipelines for continuous testing and early issue detection.
- Cost-Effectiveness: Although initially more costly, it saves on long-term expenses related to fixes and support.
Conclusion
In today’s software automation world, continuous development, and continuous deployment is the key objective of development environments. Selenium and Appium are the two popular and powerful testing automation tools that help testers integrate continuous testing. It supports multiple browsers, platforms, and operating systems.
As the gatekeeper of any product, it is the responsibility to test the product on real devices, platforms, and browsers before releasing it in production.
BrowserStack addresses all these concerns by providing 3000+ real devices and browsers. It supports cross-browser testing and delivers a seamless user experience across browsers and devices.


