Local testing of websites allows developers to simulate user interactions and verify functionality in a controlled environment before going Live. This process helps catch issues early, ensuring a smoother deployment and a better user experience.
Overview
Advantages of testing a website locally
- Faster feedback cycles during development
- Early detection of bugs and issues
- Controlled environment for precise testing
- Reduced deployment risks
- Streamlined debugging process
- Cost-effective and efficient workflow
How to test a Website Locally using BrowserStack?
- Install pip (sudo easy_install pip) and Selenium (sudo pip install selenium); add dependencies like dotenv if needed.
- Configure your first build by copying the build snippet from BrowserStack Automate and setting up your desired browser/device combinations.
- Run the first build locally to validate the testability of your software.
- Execute the build on BrowserStack and view the results on the Automate dashboard.
This article explains about how we can set up an environment to test websites locally.
Local Testing for Staging Applications
You can always opt for writing automation test scripts in various testing frameworks to test your websites locally, be it a local host server, or a staging website. There are some tools like BrowserStack Automate and BrowserStack Live that can help you test your websites locally. These tools help run interactive and automation tests on localhost or staging environments.
What is a Local Testing Environment?
Whenever a change has to go Live on a website, ideally the entire process goes through a fool-proof method where the changes are done on a prototype or a beta version of the website that will carry out various test cases and figure out the changes that must be fixed before the final release.
Any environment that acts as a barrier between the Live website or Live server is known as a local testing environment. This is the environment where changes are made and tested first.
Advantages of using a Local Testing Environment
Some of the advantages of using a local testing environment are as follows:
- Faster Feedback: Quickly iterate on changes with near-instant insights during development.
- Early Bug Detection: Catch and fix issues before they reach production.
- Controlled Environment: Test in a stable, predictable setting without external interference.
- Reduced Deployment Risks: Mitigate potential Live issues by identifying problems early.
- Simplified Debugging: Isolate and resolve errors more efficiently in a local setup.
- Cost-Effective Workflow: Save resources by testing without relying on expensive Live environments.
Running your First Build on a local Testing Environment
Take an example of a simple web application that has some functionality as simple as a to-do list app. The interface contains the login page, and, if authenticated, takes you to the home page.
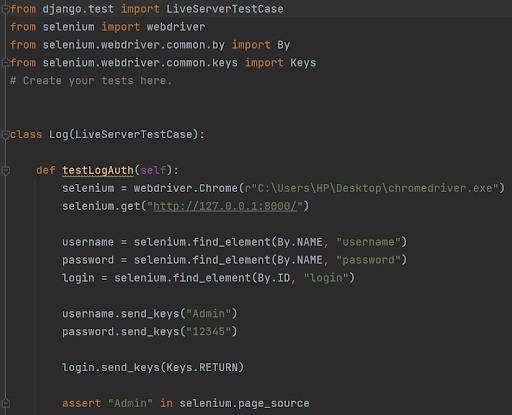
Create our first build using the Django framework, which will run a test case in the Chrome web browser that will Automate the login authentication and test whether the “admin” is present on the source page or not. You would also need to install the compatible Chrome driver and selenium to run the following python script.
Once you hit the following command in the terminal, you can see that terminal identifies the test script with the mentioned test cases.
The result shows that the test ran successfully without any errors.
Now understand about some of the prerequisites that must be followed in order to create efficient local testing environments.
What to Expect While Setting Up the Local Environment?
Before diving into local testing, ensure that all necessary prerequisites are in place for a smooth setup process.
- Interaction – One has to make sure, the local environment is able to interact with the APIs, Local databases, and Other integrated systems that the website might require.
- Test Management Tool – One must have a test management tool that will consist of a test matrix, that can map the requirements with the entire testing strategy and plans.
- Test Requirements – The team must narrow down the frameworks, testing tools, programming languages, and team efficiency that will be involved in the test management strategy.
- Resource Management – Based on the efficiency of the QA teams, you should be able to narrow down the various types of tests, and reports that will be generated. The objective of the testing environment and how the insights/solutions will be deployed on the deployment server should be clear in the resource management plan.
- Budget Management – Once the entire testing strategy or the project management plan has been created, one must allocate the necessary resources(budget) to the tools and frameworks that will be required most in the entire cycle.
These are some pointers that can make your job a little easier when it comes to setting up a local testing environment. Although, different projects may have unique challenges and thus be dealt with in unique manners. Since, we have discussed what we should expect while creating a local testing environment, let’s also understand how you can set up one as well.
How to Set Up Environment for Local Testing of Website
Let’s take a look at how to set up BrowserStack Automate and BrowserStack Live to get started. Here, we are using Python for setting up a Local Testing Environment using BrowserStack Automate, you can choose the scripting language according to your project.
You can follow the steps below to get started with automation testing using BrowserStack Automate:
1. Set up the dependencies: You can set up the dependencies by installing Selenium and programming language bindings, for instance, python programming, etc.
- Sudo easy_install pip
- Sudo pip installs selenium
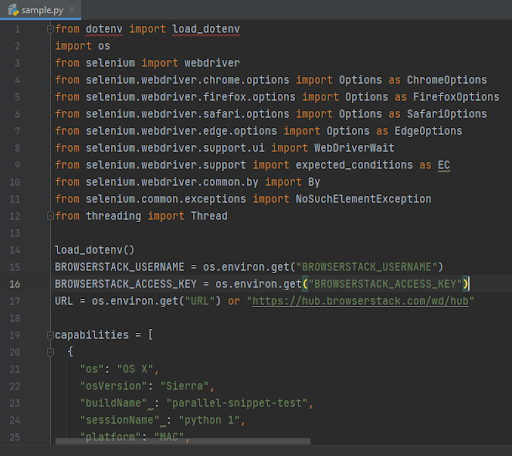
2. Configure your first build: Once you have configured the browser and device combinations, you can copy the first build from the BrowserStack Automate page, and run the first build on your local machine. A first build can be explained as a small part of the software/requirements/ that needs to be tested, and once the first build runs successfully, it can be assumed that the entire build is testable, and the QA teams can proceed to test it further.
Note: You might have to additionally install a few dependencies like ‘dotenv’ to be able to run the script.
Read More: Selenium with Python Tutorial
3. You can simply, Execute the build on BrowserStack and view the results on the Automate dashboard. To execute the build, you can follow the steps below:
- Once you have copied the sample build from the BrowserStack Automate and have chosen the OS versions and browser settings. You can save your file with the “xyz” name and .py extension. If you are using an IDE, you can simply execute the following command in the Terminal.
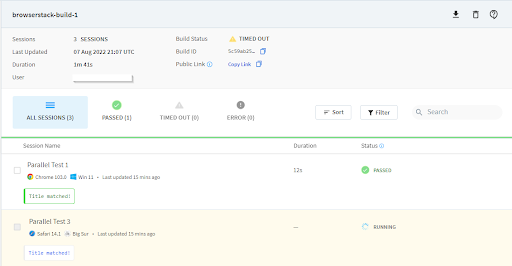
- Open the terminal and run the python file you have just created using “Python filename.py”. It will redirect you to the dashboard, where we will complete the two objectives. One is to run the first build, and the other objective is to analyze the results in the dashboard as shown in the image below.
- This is just a sample build that we have run on the platform to get familiar with the testing environment. You can use the BrowserStack Automate to test your local websites and analyze the test results in the dashboard for clarity and assessment of future builds.
Browserstack Live, on the other hand, is another tool that can provide interactive manual testing and debugging support for websites on localhost or staging. You can follow the steps below to get started with BrowserStack Live:
- Download BrowserStack local app on your machine to enable local testing.
The local testing feature from the Browserstack local app will allow you to choose from various operating systems, including windows, mac, etc., and devices that will include multiple browser support, such as Chrome, Opera, and Firefox.
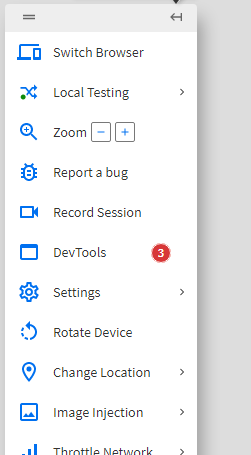
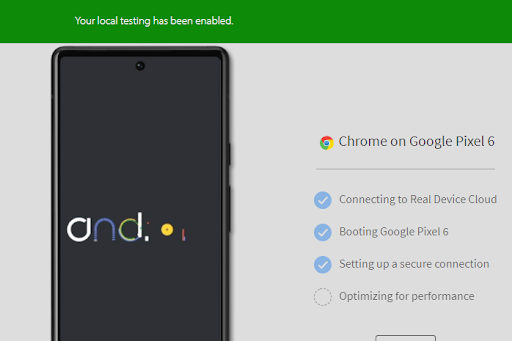
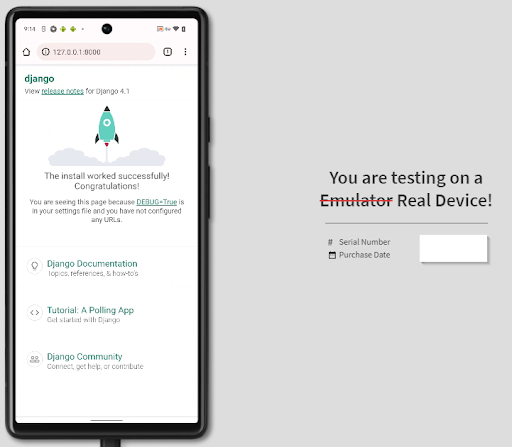
- Launch local testing on the BrowserStack Live dashboard. On the BrowserStack Live dashboard, you can choose from a range of devices and operating systems to set up the environment to test your websites locally.
Conclusion
The advantages of a local testing environment can save millions for organizations that make changes at scale. The cost-effectiveness of any changes that might be required on the Live websites can be efficiently achieved through automation testing tools that can help you navigate the changes on various devices, operating systems, etc. Therefore, it is always a hard and fast rule to set up a local testing environment for any project (website) to save precious time and resources.
Experience seamless local website testing with BrowserStack. Integrate your local environment to run cross-browser tests effortlessly, ensuring reliable performance before deployment


