Hybrid load testing using Playwright with JMeter or k6
Run a hybrid load test using Playwright scripts on BrowserStack Load Testing
Run a hybrid load test that combines your Playwright browser tests with a JMeter or k6 protocol load test.
Supported versions
The following framework and engine versions are recommended for hybrid load tests with Playwright:
| Framework | Node version | Framework version | Protocol engine |
|---|---|---|---|
| Playwright | Node.js 24 | Playwright 1.53.1 | JMeter 5.6.3, k6 2.0.0 |
Prerequisites
- BrowserStack Username and Access key. You can find these under your account profile.
- An existing JMeter script and an automated test suite written in Playwright Javascript or Typescript.
Run a test
Perform the steps given to run load tests for your automated Playwright test suites written in:
- NodeJS
- Python - Robot
You can start a new test either from the Quick Start page or the Load Tests page on the Load testing dashboard.
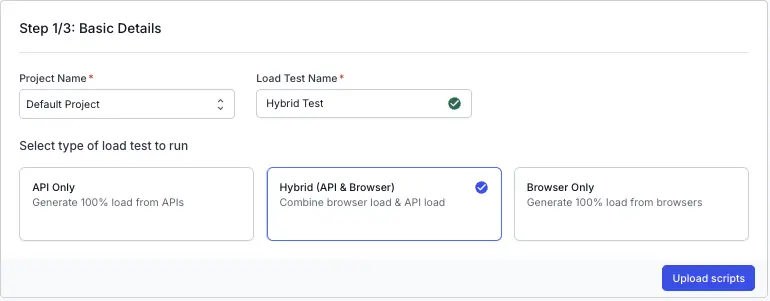
On the dashboard, click Create Load Test.

Enter a Test Name for your load test, select Hybrid and click Upload scripts
Upload your scripts
The product runs a hybrid test using JMeter and Playwright automation projects. JMeter is used to generate API-level load, and Playwright drives browser-level load to simulate real user interactions.
You see two sections:
-
JMeter Script: Upload your JMeter
.jmxfile (up to 50MB). Drag and drop the file or click to select it. -
Automation Project: Select Playwright - NodeJS from the dropdown as your automation framework. Then, upload your zipped project files (
.zipup to 250MB). Drag and drop the file or click to select it.
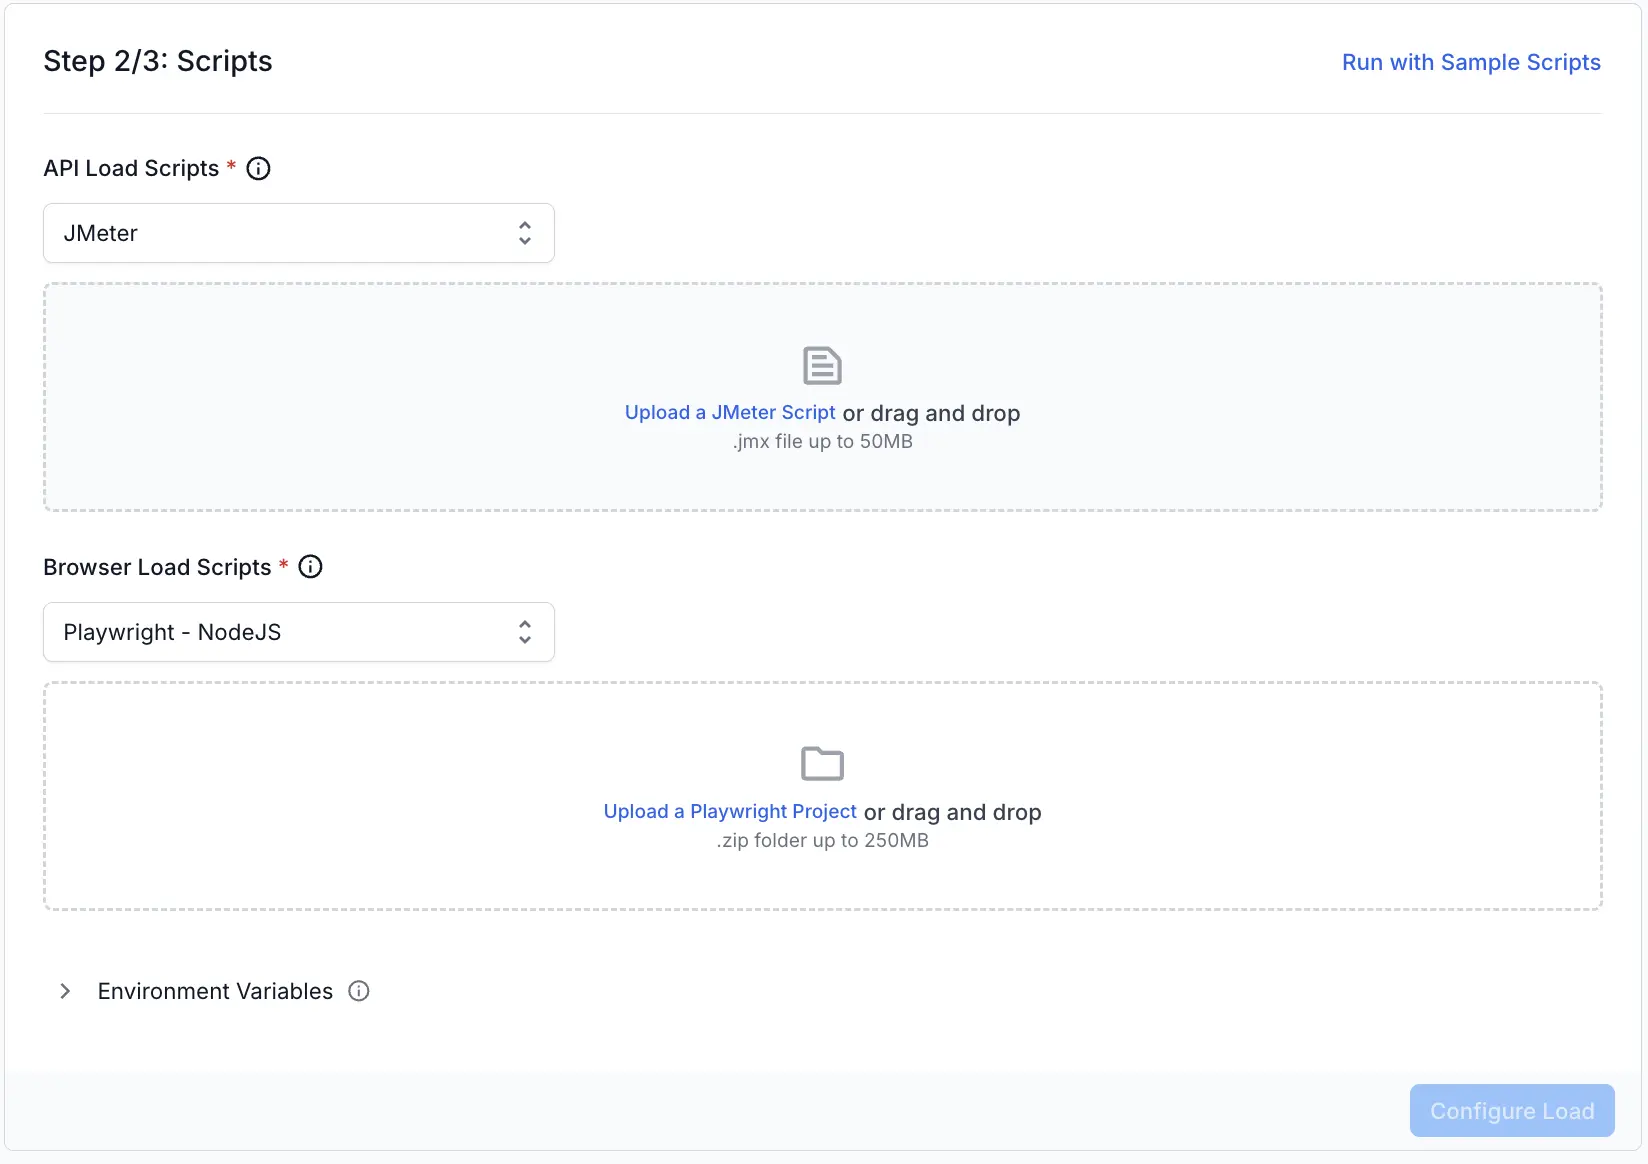
Both fields are mandatory for their respective test types. After uploading, click Configure Load to proceed to the next step.
You can also run load tests using the sample scripts if you want to try out the feature before uploading your own files.
You can configure the following load parameters to customize your load test:
Run test
After you finish configuring load parameters, click RUN TEST .
Download BrowserStack NodeJS SDK
Run the given command to install the BrowserStack NodeJS SDK in your project
Initialize your project for Load Testing
Run the following command from the root directory of your test project to generate the browserstack-load.yml file, which contains the configuration required to define and run your load test:
Configure your Load Test
Open the generated browserstack-load.yml file and update it with the relevant test details. Here’s a sample configuration:
Specify the tests
- The tests block defines the combination of test types you want to run as part of a hybrid load test. Specify
Playwrightas thetestTypefor one sub-block andJMeterfor another. - For the
Playwrightsub-block,-
browserLoadPercent- Specify the percentage of total virtual users to be allocated for Playwright tests. -
language- Set this tonodejs. -
files- Define the key files needed to install dependencies and identify which tests to execute.- Under
dependencies, include the path to files required for environment setup. ForNode.jsprojects, this is typicallypackage.json. - Under
testConfigs, provide the path to yourplaywright.config.js.
- Under
-
- For the
JMetersub-block,-
apiLoadPercent- Specify the percentage of total virtual users to be allocated forJMetertests. -
testScripts- Set the path to the.jmxfile.
-
Headless mode
- You can configure your Playwright load tests to run in either headless or headful mode using the
headlesscapability. - Headless mode (default): The browser runs without a visible UI, which is faster and consumes fewer resources. Most CI/CD and automated load tests use headless mode.
- Headful mode: The browser UI remains visible during test execution.
- If not specified, tests will run in headless mode by default.
Set reporting structure
Use projectName to group related tests under the same project on the dashboard. Use testName to group multiple runs of the same test.
Both projectName and testName must remain consistent across different runs of the same test.
You can use the following characters in projectName and testName:
- Letters (A–Z, a–z)
- Digits (0–9)
- Periods (
.), colons (:), hyphens (-), square brackets ([]), forward slashes (/), at signs (@), ampersands (&), single quotes ('), and underscores (_)
All other characters are ignored.
You can configure the following load parameters to customize your load test:
- Load profiles
- Load zones
- Set thresholds
- Per-VU external inputs with test data
- Environment variables
- Capture response details
Run the Load Test
Run the given command to start your test:
Check out the FAQs section to get answers to commonly asked questions.
View test results
Once the test starts running, you’ll get a link to the test report.
Prerequisites
- BrowserStack Username and Access key. You can find these under your account profile.
- An existing k6 script and an automated test suite written in Playwright Javascript or Typescript.
Run a test
Perform the steps given to run load tests for your automated Playwright test suites written in:
- NodeJS
- Python - Robot
You can start a new test either from the Quick Start page or the Load Tests page on the Load testing dashboard.
On the dashboard, click Create Load Test.
Enter a Test Name for your load test, select Hybrid and click Upload scripts
Upload your scripts
The product runs a hybrid test using k6 and Playwright automation projects. k6 is used to generate API-level load, and Playwright drives browser-level load to simulate real user interactions.
You see two sections:
-
k6 Script: Upload your k6
.jsfile (up to 50MB). Drag and drop the file or click to select it. -
Automation Project: Select Playwright - NodeJS from the dropdown as your automation framework. Then, upload your zipped project files (
.zipup to 250MB). Drag and drop the file or click to select it.
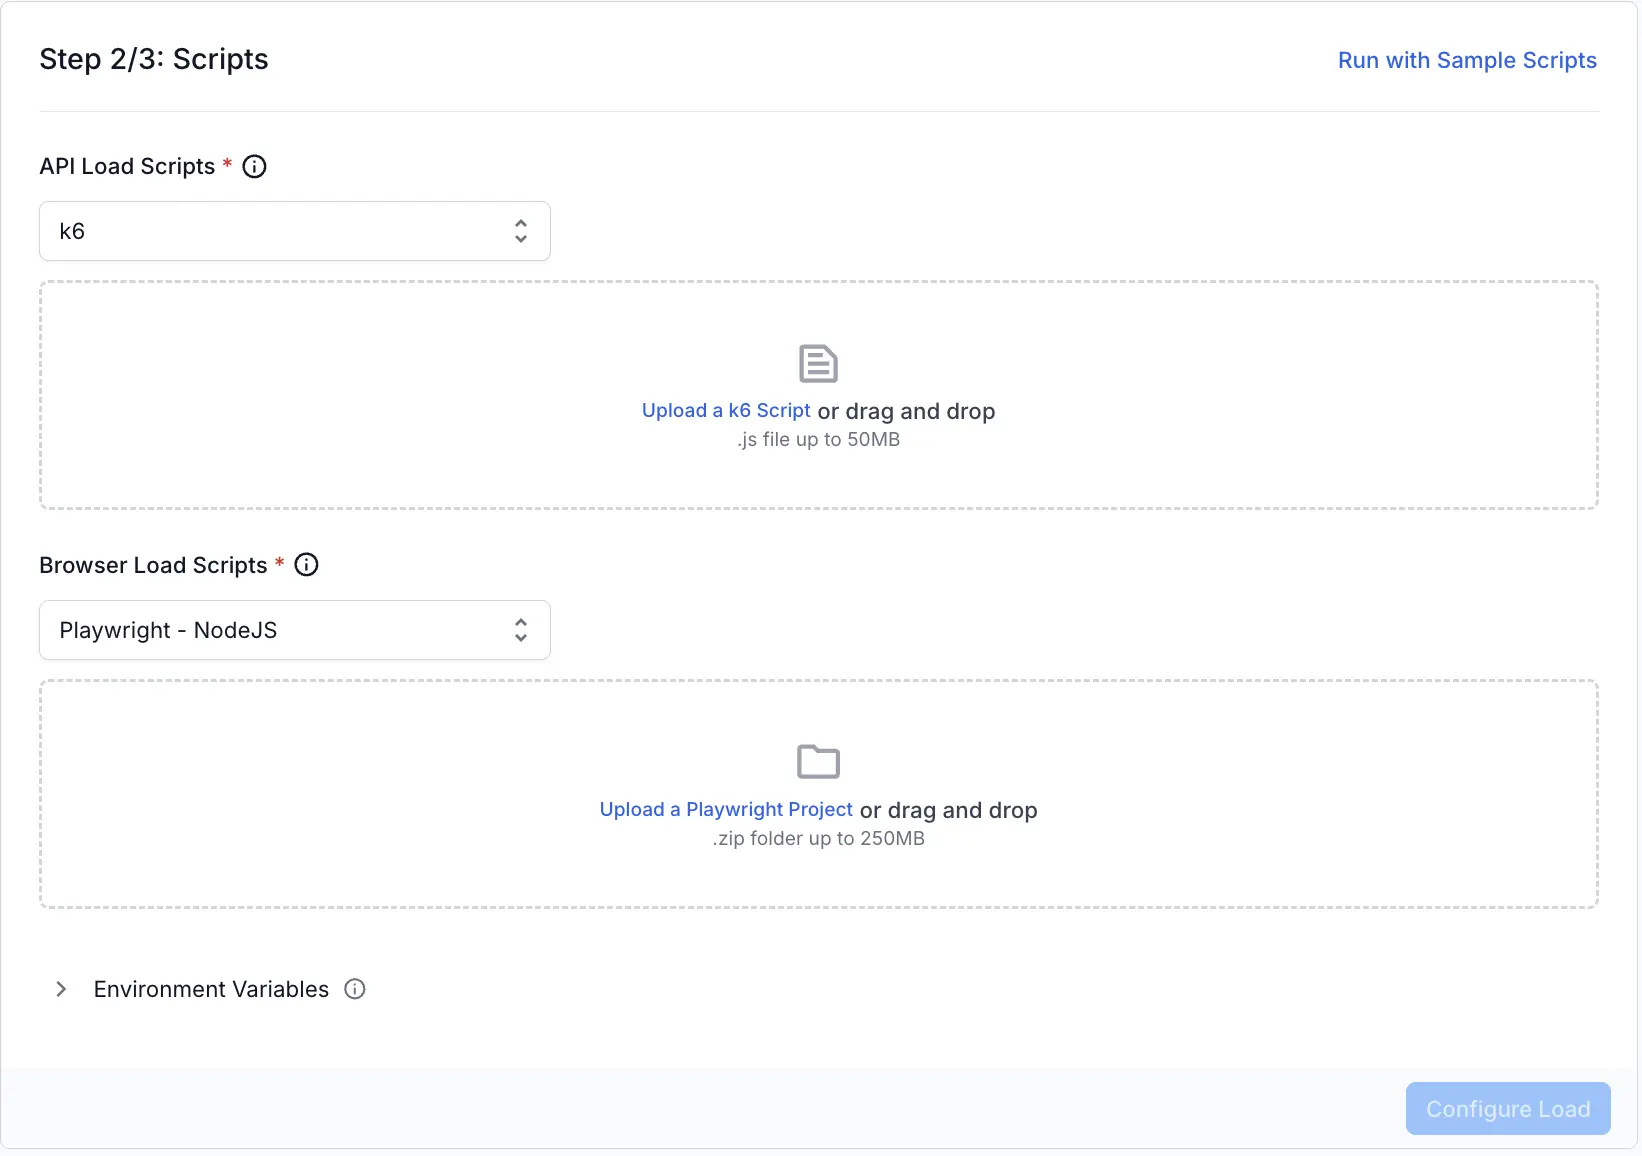
Both fields are mandatory for their respective test types. After uploading, click Configure Load to proceed to the next step.
You can also run load tests using the sample scripts if you want to try out the feature before uploading your own files.
You can configure the following load parameters to customize your load test:
Run test
After you finish configuring load parameters, click RUN TEST .
Download BrowserStack NodeJS SDK
Run the given command to install the BrowserStack NodeJS SDK in your project
Initialize your project for Load Testing
Run the following command from the root directory of your test project to generate the browserstack-load.yml file, which contains the configuration required to define and run your load test:
Configure your Load Test
Open the generated browserstack-load.yml file and update it with the relevant test details. Here’s a sample configuration:
Specify the tests
- The tests block defines the combination of test types you want to run as part of a hybrid load test. Specify
Playwrightas thetestTypefor one sub-block andk6for another. - For the
Playwrightsub-block,-
browserLoadPercent- Specify the percentage of total virtual users to be allocated for Playwright tests. -
language- Set this tonodejs. -
files- Define the key files needed to install dependencies and identify which tests to execute.- Under
dependencies, include the path to files required for environment setup. ForNode.jsprojects, this is typicallypackage.json. - Under
testConfigs, provide the path to yourplaywright.config.js.
- Under
-
- For the
k6sub-block,-
apiLoadPercent- Specify the percentage of total virtual users to be allocated fork6tests. -
testScripts- Set the path to the.jsfile.
-
Headless mode
- You can configure your Playwright load tests to run in either headless or headful mode using the
headlesscapability. - Headless mode (default): The browser runs without a visible UI, which is faster and consumes fewer resources. Most CI/CD and automated load tests use headless mode.
- Headful mode: The browser UI remains visible during test execution.
- If not specified, tests will run in headless mode by default.
Set reporting structure
Use projectName to group related tests under the same project on the dashboard. Use testName to group multiple runs of the same test.
Both projectName and testName must remain consistent across different runs of the same test.
You can use the following characters in projectName and testName:
- Letters (A–Z, a–z)
- Digits (0–9)
- Periods (
.), colons (:), hyphens (-), square brackets ([]), forward slashes (/), at signs (@), ampersands (&), single quotes ('), and underscores (_)
All other characters are ignored.
You can configure the following load parameters to customize your load test:
- Load profiles
- Load zones
- Set thresholds
- Per-VU external inputs with test data
- Environment variables
- Configure multiple scenarios
- Capture response details
Run the Load Test
Run the given command to start your test:
Check out the FAQs section to get answers to commonly asked questions.
View test results
Once the test starts running, you’ll get a link to the test report.
We're sorry to hear that. Please share your feedback so we can do better
Contact our Support team for immediate help while we work on improving our docs.
We're continuously improving our docs. We'd love to know what you liked
We're sorry to hear that. Please share your feedback so we can do better
Contact our Support team for immediate help while we work on improving our docs.
We're continuously improving our docs. We'd love to know what you liked
Thank you for your valuable feedback!