Xcode is the powerful integrated development environment (IDE) for building apps across Apple’s platforms. It is essential for Mac users who want to develop, debug, test, and deploy applications.
Whether you are starting a new project or maintaining an existing one, having the latest version of Xcode ensures access to the newest features and tools.
This guide will explain the steps to download, install, and keep Xcode up to date on your Mac.
What is Xcode?
Xcode is an IDE developed by Apple. You can use Xcode for developing iPhone, iPad, Apple Watch, MacOS, and Apple TV. It includes a set of tools for developing, debugging, and testing your iOS apps. The latest version of Xcode is 14.3.
Key Features of Xcode
Some of its important features are –
- It supports multiple programming languages like – Swift, C, C++, Java, Apple Script, Python, and more.
- It provides a Swift package and Swift UI. You can find Interactive UI previews with light and dark modes. There are plug-ins for building your apps. Also, developers can create reusable codes and collaborate with other developers.
- The Xcode simulators allow you to test your iOS apps in a simulated environment. You will get all types of iOS environments like – iPhone, iPad, Apple Watch, and Apple TV. These simulators come with different configurations and OS versions.
- Xcode has a set of instruments for profiling and analyzing your apps. These instruments also improve performance and memory issues for your apps.
- It creates 3D textures, augmented reality (AR), and Machine Learning models as well.
Why do you need Xcode?
Below are the reasons why you need Xcode:
- Xcode is the only Apple-supported IDE for building iOS and macOS apps.
- Includes tools to identify and resolve issues in applications quickly.
- Helps organize image assets and code files efficiently.
- Allows developers to create menus, windows, and custom interfaces easily.
- Enables apps to adjust to different screen sizes seamlessly.
- It provides pre-built templates and reusable code snippets, ideal for beginners.
- Identifies errors in code and suggests solutions for faster debugging.
Also Read: How to perform XCode UI testing?
How to Download and Install Xcode on Mac
Before downloading and installing Xcode, ensure you have:
- A Mac running macOS 10.15.4 or later.
- Sufficient storage space for Xcode.
- An active Apple ID.
- Membership in the Apple Developer Program (for certain download methods).
Xcode can be installed through two main methods: downloading it from the App Store or from the Apple Developer Website.
Additionally, you may need to install Command Line Tools (CLT) for certain functionalities.
Method 1: Download Xcode from the App Store
Below are the steps to download and install Xcode from the App store.
- Open the App Store on your Mac.
- Sign in with your Apple ID.
- Search for Xcode.
- Click Get, then click Install.
- You may be prompted to enter your Apple ID password to confirm the installation.
Method 2: Download Xcode from Apple Developer Website
Below are the steps to download and install Xcode from the Apple developer website:
- Go to the Apple Developer website and sign in with your Apple ID.
- Navigate to the More section.
- Search for the specific version of Xcode you need.
- Download the Xcode_x_x_x.xip file.
- After the file is downloaded, double-click it to extract the Xcode app.
- Drag the extracted Xcode app to your Applications folder.
- (Optional) If using multiple versions of Xcode, you can rename the app for clarity.
Optional: Install Command Line Tools (CLT)
If you need Command Line Tools (CLT) for using development utilities like git, gcc, etc., follow these steps:
- Open Terminal on your Mac.
- Run the command:
xcode-select --install
- Press Enter and confirm the installation when prompted by clicking Install.
Also Read: What is Xcode Cloud and How to use it?
How to update Xcode on Mac?
You can update your Xcode for Mac with these processes:
- If you installed your Xcode from the App Store, then you will get automatic updates. Also, you can manually update the Xcode from the ‘Update’ tab.
- If you installed it from the developers’ site, you must manually download the updates. There is no automatic update option available for this case.
Know More: How to enable Xcode Code Coverage
How to test your Xcode apps?
You can test Xcode apps using the XCTest framework for unit, integration, UI, and performance testing.
- Unit Testing: Create a subclass of XCTestCase with test cases. Use the Arrange, Act, Assert method to test and compare results.
- Integration Testing: Similar to unit testing, but covers larger parts of the app, including multiple components or class/function combinations.
- UI Testing: Use the UI Test Case Class to simulate user interactions and verify that UI controls work correctly in real-world conditions.
- Performance Testing: Measure performance metrics like memory usage and disk writes by running your code multiple times through XCTest and tracking various metrics.
Read More: All About Xcode Test App on iPhone
How to test your iOS app on Xcode?
You can test your iOS app on XCode by following the below steps:
- Creating Apple ID – Once agreed on all the service policies from Apple, an account was gets created successfully and it gave a message as – ‘Apple Connect ’.
- Installing Xcode – Just go to the Apple store and install Xcode.
- How to open Xcode – Go to File > Export > iOS. It will show a message like ‘No Bundle ID specified. But it’s not a problem at all because it’s not necessary for app testing. So, click on the ‘continue’ button.
- Export app to iOS – To open Xcode, we must create a folder for our iOS project file (.xcodeproj). Then from PTPlayer, we find a General menu for setting up the required data for ‘Team’, ‘Xcode Managed Profile’, and ‘Signing Certificate for iOS Developer’.
- Team – For Team, we must sign in to Xcode with your Apple ID by providing your Apple ID and password. In this stage, we have to plug our iPhone into our macOS for a successful Xcode profile setup. Otherwise, there may be a chance to get some error messages.
- Trusting the app certificate – Whenever our Xcode profile gets a successful setup, an automated sign-in certificate will be added to the profile.
Read More: How to test App on iPhone using Xcode?
Test your iOS app on Real iOS Device with BrowserStack
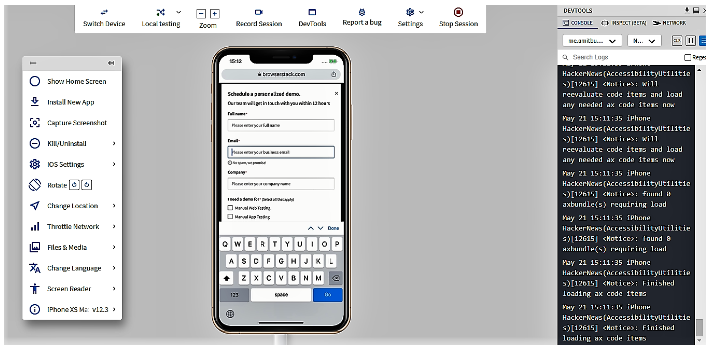
While you can test your iOS Apps on XCode, to get more accurate results it is essential to test under real user conditions. BrowserStack App Live allows you to run your iOS app tests on iPhones and iPads as opposed to running on Simulators.
Run iOS Tests on iPads and iPhones
- With the App Live, you will access BrowserStack real device cloud for a wide range of iOS (iPhones and iPads) and Androids.
- You can test your iOS and Android apps from different resources – direct upload, build tools integrations, App Store, or Play Store.
- After accessing the real devices, you can conduct performance testing like – Geolocation testing, push notifications, network simulation, pre-loaded images, etc.
- Mainly, it helps in manual testing. But also has integrations with Selenium, Cypress, and Jenkins to support automation testing.
- It binds with Gradle and Fastlane plug-ins for the build and deployment of your apps.
- Again, it provides you with integrations of project management tools like – Jira, Trello, Slack, and GitHub. They give nice solutions for your project planning, work progress, bug finding, reporting, and more.
Conclusion
You can test your Xcode apps with App Live easily. You can avail of it through any of its subscription plans. The Team plan comes with the best offers.
It includes team access for 3500+ iOS and Android devices, IP Geolocation testing, access to the 19 data centers throughout the world, and more. Also, you can purchase App Live through other plans – Individual, Team Pro, or Enterprise.


