Cypress is a robust testing framework that has a straightforward installation process. The installation process of Cypress on Windows, ensures you get everything set up to execute end-to-end tests.
Overview
Methods to Install Cypress on Windows
- Installing Cypress via npm
- Installing Cypress via pnpm
- Installing Cypress via yarn
- Direct Download
In this tutorial, learn in detail about each method to install Cypress on Windows.
System Requirements for Cypress
You will need to download and run Cypress as a desktop application on your computer. Here is a rundown of the OSes that are compatible with Cypress.
- macOS 10.9 and above (64-bit only)
- Linux Ubuntu 12.04 and above
- Fedora 21 and Debian 8 (64-bit only)
- Windows 7 and above
If you install Cypress with npm, Cypress supports Node.js 8 and above
Read More: How to run specific test in Cypress
Installing Node.js
Before proceeding with the Cypress installation, you must have Node.js installed. Node.js is a JavaScript runtime environment. An IDE (Integrated Development Environment) and a code editor, such as Microsoft’s Visual Studio Code, are also required for programming and managing project directories.
Running the installer
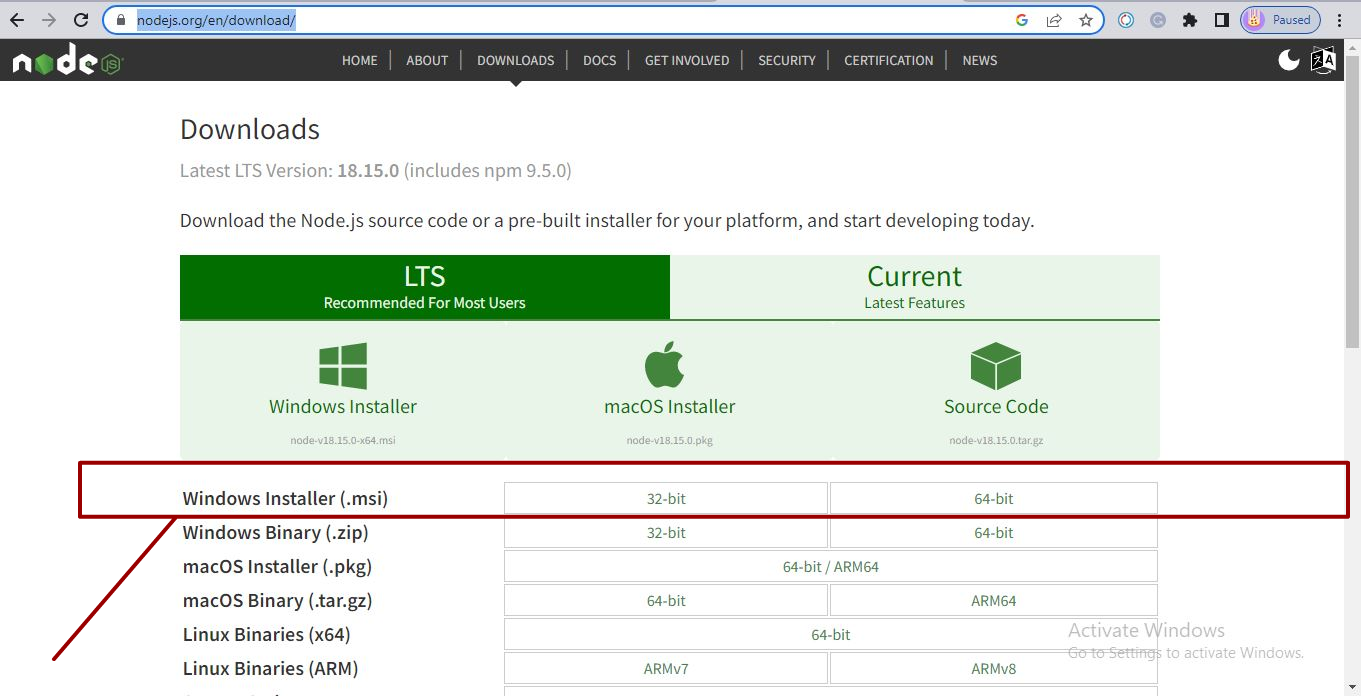
- You can get the Windows installer here. Just run the .msi file to set up Node.js.
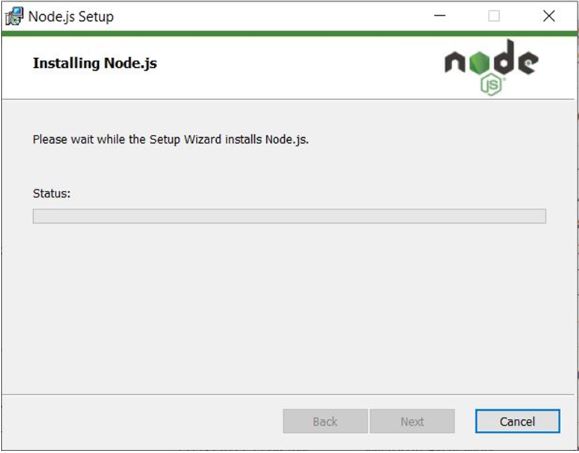
- Continue to Next and approve the license.
Verifying the installation
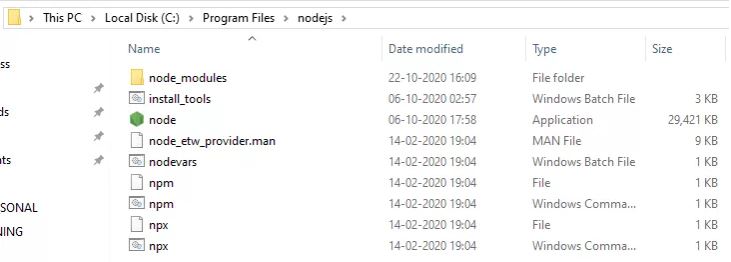
- The ‘npm package manager‘ is also installed, as shown below.
This completes the implementation of Node.js. Once installed, you can validate the version with the command node -version or node -v, as well as the installation of the Node package manager with the command npm -version.
How Install Cypress on Windows
Here are different methods used below to install Cypress in the Windows desktop.
Installing Cypress via npm
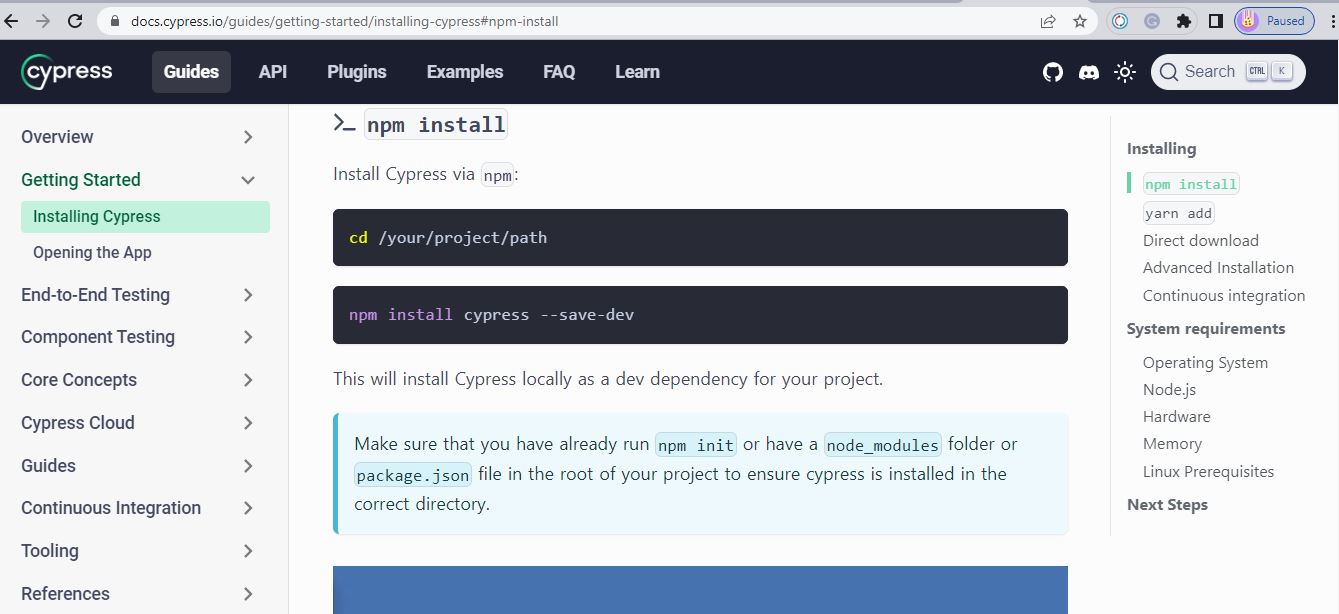
You can use npm to install Cypress; to do so, cd into your project directory and run the below command
npm install cypress -save-dev
When you run this, Cypress will be installed for your project as a dev dependency.
1. Make sure your project directory contains a package.json file or a node_modules folder. By doing this, the proper directory for Cypress’ installation is created.
2. The Cypress documentation advises using npm to run Cypress because:
- In the same way that you would track the version of any other dependency, Cypress also has versions.
- Installing npm made it easier to use continuous Integration with Cypress.
Installing Cypress via pnpm
You can install Cypress using pnpm with the following command:
pnpm add --save-dev cypress
When this is run, Cypress will be locally installed as a dev dependency for your project.
Similar to the npm method, you should ensure your project directory contains a package.json file or a node_modules folder to create the proper directory for Cypress’ installation.
Installing Cypress via yarn
To use yarn to install Cypress, cd into your project directory, and then enter the command shown below:
yarn add cypress --dev
Verifying the installation
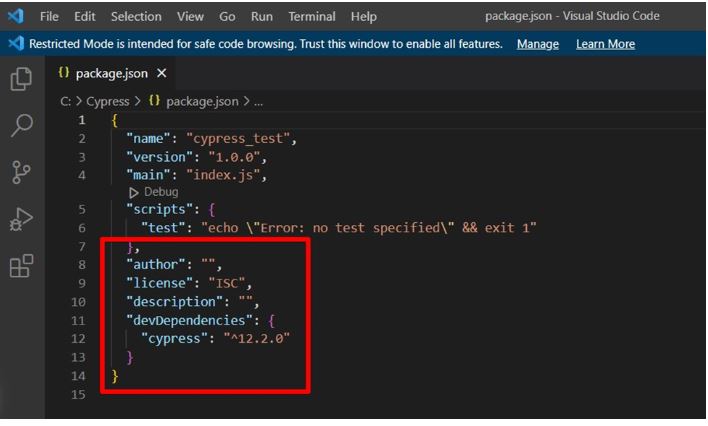
In addition to downloading Cypress immediately, npm install cypress also adds an entry to the package.json file. When you run -save-dev, the cypress entry in package.json will be saved. As a development dependency, Cypress will be downloaded and installed on your project.
The package.json will still have an entry for cypress even after you move the project cypress test to a different place. Therefore, you only need to run the npm install cypress command, not the full npm install cypress -save-dev command, which only needs to be run once.
Once you open the package.json in the cypress folder, you will see an entry for the cypress software that you have loaded.
Direct Download
You also have the option to directly download Cypress from their official website.
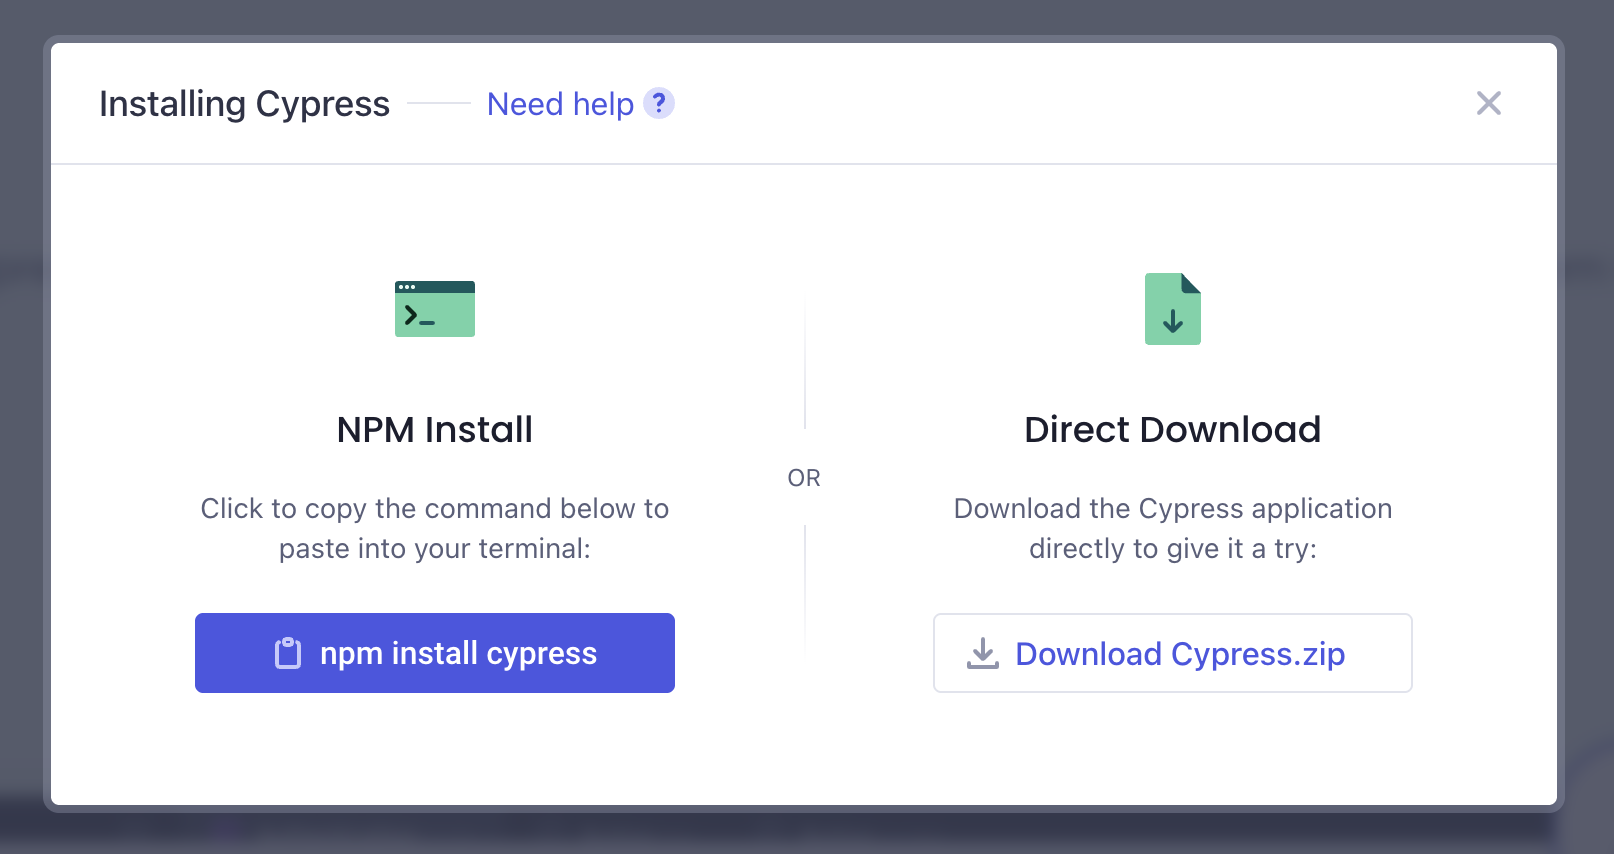
- Once you are on the homepage, you can click on >_npm install cypress button
- A pop appears with a direct download option, you can click ‘Download Cypress.zip’ and install Cypress your OS system.
Updating Cypress
Use one of the commands below to launch the Cypress application.
$ ./node_modules/.bin/cypress open

Or

$(npm bin)/cypress open

#Using npx, note: npm > v5.2

$npx cypress open
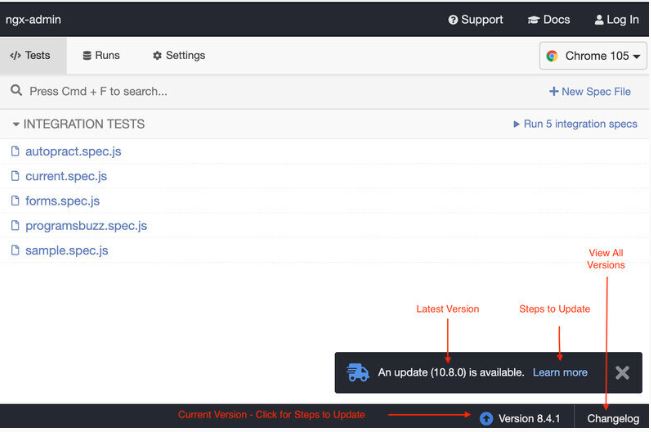
You can see the notice for the updated version (10.8.0), the link for the changelog, and the current version (8.4.1) at the bottom. You can review the changelog for the most recent version if you are not receiving notifications. To see every version, click Changelog.
To view the change logs, click Changelog at the bottom of the runner or go to this link. You can see the features, performance fixes, and bug fixes here, among other things.
The most recent version with the release date will be at the head of the list. You can quickly access the relevant version by clicking on the links on this page’s right side under the section.
Update Cypress using NPM
npm install --save-dev cypress@10.8.0
Additionally, you can switch the Cypress version to the most recent upgraded version in the package.json
How to Open Cypress and Set up Your First Test
Now that you have Cypress installed, you can run it by
npx cypress open
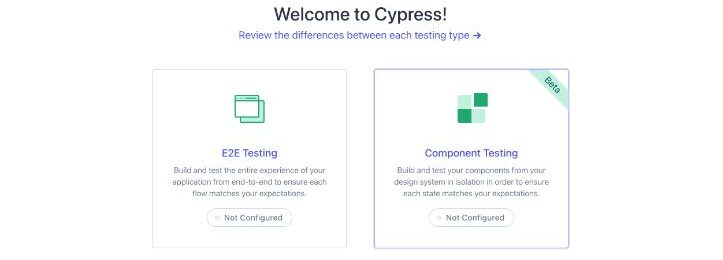
- To start, click the “E2E Testing” button on the left.
- Next, Cypress will tell you about the different files it will make for you so that everything is set up right for e2e testing. Click on “Continue”.
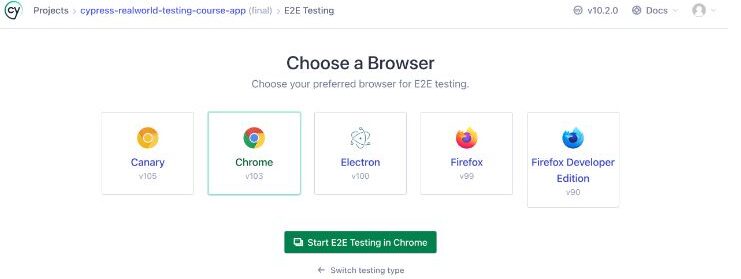
- Next, you’ll see a screen that says “Choose a Browser.” Depending on which browsers you have on your computer, you may have different choices.
- As you don’t yet have any test files created, Cypress will then launch and prompt you to create your first specification.
- Select “Create a new empty spec”: which could be home.cy.ts.
Creating a new project
In VSCode, open the file cypress/e2e/home.cy.ts.
Prior to updating it so that tests can be performed against your course application, you must analyze the code in this file.
describe("empty spec", () => {
it("passes", () => {
cy.visit("https://example.cypress.io")
})
})
It() is a singular test every time you see it in a specification file. The arguments are a string and a callback function, exactly the same as the “describe()” function’s arguments. The line needs to be updated to the following.
describe("home page", () => {
it("the h1 contains the correct text", () => {
cy.visit("https://example.cypress.io")
})
})
Writing your first test
You will write a test that asserts that the h1 on the home page includes the correct text for your first test.
The command visit instructs Cypress where to run your tests. Update the address in cy.visit() since you’ll be operating your application locally at localhost:3000.
describe("home page", () => {

it("the h1 contains the correct text", () => {
cy.visit("http://localhost:3000")
cy.get("h1").contains("Testing Angular Applications with Cypress")
})
})
Running the test
Run your test.
npx cypress open
You must always have your application’s local development server running when performing Cypress tests.
npm run dev
Troubleshooting common issues
Cypress itself can occasionally exhibit erratic or otherwise surprising behavior. There is a strong recommendation that you verify this immediately.
- Cypress is not recognized as a command
If you installed Cypress locally in your project, you must execute commands from node_modules/.bin, for example, ./node_modules/.bin/cypress run if you want to carry out Cypress run, or just run npx cypress run, which accomplishes the same thing.
Or
npm install cypress --save-dev
Then, when it is relaunched, it will work again.
- Cypress fails to start
There appears to be a library or dependency missing; simply execute npm install to add all missing libraries and dependencies to your project.
- Browser not launching
Cypress will try to detect which version of Chrome is already loaded on the machine you are using. However, errors can occur when exploring browsers in various environments. There are workarounds if Cypress cannot “see” a browser even though you are certain it is present on your computer.
- Using the `–browser` command line argument
- In Cypress, click on the Settings tab to view the complete list of discovered browsers along with their properties within the resolved configuration.
- Another method for logging what Cypress discovers is to start Cypress with the DEBUG environment variable set to cypress: launcher. This will output to the terminal details about the discovered browsers and their properties.
Why use BrowserStack Automate to Run your Cypress Tests
BrowserStack Automate lets you run Cypress tests efficiently across multiple device-OS-browser combinations. Here are a few reasons why you should choose BrowserStack:
- Cross-browser testing: One of the limitations of Cypress is that it runs on limited browsers, mainly Chrome-based ones. BrowserStack expands your Cypress tests to many other browsers, such as Safari, Edge, IE, and more.
- Video Recording: You can record videos of test execution.
- Cloud Infrastructure: Automate does not require setting up or maintaining browsers or physical devices locally.
- Parallel Testing: With parallel testing, you can run multiple Cypress tests simulatenously, and accelerate test execution and the release cycles.
- Real-device testing: BrowserStack offers you a vast real-device cloud, letting you run Cypress tests on 3500+ real device, browser, and OS combinations, thus allowing you to test under real user conditions.
- Integrations: Seamless integrations with several CI/CD tools like Jenkins, Travis CI, Circle CI, Bamboo and more.
- Scalability: BrowserStack offers real-device and parallel testing on a cloud-based infrastructure, letting you run hundreds of tests across different environments.
Conclusion
Cypress has many advantages including Real-Time Reloads, Debuggability, Automatic waiting, a unique dashboard and a GUI tool to execute/view your tests view. An entirely new method of testing that has never been feasible before is made possible by having complete control over your application, the network traffic, and native access to every host object. With Cypress, you can easily change any element of your application’s functionality rather than being “locked out” and unable to do so.
Cypress is an effective automation tool, but testing the app on an real device cloud will yield more accurate results. Bottlenecks in the real user experience can be fixed in good time before release if they are discovered and tested under realistic user scenarios. Using BrowserStack Automate, Cypress tests can be executed rapidly and efficiently by using its robust cloud infrastructure.
Run Cypress Tests on Real Devices
Useful Resources for Cypress
Understanding Cypress
- Cross Browser Testing with Cypress : Tutorial
- Run Cypress tests in parallel without Dashboard: Tutorial
- Handling Test Failures in Cypress A Comprehensive Guide
- Cypress Test Runner: Tutorial
- Handling Touch and Mouse events using Cypress
- Cypress Automation Tutorial
- CSS Selectors in Cypress
- Performance Testing with Cypress: A detailed Guide
- Cypress Best Practices for Test Automation
- Test React Native Apps with Cypress
- Cypress E2E Angular Testing: Advanced Tutorial
- Cypress Locators : How to find HTML elements
- Maximizing Web Security with Cypress: A Step-by-Step Guide
- Conditional Testing in Cypress: Tutorial
- Cypress Web Testing Framework: Getting Started
- Cypress Disable Test: How to use Skip and Only in Cypress
- What’s new in Cypress 10? How it will change your current testing requirements
Use Cases
- How to Record Cypress Tests? (Detailed Guide)
- How to run your first Visual Test with Cypress
- How to Fill and Submit Forms in Cypress
- How to Automate Localization Testing using Cypress
- How to run Cypress Tests in Chrome and Edge
- How to use Cypress App Actions?
- How to Run Cypress Tests for your Create-React-App Application
- How to Run Cypress Tests in Parallel
- How to handle Click Events in Cypress
- How to Test React using Cypress
- How to Perform Visual Testing for Components in Cypress
- How to run UI tests in Cypress
- How to test redirect with Cypress
- How to Perform Screenshot Testing in Cypress
- How to write Test Case in Cypress: (with testing example)
Tool Comparisons


