Apple Inc. makes amazing devices like the iPhone & iPad, which are on-average priced above the competition. This might not be a concern for people looking to upgrade to the latest iPhone, iWatch etc. for the love of Apple.
But for tech teams building apps for the Apple stack, this can be a major strain on the budget especially with added concerns like storing and maintaining an army of physical devices in-house.
In this guide we take a look at the current capabilities and features of Xcode Simulator, its limitations and available alternatives.
What is Xcode Simulator
Xcode is the official integrated development environment (IDE) for developing apps that run on Apple products. It provides built in simulators for a number of Apple devices, which serves as a simulated environment for testing and debugging applications.
With Xcode Simulator, developers can run their apps on virtual iOS devices, allowing them to recreate different hardware and OS versions without the need for physical devices.
Xcode offers specific simulators, such as the iOS, iWatch and tvOS simulator, as options tailored to target specific Apple product ranges. There is also additional capability to test simulated interactions between iPhone + iWatch, iPad + iWatch etc.
These simulators within the Xcode IDE enable developers to interact with and assess their apps on virtual devices, enabling performance and functionality testing within the development setup, before release on real-world devices.
How does the Xcode Simulator work?
Xcode simulator is a default part of the Xcode package, however the binaries required for different device and operating system platforms have to be downloaded separately.
When launching Xcode for the first time, you will get an option to select the supported platforms, iOS and iPadOS are selected by default.
You can change or edit the list of supported platforms from the “Platform” section in the Xcode “Preferences”.
For iPhone the default package will be downloaded and installed as a default option. Here are the steps to use iPhone simulator inside Xcode :
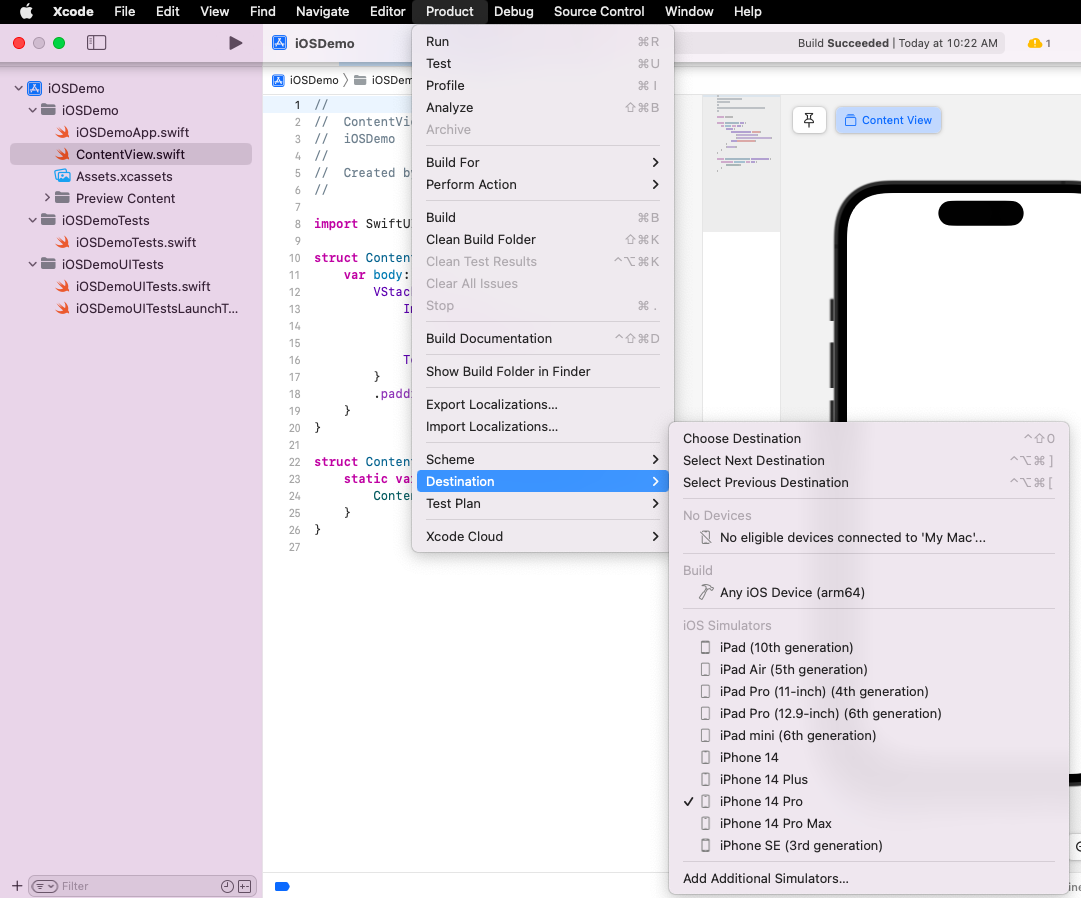
- The list of available simulators can be accessed from Product > Destination
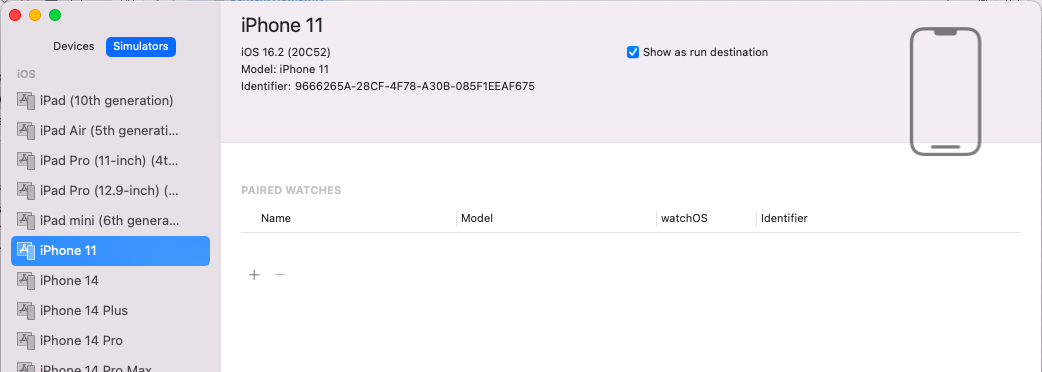
- If the simulator you want is not already set-up and installed properly, you can click on Add Additional Simulators.
- From the “Device Type” dropdown you can see a complete list of simulators available:
- iOS (iPhone 4s to 14 Pro)
- iPod (7th Gen)
- iPadOS (iPad 2 to iPad Pro 6th Gen)
- Apple TV (uptill 3rd Gen)
- Apple Watch (uptill Series 8)
- Once you select the device you want, next step is to download and install the OS version from the OS version dropdown. If you want to test on a legacy version, click on “Download more simulator runtimes” option.
- From here you can select the right OS version for your requirement and proceed with download and set-up.
- Pair Apple Watch option allows you to test app functionality between app and iWatch. If you select this option you will need similar additional setup for the Apple Watch.
- After you are done with the setup, the device will show up as a destination in the list of available simulators.
- You can select the simulator from the list of destinations and proceed with the build/run option on the active Scheme to launch the app in the selected simulator.
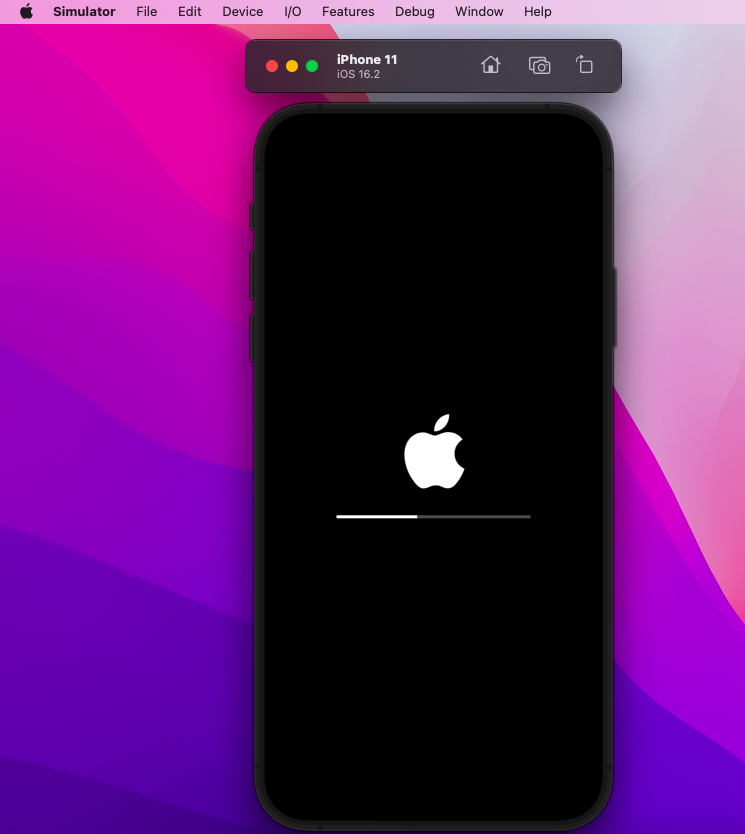
- After the app build is complete, Xcode will launch and boot the selected device simulator. Note that the simulator launches in a separate window and has a unique menu.
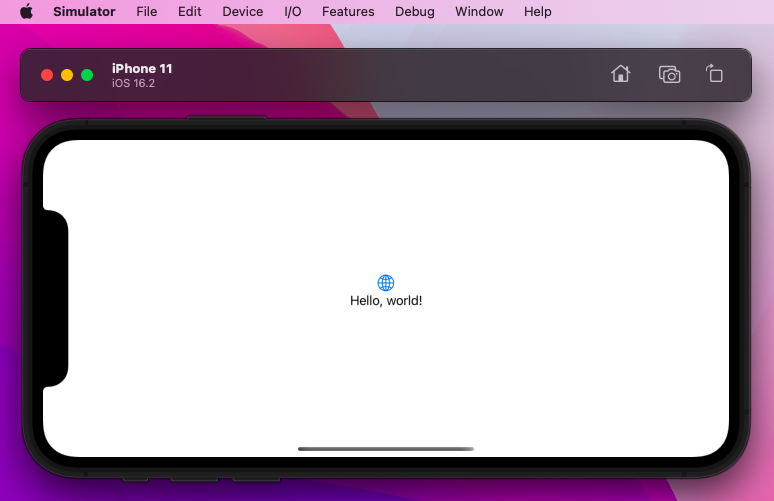
- After simulator device is on, your app will launch on the device and you can begin testing.
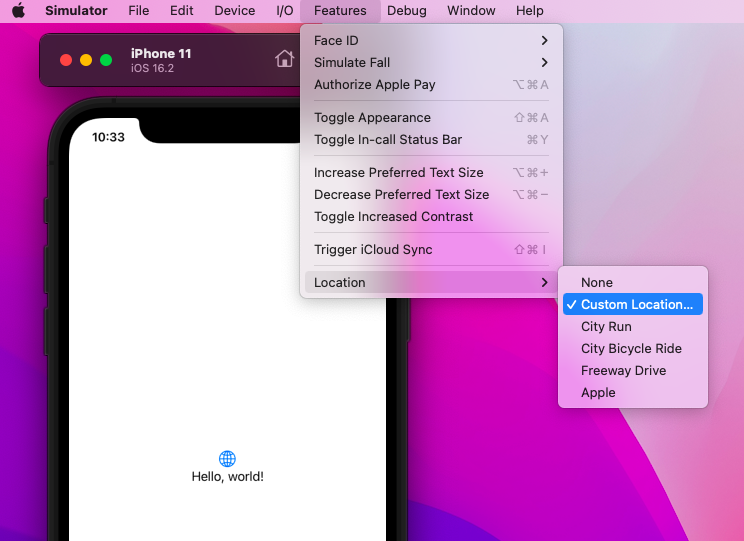
- If you want to access device features and change preferences you can use the various options available in the Simulator Menu.
How to launch iOS simulator with Safari developer tools
Once you have set-up the simulator and got your app running, you can test any web based components using Safari Developer tools:
- When the simulator is running on the device with your app on Xcode, you can open Safari to start debugging with Developer Tools
- Open Safari and enable Develop Menu from the Advanced section in Settings.
- After enabling Develop Menu, you will be able to access the “Develop” section from the menu for Safari.
- With the simulator still running, you will be able to see the simulator device listed in the list of available inside the Develop menu.
- With this you can now debug your application’s web related features through the Xcode > Simulator > Safari Develop tool chain.
How to test responsiveness of app using Xcode iPhone Simulator
To test the responsiveness of your app using Xcode’s iPhone Simulator, you can follow these steps:
- Open your project in Xcode. Select and configure the right Scheme.
- Select the target device you want to simulate by clicking on the Destination selector dropdown menu in the Xcode toolbar Product Section.
- Choose the desired iPhone model and iOS version from the available options.
- Build and run your app in the Simulator by clicking the Run button in the Xcode toolbar or by pressing Cmd+R.
- Once the Simulator launches and your app is running, interact with the app using the simulated touch input.
- Try tapping buttons, scrolling, swiping, and performing any other interactions that are relevant to your app’s responsiveness.
- Observe the app’s behavior and responsiveness in the Simulator. Pay attention to how quickly the app responds to user input, whether there are any delays or lags, and if the UI elements update smoothly.
- Repeat your interactions and test different scenarios within your app to ensure consistent responsiveness across various user actions.
- If you encounter any issues or notice unresponsive behavior, use the Xcode debugger and logging tools to identify and debug the problem.
- You can set breakpoints, inspect variables, and view console output to help diagnose any responsiveness issues.
- Make adjustments and optimizations to your code as needed to improve the app’s responsiveness based on your testing results.
- Rinse and repeat the testing process, iterating and refining your app’s responsiveness until you achieve the desired performance.
It’s important to note that while testing responsiveness in the Simulator can provide some insights, it may not accurately reflect the performance and responsiveness of the app on real devices.
Therefore, it’s recommended to perform additional testing on physical devices, especially for critical performance optimizations and to ensure a smooth user experience.
Advantages and Disadvantages of using an Xcode Simulator
Using Xcode Simulator for app development offers several advantages, such as:
- Free access to devices: Xcode Simulator allows developers to test their apps on multiple simulated iOS, tvOS, and watchOS devices, providing free access to a wide range of hardware configurations and screen sizes.
This makes it easier to identify and address compatibility issues and ensure consistent performance across different devices at the developer level and beyond. - Resource and time efficiency: Simulators are built-in tools in Xcode, making them readily available without any additional setups. They provide a quick and efficient way to test and debug apps during the development process, reducing the need for physical devices and the associated burden.
Simulators also offer faster deployment times, enabling developers to iterate and refine their apps more rapidly.
- Advanced debugging : With the simulators you can debug aspects of your applications, in depth using debugging and logging features of Xcode, providing real time access to app and platform behaviour, all in one place.
However, there are also some disadvantages of using Xcode Simulator:
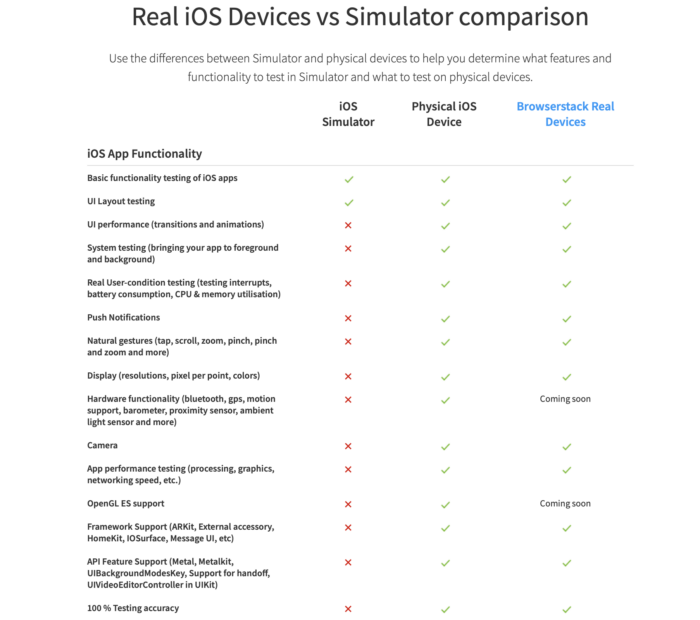
- Limited Accuracy: Simulators cannot fully replicate the performance and behavior of real devices. They may not accurately reflect certain hardware-specific features or the actual performance of an app on a physical device like CPU speed, heat management, memory, network etc.
This can lead to a false sense of app functionality and performance during testing, potentially resulting in issues when the app is deployed to real devices. - Incomplete Testing Environment: Simulators may lack certain features or APIs that are available on physical devices. This can limit the ability to thoroughly test specific functionalities, especially those reliant on device-specific sensors or capabilities.
- Un-natural input and output : Using simulators for testing means you will have to use your computer hardware like Apple keyboard and touchpad to interact with the simulated device environment, which leads to an unnatural assessment of touch gestures, mic, cameras etc.
- Limitations of availability : When you take a look at the available simulator environments, some legacy versions might not be available or easily simulate-able through Xcode.
- Limitations of form-factor : Certain new device features like NFC, Apple Pay etc. might not be re-producible hence impossible to test via simulators.
Consequently, relying solely on simulators may overlook crucial issues that could arise on real devices.
How testing real iPhones is a better option than testing on Xcode iPhone Simulator?
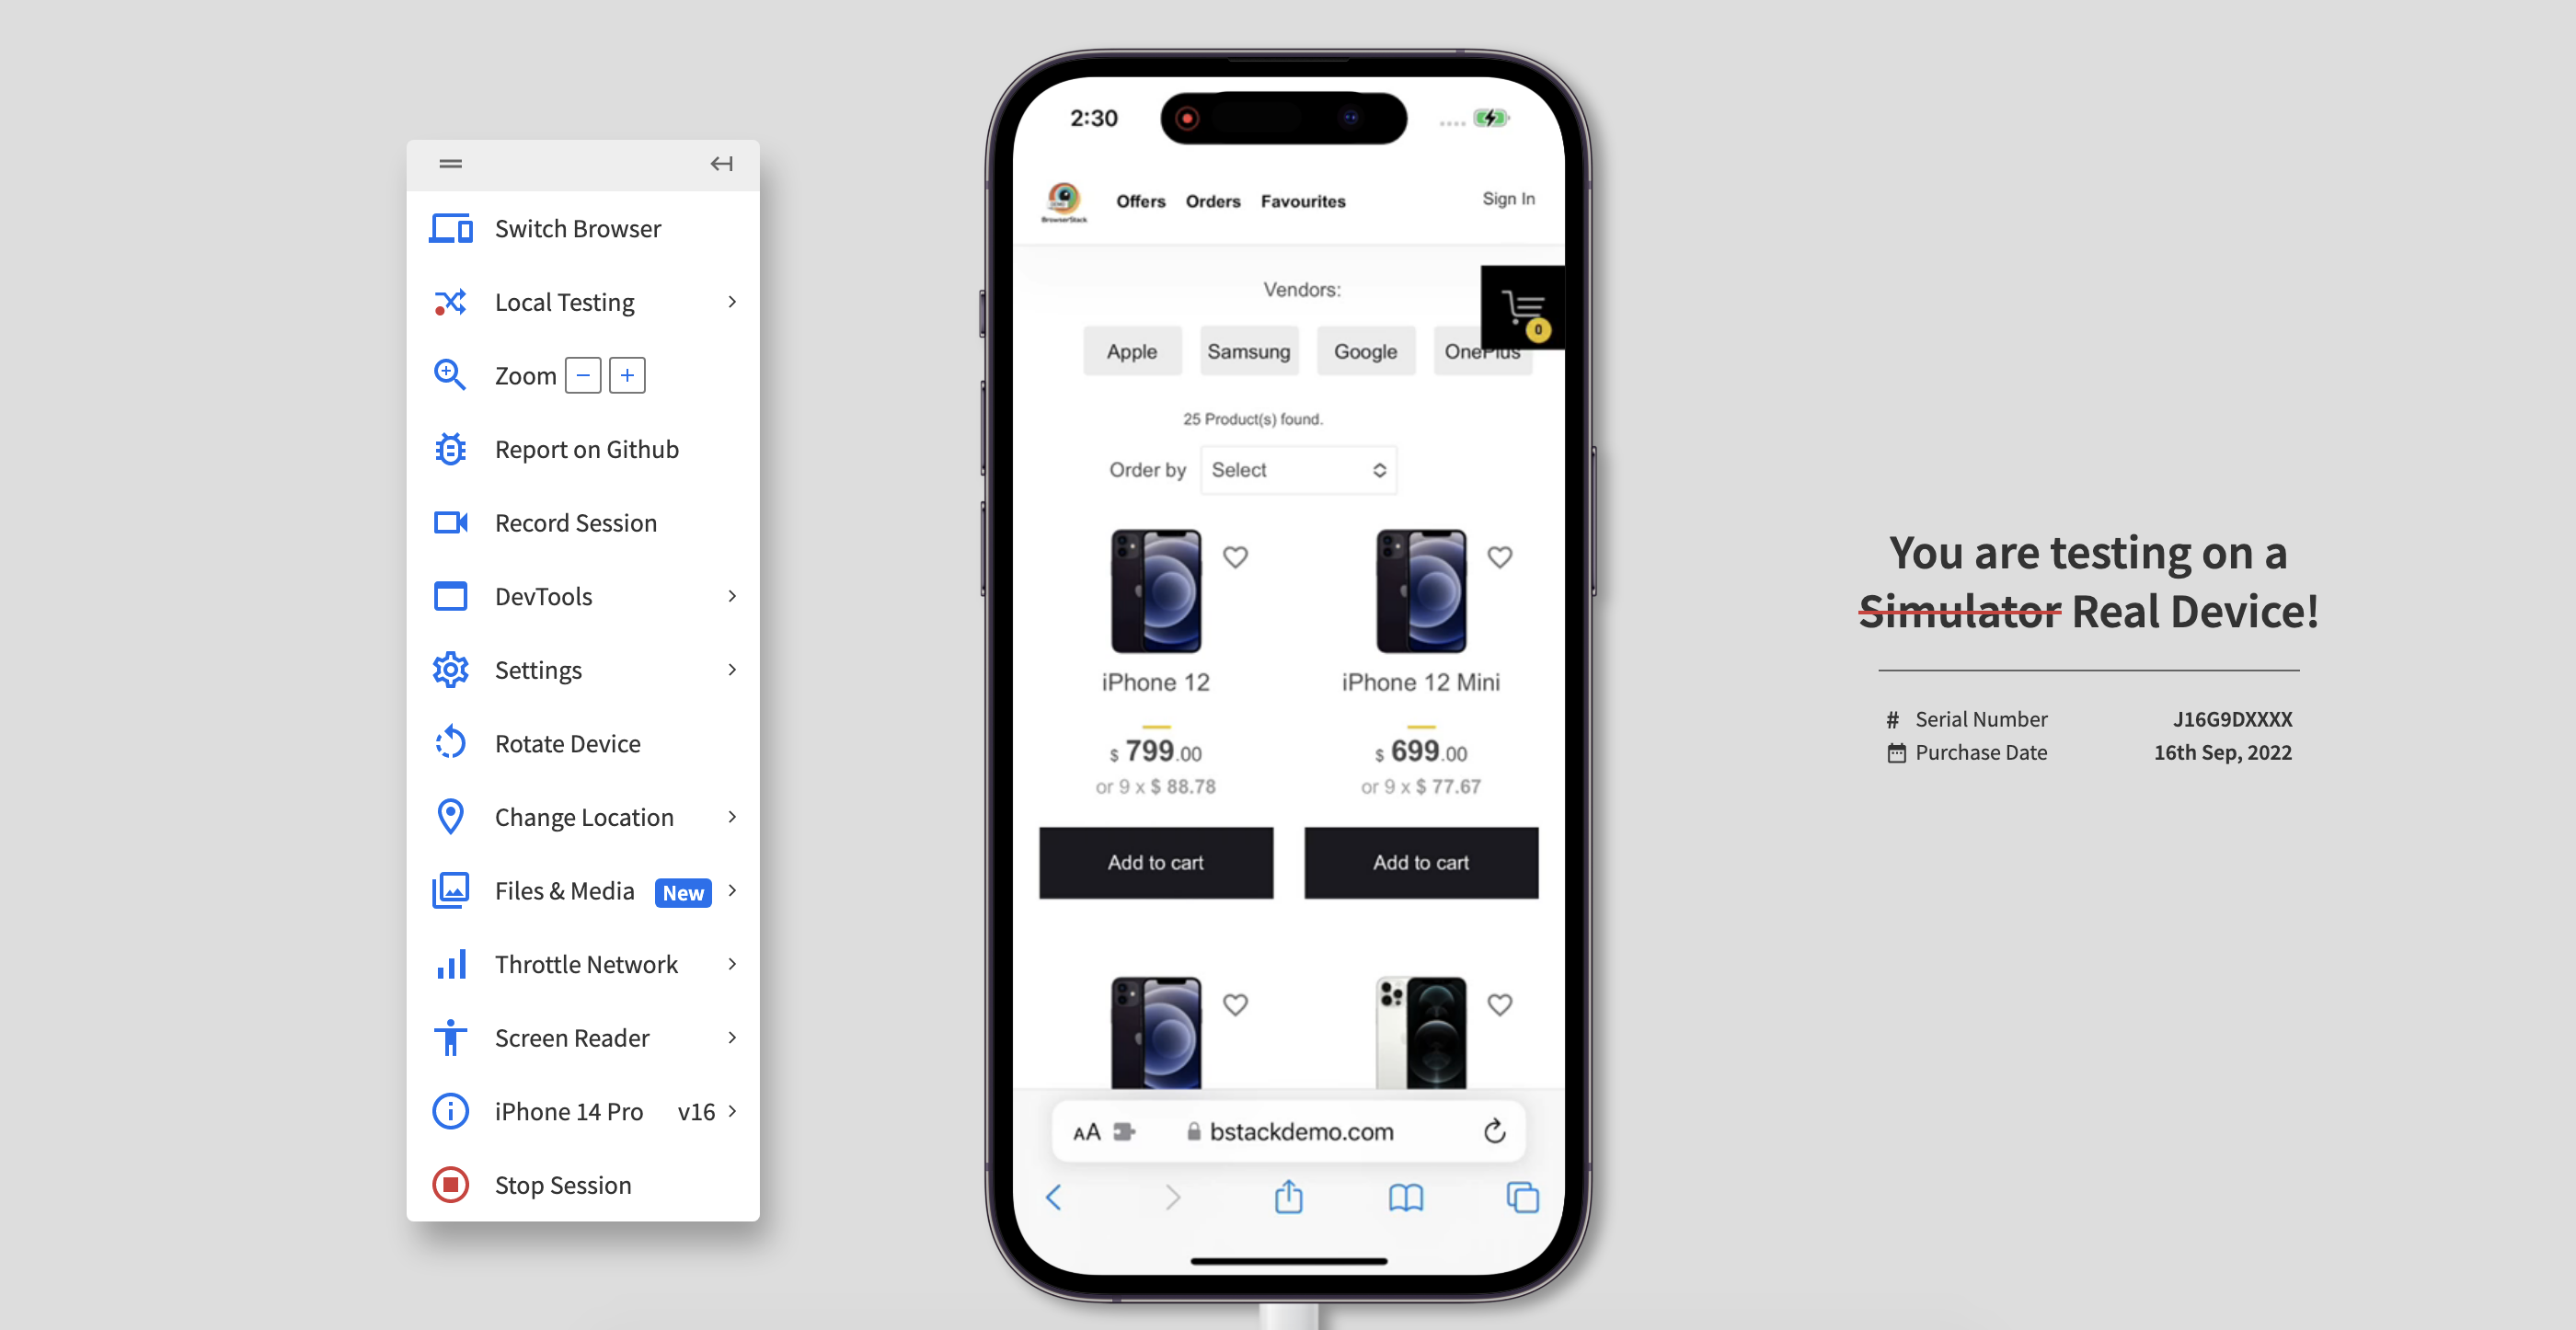
A practical alternative to testing on Xcode Simulators is testing on BrowserStack Real Device Cloud. With BrowserStack, you can remotely access and interact with real devices, allowing you to validate your app’s performance, functionality, and user experience on a diverse set of devices without the need for physical hardware.
BrowserStack offers many advanced features and advantages over managing tests on Xcode Simulators like :
- Real Device Testing: BrowserStack allows developers to test their apps on a wide range of real devices, including smartphones, tablets, and even different operating systems.
This provides a more accurate representation of how the app will perform and behave on various devices, ensuring better overall compatibility and user experience.
Comprehensive Testing Capabilities: With BrowserStack, developers can perform more comprehensive testing, including manual and automated testing, responsive design testing, and compatibility testing across multiple browsers and platforms.
This helps uncover issues that might go unnoticed when relying solely on Xcode Simulator.
- Network and Connectivity Testing: BrowserStack enables developers to test app functionality in different network conditions and connectivity scenarios, such as low bandwidth or unstable connections.
This is particularly valuable for assessing real-world performance and reliability, which may not be adequately captured by Xcode Simulator. - User Experience Testing: By using BrowserStack, developers can gain insights into the user experience of their apps on real devices. This includes evaluating touch interactions, gestures, and device-specific features that are critical for delivering a seamless and intuitive user experience.
- Performance Testing: Real devices allow you to test the performance of your app under real-world conditions. You can assess factors such as CPU usage, memory consumption, battery impact, and network connectivity that can significantly impact the user experience. These performance aspects cannot be accurately simulated by the Simulator.
- Device-Specific Testing: With a wide range of iPhone models available, it is crucial to test your app on different devices to ensure compatibility and optimal performance across various screen sizes, resolutions, and hardware configurations.
Real devices enable you to identify and address device-specific issues and ensure a consistent user experience.
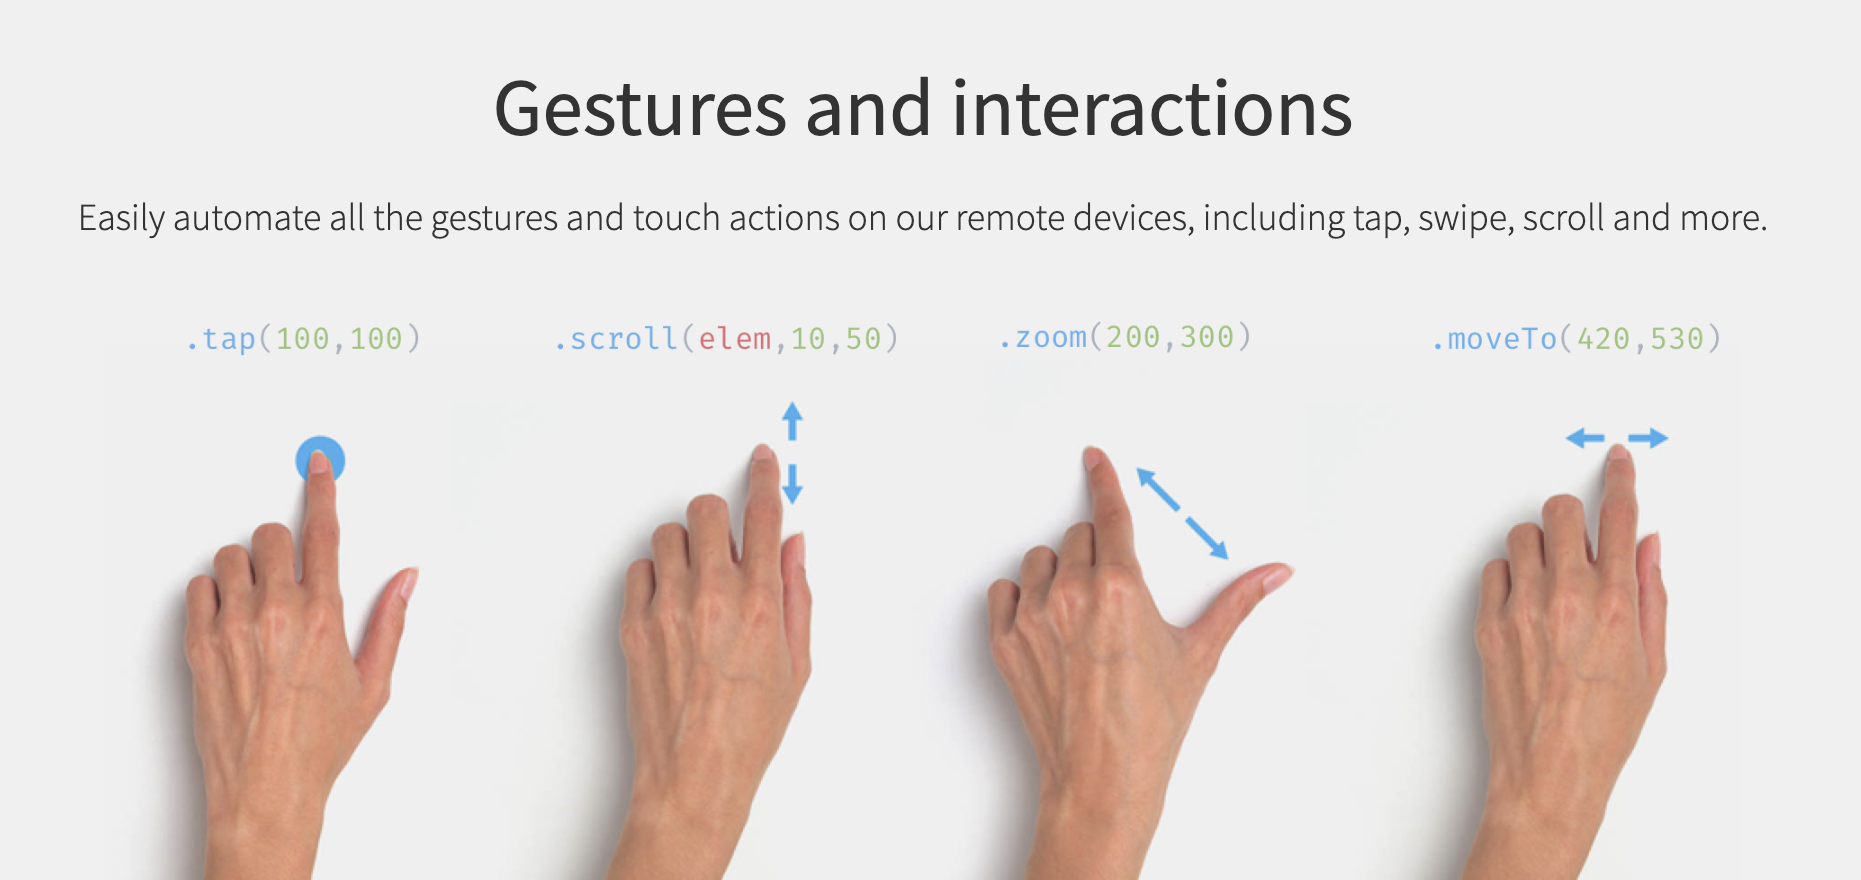
- Interaction and Gestures: Real devices allow for testing touch gestures, accelerometer movements, GPS functionality, camera input, and other hardware-specific interactions that are essential for many apps.
The Simulator, on the other hand, relies on mouse and keyboard input, which may not fully capture the user experience of touch-based interactions.
- Network Conditions: Testing on real iPhones enables you to assess your app’s performance under different network conditions, such as various connection speeds, Wi-Fi vs. cellular data, and network interruptions.
This is crucial for validating features like data synchronization, content loading, and network resilience.
- Debugging and Troubleshooting: When encountering issues or crashes, testing on real devices provides access to device logs, crash reports, and debugging tools, allowing for more effective troubleshooting and issue resolution.
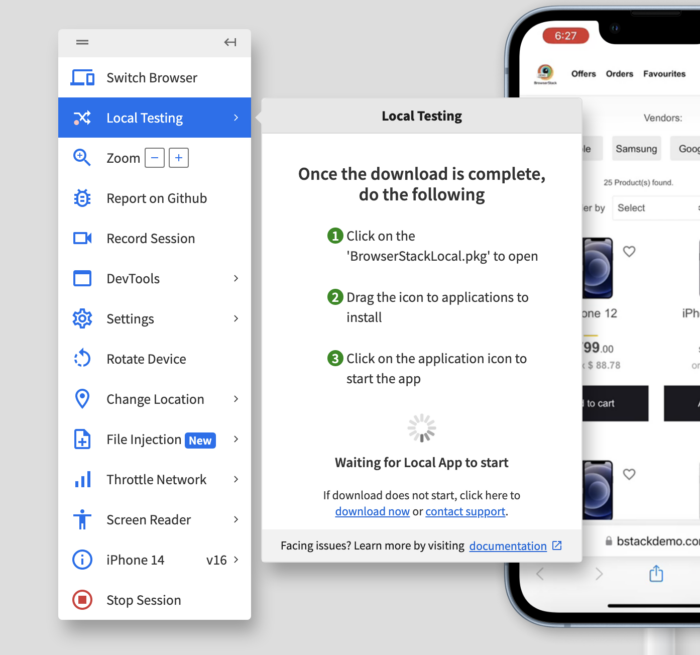
- Local Testing : One of the big advantage of Xcode Simulator is the ability to test and debug your local projects on the simulators and get validation on features along with development process.
BrowserStack offers local testing feature that enable you to bridge your local deployments / app binaries and devices on BrowserStack cloud enabling testing of apps under development on real devices on the cloud.
Conclusion
Testing is not just about finding bugs, but also about ensuring your app’s performance, responsiveness, and user experience exceed expectations. Whether you choose the convenience of the Simulator or the realism of real devices with BrowserStack, the goal remains the same: delivering a top-notch app that wows your users.
So go forth, iterate, test, and iterate some more! Embrace the joys and challenges of app testing, knowing that each step brings you closer to creating an exceptional user experience.


