Automated browser testing often requires handling alerts and popups to ensure a seamless user experience.
Overview
What is an Alert?
An alert is a browser dialog that displays a simple message to the user.
What is a Popup?
A popup typically refers to a separate window or dialog box that appears during browsing or testing.
How to Handle Alerts and Popups in Puppeteer:
- Identify and listen for dialog events using page.on(‘dialog’, …).
- Retrieve the dialog message using dialog.message().
- Accept or dismiss alerts and confirms with dialog.accept() and dialog.dismiss().
- Input values into prompt dialogs with dialog.accept(value).
- Implement real-world handling of these dialogs to ensure accurate testing.
This article gives a detailed overview of handling alerts and popups in Puppeteer, with examples and best practices for robust automated testing.
What is Puppeteer?
Puppeteer is used to automate and streamlining the front-end development and testing, respectively. Microsoft first introduced it. Based on the Node.js library, Puppeteer is free and open-source software.
Executing the test cases on widely accessible numerous devices is made easier by responsive testing.
Puppeteer also boasts of a strong responsive community, with more than 60,000 GitHub starts.
A few standout features include:
- It has APIs to interact with and control Chromium or the headless version of Chrome (following the protocols in DevTools).
- On browsers like Chrome, Chromium, Edge, and Firefox, it can also be utilized for non-headless execution.
- The majority of user interface testing, keyboard input, mouse movement, and other tasks can be automated with Puppeteer.
- It can be used for testing Angular and Angularjs applications and for tasks like web page crawling and scraping.
- Automated UI testing is used to verify ongoing application releases that comply with test cases.
- Analyze runtime performance and performance timeline to verify performance concerns.
- Reporting is made simpler by allowing users to save the automated execution video and create screenshots and PDFs.
Puppeteer for Browser Automation
The following are primary justifications for introducing Puppeteer for automating browser actions:
1. Chrome is the primary focus right now. Although Puppeteer for Firefox is currently available, it is still in the experimental stage, and different browsers may enter the domain in the future. Therefore, we cannot state that it is a cross-browser automation testing tool. It utilizes chromium; therefore, Microsoft Edge is also compatible.
2. Users can consider Puppeteer cross-browser testing to be a drawback. The Chromium Principles, which include its speed, stability, simplicity, and security, outweigh the drawbacks.
- Speed: ‘0’ performance overhead
- Stability: It has a solid implementation design.
- Simple: It offers a simple user-interactive interface to understand, utilize, and troubleshoot.
- Security: Since Puppeteer runs off-process using Chromium, it is safe to automate potentially harmful malicious web pages.
3. Puppeteer is an API built on top of Chrome that aims to reduce incompatibilities. The Chromium version included with Puppeteer is distinct.
4. To increase productivity, users can gain from promoting headless browser testing.
5. It is built on an event-driven architecture.
Learn More: How to run Tests in Puppeteer with Firefox
Setting Up Puppeteer
Here are the pre-requisites for setting up Puppeteer:
- NodeJS must be installed since it is a JavaScript engine.
- A Code Editor is also needed. The most well-liked code editors for JavaScript are VS Code, Atom, and Sublime Text. However, we are using VS Code for this article.
Installation and Project Initialization for Puppeteer
The steps below must be completed to install Puppeteer and set up a project of automated test cases for a web application:
Step 1: Create a directory for the project files
Step 2: Open VS Code and import that directory into the editor.
Step 3: Launch VS Code’s Terminal and enter the following command.
npm init
This utility will guide the creation of a package.json file
Step 4: Type “YES” to the question “Is this OK?” and hit the “Enter” key.
Step 5: Execute the command listed below to install Puppeteer. −
Or,
npm i puppeteer
Step 6: Execute the following command to install Puppeteer core. −
npm i puppeteer-core
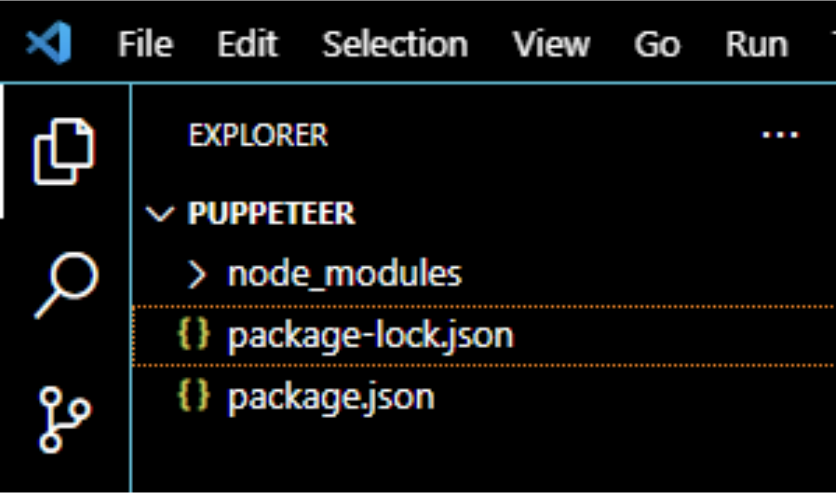
Step 7: Once Puppeteer and Puppeteer core has been installed, you can find the node_modules folder, package-lock.json file, and package.json file in the empty folder you made in Step 1.
Write your first Script
As an example, we will run a sample e-commerce website and take a screenshot. To begin, we must carry out the steps listed below:
Step 1: First, make a new file called example1.js in the directory.
Step 2: In this file, add the following code:
const pt = require('puppeteer');  //adding Puppeteer library

pt.launch().then(async browser => {

   const p = await browser.newPage();  //browser new page

   await p.setViewport({ width: 1000, height: 500 })   //set viewpoint of browser page

   await p.goto('https://bstackdemo.com/')  //launch URL

   await p.screenshot({    //capture screenshot

      path: 'bsdemo.png'

   });

   await browser.close()   //browser close

})
Step 3: Run the code by using the given command. −
node <filename>
Consequently, we will execute the following command in our example −
node example1.js
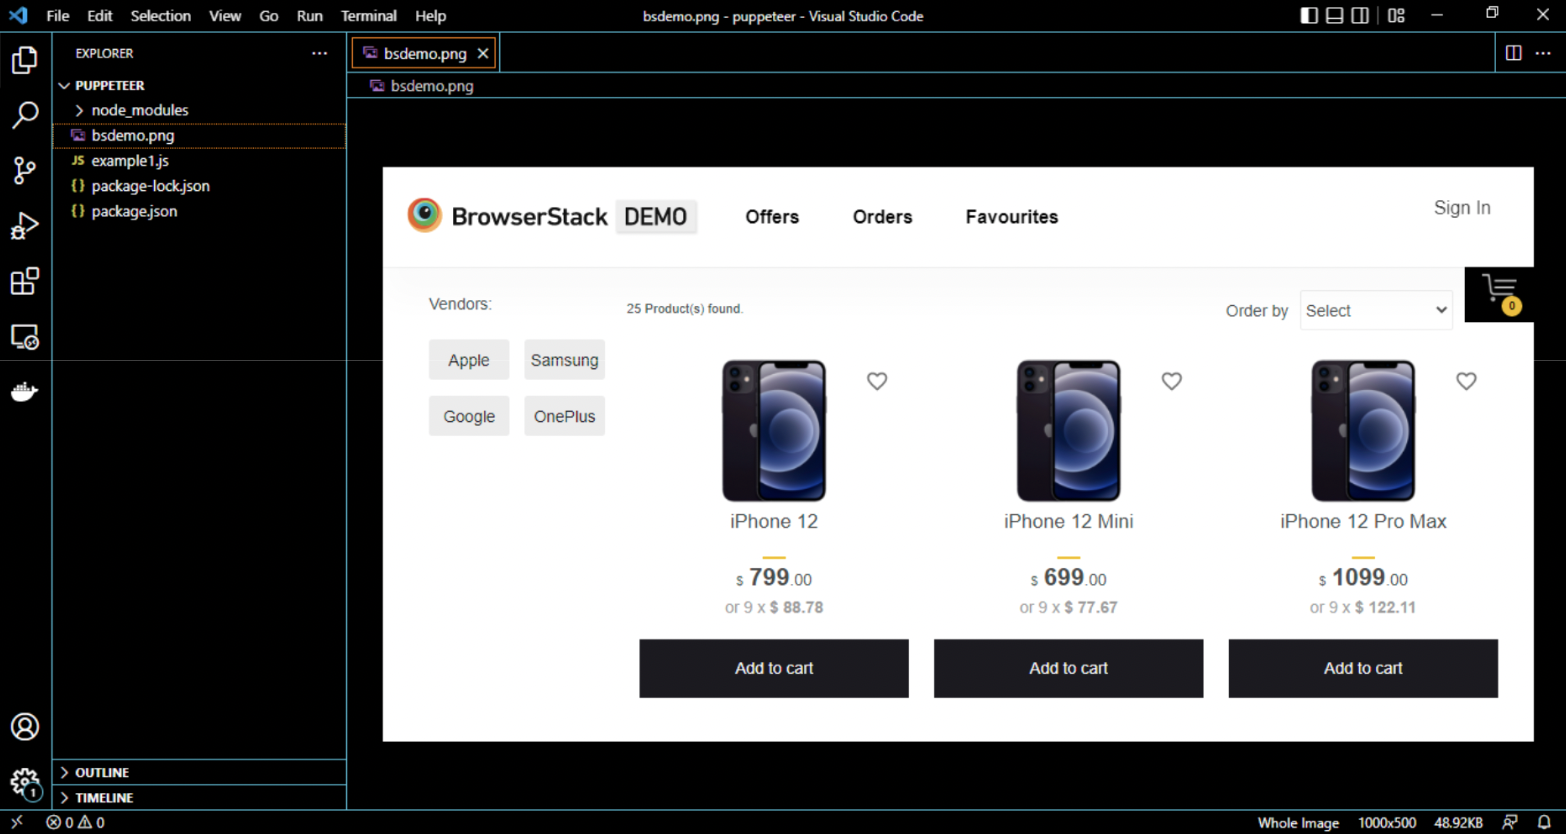
Step 4: You can see a new image bsdemo.png is saved in the project directory. On opening it you will see the screenshot of the website.
Note: By default, Puppeteer runs in headless mode. For Headed execution, the user has to add one more argument {headless:false} with the launch function.
How to Handle Alerts and Pop-ups in Puppeteer?
Browser alerts can be handled via Puppeteer. After an alert has been displayed on the website, automation tools like Selenium and WebdriverIO accept or reject it.
However, before an alert shows on the page in Puppeteer, the user must specify whether to accept or dismiss it. For this, Puppeteer must be used to activate the on-event listener.
Methods for Handling Confirm Alerts
Here are a few ways to interact with Alerts −
- accept(): Promise<void> − method to accept an alert.
- message(): string − returns the message acquired from an alert.
- type(): DialogType − method to get the Dialog type. It can be prompt, confirm, or prompt.
- dismiss(): Promise<void> − alert is dismissed using this method.
Example of Handling Alerts and Pop-ups in Puppeteer
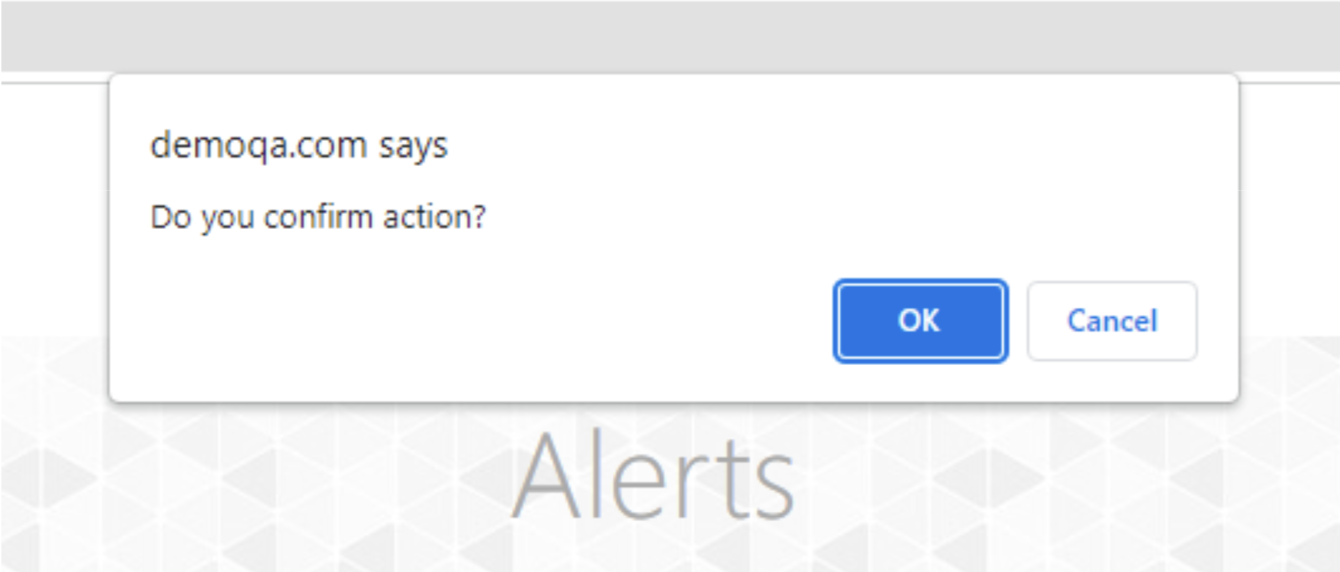
A confirm alert appears in the image below when the “Click me” button for “On button click, confirm box will appear” is clicked. We’ll get the alert’s text by using Puppeteer here, and we’ll accept it.
We’ll start by making a new file in the directory. Say example.js, and then add the following code to the newly created file.
const pt= require('puppeteer')  //Puppeteer library

async function confirmAlert(){

   const browser = await pt.launch({headless:false})  //launch browser in headless mode

   const page = await browser.newPage();  //browser new page

   await page.setViewport({ width: 1920, height: 1080 });

   page.on('dialog', async dialog => {   //on event listener trigger

      console.log(dialog.message());  //get alert message

      await dialog.accept();        //accept alert

   })

   await page.goto('https://demoqa.com/alerts')     //launch URL

   const b = (await page.$x("//button[@id='confirmButton']"))[0]     //identify element with xpath then click

   b.click()

   await browser.close()   //browser close
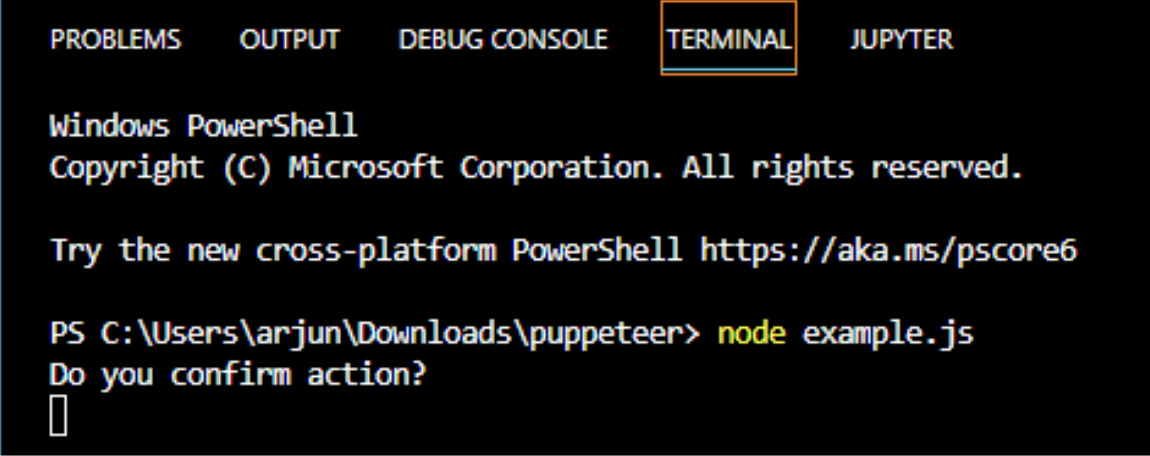
After successful execution, “Do you confirm action?” will appear in the console as the confirm alert text.
Understanding Dialog Types in Puppeteer
Puppeteer handles three main types of dialog boxes:
1. Alert Dialogs: Simple messages requiring acknowledgment.
Example: alert(“This is a test alert!”)
2. Confirm Dialogs: Dialogs prompting the user to accept or cancel an action.
Example: confirm(“Are you sure you want to proceed?”)
3. Prompt Dialogs: Dialogs that collect user input as a string.
Example: prompt(“Enter your name:”)
Understanding these dialog types helps you manage interactions effectively in automation workflows.
Learn More: Handling Alerts and Popups in Cypress
Implementing Dialog Event Handlers
Puppeteer captures dialogs using the dialog event:
Setting up page.on(‘dialog’, …): Listen for dialog events on the page:
page.on('dialog', async dialog => {

  console.log(dialog.message());

  await dialog.dismiss();

});
Using dialog.accept(), dialog.dismiss(), and dialog.message()
- dialog.accept(): Accepts the dialog (or confirms).
- dialog.dismiss(): Cancels the dialog.
- dialog.message(): Retrieves the dialog’s message for logging or validation.
These event handlers allow robust interaction with alerts and pop-ups during automated tests.
Practical Examples of Handling Dialogs
Here are real-world scenarios to illustrate dialog handling:
1. Alert Dialog
page.on('dialog', async dialog => {

  console.log('Alert message:', dialog.message());

  await dialog.accept();

});
2. Confirm Dialog
page.on('dialog', async dialog => {

  console.log('Confirm message:', dialog.message());

  await dialog.dismiss(); // simulate clicking "Cancel"

});
3. Prompt Dialog
page.on('dialog', async dialog => {

  console.log('Prompt message:', dialog.message());

  await dialog.accept('Test User');

});
4. Real-world Use Case: In an e-commerce app, confirmation dialogs might appear before deleting a saved address. Automated tests must handle these dialogs correctly to avoid errors during test runs.
BrowserStack Automate Integration with Puppeteer
It’s really simple to run the Puppeteer test suite on BrowserStack. First, our script requires BrowserStack credentials for execution. For that, we will set our credentials into the environment variables
BROWSERSTACK_USERNAME and BROWSERSTACK_ACCESS_KEY as shown below:
export BROWSERSTACK_USERNAME="arjunsinha_AN654z"

export BROWSERSTACK_ACCESS_KEY="hysmkJJYir7aWu4gcrMS"
Also, use puppeteer.connect to connect to the CDP endpoint at BrowserStack. The caps variable is used to send the additional parameters to BrowserStack so that the specific browser/OS combination can be assigned to our test.
After configuration, we can run the Puppeteer test on BrowserStack.
After execution, we can see the test results on the BrowserStack Automate dashboard. Visit View Puppeteer test results to learn more.
'use strict';

const { strict } = require('once');

const puppeteer = require('puppeteer');

const expect = require('chai').expect;

(async () => {

  const caps = {

    'browser': 'chrome',  // we can choose `chrome`, `edge` or `firefox`.

    'browser_version': 'latest',  // supports v83 and above. we can choose `latest`, `latest-beta`, `latest-1`, `latest-2` and so on.

    'os': 'os x',

    'os_version': 'big sur',

    'build': 'puppeteer-build-1',

    'name': 'example1',  // The name of our test and build

    'browserstack.username': process.env.BROWSERSTACK_USERNAME || 'johndoe_AN654z',

    'browserstack.accessKey': process.env.BROWSERSTACK_ACCESS_KEY || 'xyzxyz123abc123'

  };

  const browser = await puppeteer.connect({

  browserWSEndpoint:

  `wss://cdp.browserstack.com/puppeteer?caps=${encodeURIComponent(JSON.stringify(caps))}`,// That endpoint gives a `browser` instance based on the `caps` that we specified

  });


//The BrowserStack Configuration code ends here. Following this line is our test script.

pt.launch().then(async browser => {

   const p = await browser.newPage();

   await p.setViewport({ width: 1000, height: 500 })

   await p.goto('https://bstackdemo.com/')

   await p.screenshot({

      path: 'bsdemo.png'

   });

   await browser.close()

})
Conclusion
Due to its swift dependability, and robust foundation, Puppeteer framework is the newest trend in automation testing. Compared to existing automated testing tools, it is considerably easier to grasp. This article demonstrates how easy it is to set up the Puppeteer environment, manage alerts and pop-ups, and integrate Puppeteer with BrowserStack.
Use Puppeteer with BrowserStack Automate
Useful Resources for Puppeteer
Understanding Puppeteer:
- Puppeteer Framework Tutorial: Basics and Setup
- How to start with Puppeteer Debugging
- How to install and setup Puppeteer with npm (NodeJS)
- Puppeteer Type Command: How to type a text in input box in Puppeteer
- Cross Browser Testing in Puppeteer: Tutorial
- Understanding Puppeteer Headless
- How to run UI Automation Testing using Puppeteer
- How to capture Lazy Loading Images for Visual Regression Testing in Puppeteer
- How to use Proxy in Puppeteer?
- How to run Tests in Puppeteer with Firefox
- How to Perform Visual Regression Puppeteer
- Handling Alerts and Popups in Puppeteer
- Pyppeteer Tutorial: Guide to Puppeteer in Python (with Examples)
Tools Comparisons:


