Node.js has transformed web development by enabling JavaScript to be used for both frontend and backend development.
Built on Chrome’s V8 engine, it offers high performance and asynchronous capabilities, making it ideal for real-time applications, APIs, and scalable network applications. Its non-blocking I/O model allows handling multiple connections efficiently without excessive resource consumption.
This article explores Node.js in depth, covering its benefits, applications, and best practices for development.
What is NodeJS?
Node.js is an open-source, cross-platform JavaScript runtime environment that runs on Chrome’s V8 engine. It allows developers to use JavaScript for both frontend and backend development, making the development process more seamless.
Key Features of Node.js:
- Asynchronous and Event-Driven: Node.js operates on a non-blocking architecture, handling multiple requests simultaneously without waiting for one task to complete before starting another.
- Single-Threaded but Highly Scalable: Unlike traditional multi-threaded models, Node.js uses a single-threaded event loop to manage concurrent operations efficiently.
- Fast Execution: Built on the V8 JavaScript engine, Node.js compiles JavaScript into machine code, enabling faster execution.
- Cross Platform Compatibility: It runs on Windows, macOS, and Linux, making it highly flexible for different development environments.
- Node Package Manager (NPM): Comes with NPM, which provides a vast ecosystem of libraries and tools to enhance development efficiency.
- Supports Microservices and APIs: Ideal for building RESTful APIs, GraphQL services, and microservices architecture.
- Real-Time Capabilities: Excellent for real-time applications such as chat apps, online gaming, and live streaming due to WebSocket support.
Must Read: Synchronous vs Asynchronous in JavaScript
Why use NodeJS?
There are several reasons why NodeJS is preferred over other technologies, and why JavaScript is the most used server-side programming language among developers.
- Leverage JavaScirpt: JavaScript is without a doubt the first programming language that any web developer learns, but until recently, it could only be used for server-side development. NodeJS expands the capabilities of JavaScript, enabling programmers to build whole applications using only JavaScript.
- Greater Performance: A seamless data transfer between the server side and client side is achieved if both are programmed in JavaScript. Additionally, NodeJS’s lightweight design and event-driven approach are among the main factors contributing to its speed and effectiveness. This has its advantages on applications that require low latency such as a chat application, and more.
- Strong community support: Given that JavaScript is already one of the most popular programming languages in the world, node.js has a huge community of active users who not only support the platform’s overall growth and development but also help other developers navigate the learning curve.
- Cross-platform compatibility: NodeJS can operate on a variety of operating systems, including Mac OS, Windows, Linux, Unix, and more. This interoperability makes it simple for developers to work together on a project, and once produced code can be distributed on various operating systems, saving the developer a tonne of hassle.
- Handle tasks simultaneously: Node.js manages several tasks very effectively and doesn’t cause the system to lag. To put it another way, if node.js is performing one job and another one appears at the same time, it may run both tasks concurrently, even if the first task isn’t complete. This is node.js’s non-blocking behaviour, which enhances the system’s overall performance.
Applications of Node.js
Node.js is widely used for developing various types of applications due to its non-blocking, event-driven architecture.
Some common applications include:
- Streaming Applications: Node.js efficiently manages real-time data streams, enabling seamless content delivery without overloading servers or client devices. Its event-driven nature ensures smooth data synchronization between the server and client, reducing latency and improving performance.
- Single-Page Applications (SPAs): Node.js is well-suited for SPAs because it can handle asynchronous operations and high I/O workloads. With frameworks like Express.js, it enhances speed, efficiency, and scalability for data-driven web applications.
- Real-Time Applications: Ideal for real-time features such as messaging apps and chatbots, Node.js supports WebSockets, enabling bi-directional communication between servers and clients. This makes it a preferred choice for applications requiring instant data updates.
- API Development: Since Node.js is built on JavaScript, it seamlessly processes JSON data, making it an excellent choice for developing RESTful APIs. Its lightweight nature and asynchronous capabilities ensure high performance and scalability for API-driven applications.
While these are some primary use cases, Node.js is continually being adopted for various other applications across industries, proving its versatility and efficiency in modern web development.
How to Download and Set up NodeJS
Now, let’s set up NodeJS in our system and understand its concepts thoroughly.
Step 1: Download NodeJs from its official website.
Step 2: Start installation from the NodeJs installer that you have just downloaded.
Step 3: When the installer finishes, click on ‘finish’ and verify if it is installed properly by running the following command on the command prompt.
node -version
If the version is displayed on the command prompt, it is indicated that the NodeJS is installed properly.
Getting Started with NodeJS
Now, let’s practically demonstrate NodeJS with the help of code. Since you have already installed NodeJS in your system, now open an IDE, create a new JavaScript file, and let’s start right away. In this example, we are using VS Code.
As we know that NodeJS is based upon the V8 engine, it helps in executing our NodeJS programs on our terminal itself. Note that, not on the browser’s terminal but on the server’s terminal. In this example, we are going to use VS Code for writing code as well as its built-in terminal.
Also Read: Unit testing for NodeJS using Mocha and Chai
NodeJS CLI
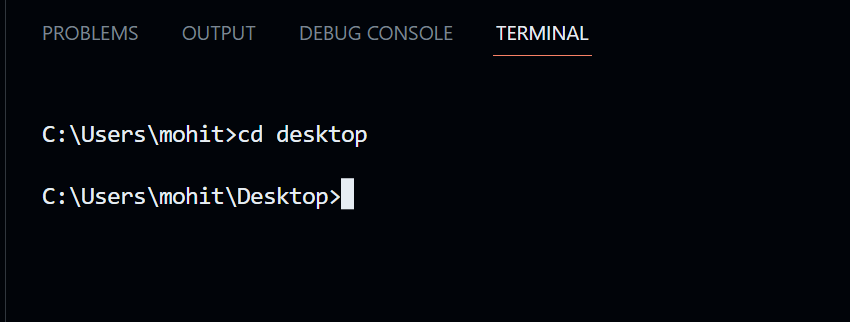
CLI stands for Command Line Interface and it helps you to interact with your project via the command line. Let’s understand it with a simple example. We have created a JavaScript file, let’s navigate to the file in the terminal. To do so, enter the path location of your file after the keyword ‘cd’.
Now, let’s write our first code in NodeJS. To do so, open the file you have just created and paste the following code into it.
console.log("Hello World");The output of the ‘console.log()’ function is displayed on the terminal, so let’s head towards the terminal and execute the program.
Initiating NodeJS File
Press the shortcut key “CTRL + SHIFT + `” to access the terminal in VS Code or you can navigate from the Menu Bar. In the terminal, navigate to the file you have written the code upon, and use the following command to execute it.
We have successfully created our first NodeJS application. In case, you don’t want to use the VS Code terminal, you can use the command prompt application present in your application.
NodeJS Modules and File System
Whenever we code in JavaSccript, we often use certain libraries that act as a reusable block of codes that if we don’t use, we spend a lot of time writing the code for that. Similarly, in NodeJS, a set of functions or built-in modules that you can use without installation. Some of the built-in NodeJS modules are HTTP, assert, buffer, events, and more.
Let’s understand with a simple example, we shall consider a NodeJS built-in module, in this example let’s consider the module “fs”. It is a file system module that allows you to perform various operations on the file system of your computer. Some of the uses are, creating files, reading files, deleting files, and more. Note that, we can perform all these operations with the help of NodeJS code.
Paste the following code inside the JavaScript file. We are fetching the ‘fs’ module and with the help of it, we are creating a text file on our system, that has some data.
// fetching built-in module
const fs = require("fs");

// executing modules to create a file and storing some data on a newly created file
fs.writeFileSync("readMe.txt","BrowserStack");
Now head over to the terminal and use the following command to execute your NodeJS program.
node browserstack.js
After the command is executed, you shall see a new file created on your system that is a text file named “readME.txt” with “BrowserStack” written inside it. There are several other actions you can perform with the help of the File System module. You can read more about the File System module in the official documentation.
NodeJS NPM
As we came across NPM in the above section also, we understood that NPM is a package manager that manages several dependencies and packages in a NodeJS project. A package contains the files you need for a module. NPM is automatically installed when you’re installing NodeJS in your computer system. utilizing NPM and let’s see how to utilize those packages in our project.
Firstly open the project folder and launch the terminal there. Follow the following command, which will create a package.json file. This file is essential for a NodeJS project, as it provides various information related to the project. It is important in knowing all the dependencies, packages, and more that are installed and needed on your project.
npm -init
Now, for example, let’s install a package, which is known as Chalk which is used to style your boring looking terminal and bring some colors into it. Follow the command to install the package.
npm install chalk
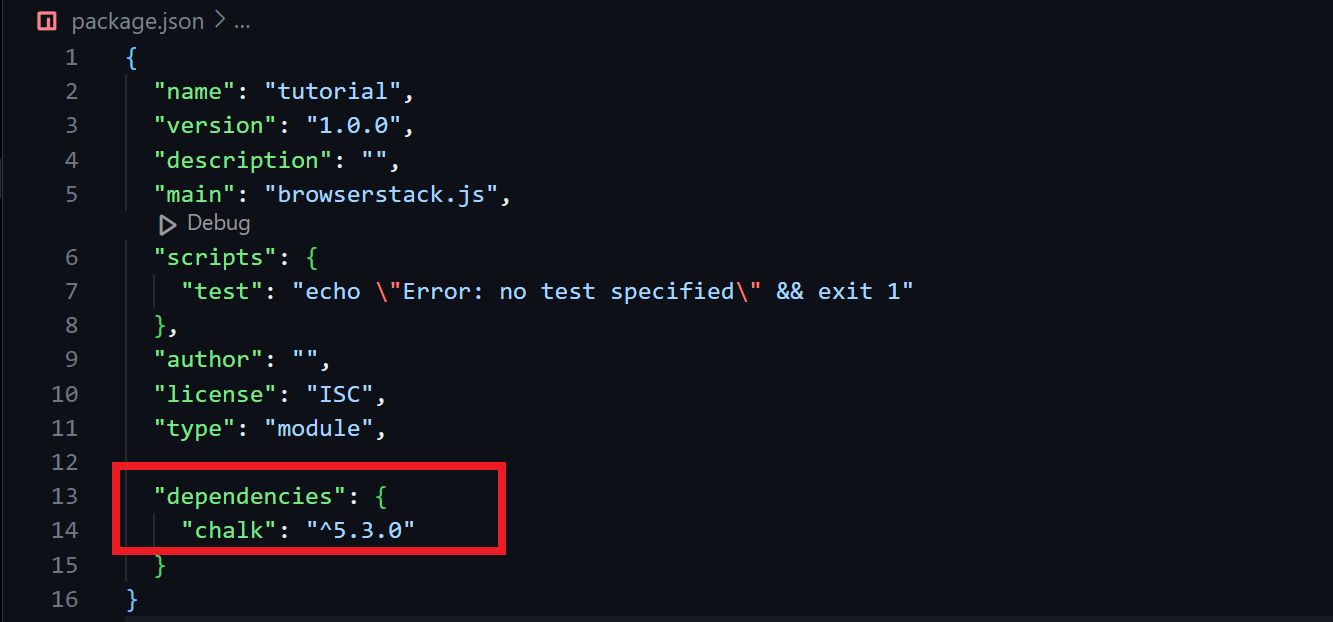
After you have successfully installed the package with the command, and now you can see it is present in the package.json file in your project folder. All the required files necessary for that package or module are stored in the node_modules folder which is also automatically created in the project folder.
Paste the following code in the JavaScript file in your project folder.
import chalk from "chalk";

console.log(chalk.red('This is red'));
console.log(chalk.blue('This is blue'));
console.log(chalk.green('This is green'));
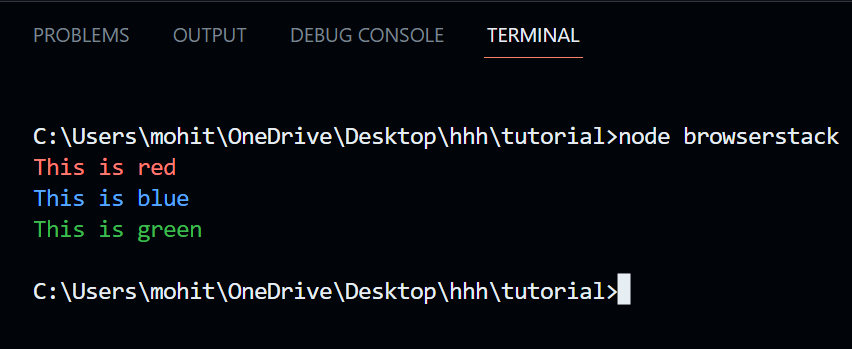
Now, execute the program and we shall see the following output on the terminal.
NodeJS Events
Every action such as clicking, hovering, opening a file, and more that are done on a computer are referred to as events. In NodeJS there’s a built-in module, known as ‘Events’ that assists in creating, firing, and listening to your events. It is similar to how we use event handlers in JavaScript.
To assign event handlers in NodeJS to our events, we have to use the EventEmitter object, and to fire the event, we have to use the emit() function.
Let’s consider an example, where we shall be creating a function that will be executed when the “myName” event is fired.
//fetching the Events module:-
const EventEmitter = require("events");
const event = new EventEmitter();

//creating an event Handler:-
event.on("myName", ()=>{
    console.log("BrowserStack");
});

//fire the myName event:-
event.emit("myName");
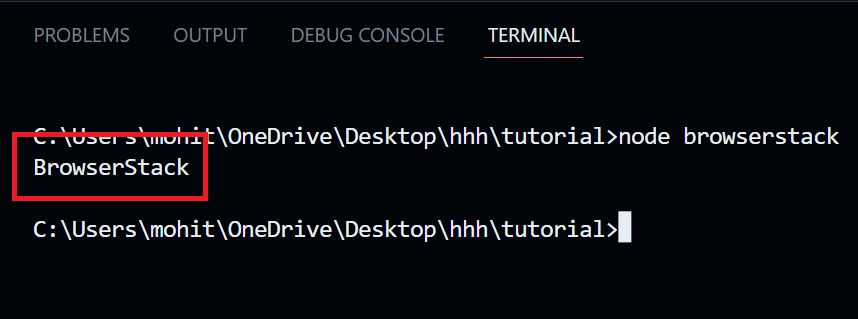
Upon executing the above code, we shall see the following output.
NodeJS Assert
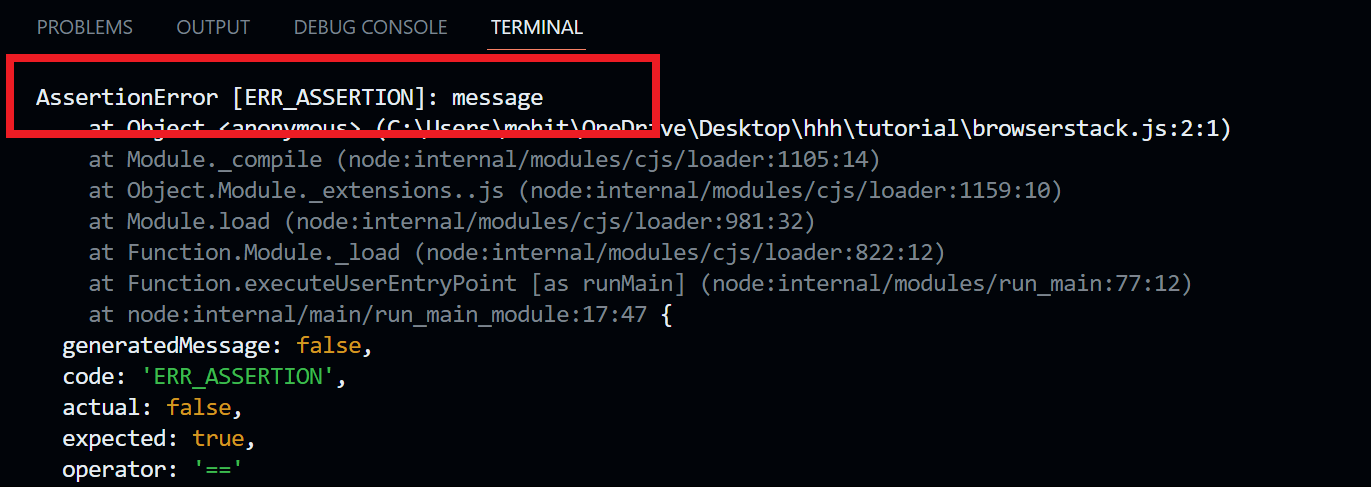
Assert is also a built-in module in NodeJS that is useful for testing if a given assertion is true or not. The assert method throws an error and terminates the program in case the expression evaluates to zero or the expression is false. The syntax of using the assert method in NodeJS is as follows.
assert(expression, message);
Let’s understand the concept with the help of an example.
const assert = require('assert');
assert(2+2==5, "message");
NodeJS Callbacks
A callback in NodeJS is equivalent to an asynchronous function. It is a special type of function that is passed as an argument to another function and is invoked when the function which contains the callback is completed. Callback functions are necessarily important for enabling asynchronous tasks and building flexible code.
The syntax for writing a callback function is as follows.
function function_name(argument, callback)
Let’s understand the concept with the help of an example. Create a text file with the following content.
“The quick brown fox jumps over the lazy dog”.
Now we shall create two JavaScript files that will depict two different functionalities. This will help in highlighting the importance of a callback function.
The first program will look something like this.
var fs = require("fs");
var data = fs.readFileSync('main.txt');

console.log(data.toString());
console.log("Ends");
The second program will be looking like this.
var fs = require("fs");

fs.readFile('main.txt', function (err, data) {
   if (err) return console.error(err);
   console.log(data.toString());
});
console.log("Ends");
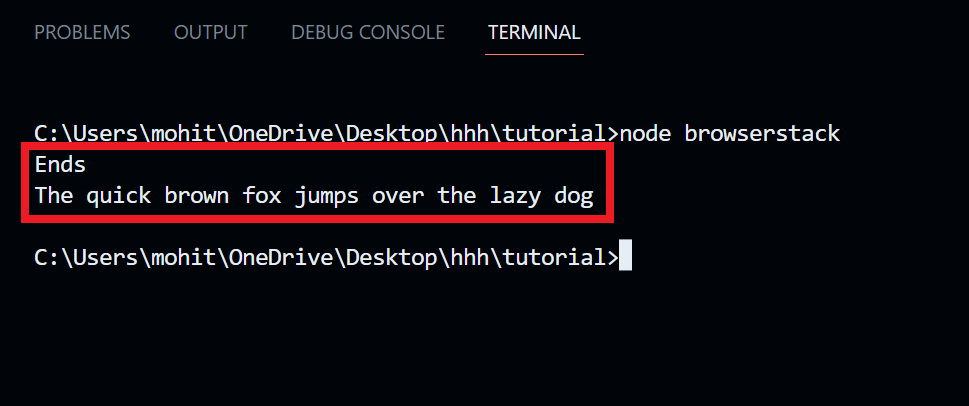
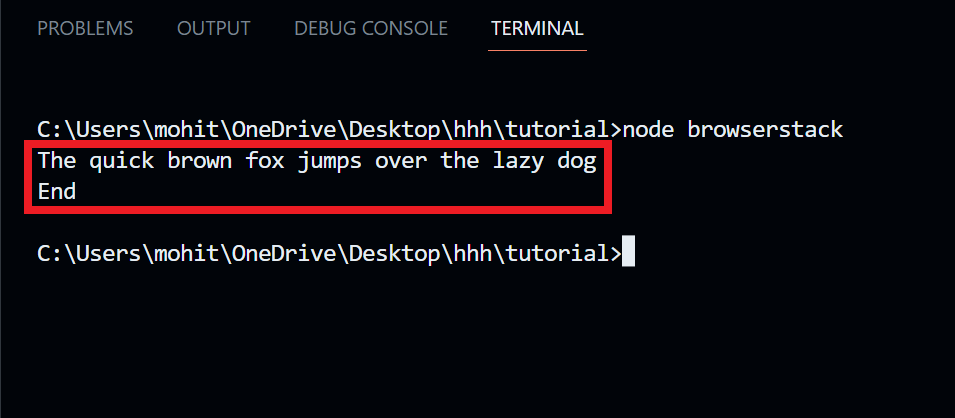
Upon executing both the programs separately, we saw that the first program blocks the code until it reads the file, however, the second example which utilizes the callback function does not do that, and executes multiple functions simultaneously.
Useful Resources for NodeJS
- NodeJS Tutorial
- How to use Selenium in NodeJS (A Detailed Guide)
- How to install and setup Puppeteer with npm (NodeJS)
- How to Test Selenium NodeJS with Mocha
- Performing NodeJS Unit testing using Jest
- Unit testing for NodeJS using Mocha and Chai
- Jest vs Mocha: Comparing NodeJS Unit Testing Frameworks
- How to Write Files using fs.writeFileSync in NodeJS
Conclusion
In this NodeJS tutorial we delve into the fundamental yet essential concepts of NodeJS, which are used frequently throughout your NodeJS development stages. NodeJS is a free open-source server-side JavaScript runtime environment that is currently used across the globe to build highly scalable applications.
The primary reasons for choosing NodeJS over any other technology are its event-driven and non-blocking i/o model. Throughout this tutorial, we have explored the key features and concepts of NodeJS, including modules, the package manager (npm), and the event-driven model. Moreover, we learned about the callback function and its role in dealing with asynchronous tasks.


