Domain controls
Claim ownership of organization domain(s) and capture the domain users.
Domain Capture allows administrators to verify domain ownership, manage domain users and ensure their usage falls within the boundaries of their Enterprise subscription. When domain capture is on, any user with a verified company domain can choose to get added to the company’s Enterprise subscription.
Enable domain capture now to ensure more secure BrowserStack configuration for Enterprise as well as a smoother experience for your end users.
How does domain control empowers administrators?
- Verify and claim ownership of your company’s email domain(s) to establish complete control of them and prevent unauthorized usage of your company’s sensitive data.
- Discover users outside your Enterprise subscription and invite them to join the subscription.
Domain verification and capture ensures all users’ adherence to internal security, compliance, and data access policies as well as prevent unauthorised users from using your domain for abusive or fraudulent activities on BrowserStack
Permissions to initiate domain capture
Anyone with the organisation Owner or Admin roles on BrowserStack can add/verify domain ownership and enable domain capture.
Understanding domain ownership verification
Step 1: Verify domain ownership
You can verify your ownership by selecting any one of the following verification methods.
- Sign in to BrowserStack Admin portal and visit the Settings section.
- Click Domains on the left navigation bar to navigate to the Domains page.
- Click Add Domain button.
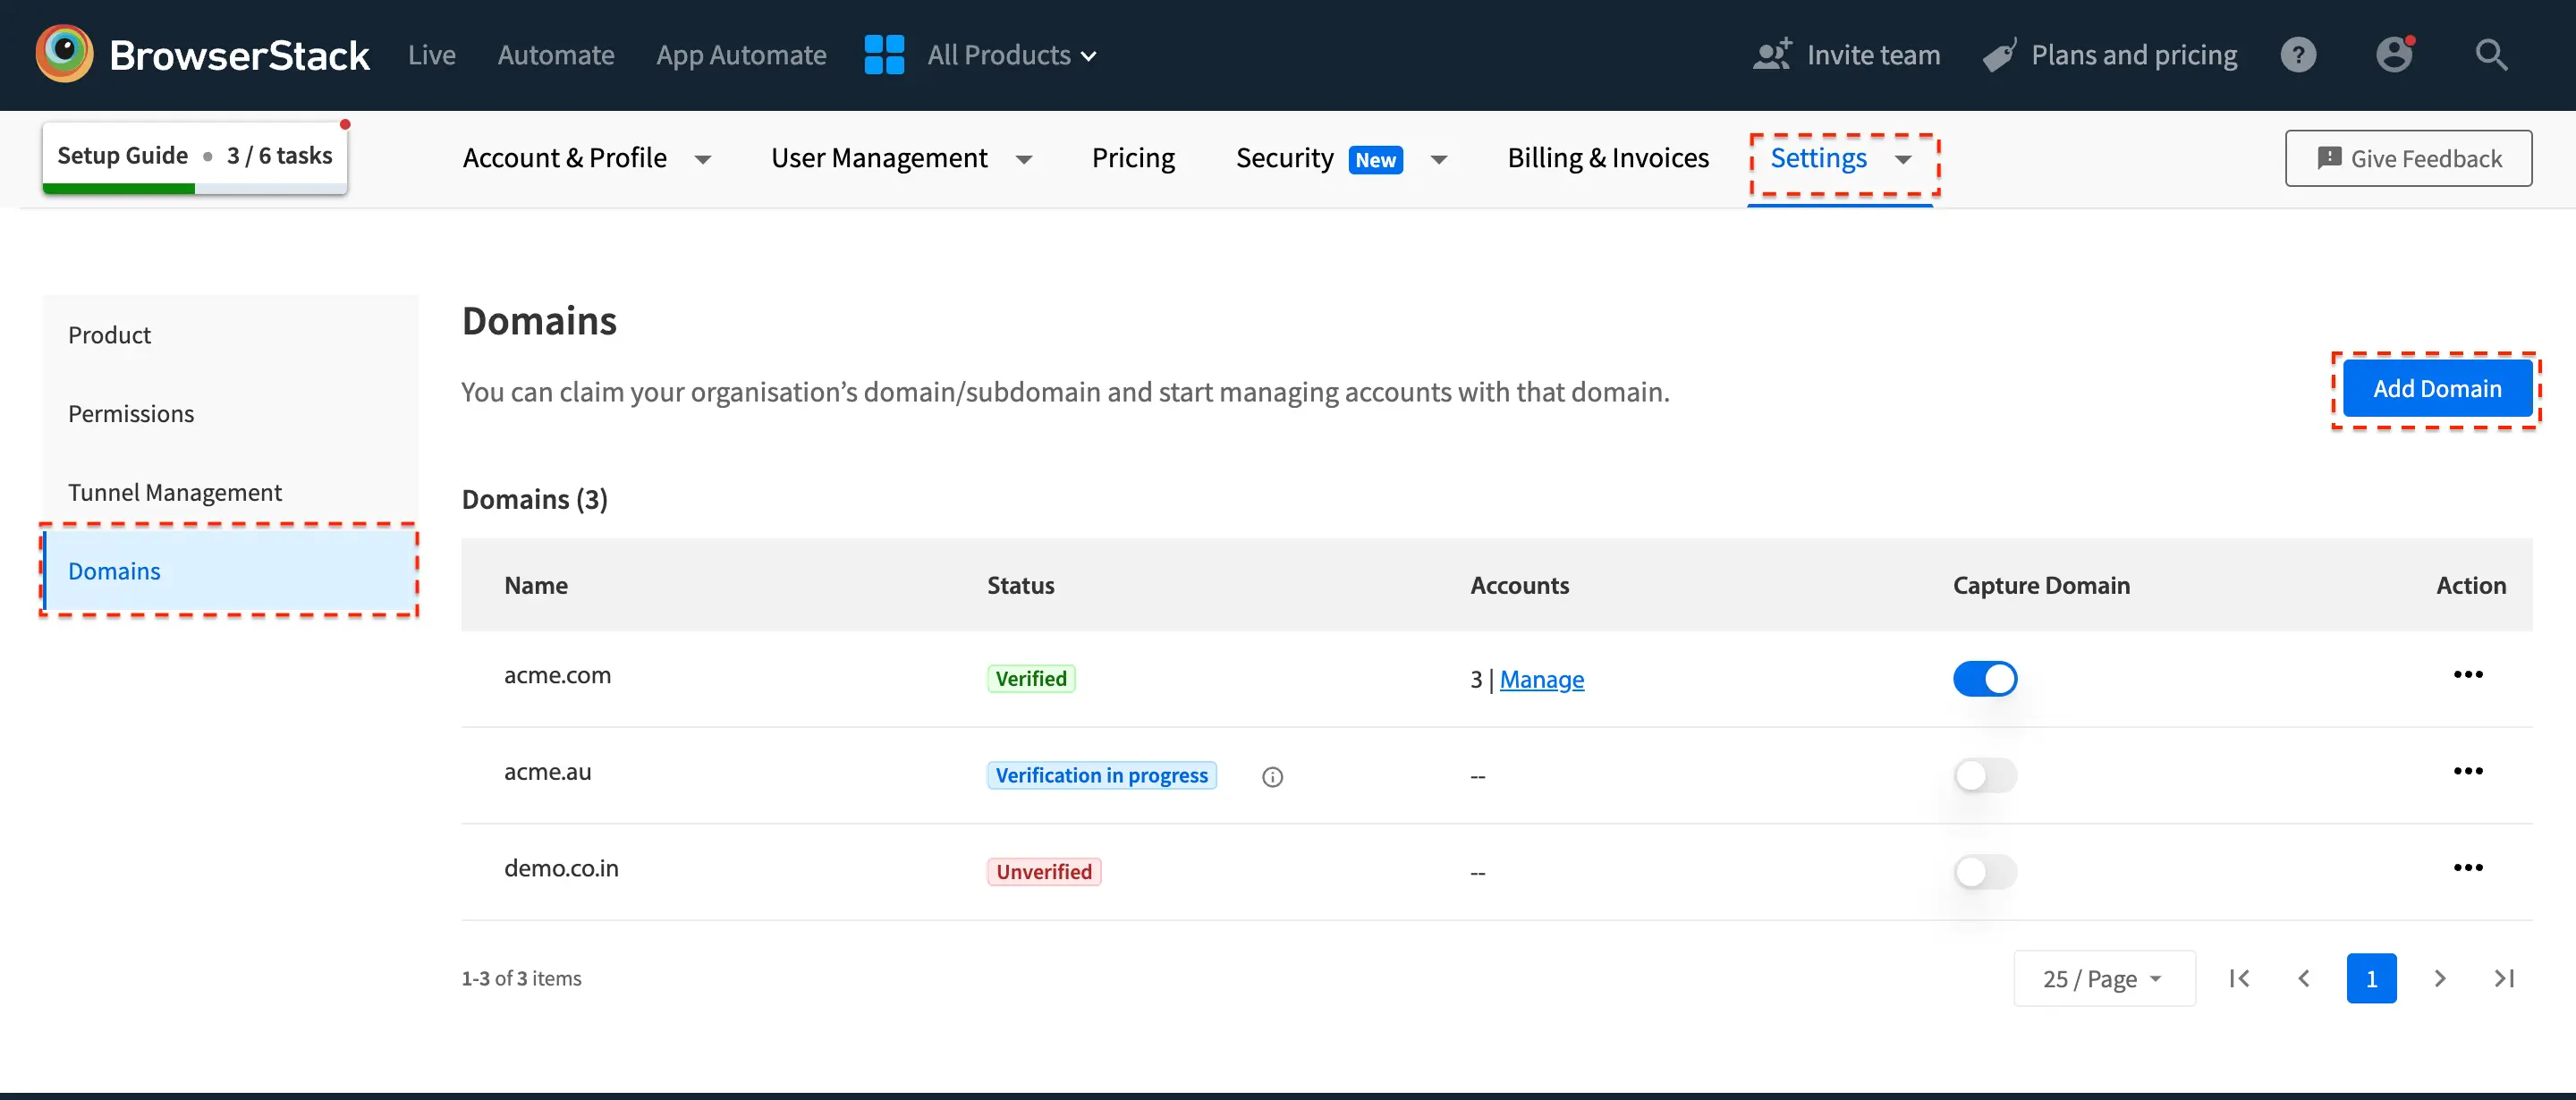
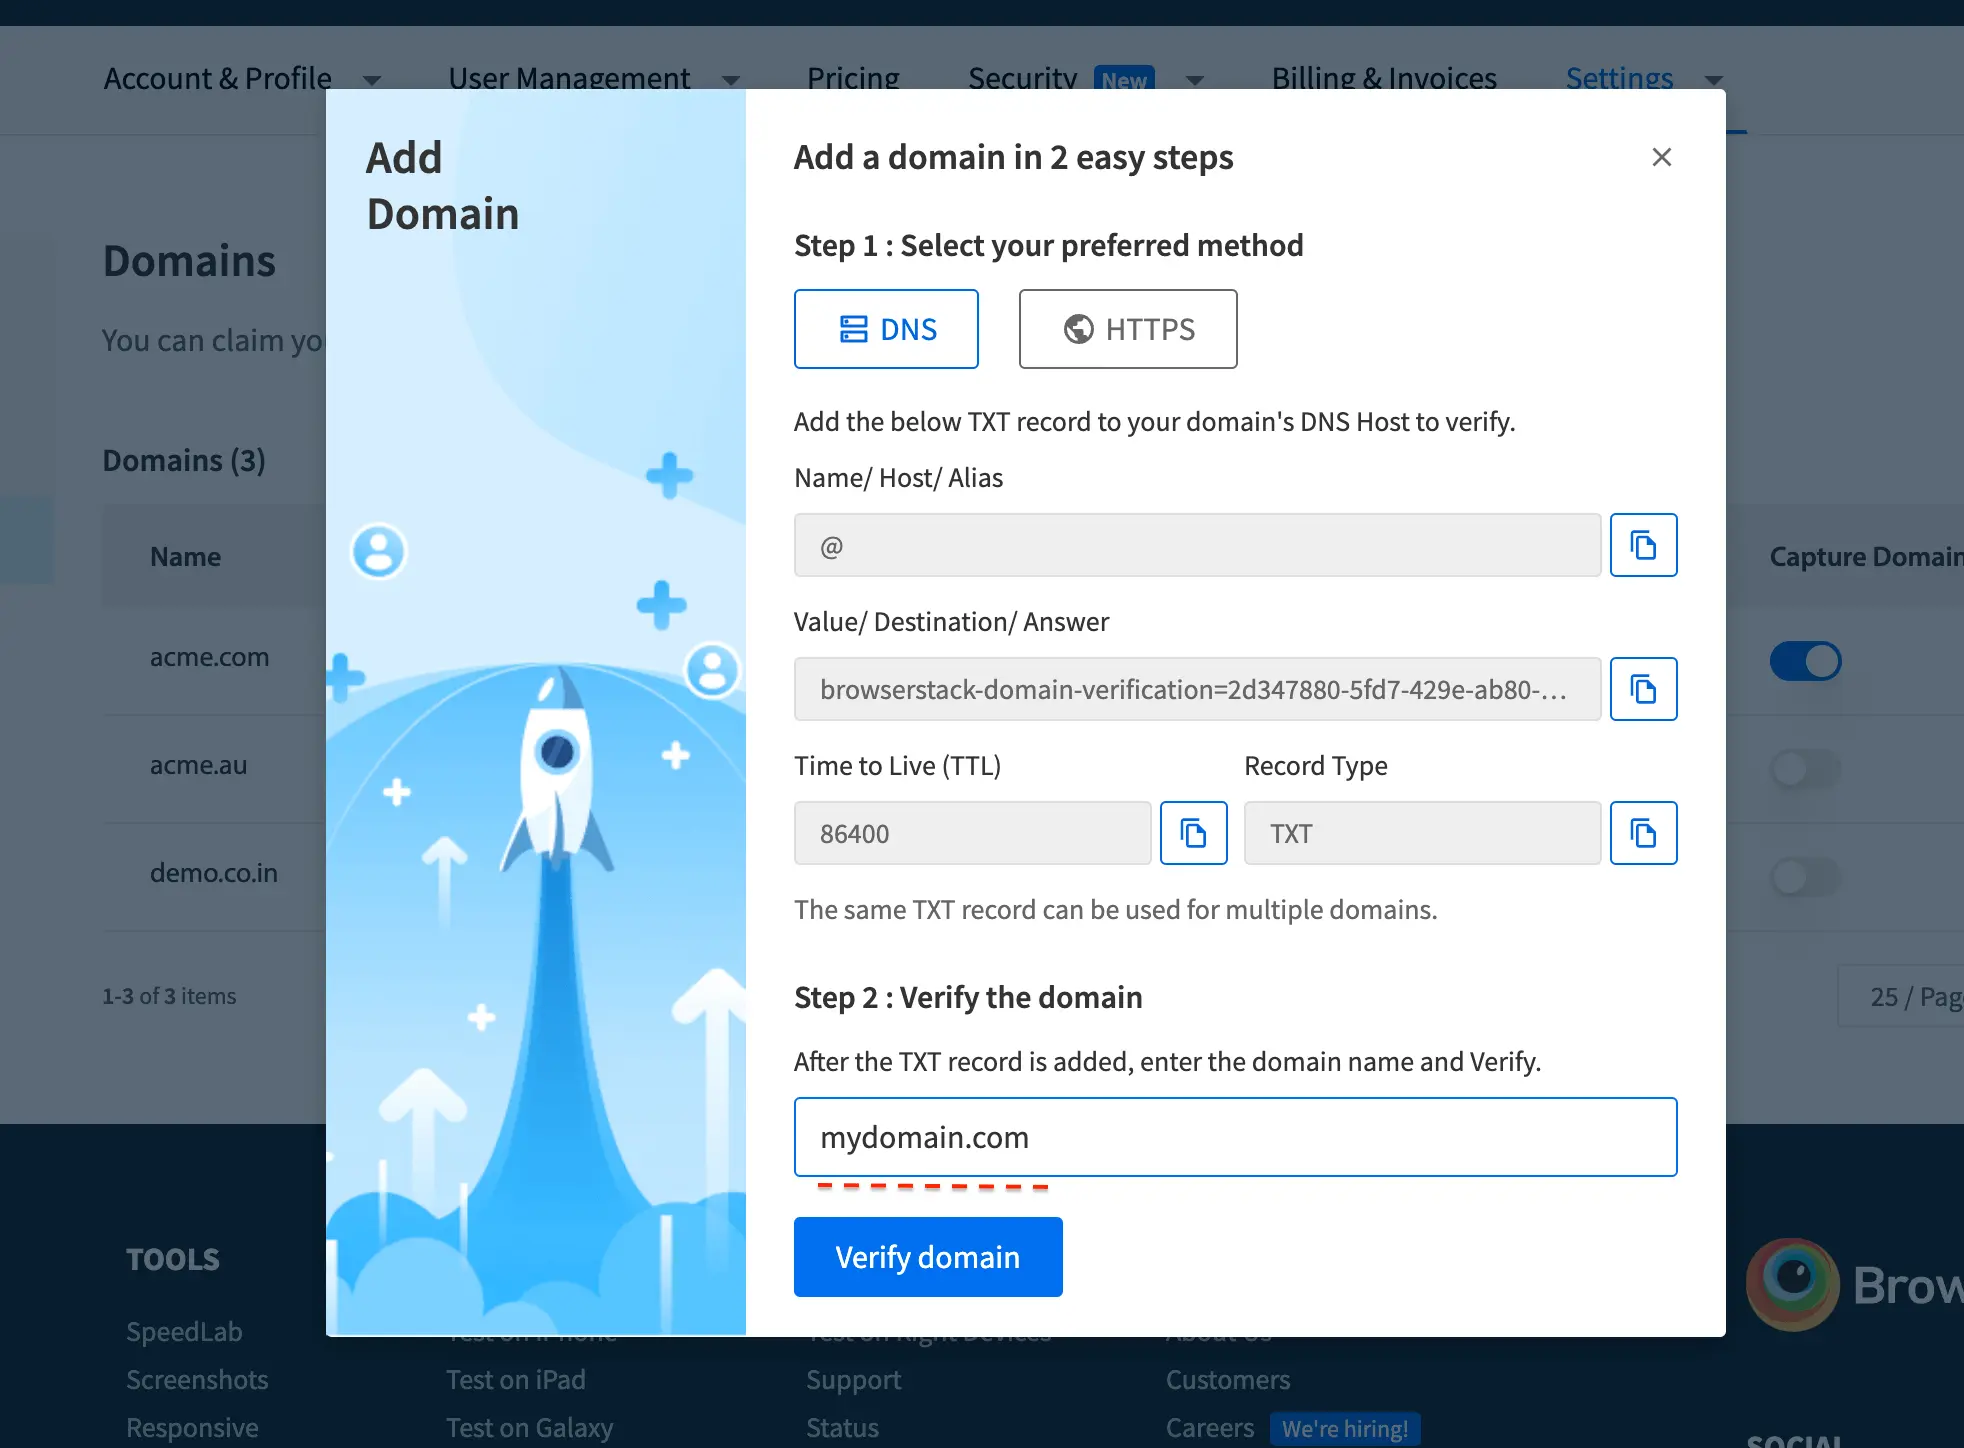
- In the Add Domain dialog, select the DNS tab.
- Visit your domain registrars page in a new tab and follow the instructions specified in Step 1.
- Once you add a new TXT record on your DNS host, switch tabs and return to the Add Domain dialog.
- In the input box provided in Step 2, enter the domain you wish to verify and click Verify domain
- BrowserStack will periodically check to see if your changes are published (this may take some additional time depending on your domain registrar). Once we find the new TXT record, the domain status will automatically be marked
VERIFIED.
- Sign in to BrowserStack Admin portal and visit the Settings section.
- Click Domains on the left navigation bar to navigate to the Domains page.
- Click Add Domain button.
- In the Add Domain dialog, select the “HTTPS” tab.
- Download the verification file and upload it to the root folder of your domain’s website.
- Verify that the page
https://(your_domain)/browserstack-domain-verification.htmlis accessible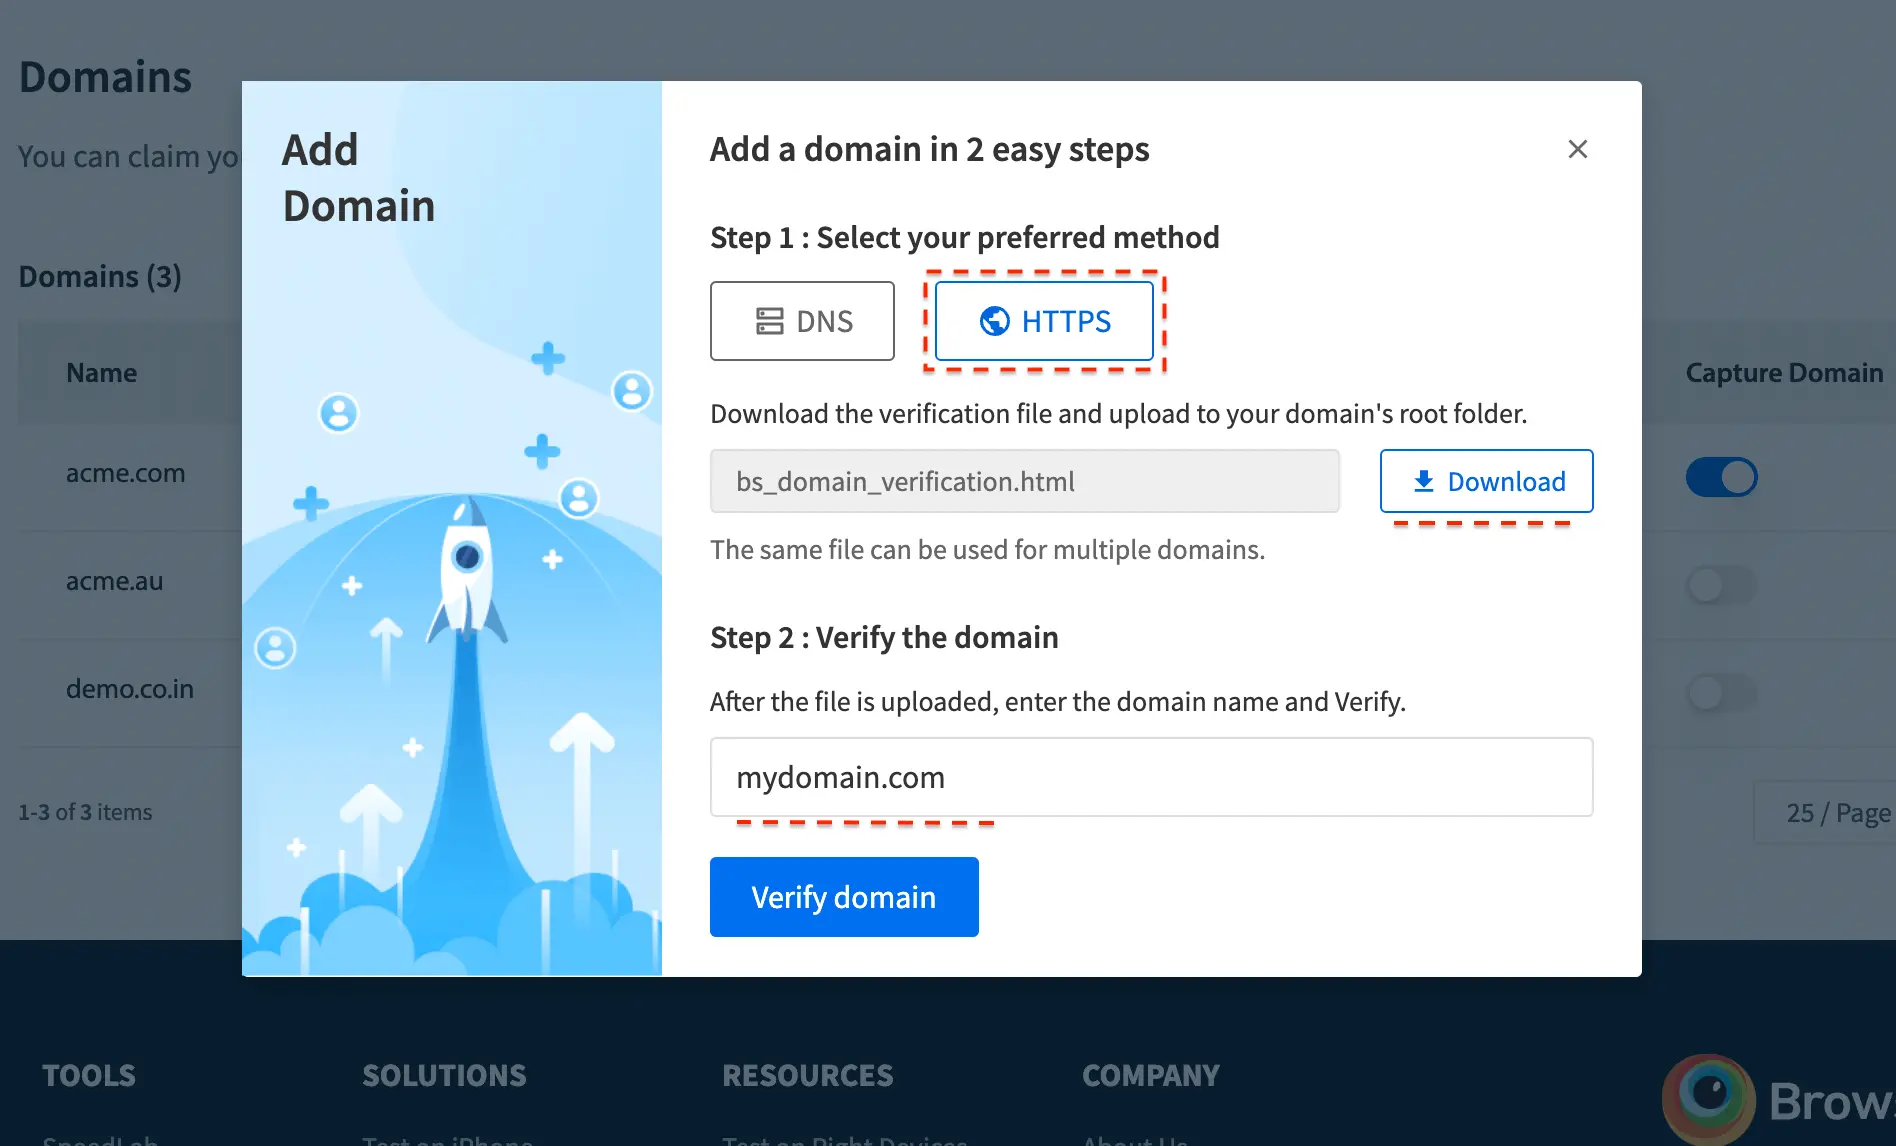
- Once BrowserStack is able to access this page and confirm that your domain verification token is found on it, the domain status will be marked
VERIFIED.
If your company owns multiple web domains/sub-domains, you can add and verify them each individually.
Step 2: Enable domain capture
How to enable domain capture
- In the Domains table, find the domain you wish to capture.
- in the Capture Domain column, toggle the switch to ON .
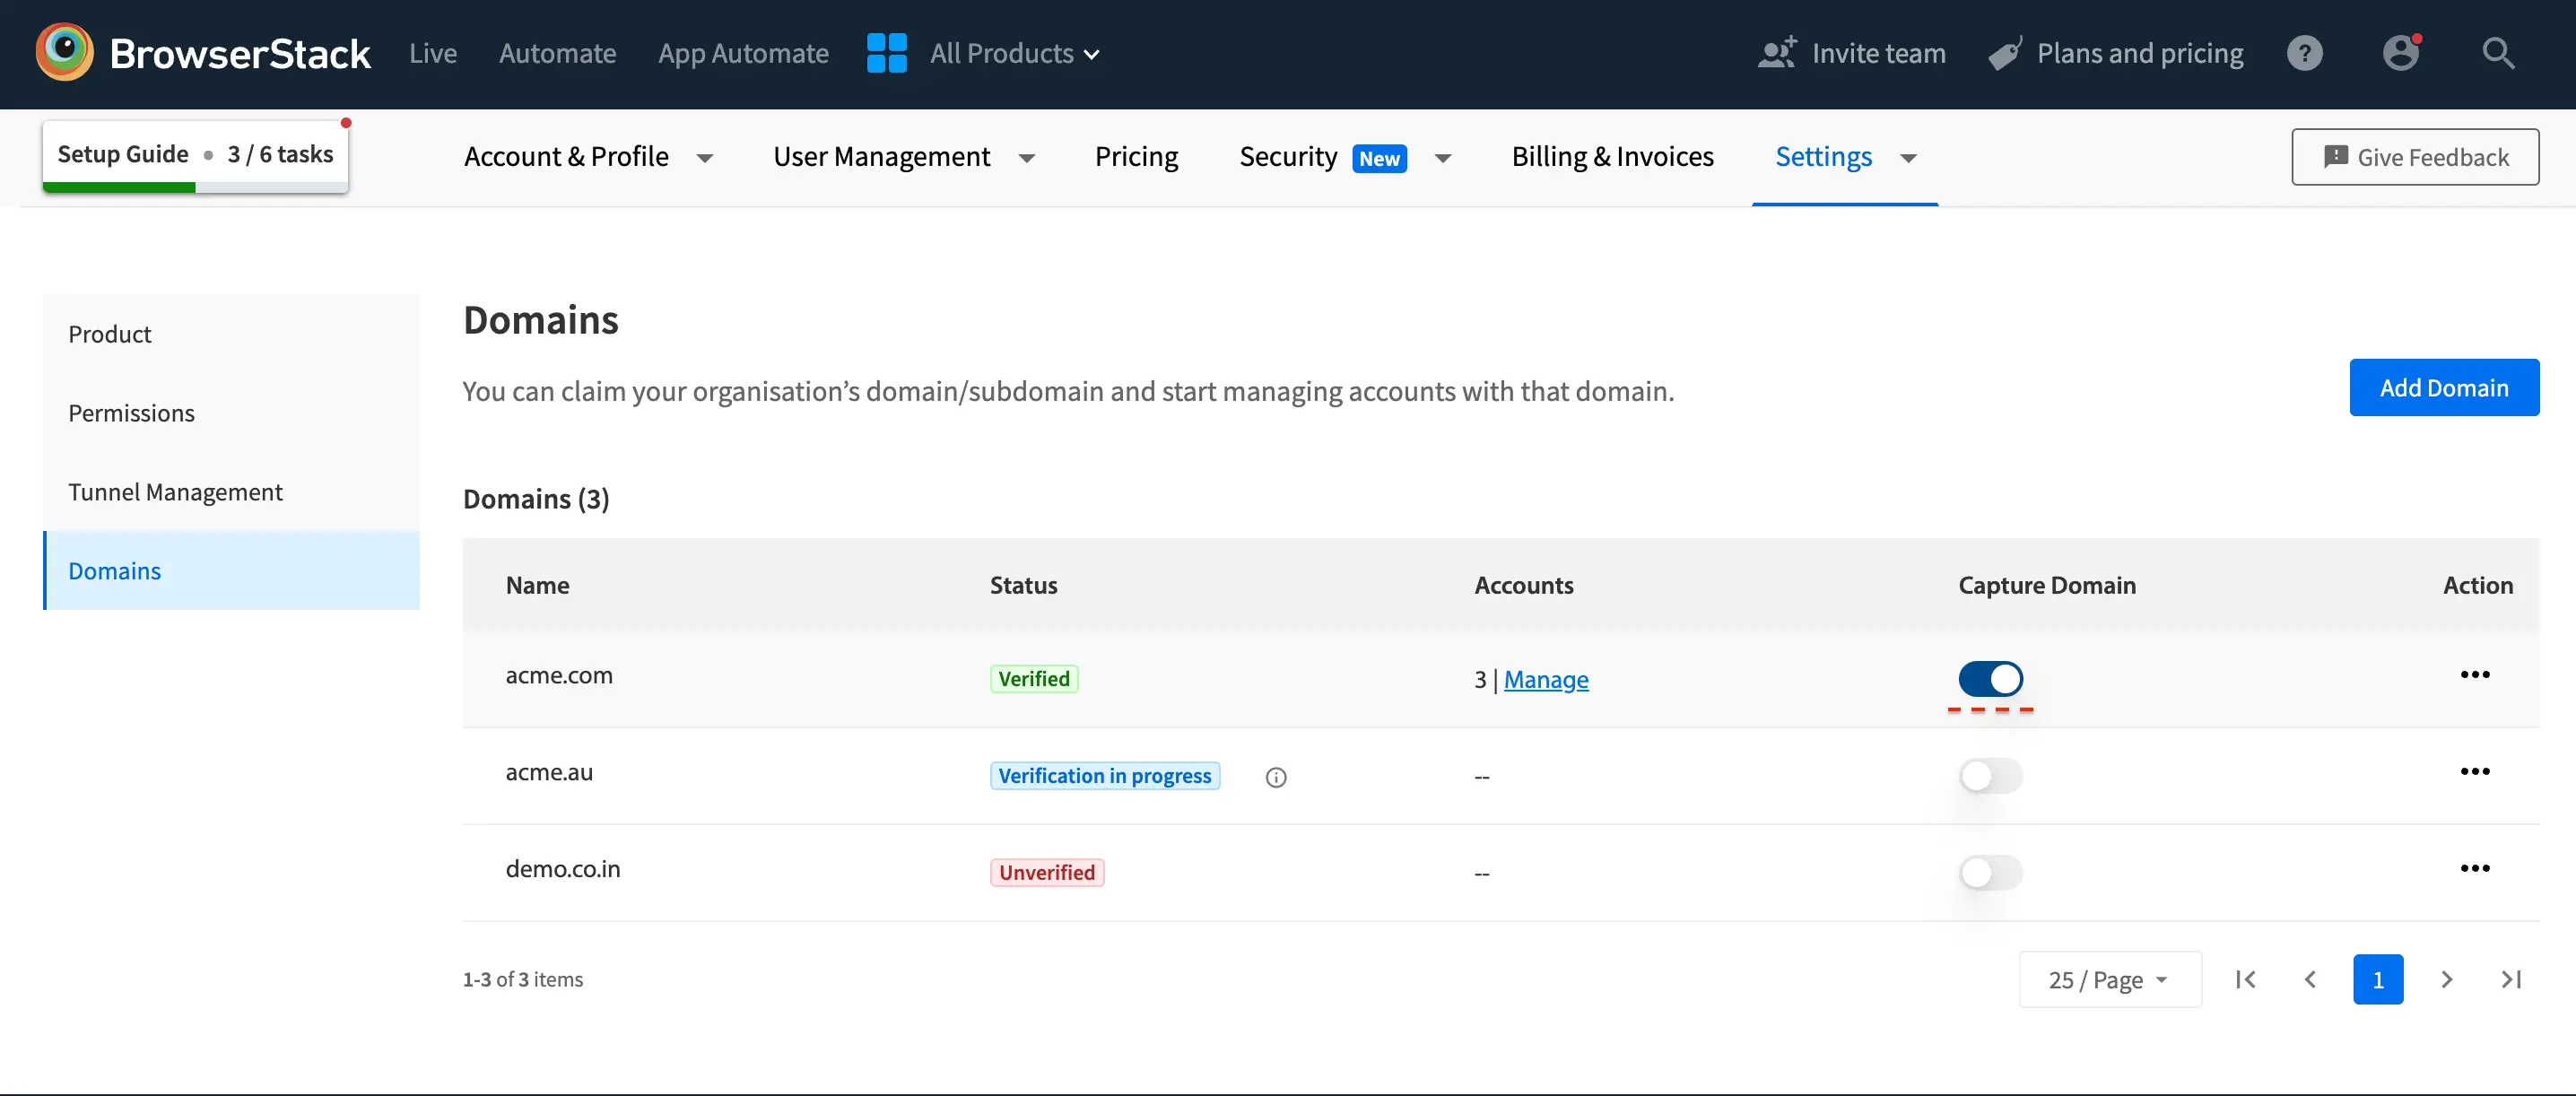
- Click Confirm on the dialog that opens, to capture the domain.
Step 3: Start managing user accounts with the domain
Once domain capture is enabled, you can start managing user accounts with the domain. Furthermore,
- You can view members who have created BrowserStack accounts using email address matching the verified domain.
- You can invite such members to your group’s plan since they are dispersed across different free trial groups on BrowserStack.
- You can review their requests to join your group’s plan.
- Users registered with your domain but are not part of your group will be notified of your ownership of the domain and can request to join your group.
- Sign in to BrowserStack Admin portal and visit the User Management section.
- On the left navigation bar, click Managed Users to navigate to the Managed accounts page.
- Click on the Users tab to access managed users table. This table contains information on user accounts that are registered with your domain emails.
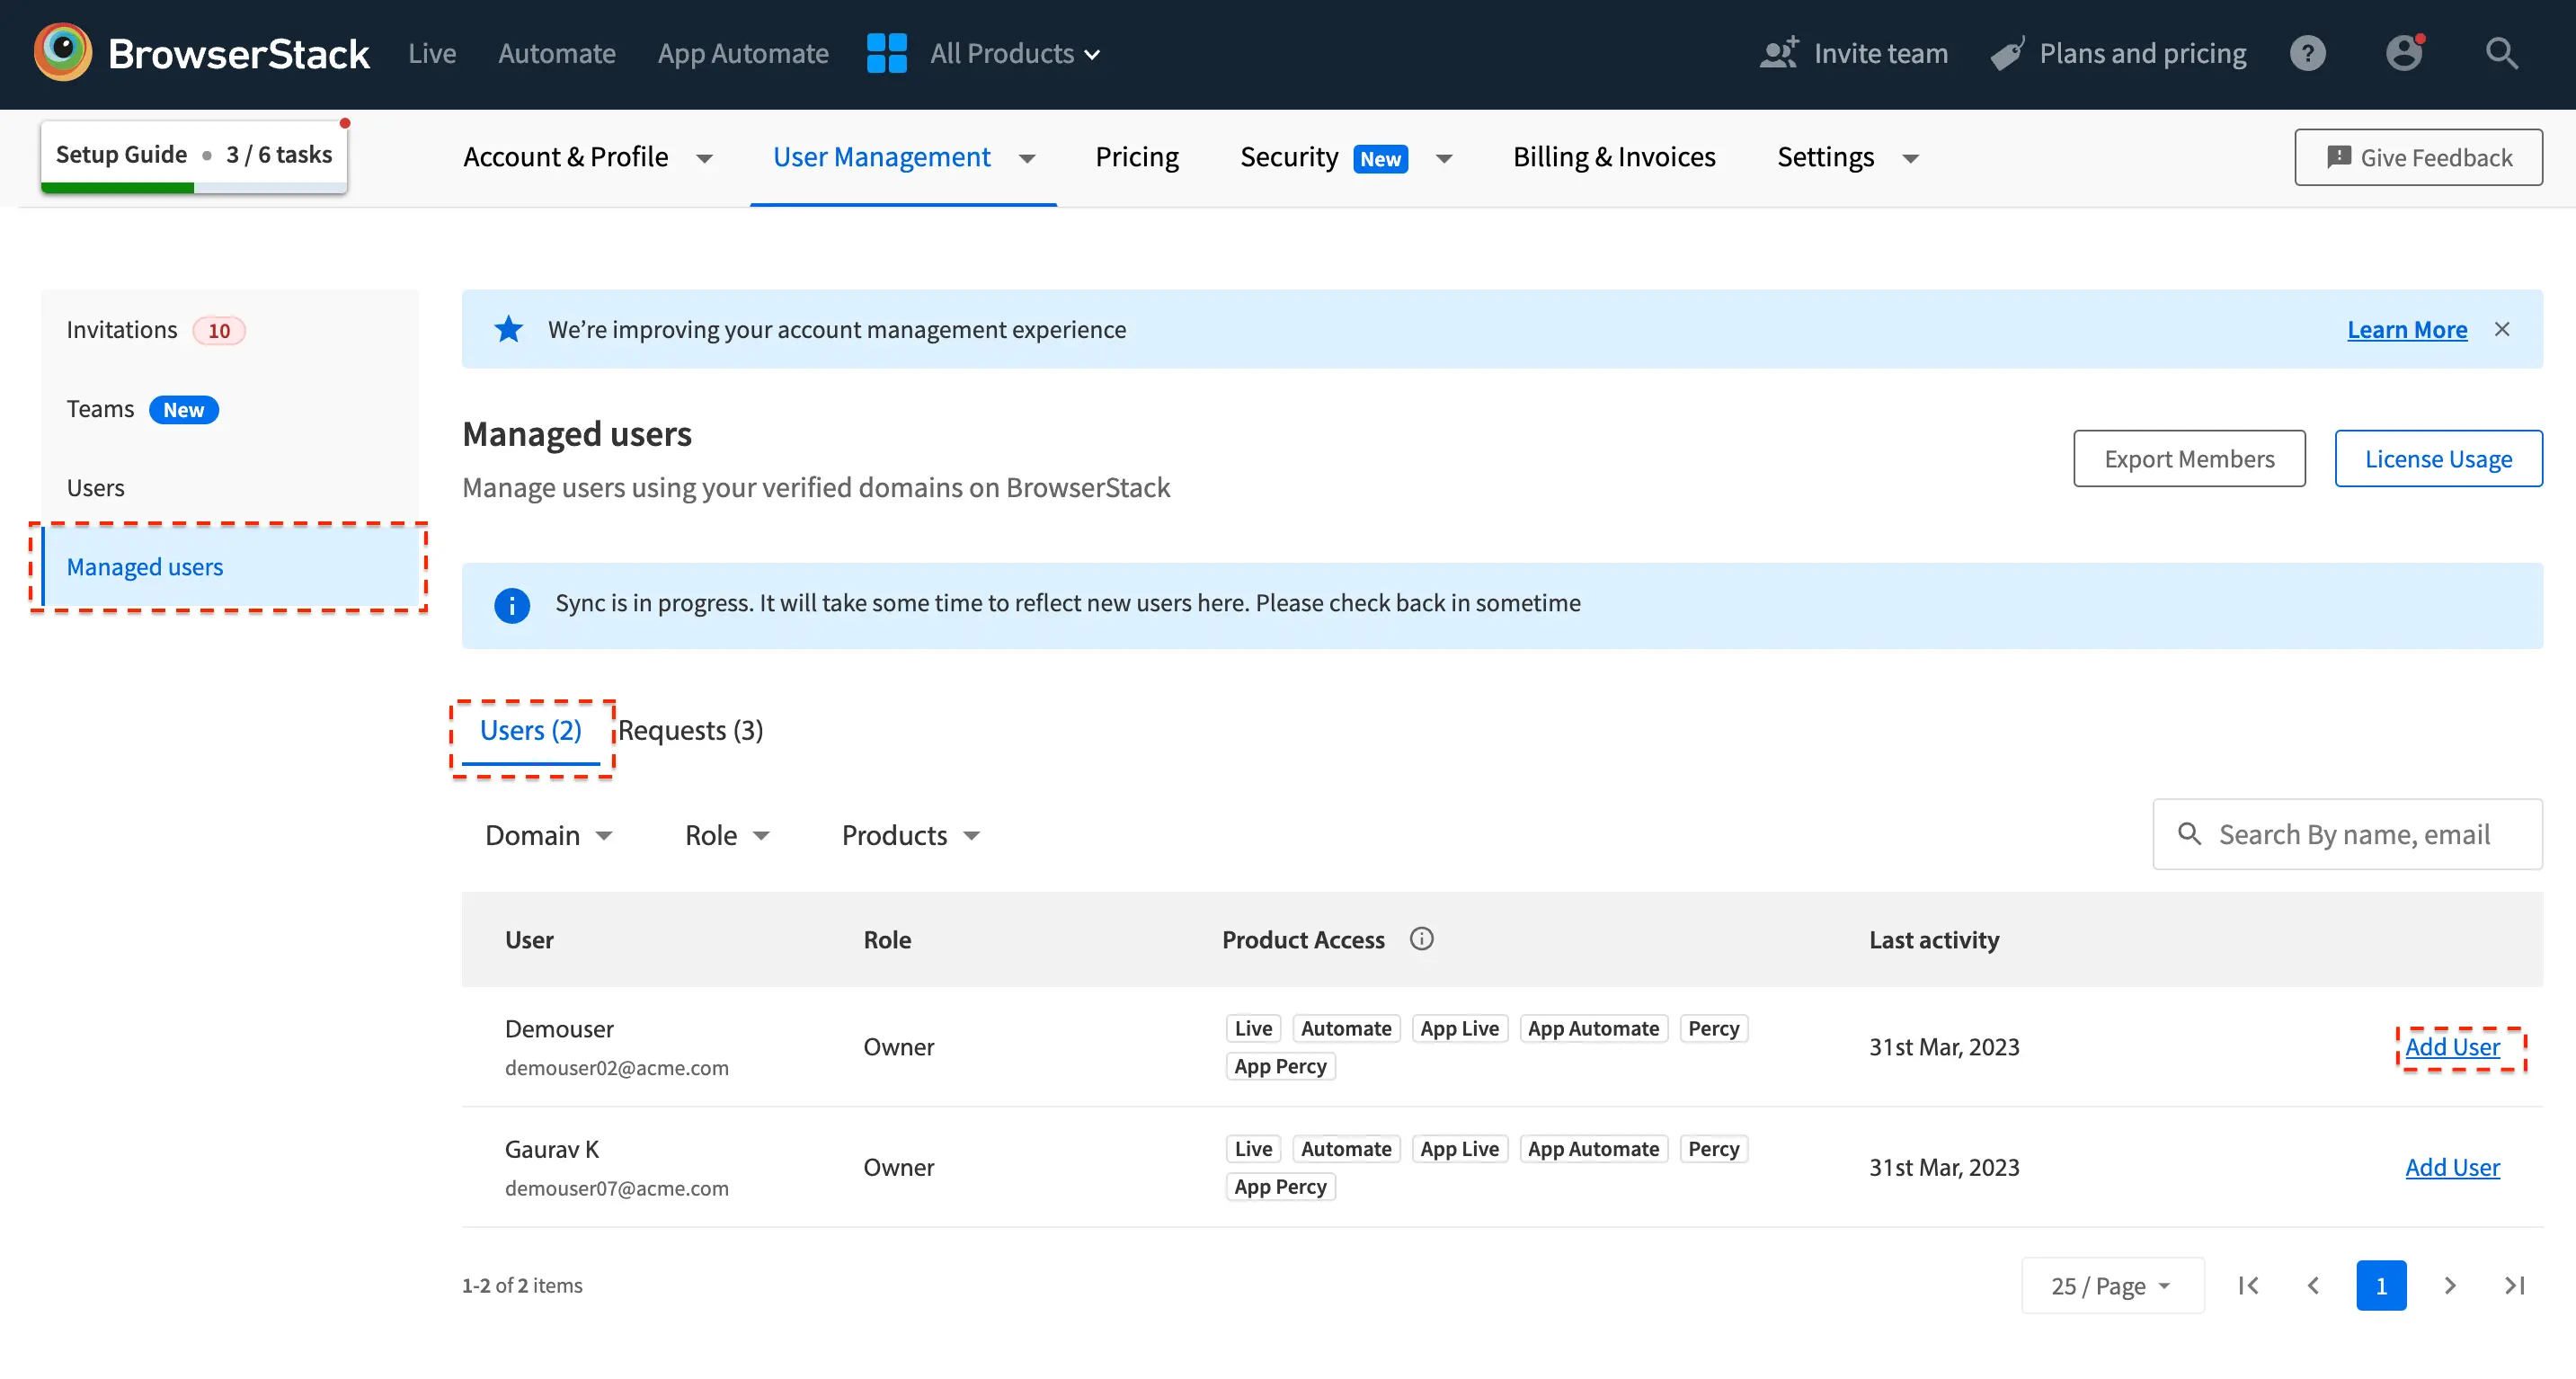
- Locate the member you want to add to your group and click Add User.
- Add user dialog will appear. In this dialog, select the role(s), product accesses and the team to which you want to add the member to.
- Click Add to confirm.
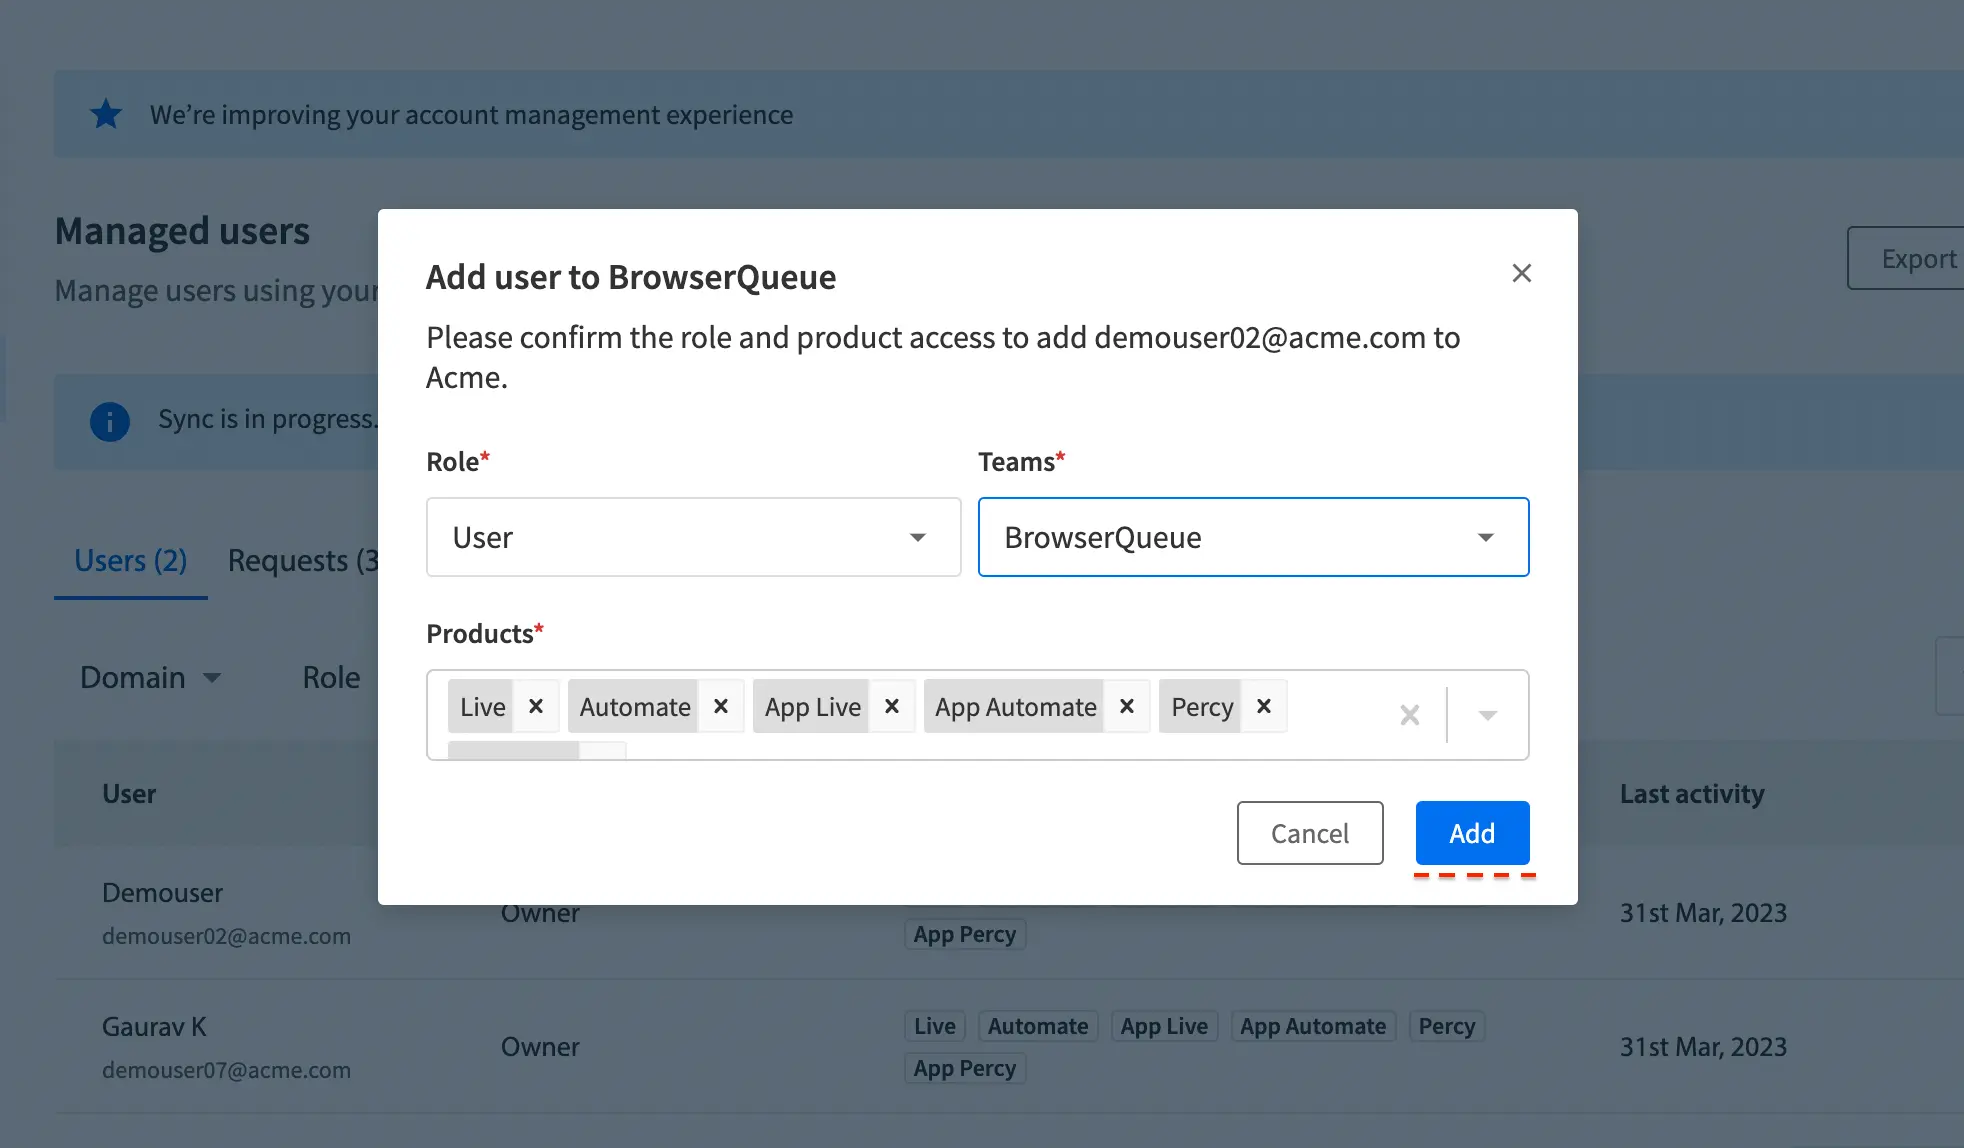
- An invitation to join your group will be sent to the member. Once the member accepts it, they will be added to your Organization’s account on BrowserStack.
- Sign in to BrowserStack Admin portal and visit the User Management section.
- On the left navigation bar, click Managed Users to navigate to the Managed accounts page.
- Click on the Requests tab to access the managed user requests table. This table details the requests made by members to join your group.
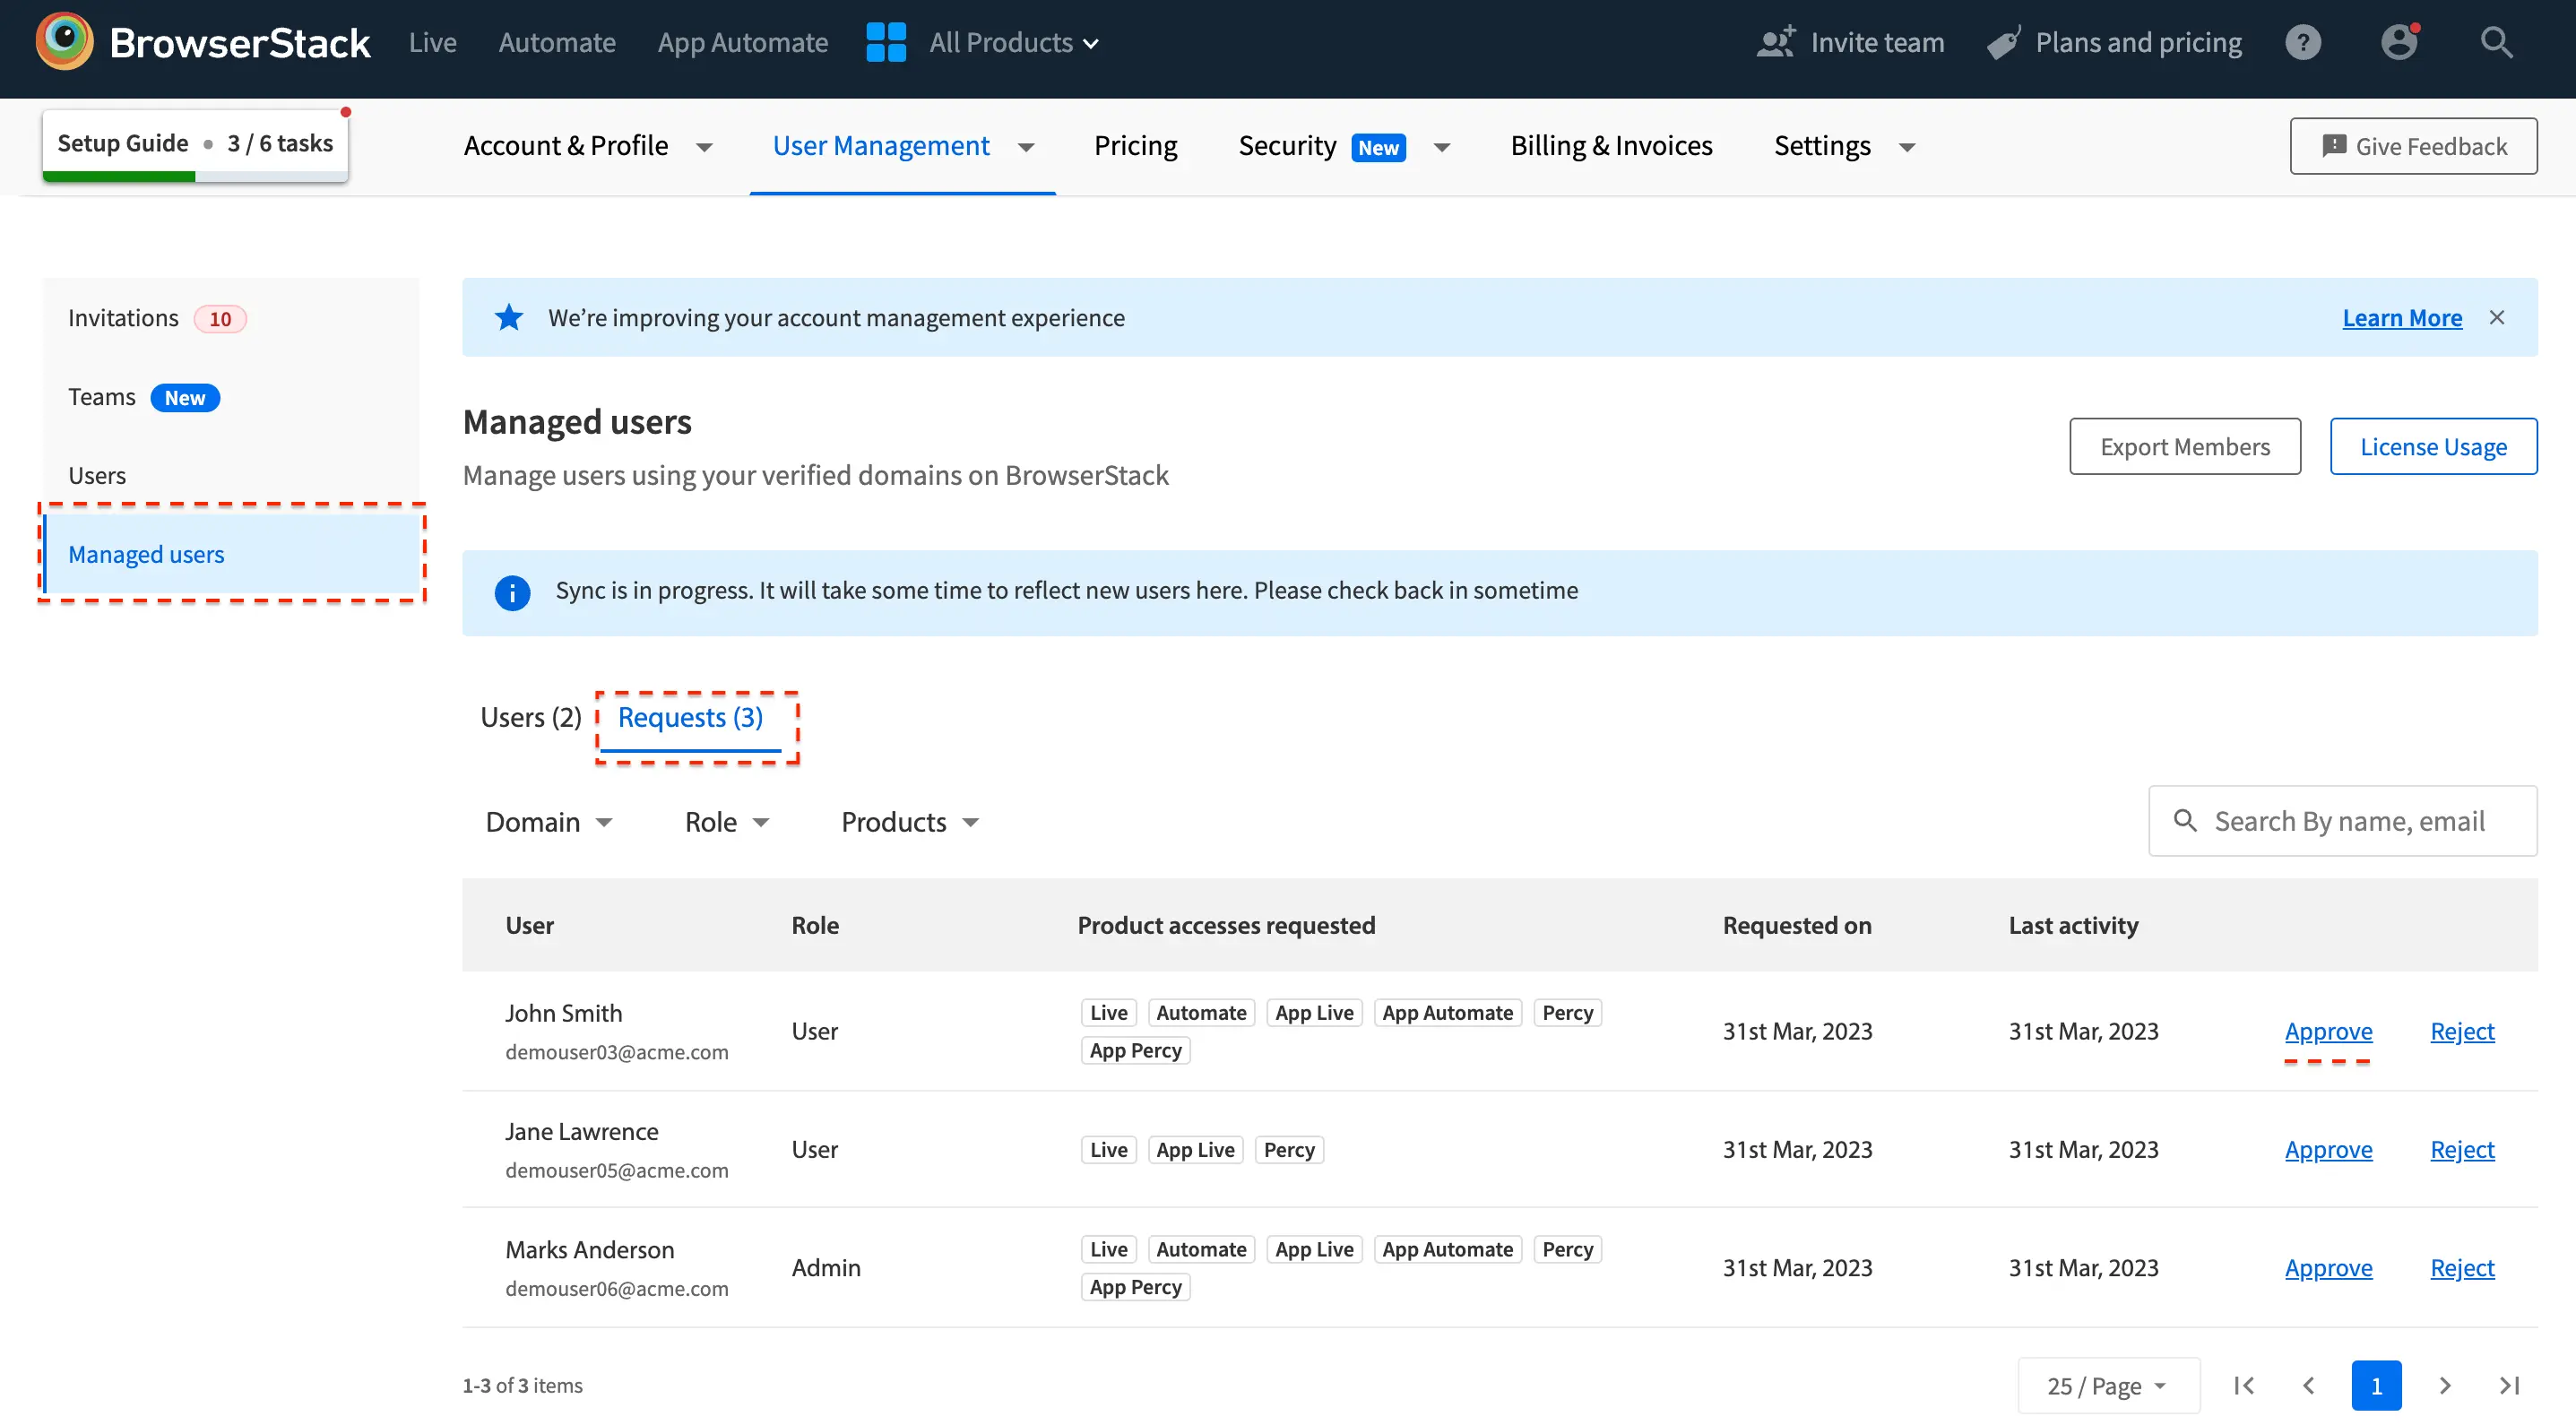
- Locate the request you want to review. Click on Approve to review details before adding the member to your group.
- A dialog will appear. If required, you can review and modify the specifics(role, product accesses) of the request before approving it, on this dialog.
- Click Approve to confirm.
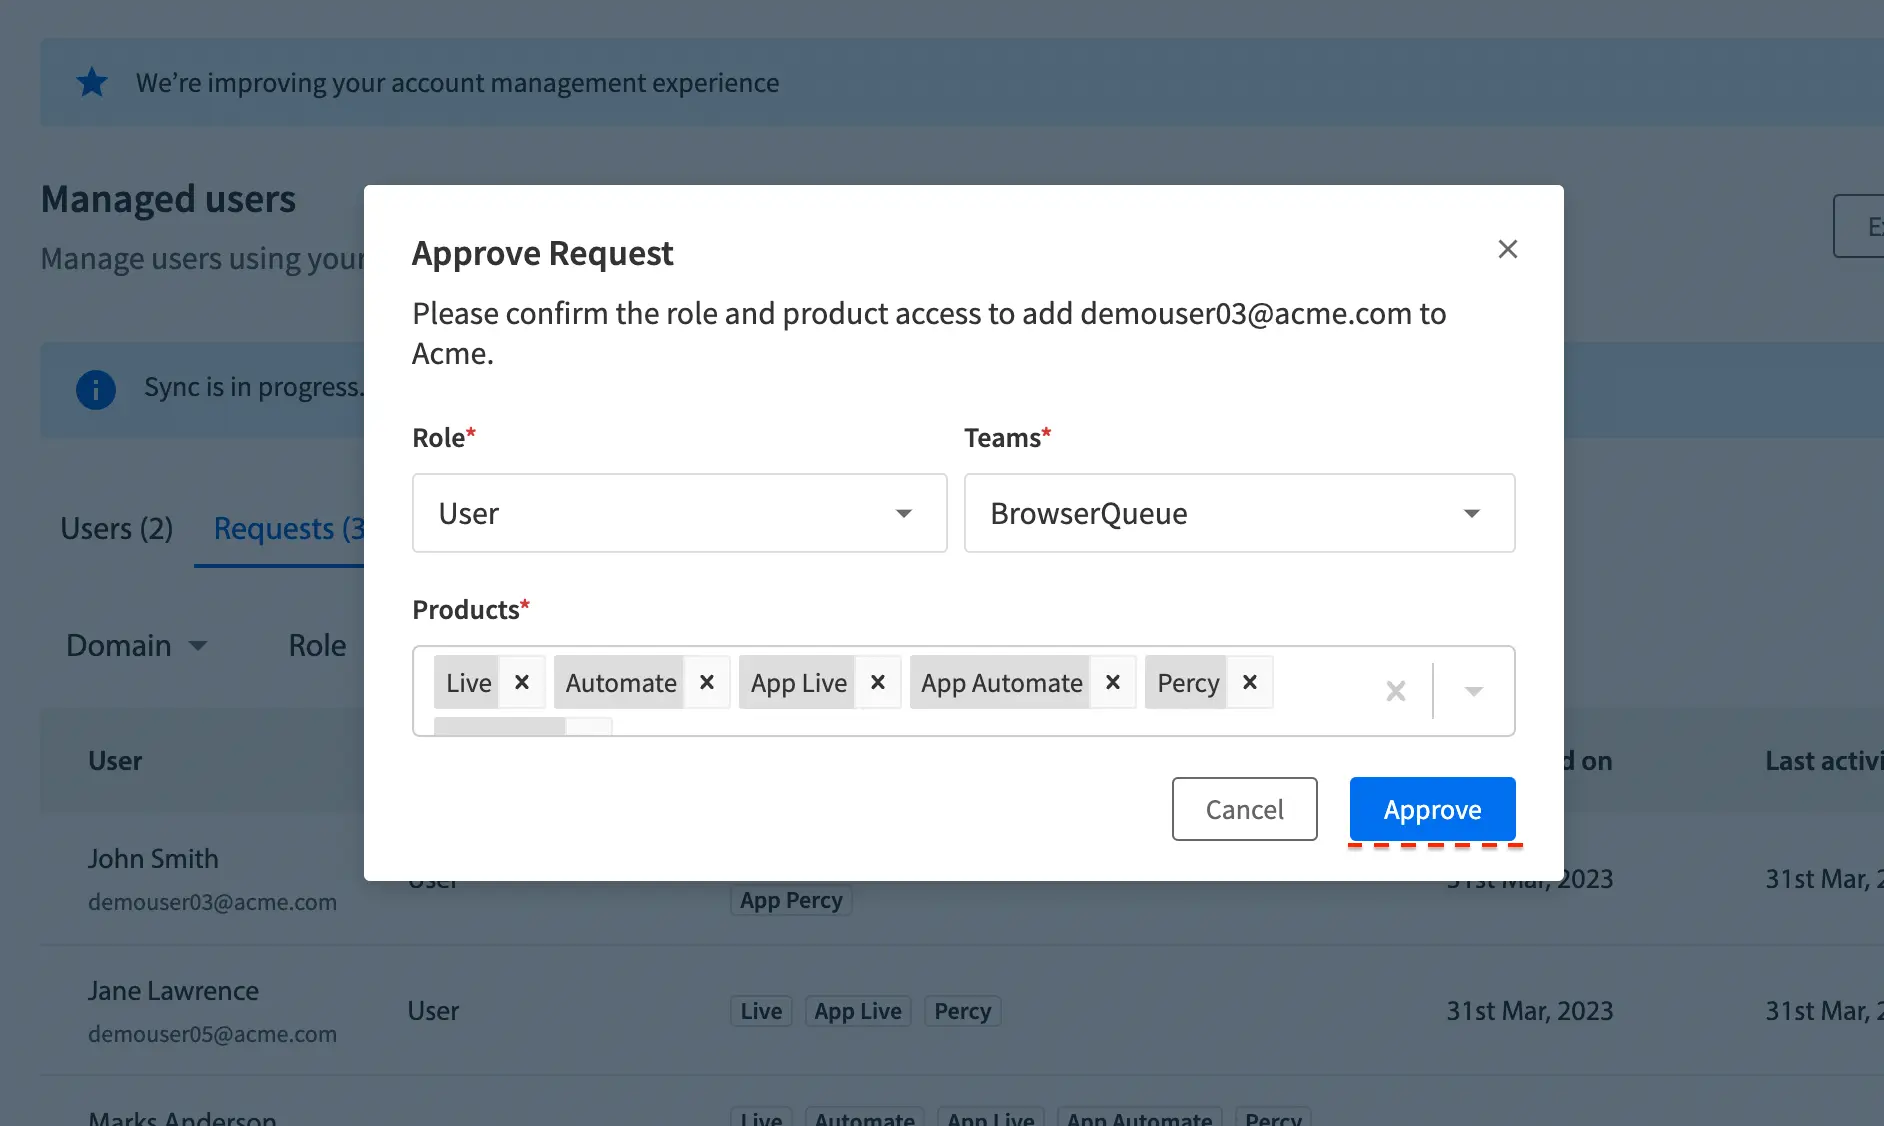
- Member will be added to your group with the approved role and product accesses.
Frequently Asked Questions (FAQs)
Why is my domain not verified?
After a domain is added for verification, BrowserStack will attempt to access the necessary TXT record (for DNS method) or HTML file (for HTTPS method).
- If the TXT record/file is detected, the verification status is marked as
VERIFIEDinstantly. - Otherwise, until your changes are published, the verification status is marked
VERIFICATION IN PROGRESSfor up to 72 hours. - If the updates are still inaccessible after 72 hours, the domain is marked
UNVERIFIED. In this case, you may retry verification by selecting Verify Again from the 3 dot menu.
If you are having trouble verifying your domain even after multiple attempts,
- For “DNS” method : Contact your domain registrar for assistance
- For “HTTPS” method : Verify that you are able to access
https://(your_domain)/browserstack-domain-verification.html
How do I modify an invitation to add a managed user
You may resend, modify, or withdraw an invitate thats been sent as long as the recipient has not already accepted it. Simply visit the Pending Invitations table in the Invitations section.
Can anyone request to join the domain owner’s group?
No. Only members who create BrowserStack accounts with an email address matching one of the group’s verified domains and are not part of a paid plan may request to join the domain owner’s group. Additionally, only those members who can confirm their email addresses will be allowed to request to join the group.
How can I request to join my domain owner’s group?
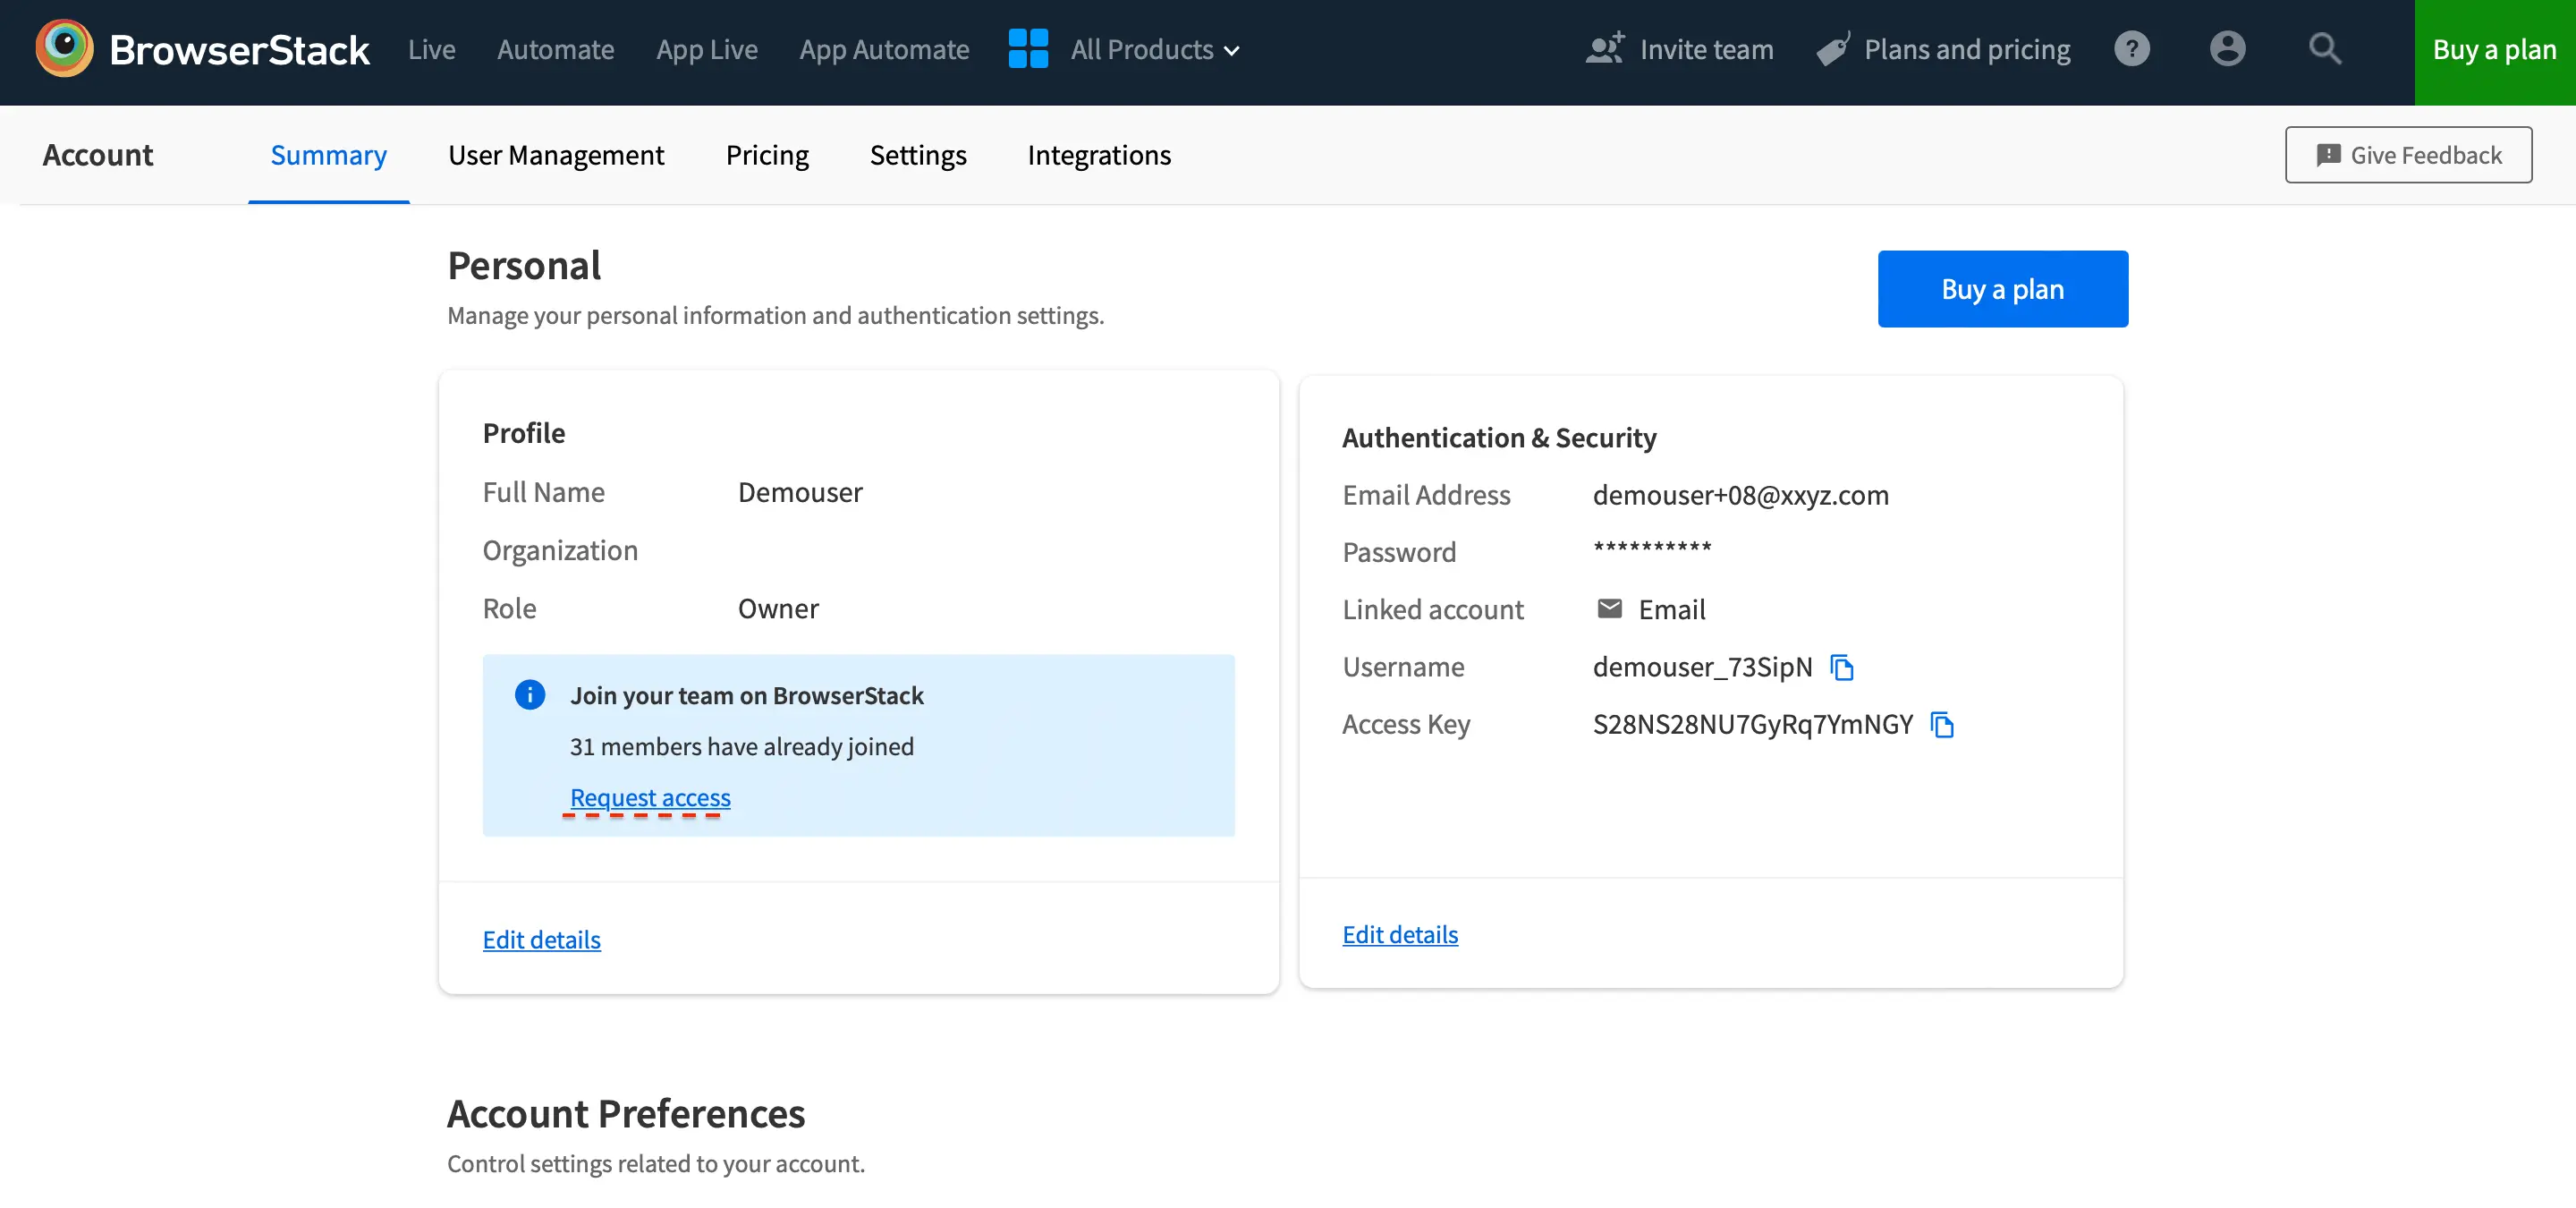
- Sign in to BrowserStack and visit the Account & Profile section.
- On the Profile card, you’ll see a link to join your team, if your organisation has verified ownership of their domain. Click on Request Access.
- On the dialog that appears, select the role and product accesses you require in your org’s group and send the request by clicking on “Request”.
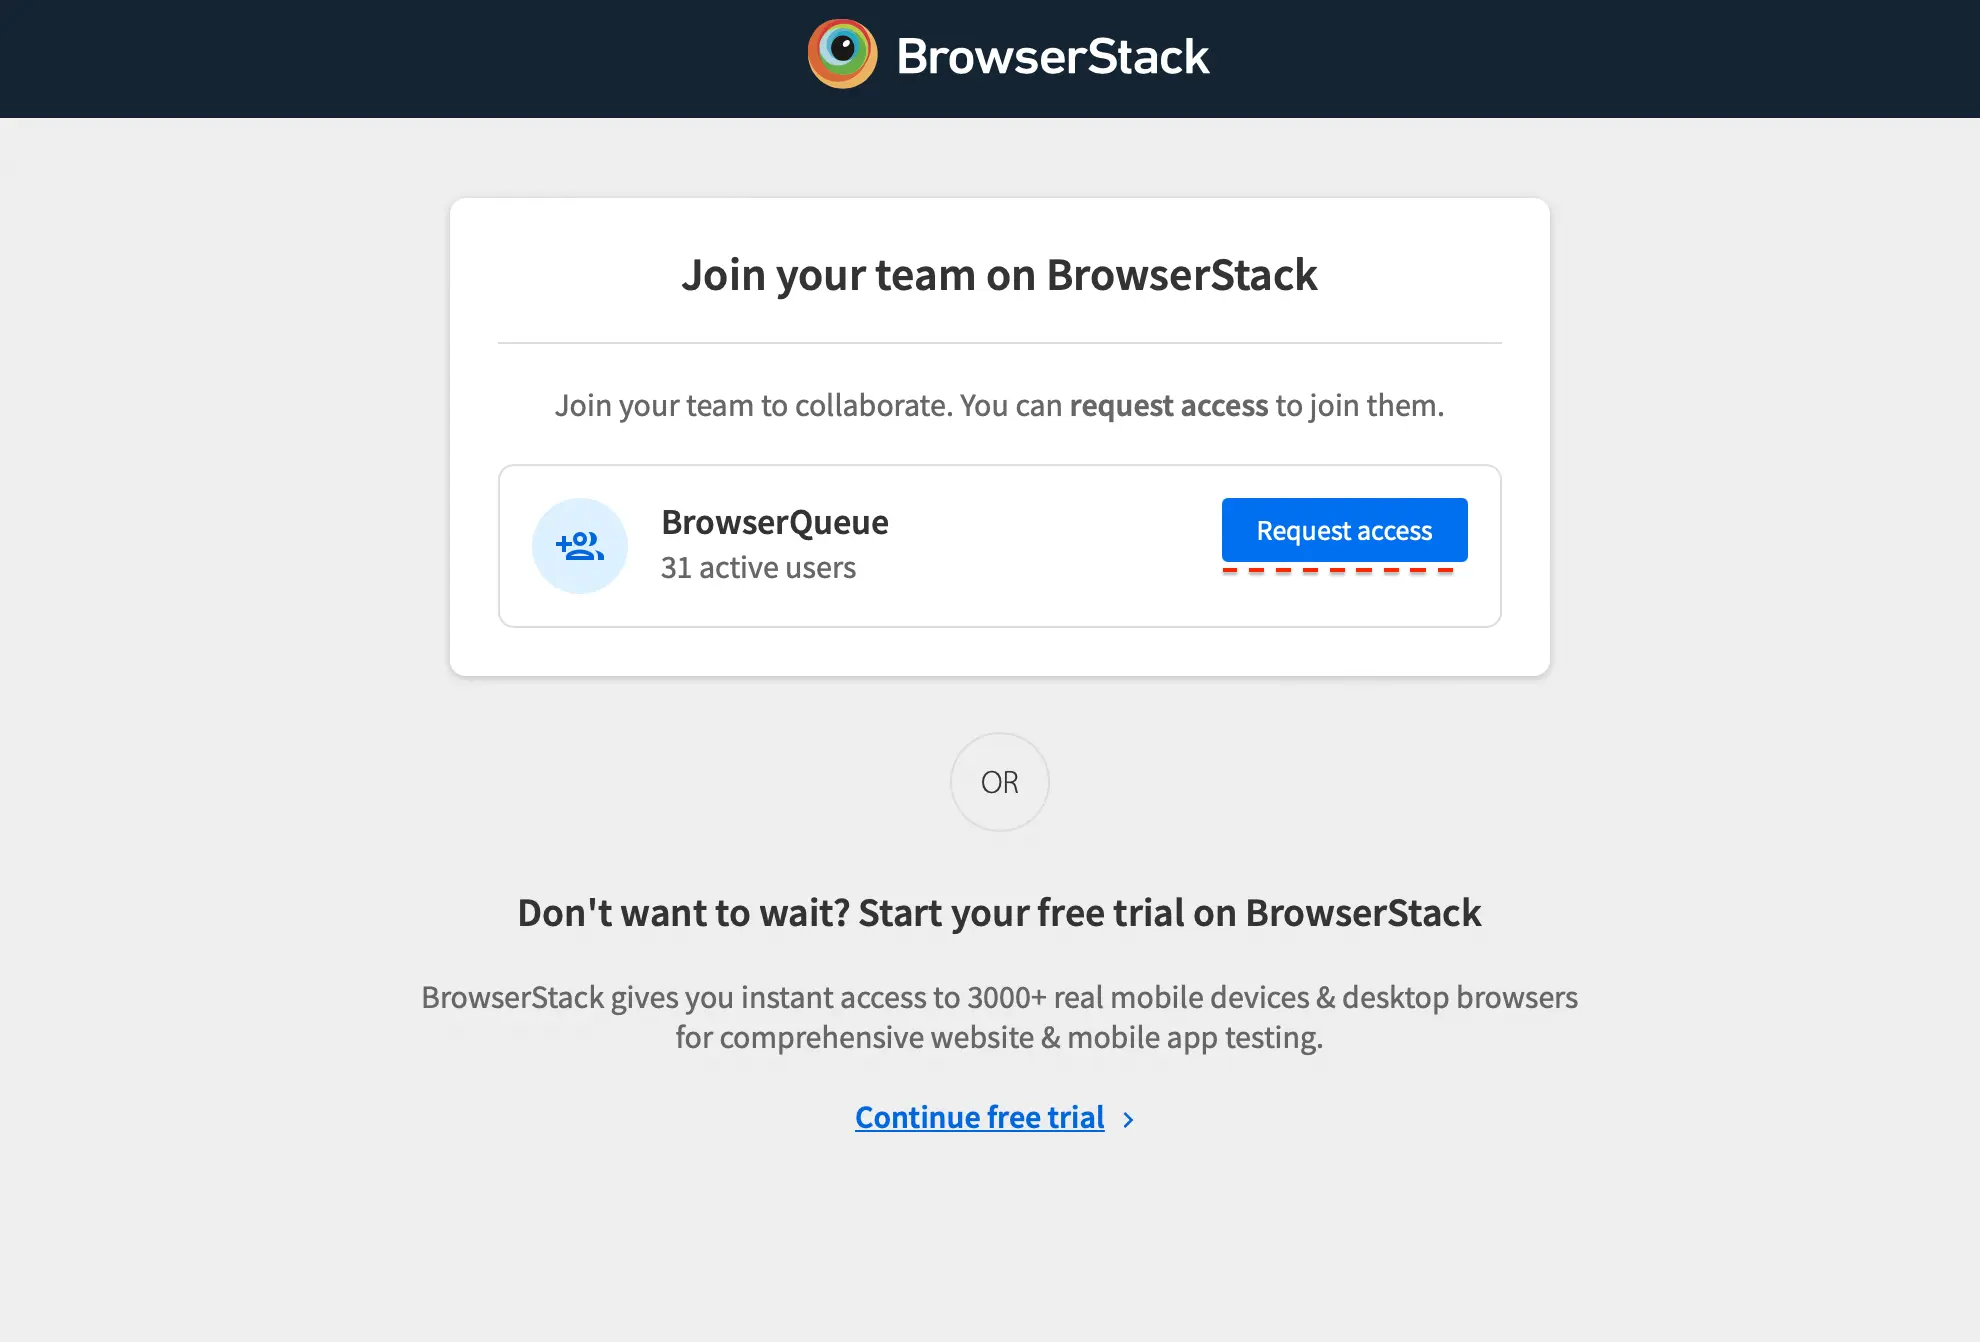
- Immediately after you sign-up, you’ll be redirected to see a link to join your team, if your organisation has verified ownership of their domain. Click on Request Access.
- On the dialog that appears, select the role and product accesses you require in your org’s group and send the request by clicking on “Request”.
Customer support
If you have any queries, please reach out to your respective CSMs or get in touch with support
We're sorry to hear that. Please share your feedback so we can do better
Contact our Support team for immediate help while we work on improving our docs.
We're continuously improving our docs. We'd love to know what you liked
We're sorry to hear that. Please share your feedback so we can do better
Contact our Support team for immediate help while we work on improving our docs.
We're continuously improving our docs. We'd love to know what you liked
Thank you for your valuable feedback!