
 Join our Discord
Default scan settings
Configure default scan settings that Website Scanner applies to every new scan, so you set your preferences once instead of repeating them.
Default scan settings store the options you want on every new scan: the capture delay, tags, device location, login configuration, and the settings for each scan type. Website Scanner applies them when you create a scan.
How default scan settings work
Three rules govern how Website Scanner applies your defaults:
- Saved defaults apply only to scans you create after you save them. Your existing scans keep their current settings.
- Each user sets their own defaults. Teammates on the same account can choose different defaults.
- You can change any default for a single scan while you create it. The saved default itself stays the same.
Open default scan settings
To open your default scan settings, follow these steps:
-
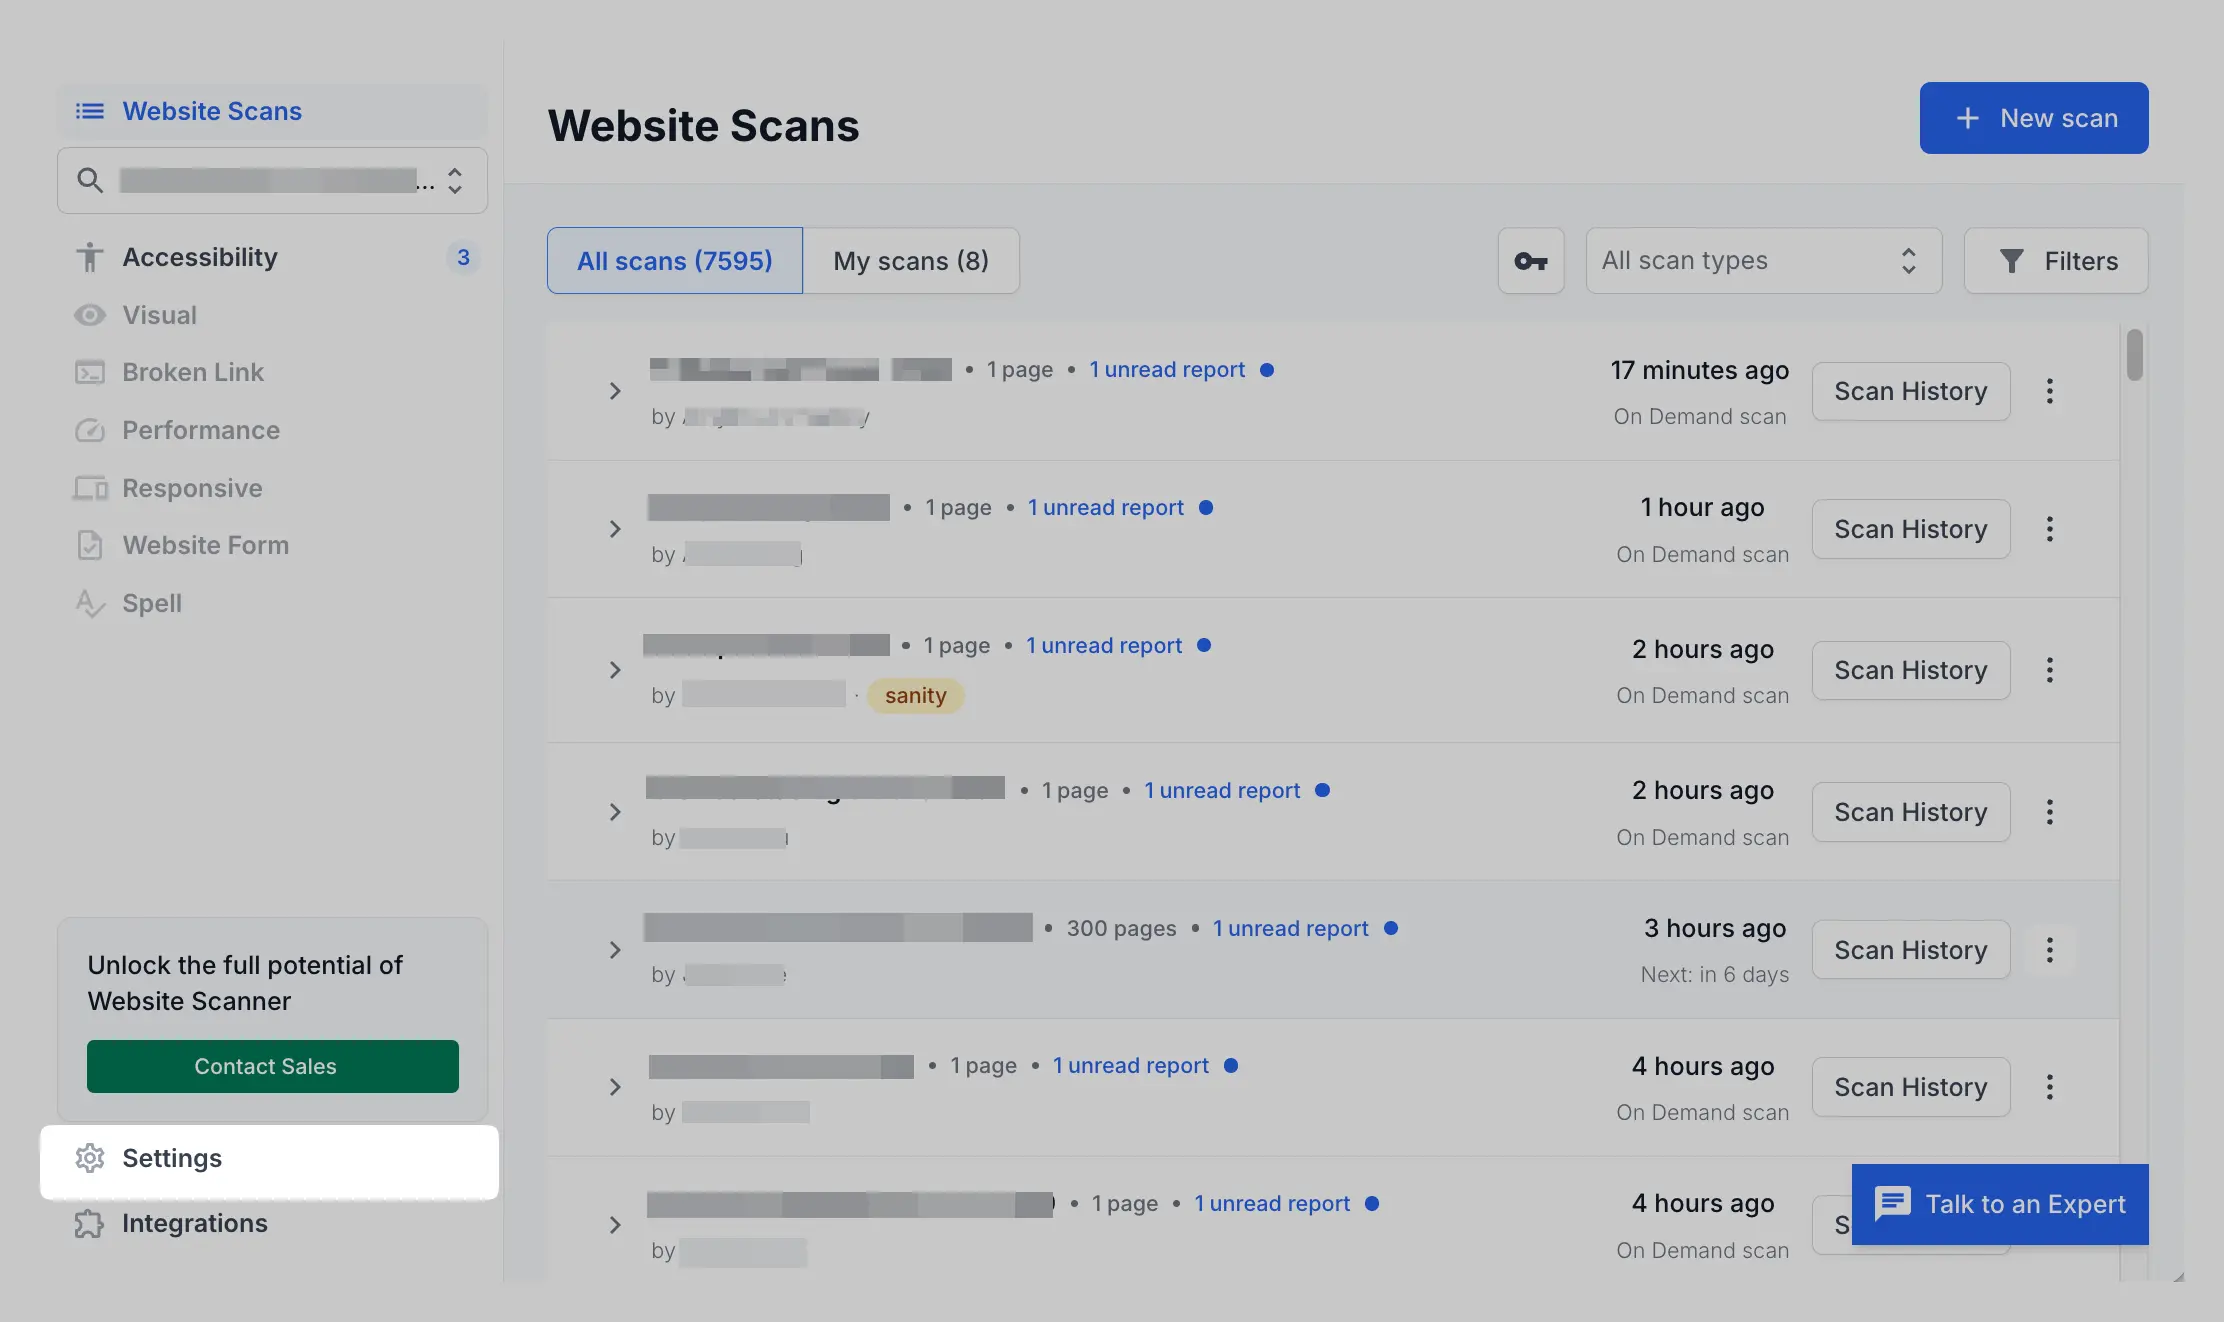
In the Website Scanner left navigation, click Settings.
-
On the Settings page, select Default Scan Settings.
The page opens on the General tab. A separate tab appears for each scan type:
- Accessibility Scan
- Visual Scan
- Responsive Scan
- Broken Link Scan
- Spell Scan
After you change any option, click Save changes to store your defaults.
Set General defaults
The General tab holds options that apply across scan types.
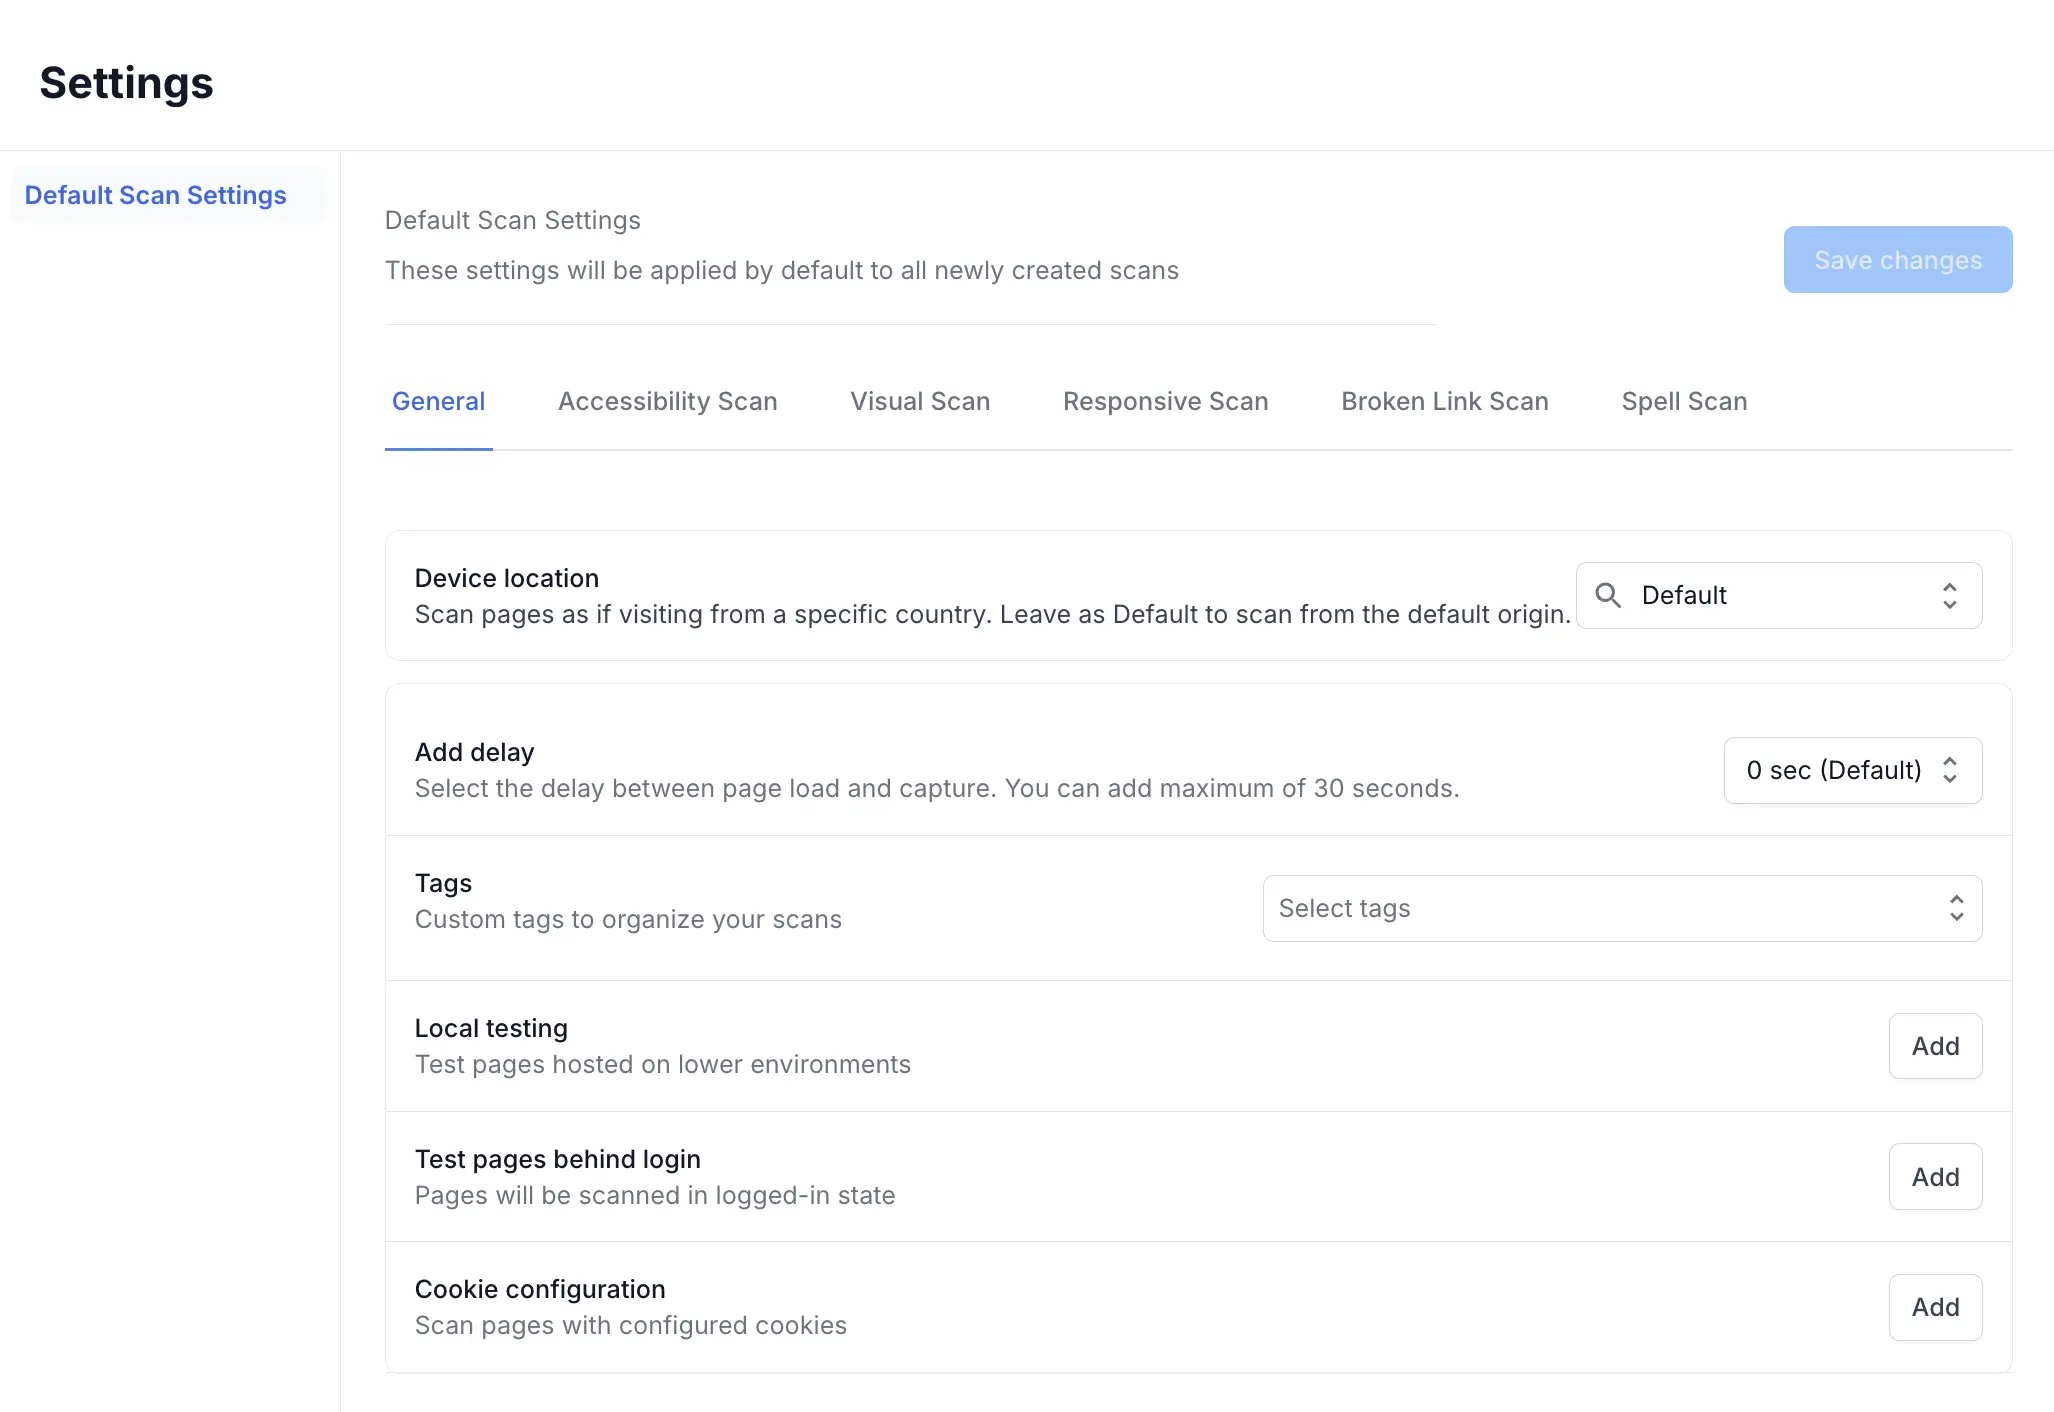
Set any of the following defaults:
- Device location: Scans your pages as if you visit them from a specific country. Leave it as Default to scan from the default origin.
- Add delay: Sets the wait between page load and capture, up to 30 seconds. Increase it for pages that rely on JavaScript rendering or lazy-loaded content.
- Tags: Applies your selected tags to every new scan. Pick from your existing tags, or click Manage Tags to create them.
- Local testing: Sets a default Local Testing connection for pages hosted on lower environments.
- Test pages behind login: Sets a default login configuration, so scans reach pages in a logged-in state.
- Cookie configuration: Sets cookies to apply before each scan runs.
Set Accessibility Scan defaults
The Accessibility Scan tab sets defaults for how accessibility scans run and which issues they report.
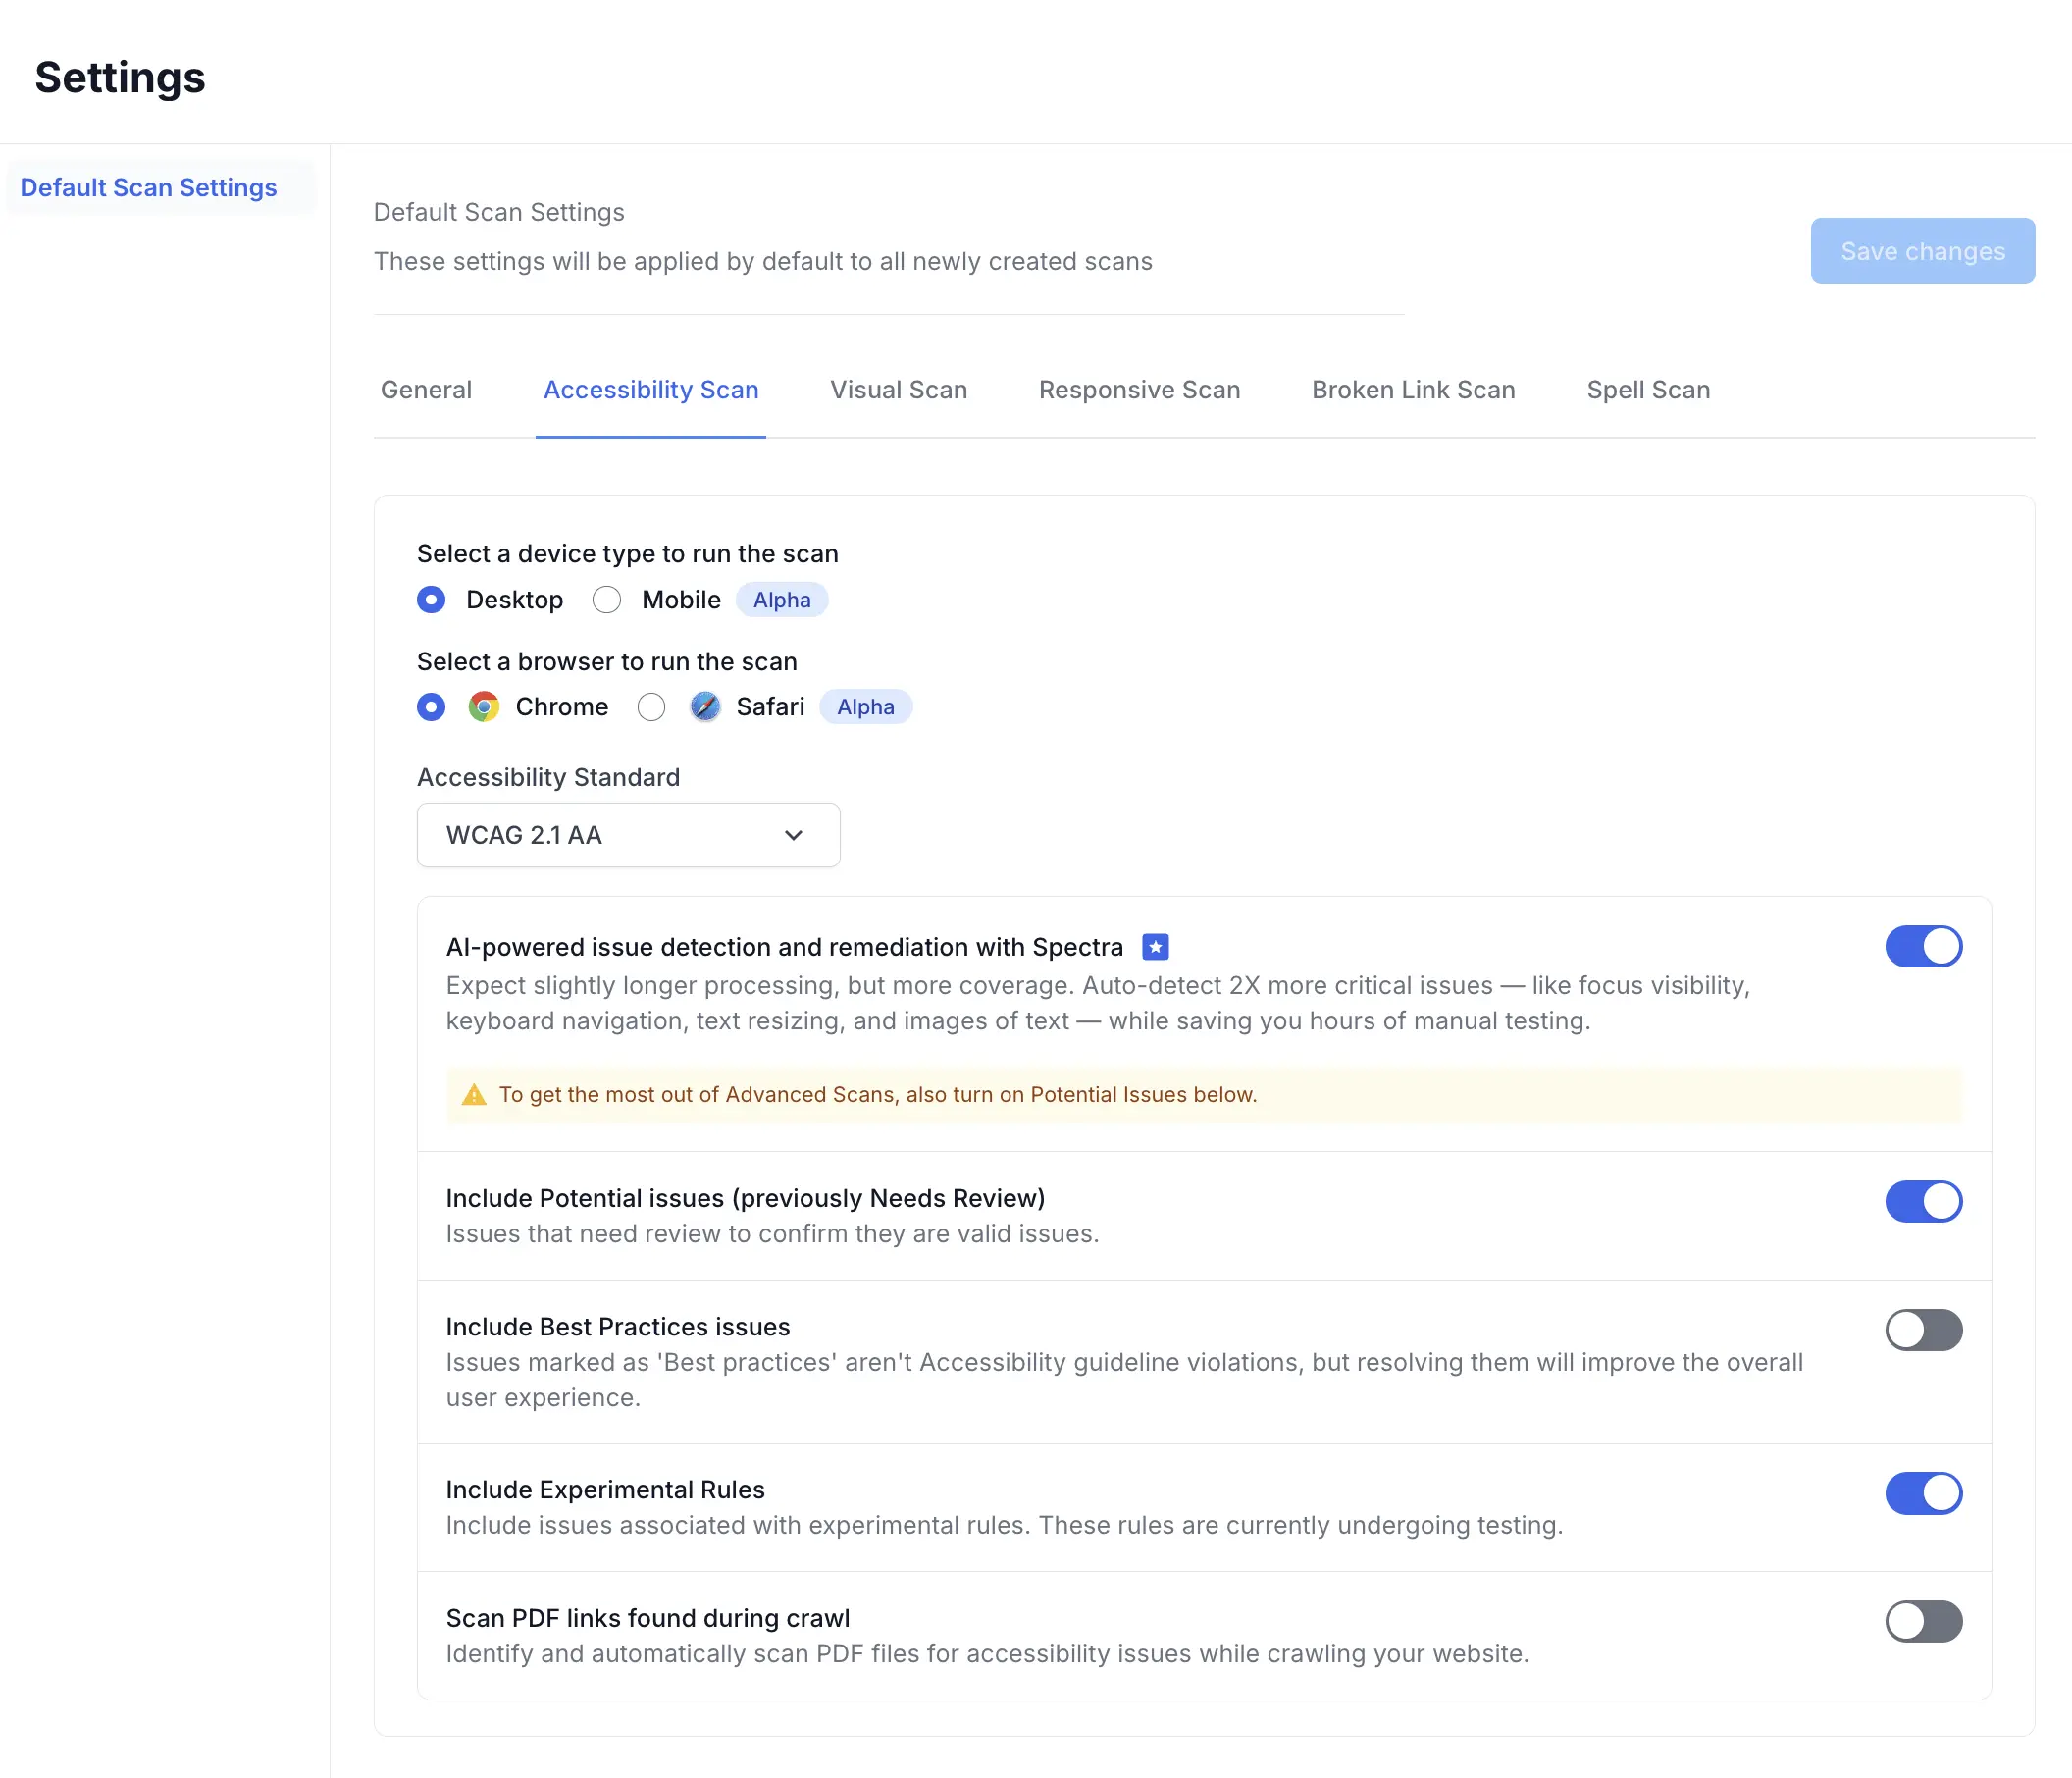
Set any of the following defaults:
- Select a device type to run the scan: Choose Desktop or Mobile. Mobile scans run on Chrome on Android.
- Select a browser to run the scan: For desktop scans, choose Chrome, Safari, or Edge.
- Accessibility Standard: Sets the standard the scan checks against, such as WCAG 2.1 AA.
- AI-powered issue detection and remediation with Spectra: Detects 2X more critical issues, such as focus visibility, keyboard navigation, text resizing, and images of text. Scans take a little longer to process. Available on desktop scans that run on Chrome or Edge.
- Include Potential issues: Includes issues that need manual review to confirm they are valid. Turn it on to get the most from Spectra.
- Include Best Practices issues: Includes issues that are not accessibility violations but improve the overall user experience.
- Include Experimental Rules: Includes rules that are still under evaluation.
- Scan PDF links found during crawl: Checks the PDF files the crawl finds for accessibility issues.
For more about the accessibility standard, potential issues, best practices, and experimental rules, see Accessibility scan settings.
Set defaults for other scan types
The Visual Scan, Responsive Scan, Broken Link Scan, and Spell Scan tabs set defaults for those scan types. For the options available on each, see the matching settings page:
- Visual scan settings
- Responsive scan settings
- Broken Link scan settings
- Spelling dictionary for Spell Scan
Override a default for a single scan
When you create a scan, its Advanced scan settings open with your defaults already filled in. Change any value to override the default for that scan. The saved default does not change, so your next scan starts from it again.
Next steps
- Create a new scan that uses your defaults.
- Review the general settings available per scan, including recurring scans and notifications.
- Fine-tune Accessibility scan settings.
We're sorry to hear that. Please share your feedback so we can do better
Contact our Support team for immediate help while we work on improving our docs.
We're continuously improving our docs. We'd love to know what you liked
We're sorry to hear that. Please share your feedback so we can do better
Contact our Support team for immediate help while we work on improving our docs.
We're continuously improving our docs. We'd love to know what you liked
Thank you for your valuable feedback!