Successful web development teams understand the risks posed by browser fragmentation on their UI. To ensure what they build delivers great UX for every user, they validate all front-end changes across multiple browsers. This continuous cross browser testing is carried out by developers and testers using frameworks like Cypress.
Cypress lets you write, execute, and debug tests written in JavaScript. Once installed on your local machine, you can use the framework to write tests that are executed in the same run loop as your application on Cypress-supported browsers—also installed on your local machine.
Because Cypress is installed locally on your machine, automation tasks are faster. However, it also limits the number of browser/OS combinations you can test against to the browsers installed on your machine. As a workaround, agile development teams use Docker containers to test across various OS/browser configurations, but this can get unmanageable at scale. Spinning up test environments becomes a prerequisite to every test run, adding to build times.
Cross browser Cypress tests are easier to run at scale on a cloud testing platform, which gives you coverage and scale on-demand without the Docker containers. Here’s how you can run your Cypress tests using a cloud testing platform like BrowserStack.
Running cross browser Cypress tests on the cloud
Recently, we introduced support for cross browser testing with Cypress on BrowserStack cloud, enabling teams to run cross browser Cypress tests on 30+ versions of Chrome, Edge, & Firefox across Windows & macOS. It also lets you run hundreds of Cypress tests in parallel without maintaining Docker containers as you scale.
To get started, follow the steps:
Step 1: Install the CLI
Install the BrowserStack-Cypress CLI via npm using the following command:
$ npm install -g browserstack-cypress-cli
Step 2: Configure
Use the init command to generate a sample browserstack.json file.
$ browserstack-cypress init
In the browserstack.json file, add your BrowserStack login credentials in the auth section to authenticate your test runs:
{
  ...
  "auth": {
    "username": "YOUR_USERNAME",
    "access_key": "YOUR_ACCESS_KEY"
  }
  ...
}
And specify browsers and OSs from a list of supported browsers and OSs:
{
  ...
  "browsers": [{
      "os": "Windows 10",
      "browser": "chrome",
      "versions": ["69", "80", "81"]
    },
    {
      "os": "Windows 10",
      "browser": "edge",
      "versions": ["80", "81"]
    },
    {
      "os": "OS X Mojave",
      "browser": "firefox",
      "versions": ["69", "66"]
    },
    {
      "os": "OS X Catalina",
      "browser": "edge",
      "versions": ["80", "81"]
    }
  ]
  ...
}
Now configure run_settings such as your Cypress project directory, build name, npm dependencies, number of parallels, etc. to specify how many tests should be executed at the same time on the cloud, and so on. Here’s an example:
{
 ...
  "run_settings": {
    "cypress_proj_dir": "./",
    "build_name": "Cypress Build: 1556",
    "parallels": 5,
    "npm_dependencies": {}
  },
  "connection_settings": {
    "local": false,
    "local_identifier": null
  }
 ...
}
Step 3: Run your tests
Run your tests on BrowserStack with the following command:
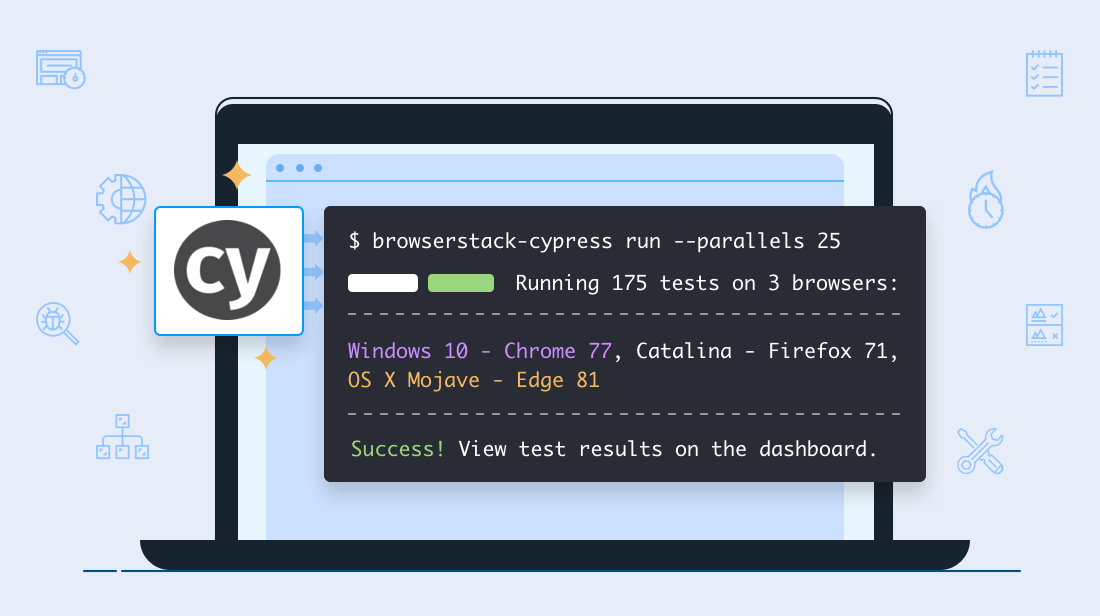
$ browserstack-cypress run
On the Automate dashboard, you’ll be able to see your tests grouped by browser/OS combinations that you specified, like this:
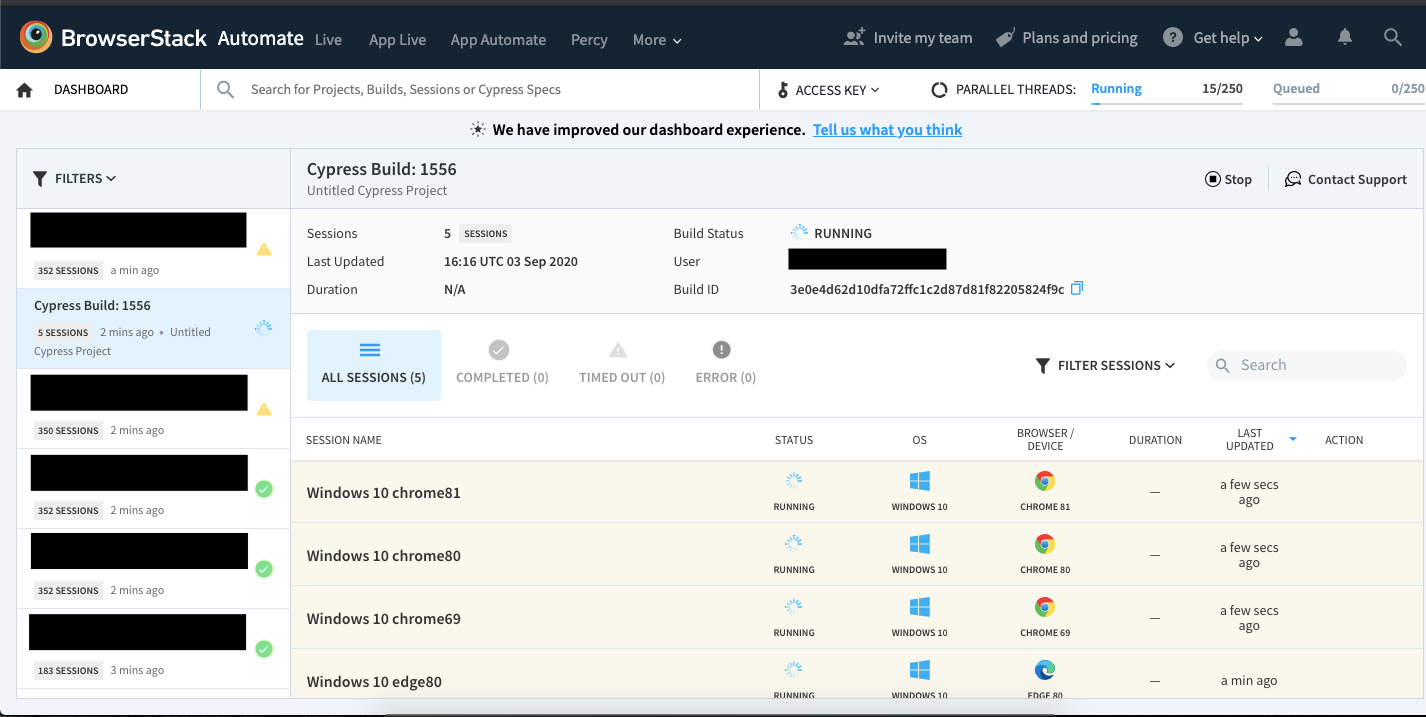
Each browser/OS you specify in browserstack.json will be one session name. Clicking any one of the session names will take you to the spec files.
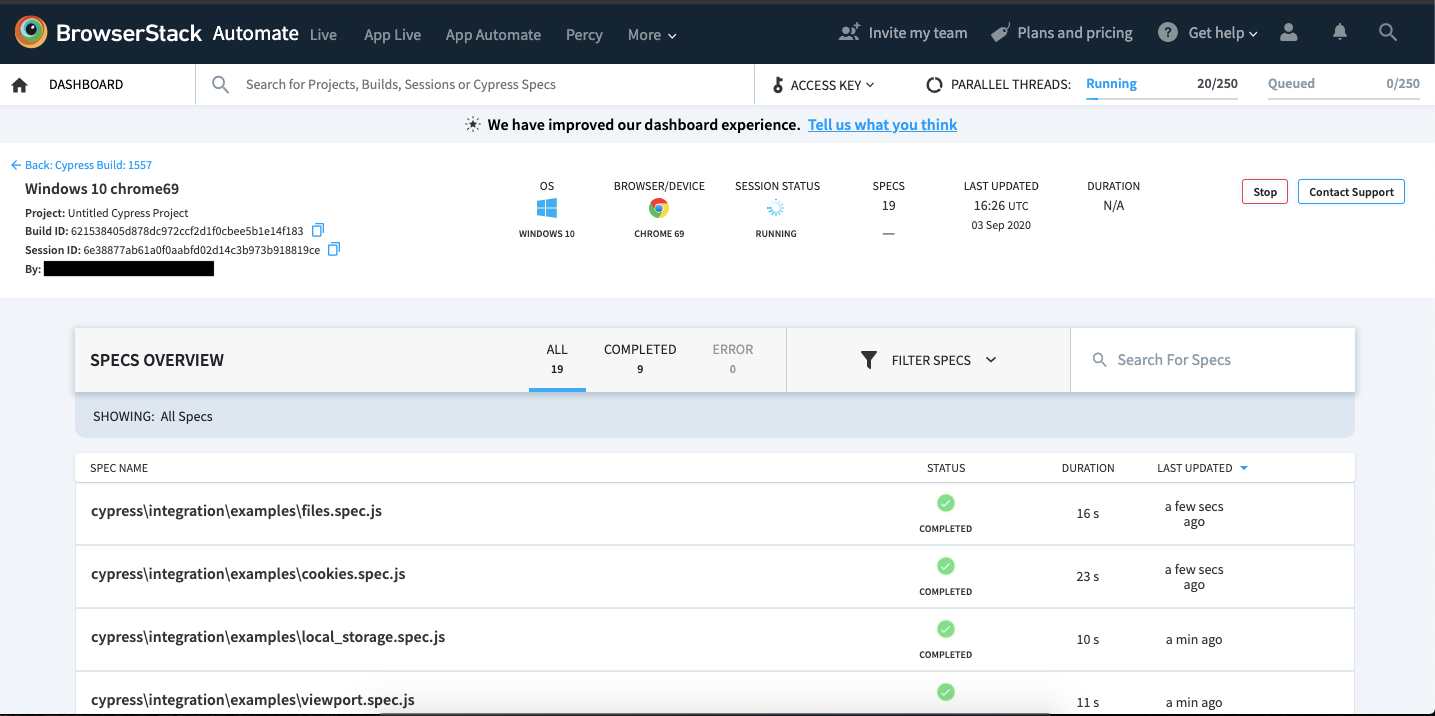
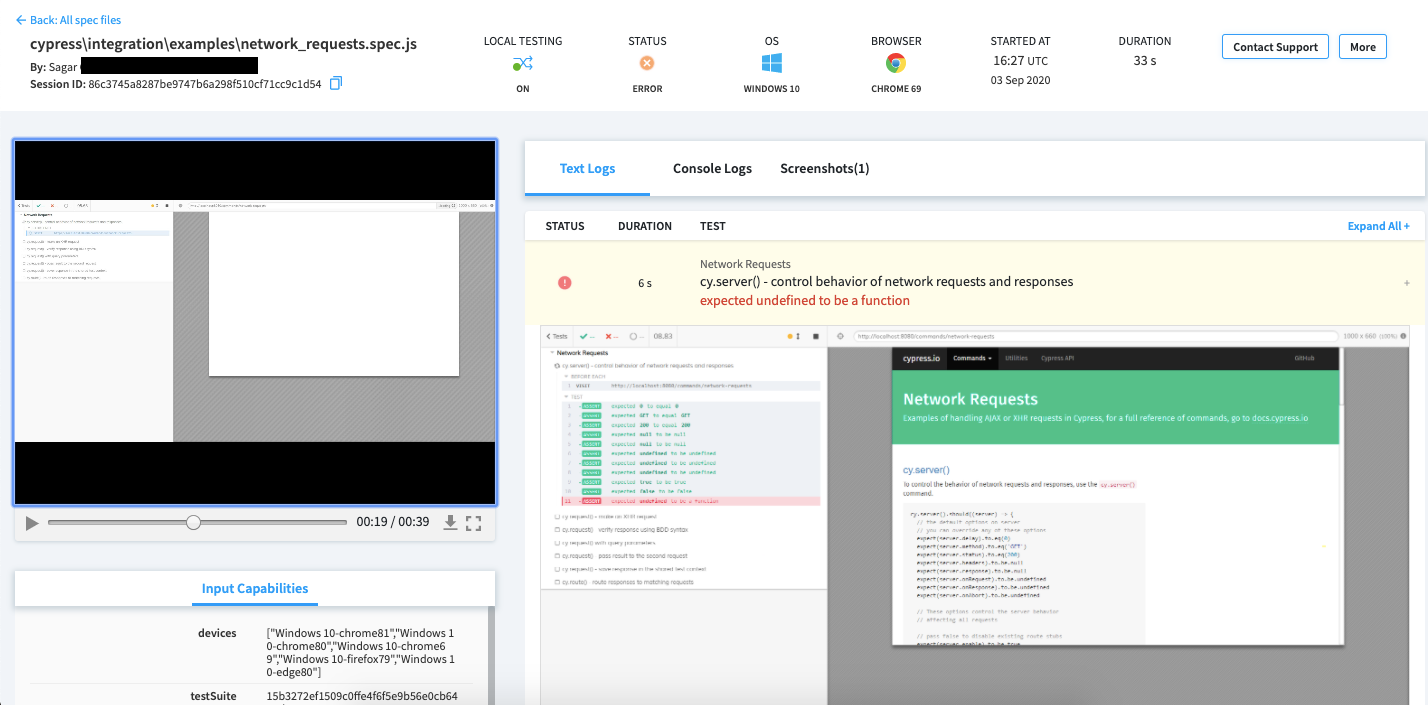
Clicking on one of the completed spec files will take you to BrowserStack Automate debugging dashboard which contains video logs, screenshots, and test logs that can be downloaded and shared for reviewing.
Running cross browser Cypress tests in parallel on the cloud
You can specify the number of parallels in one of two ways:
1. Using the CLI parameter
Use the --parallels parameter, followed by the number of parallel tests while triggering your cross browser Cypress tests on BrowserStack:
$ browserstack-cypress run --parallels 5
2. Configuring the browserstack.json
In the run_settings, use the parallels key and specify the number of parallels you want to use to run your Cypress tests on BrowserStack:
{
  "run_settings": {
    ...
    "parallels": 5,
    ...
  }
}
Sample tutorial: Kitchen Sink App
Let’s try to test Cypress’ Kitchen Sink sample app on BrowserStack cloud.
1. Download Kitchen Sink
Start by downloading Kitchen Sink here or cloning the repository as follows:
# Clone the Kitchen Sink repo
git clone https://github.com/cypress-io/cypress-example-kitchensink.git

# Switch to the cloned example
cd cypress-example-kitchensink
This repository will contain:
app
...
cypress
|-- fixtures
|-- integration
|-- plugins
|-- support
cypress.json
...
2. Configure browserstack.json
If you haven't, install the BrowserStack CLI.
npm install -g browserstack-cypress-cli
Next, edit the browserstack.json file, and update:
auth: You can find yourusernameandaccess_keyon the Automate dashboard.browsersthat you want to run the tests on from this list of supported browsers and OSs.cypress_proj_dir: The path to the folder that contains the cypress.json file.project_name: Specify a project name for good hygiene (eg., Cypress Kitchen Sink Example)build_name: Specify a build name for good hygiene (eg., Build no 12345)parallels: Specify how many tests you want to run concurrently (eg., 5)
Here is a sample configuration for this tutorial:
{
  "auth": {
    "username": "YOUR_USERNAME",
    "access_key": "YOUR_ACCESS_KEY"
  },
  "browsers": [{
      "browser": "chrome",
      "os": "Windows 10",
      "versions": [
        "78",
        "77"
      ]
    },
    {
      "browser": "firefox",
      "os": "OS X Mojave",
      "versions": ["69", "66"]
    }
  ],
  "run_settings": {
    "cypress_proj_dir": "./",
    "project_name": "Cypress Kitchen Sink Example",
    "build_name": "Build no: 1",
    "parallels": 5,
    "npm_dependencies": {}
  },
  "connection_settings": {
    "local": false,
    "local_identifier": null
  },
  "disable_usage_reporting": false
}
3. Setup the application server
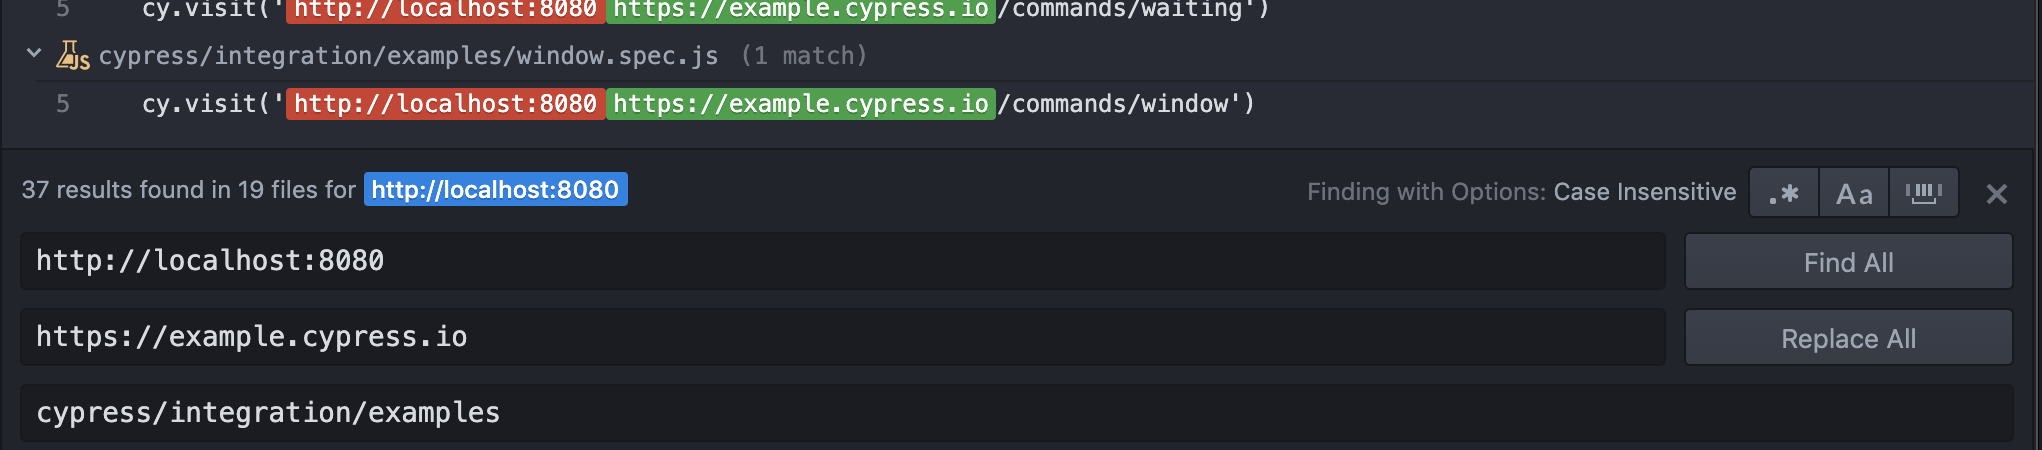
The tests in Cypress' Kitchen Sink sample use localhost:8080 to access the application server. You can either set up the application locally (as per the instructions in Cypress Kitchen Sink’s README).
Alternatively, you can replace all occurrences of localhost:8080 with https://example.cypress.io as follows:
Note: If you’re using localhost:8080, make sure to set up a Local Testing connection so that the application can be accessed by BrowserStack while running your tests.
Now, you can run your tests with the following command:
browserstack-cypress run
And access the test results on the Automate dashboard.
Bottom line
Browser fragmentation is an unavoidable reality of developing for today’s web. That’s why continuous cross browser testing is essential. With Cypress and cloud testing, continuous cross browser testing can become a cornerstone of your testing strategy for the web.
Use the BrowserStack cloud to cover 30+ browser versions at every Cypress test run.
It’s easy and free. Get started.