Configuration and preferences
Test Companion lets you control how it behaves, how it interacts with your project files, and how it connects to BrowserStack’s cloud testing infrastructure.
This page gives you an overview of every available setting, so you can match Test Companion to your testing environment and workflow. Settings apply to your own Test Companion. Each teammate configures their own. This guide explains what each setting does, when to use it, and how your choices change Test Companion’s behavior.
How to open settings
To open the Settings panel:
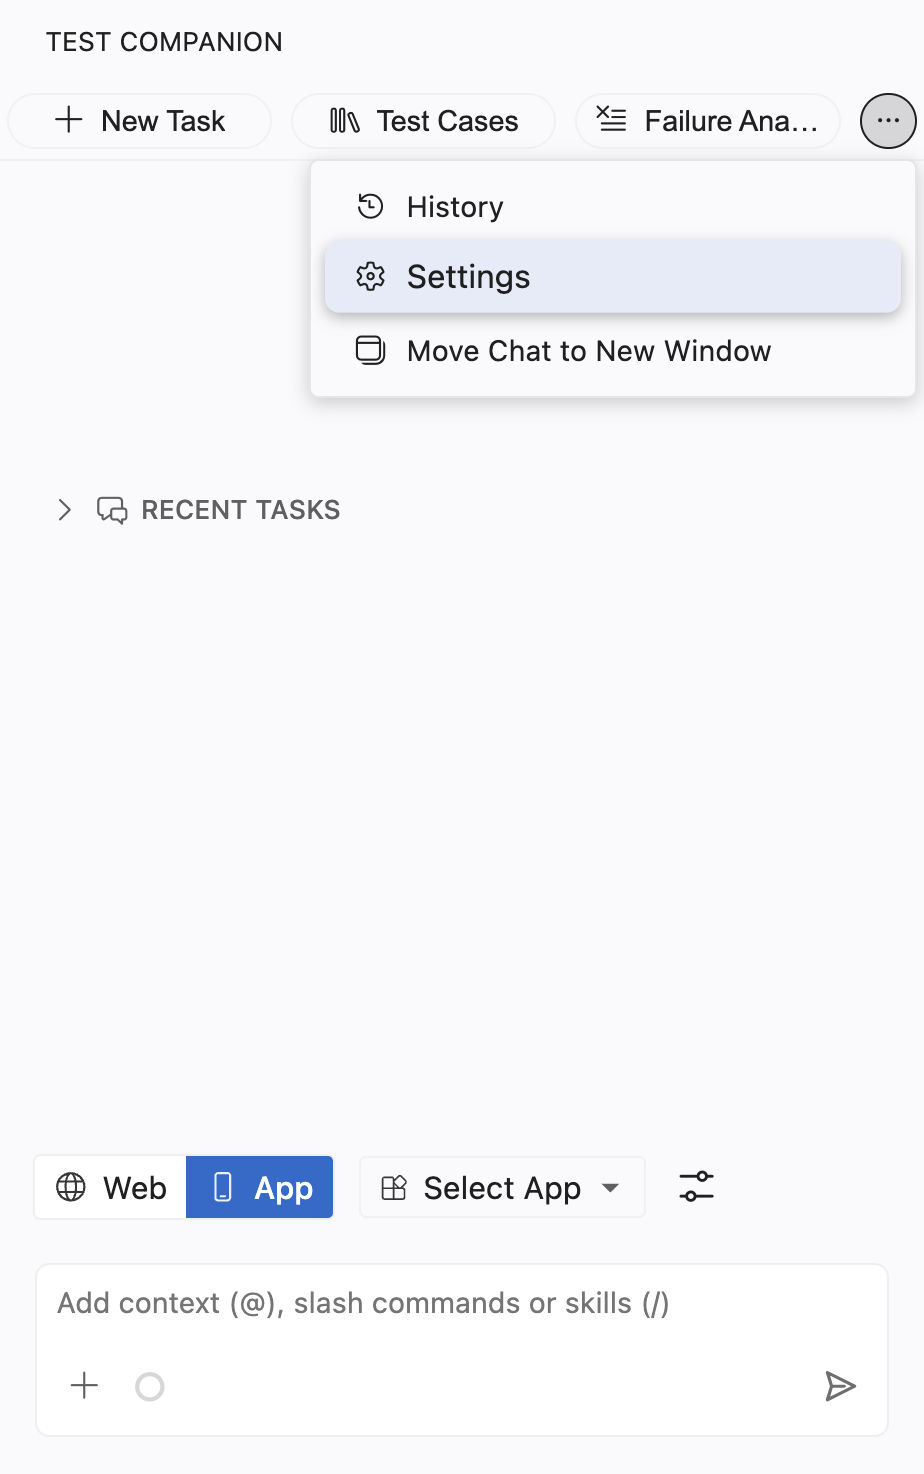
Click the ... (more options) button at the top-right corner of the Test Companion panel, then select Settings.
Open the tab you need and make your changes, then click Save.
Settings tabs
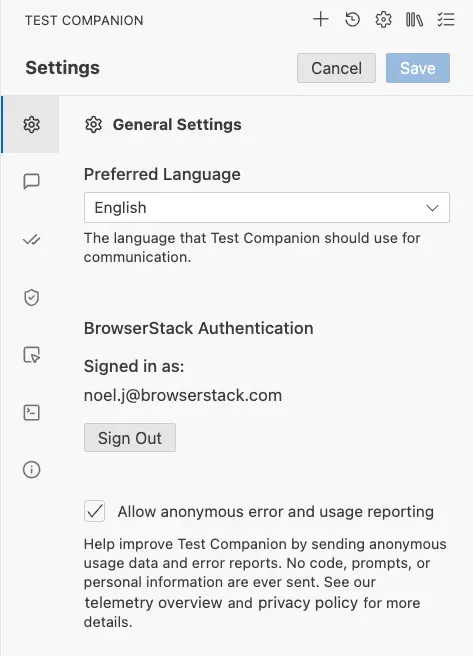
The Settings panel is organized into tabs in the left sidebar. Each tab links to its detailed guide:
- General settings: Adjust language preferences, authentication settings, and telemetry options.
- Chat settings: Choose an interaction mode, Default or Guided, and set system instructions for your test automation environment.
- Feature settings: Choose a test case format, Default or BDD, and manage checkpoints, notifications, and Electron testing support.
- Auto-approve settings: Control the actions that Test Companion can perform without prompting for your permission.
- Browser settings: Set the viewport size, browser profile behavior, and headless mode for browser-based tasks.
- Mobile settings: Set Android and iOS session overrides, network and orientation defaults, and diagnostics captures for mobile sessions.
- Proxy and local settings: Configure local testing, tunnel routing, and proxy settings so Test Companion can reach BrowserStack from your network.
- Terminal settings: Configure how Test Companion reuses your IDE’s integrated terminal.
- Plan and usage: View your current plan, track your usage allowance, and find support contacts.
- Info and support: Check the Test Companion version, open the documentation, contact support, report a bug, or schedule a demo.
Choose where to start
If you are new to Test Companion, start by exploring the Chat settings and Auto-approve settings. These two tabs significantly influence how the AI interacts with you on a daily basis. The Chat settings determine whether the AI asks for confirmation at each step or operates independently, while the Auto-approve settings control what the AI can do without your explicit approval.
Next, set the viewport size in the Browser settings to match your target devices.
We're sorry to hear that. Please share your feedback so we can do better
Contact our Support team for immediate help while we work on improving our docs.
We're continuously improving our docs. We'd love to know what you liked
We're sorry to hear that. Please share your feedback so we can do better
Contact our Support team for immediate help while we work on improving our docs.
We're continuously improving our docs. We'd love to know what you liked
Thank you for your valuable feedback!