As mobile ecosystems evolve rapidly, QA teams face the challenge of keeping pace with continuous development cycles. Choosing the right Android app testing tool ensures efficiency, accurate bug detection, and faster delivery. With options ranging from open-source frameworks to cloud-based solutions, selecting the right fit depends on project scope, team skills, and testing needs.
Overview
Why Choosing the Right Android App Testing Tool Matters
- Continuous delivery = faster releases, higher risks without proper QA.
- Android fragmentation → thousands of devices, OS versions, screen sizes.
- Right tools = real-device accuracy, automation, and seamless integration.
Steps to Select the Right Tool
- Requirement Gathering → define device coverage, CI/CD needs, and security requirements.
- Product Research → ensure tool supports multiple Android OS versions + frequent updates.
- Continuous Testing → must detect regression with every code change.
- Automated Tests → write repeatable scripts, run in parallel across devices.
- Tool Shortlisting → prioritize security, integrations, scalability, and adaptability.
Core Capabilities to Check
- Access to real mobile devices (not just emulators).
- Integrations with CI/CD + test frameworks.
- Strong security infrastructure.
- Support for functional, UI, and accessibility testing.
Popular Open-Source Testing Frameworks
- JUnit → default Android framework; supports native tests.
- Appium → cross-platform, supports Selenium languages, native + hybrid apps.
- Robotium → open-source, UI black-box testing with Java.
- Espresso → fast, reliable Android UI testing (Java/Kotlin only).
This guide explains how to evaluate Android app testing tools, key features to look for, and the frameworks that best support mobile QA.
Requirement Gathering for Android App Testing Tools
Your tools and tech are essential for the efficiency of your QA processes. Make a list of your requirements and choose accordingly with the following parameters.
Research the product you’ll be Testing
- Before you shortlist a tool check if it supports the OS and different versions. You also need to see how frequently they release updates and devices.
- With the Android eco-system growing really fast, it is essential to test on legacy OS versions but also new OS and the corresponding versions.
Read More: How to deal with Android Fragmentation
Determine if Continuous Testing should be done
- Continuous testing recognizes how code changes have impacted the existing system.
- Your tests should always factor in new code changes and continually give you feedback.
- It should support the framework, quickly tackle revisions, track issues, and generates esports. If your tool doesn’t perform these functions defects will begin to show.
Try running Automated Tests
After developing an Android app, ensure it works seamlessly with other Android devices and hardware specifications. Therefore testing thousands of Android OS device combinations can be unrealistic.
- Instead of testing every scenario manually, opt for automation testing.
- Create test scripts, that speak about user actions and establish benchmarks that will tell you if your app passes or fails.
- With automated testing, you can test the top Android devices in parallel reducing the overall time and effort taken.
Though manual testing may be required for essential test cases, QAs can otherwise bulk-test the majority of the scenarios.
Follow-Up Read: Why is Manual Testing not sufficient for Continuous Delivery?
Shortlist the Tool most suited
- Don’t choose a popular tool thinking it might solve your problem.
- Select an Android app testing tool based on the frame and requirements of your teams.
- Ensure that your tools can handle changes and upgrades in test cases.
- It should be highly secure and integrate with your tech stack.
After you understand your testing tool’s scope and expectations, you can start performing your tests. In addition to that, you should also ensure the following things are in place such as
- Access to Real Mobile Devices
- Integrations with application testing frameworks and tools
- Security infrastructures
- Supporting different testing techniques
Access to Real Mobile Devices
People generally use Emulators for Android testing. However, they’re good for early testing, but they’re not accurate for testing for compatibility. With cloud-based testing tools, it’s much easier to test as devs and testers can access real versions of Android devices and OS, making it easier to test in real-world scenarios.
Access BrowserStack Real Device Cloud
Integrations with App Testing Frameworks and Tools
When you choose your testing platform, you need to ensure that it is integrated or can be integrated with your testing tool. It should integrate easily with commonly used tools and frameworks.
Security Infrastructures
Security breaches can happen, given that testing happens collaboratively. Your testing tool should be secure and shouldn’t cost your business dearly. Ensure that your tools have a thorough and firm security architecture and are updated with the latest malware protection software.
Choosing the right Android App Testing Tool
As newer versions come into the foray, your testing tool should be equipped to test new developments. Tools should facilitate accessibility testing as designs become more accessible for people with disabilities.
Android platform is over 10 years old and has a rich assortment of tools fit for different requirements and projects.
Here’s an overview of critical open-source testing frameworks that should help you choose your Android testing tool.
JUnit: This is the default testing framework for Android. Other platforms like Mockito, and Espresso have built on top of this. JUnit4 also has the capability to run native tests within the Android realm.
Appium: It is the native testing framework for iOS, desktop, Windows, IoTs, and Android devices. It uses flow-type tests that provide fidelity to your end-user scenarios and can also integrate with other devices for push notifications and widget features.
Appium supports Android versions from upwards of Android 2.3. It also supports languages that are a part of Selenium client libraries such as Java, JavaScript, Python, c#, PHP, Ruby, etc.
Teams that use a hybrid or native app – can use Appium tests as it provides co-location, for Selenium users it can provide automation.
Robotium: This is a UI testing tool that’s open source. It can test applications of all versions and is the first tool that can perform Android UI testing. It is compatible with Android 1.6 and onwards and the preferred language is Java.
Since Robotium does black box testing, it is easier to write test cases for mobile apps. These test cases need minimal knowledge and are much faster. Since it’s open source devs continuously introduce new features.
Espresso: Espresso is one of the fastest testing tools available that provide insight into the applications’ status. This is the default UI framework for Android, also used by Appium. Google’s investment in Espresso aims to provide superior support and adoption within the Android communities. It supports Android versions from Android 2.3 onwards.
If your development teams are relatively new, then Espresso is the right choice as it doesn’t have a large learning curve. Additionally, it syncs changes and reuse mocks easily that you have previously created for test units.
Even though Espresso sounds like a good fit, it has limitations. It is only compatible with Java and Kotlin, and your coding language should be only these two to run the tests. There is no support provided for cross-operating systems – if you’re developing an app for both Android and iOS.
However, instead of hopping through multiple testing frameworks, you can ease your work through cloud testing.
- Cloud-based app testing with BrowserStack streamlines manual and automated app testing on different Android device-browser-OS.
- It visualizes your apps on different screen sizes and resolutions.
- Additionally, BrowserStack allows performing local testing on different staging environments without any setup.
Here’s how you can test your Android application using BrowserStack
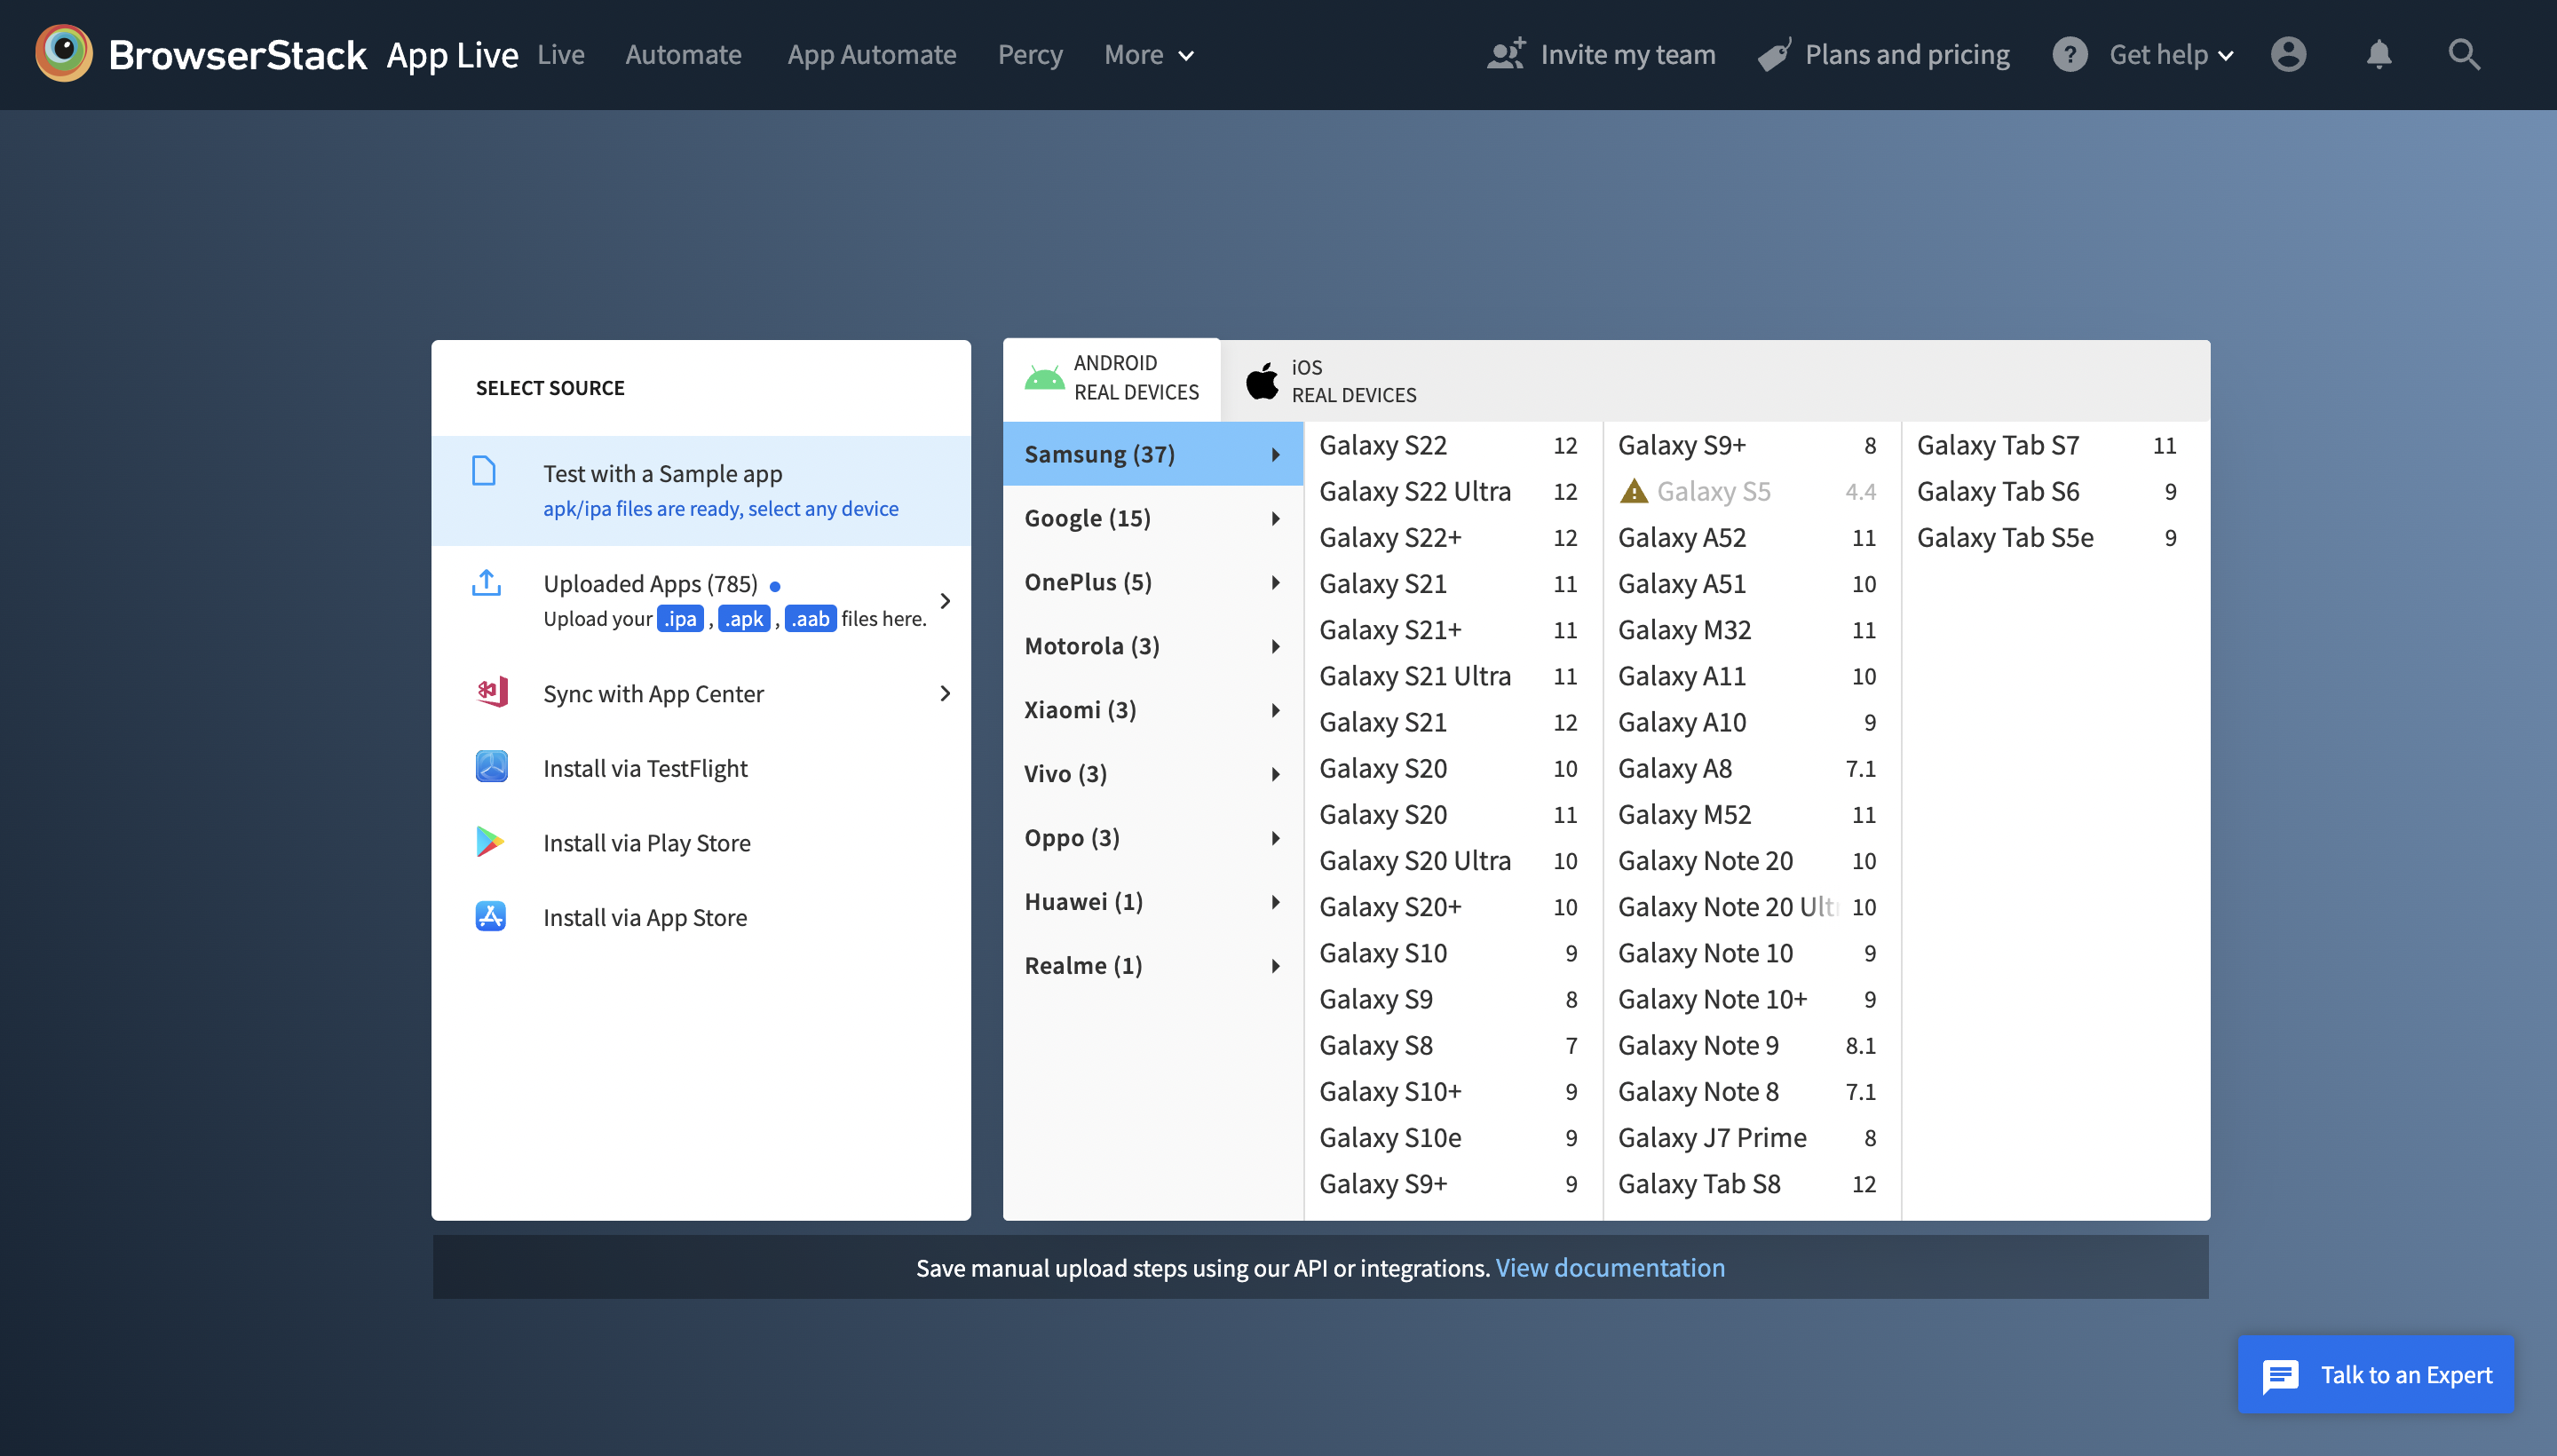
Step 1 – Select the device you would like to run your trial on. Over here we’ll be selecting the Galaxy S22 environment to run our sample test.
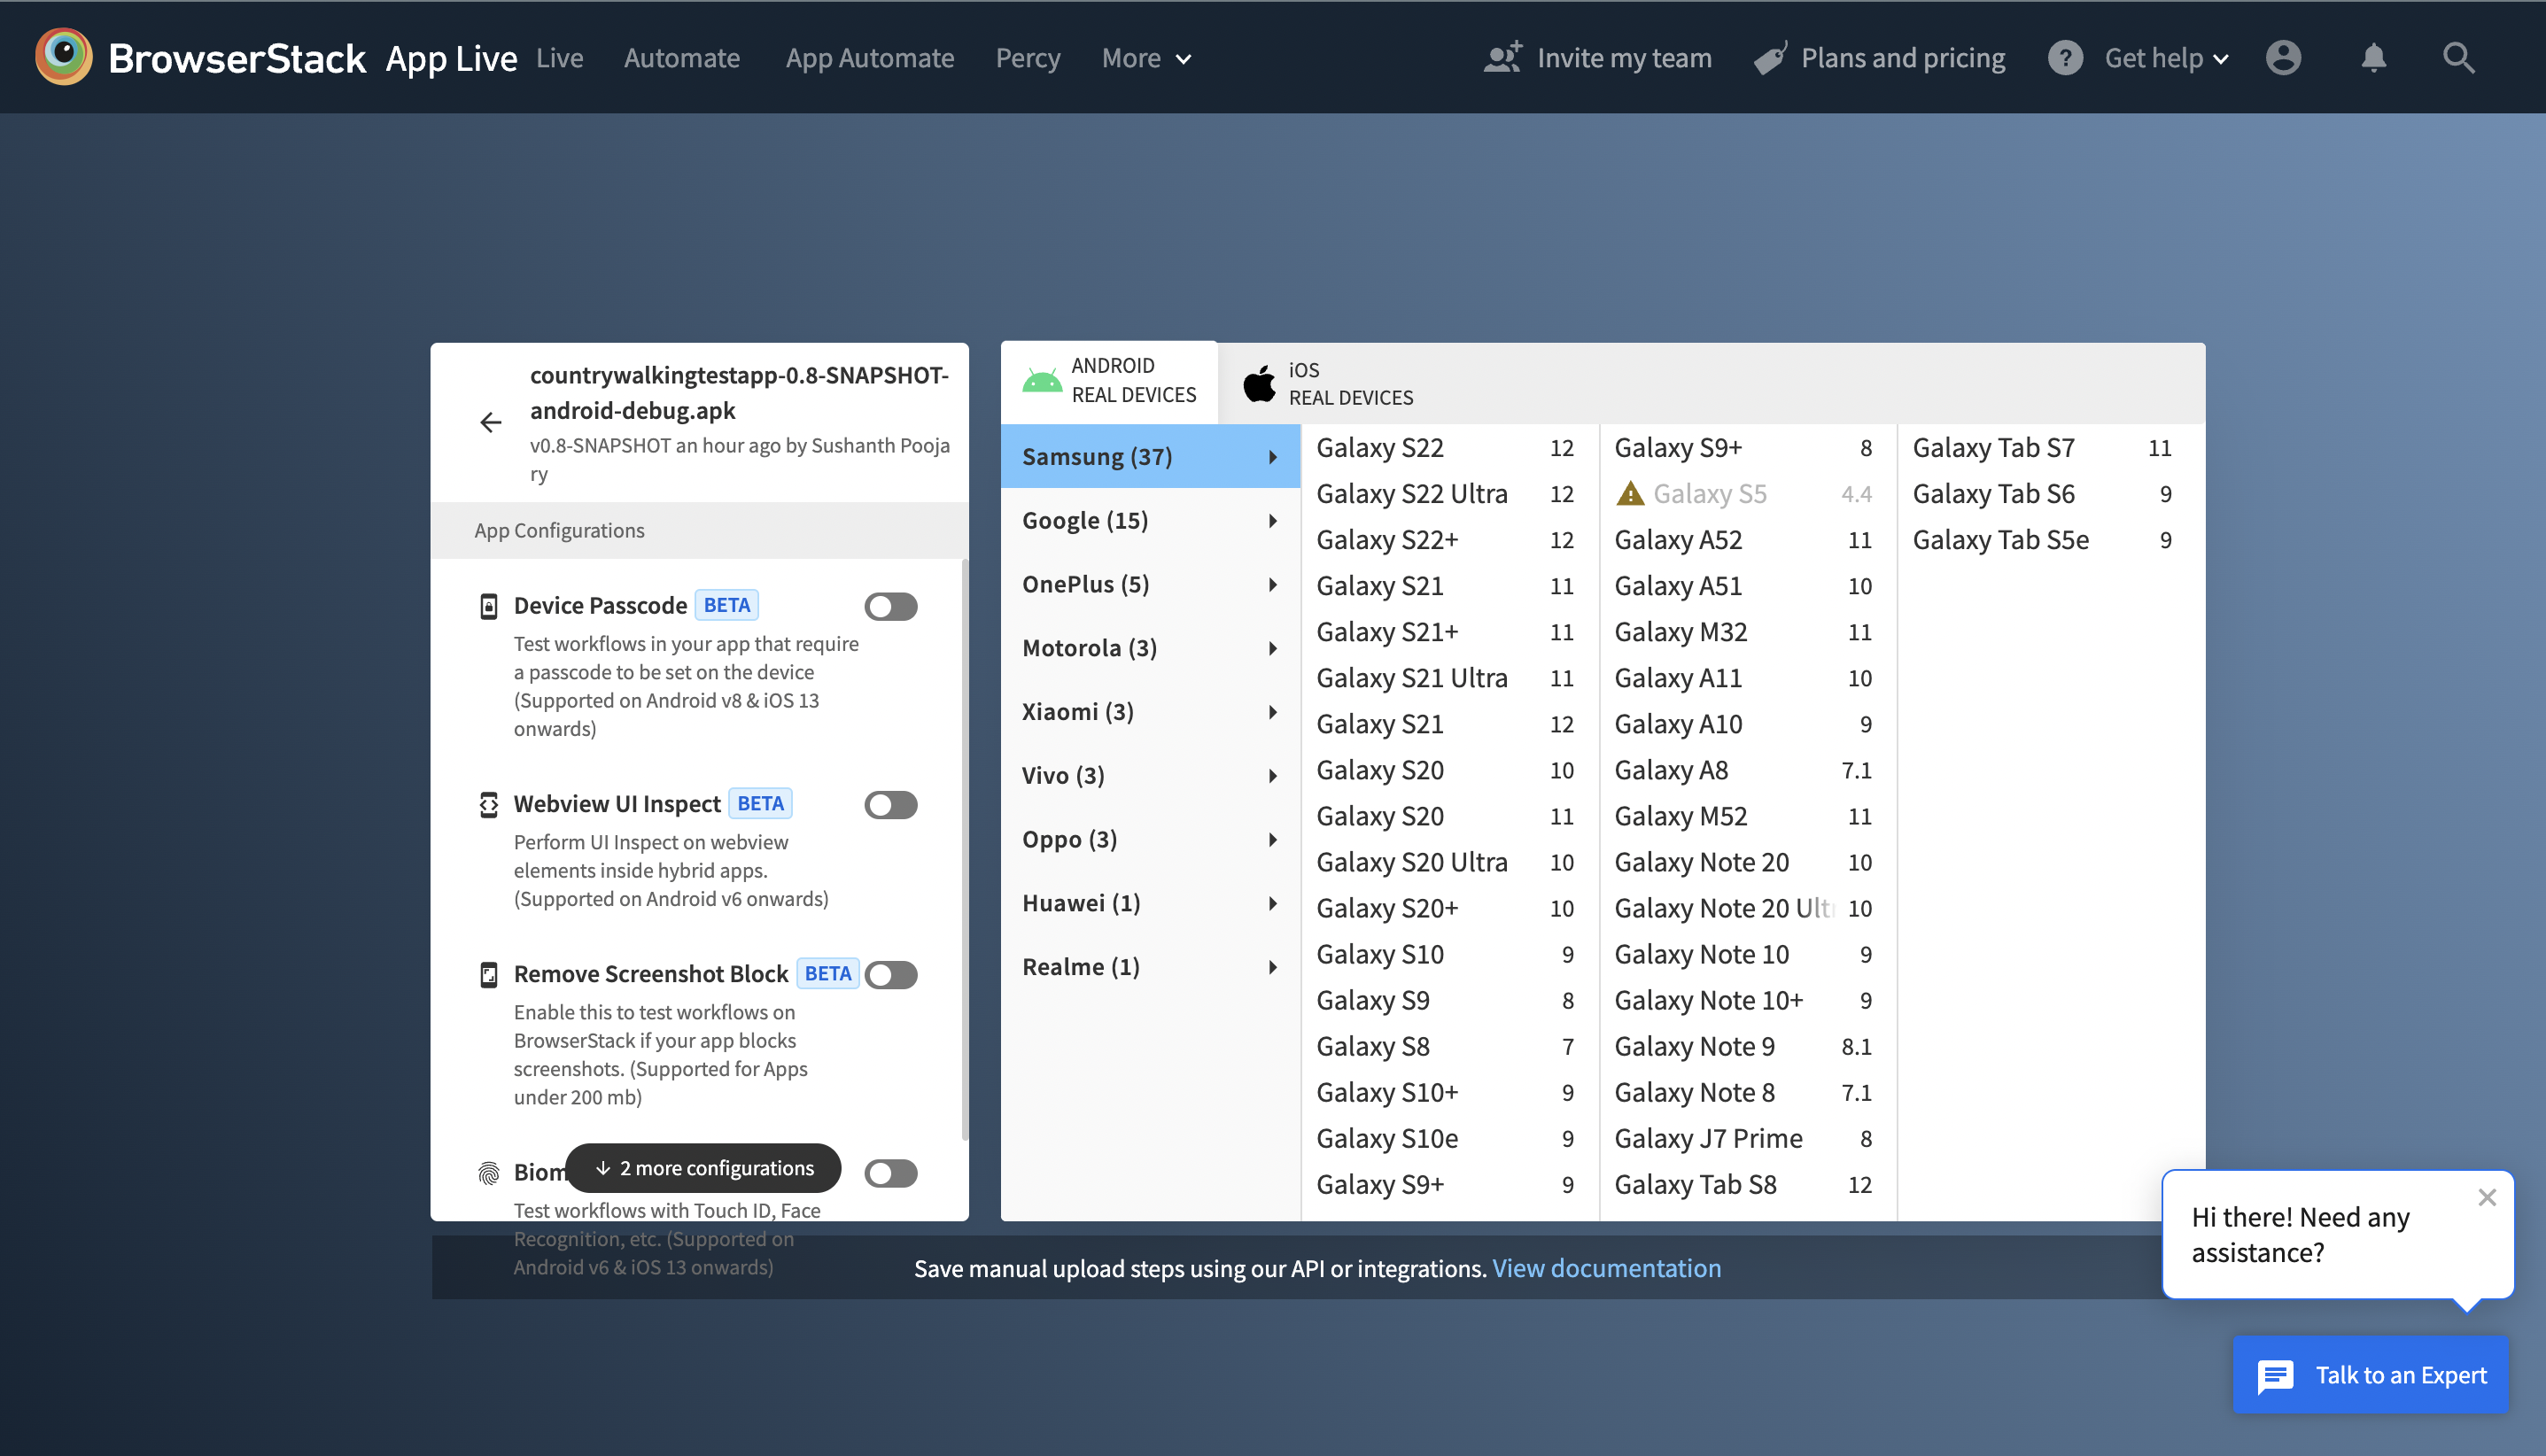
Step 2 – Download your Android application to be tested or its URL onto the platform. The accepted Android app formats are .ipa, .apk and .aab. Testers can also toggle app configurations as shown below.
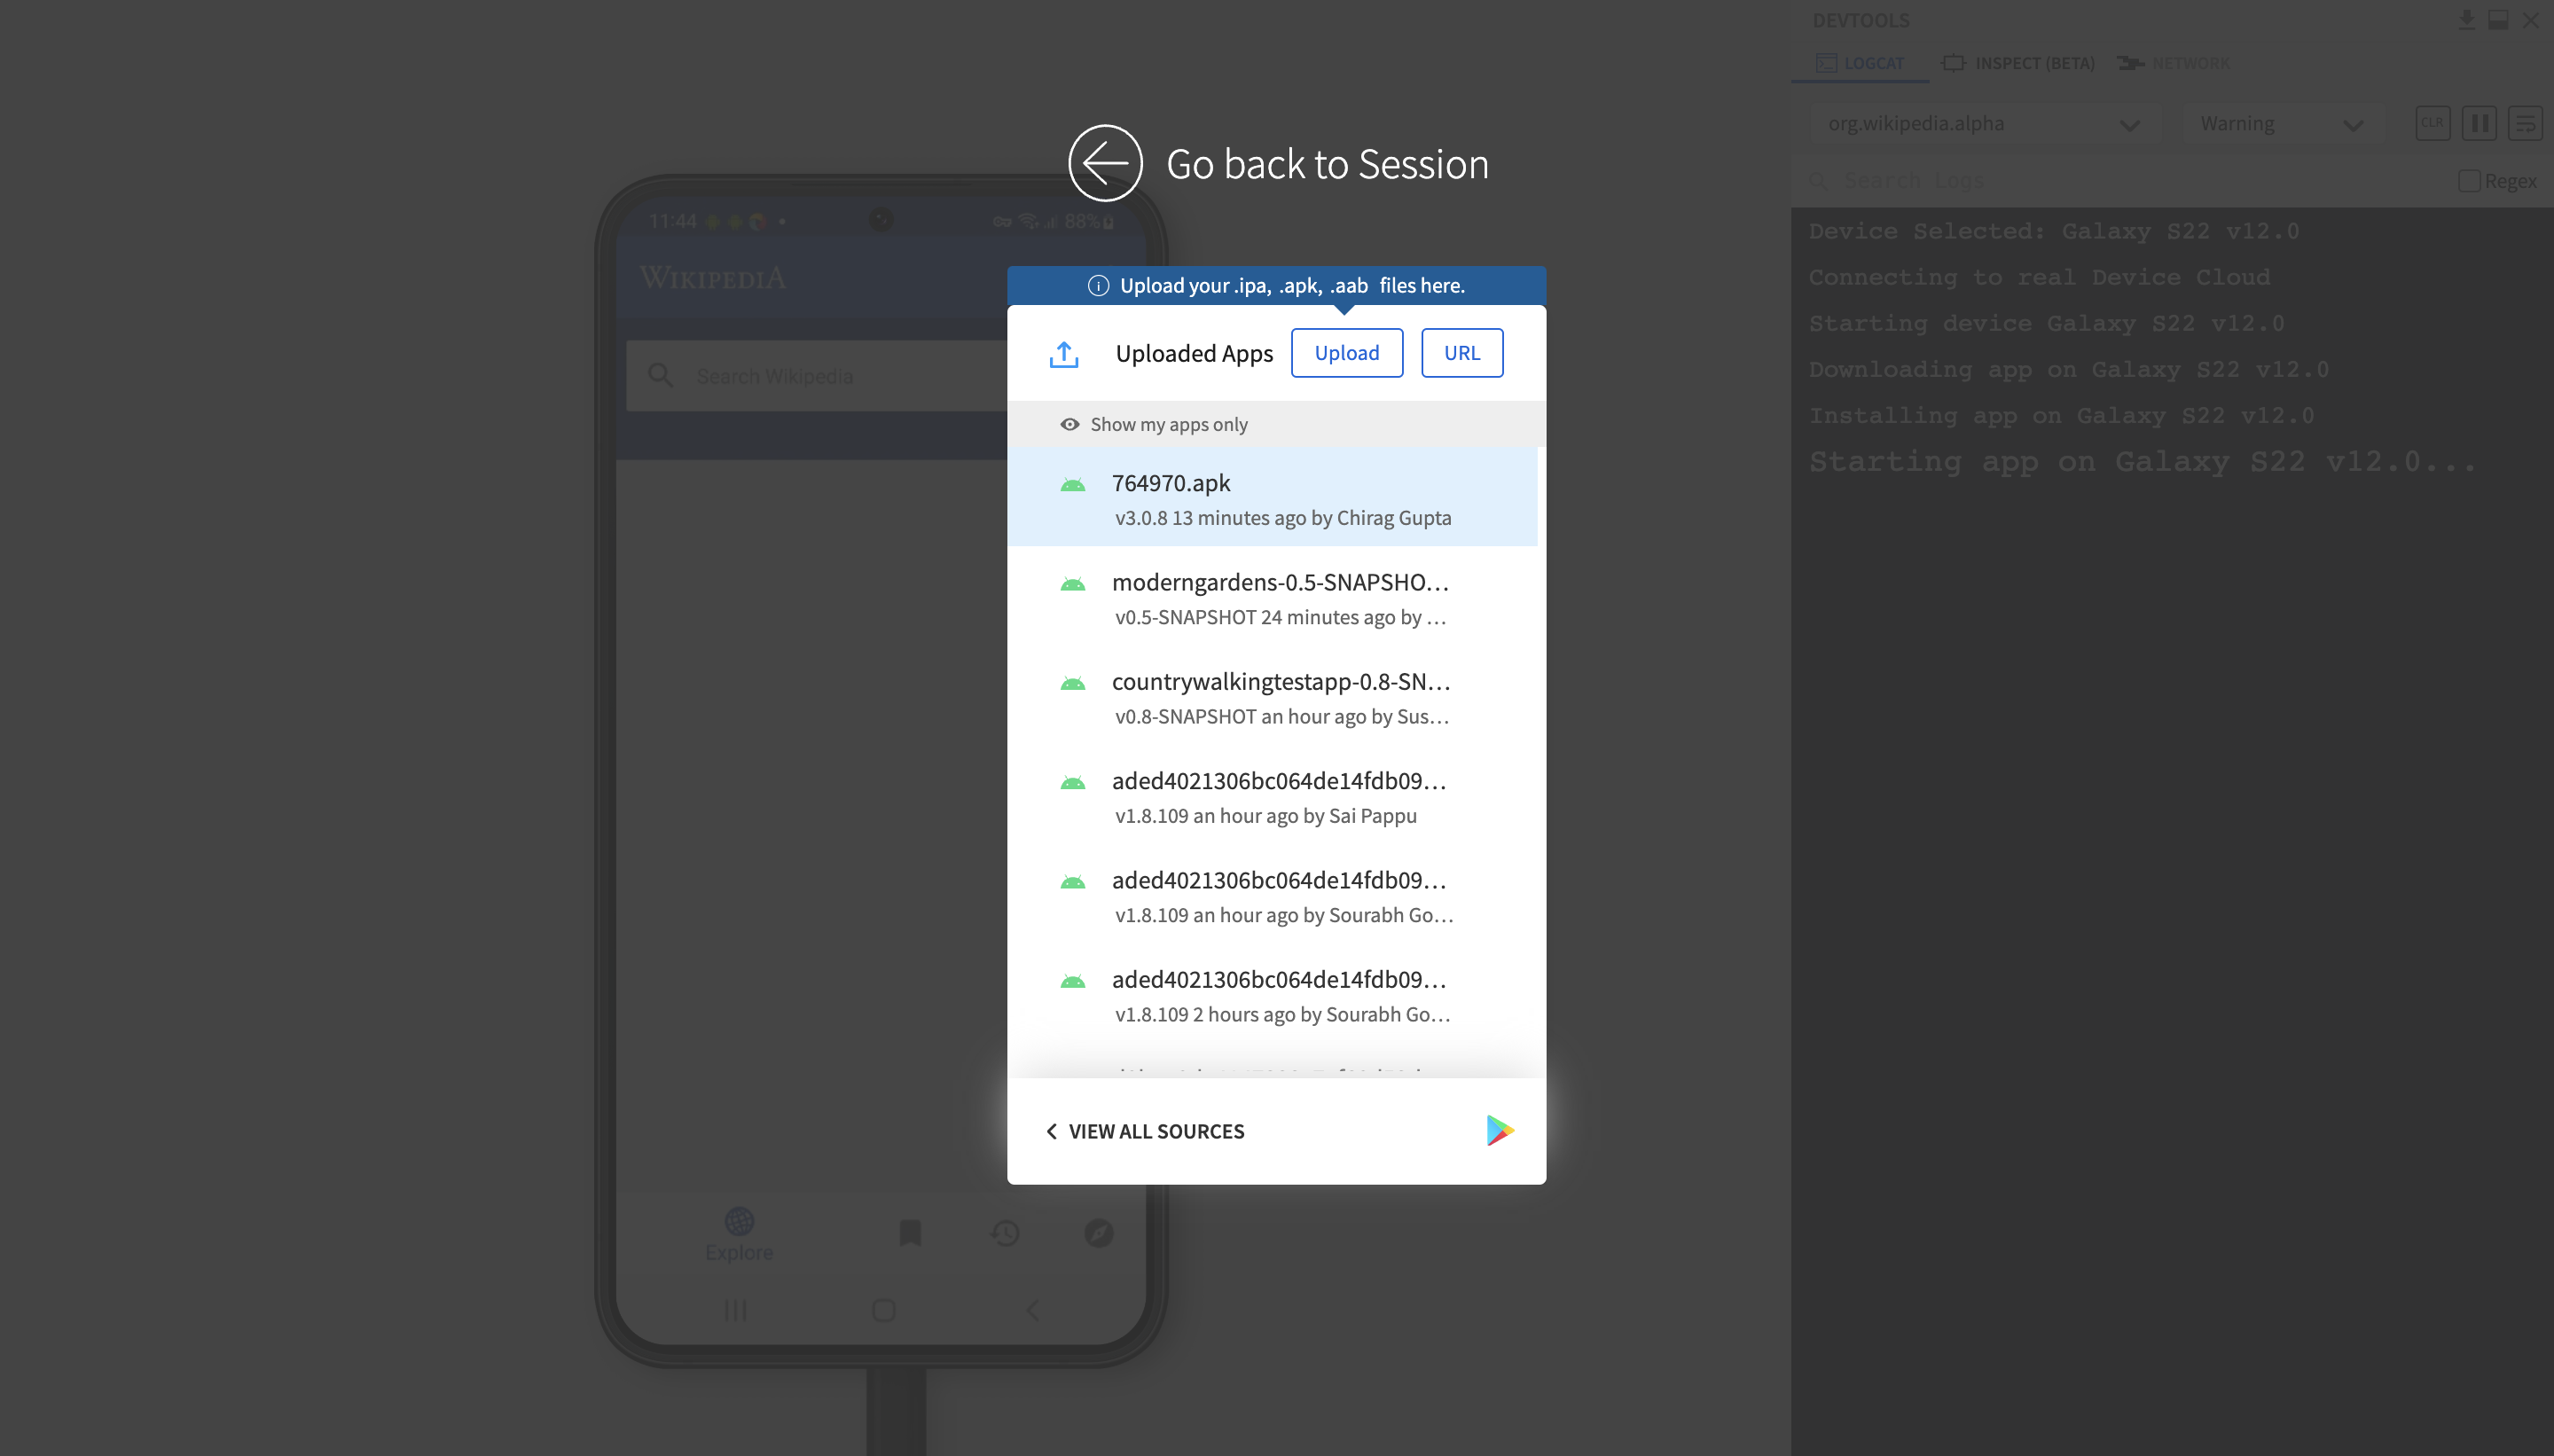
Step 3 – Once you download your app into the test environment you can start running your compatibility, functionality, and usability tests in your device environment. BrowserStack also lists the app versions that have been used – making it easier for you to copy, or re-run some tests.
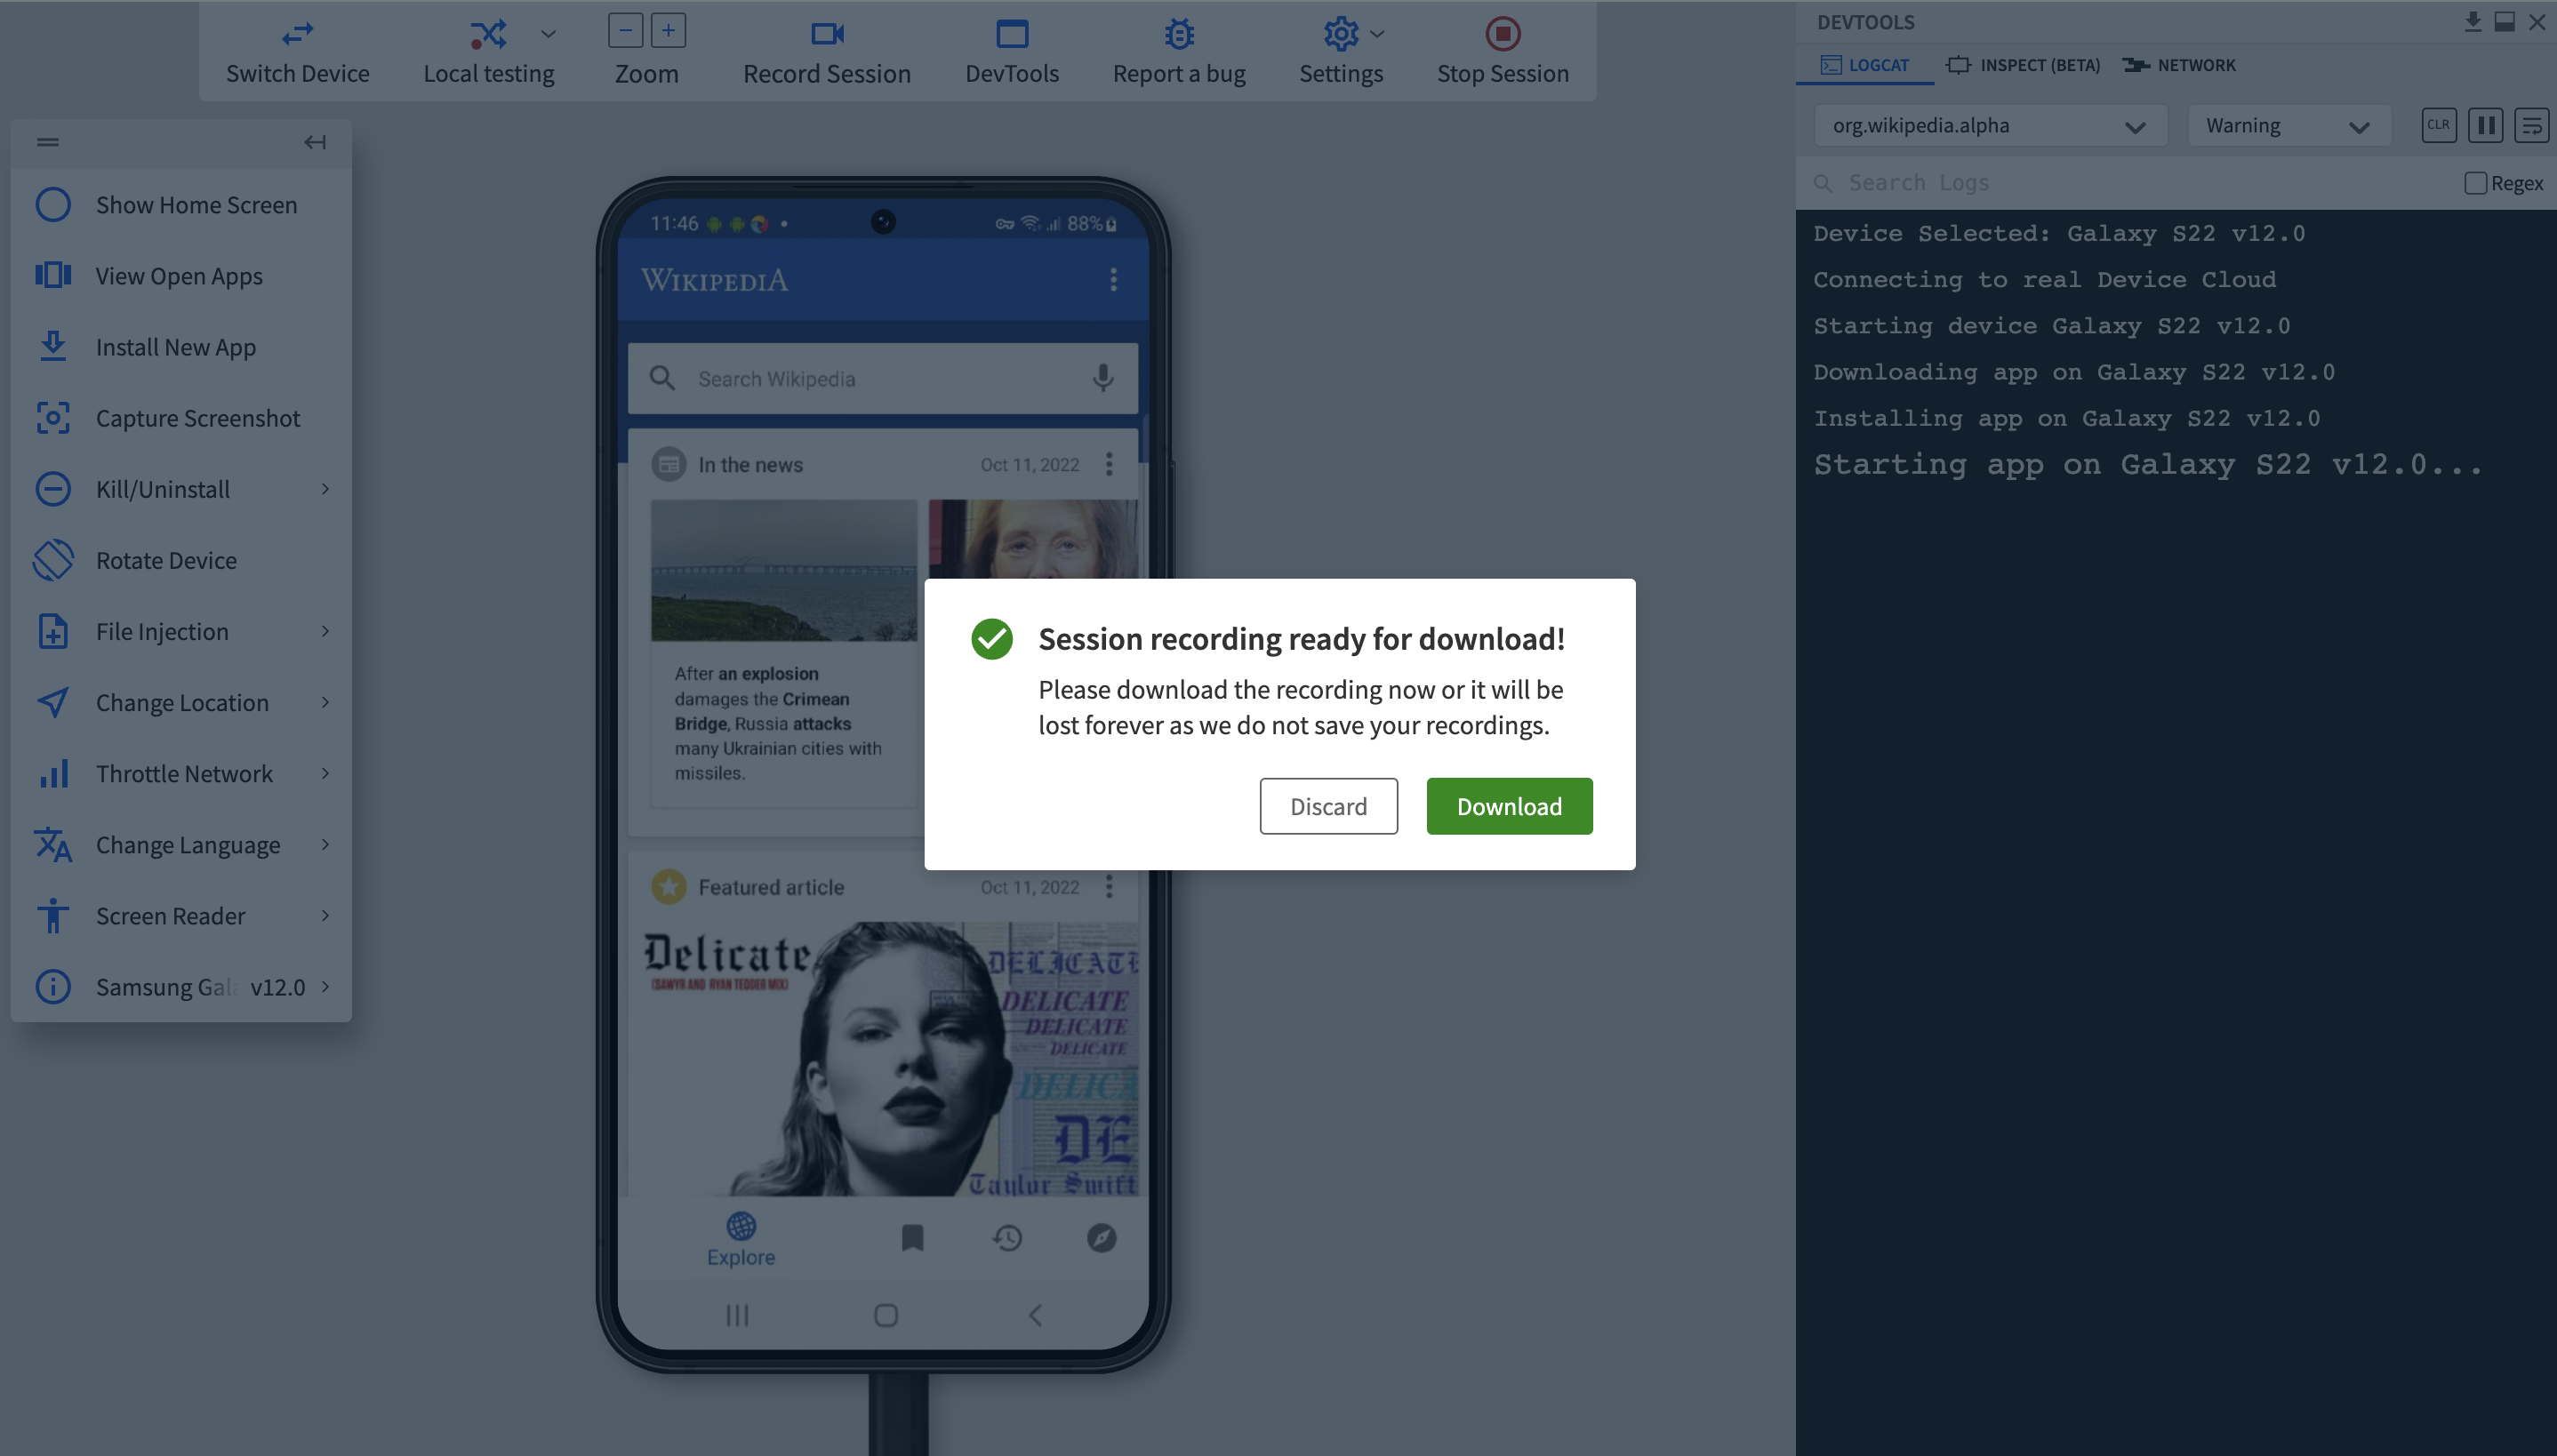
Step 4 – This is the test environment that mimics your phone screen under testing. You can choose to record the session for your reference and go through the process again.
Step 5 – Run multiple tests by switching devices, thus saving your time. QA can even kill/uninstall your app if it’s not working, depicting a real-life scenario of unresponsiveness.
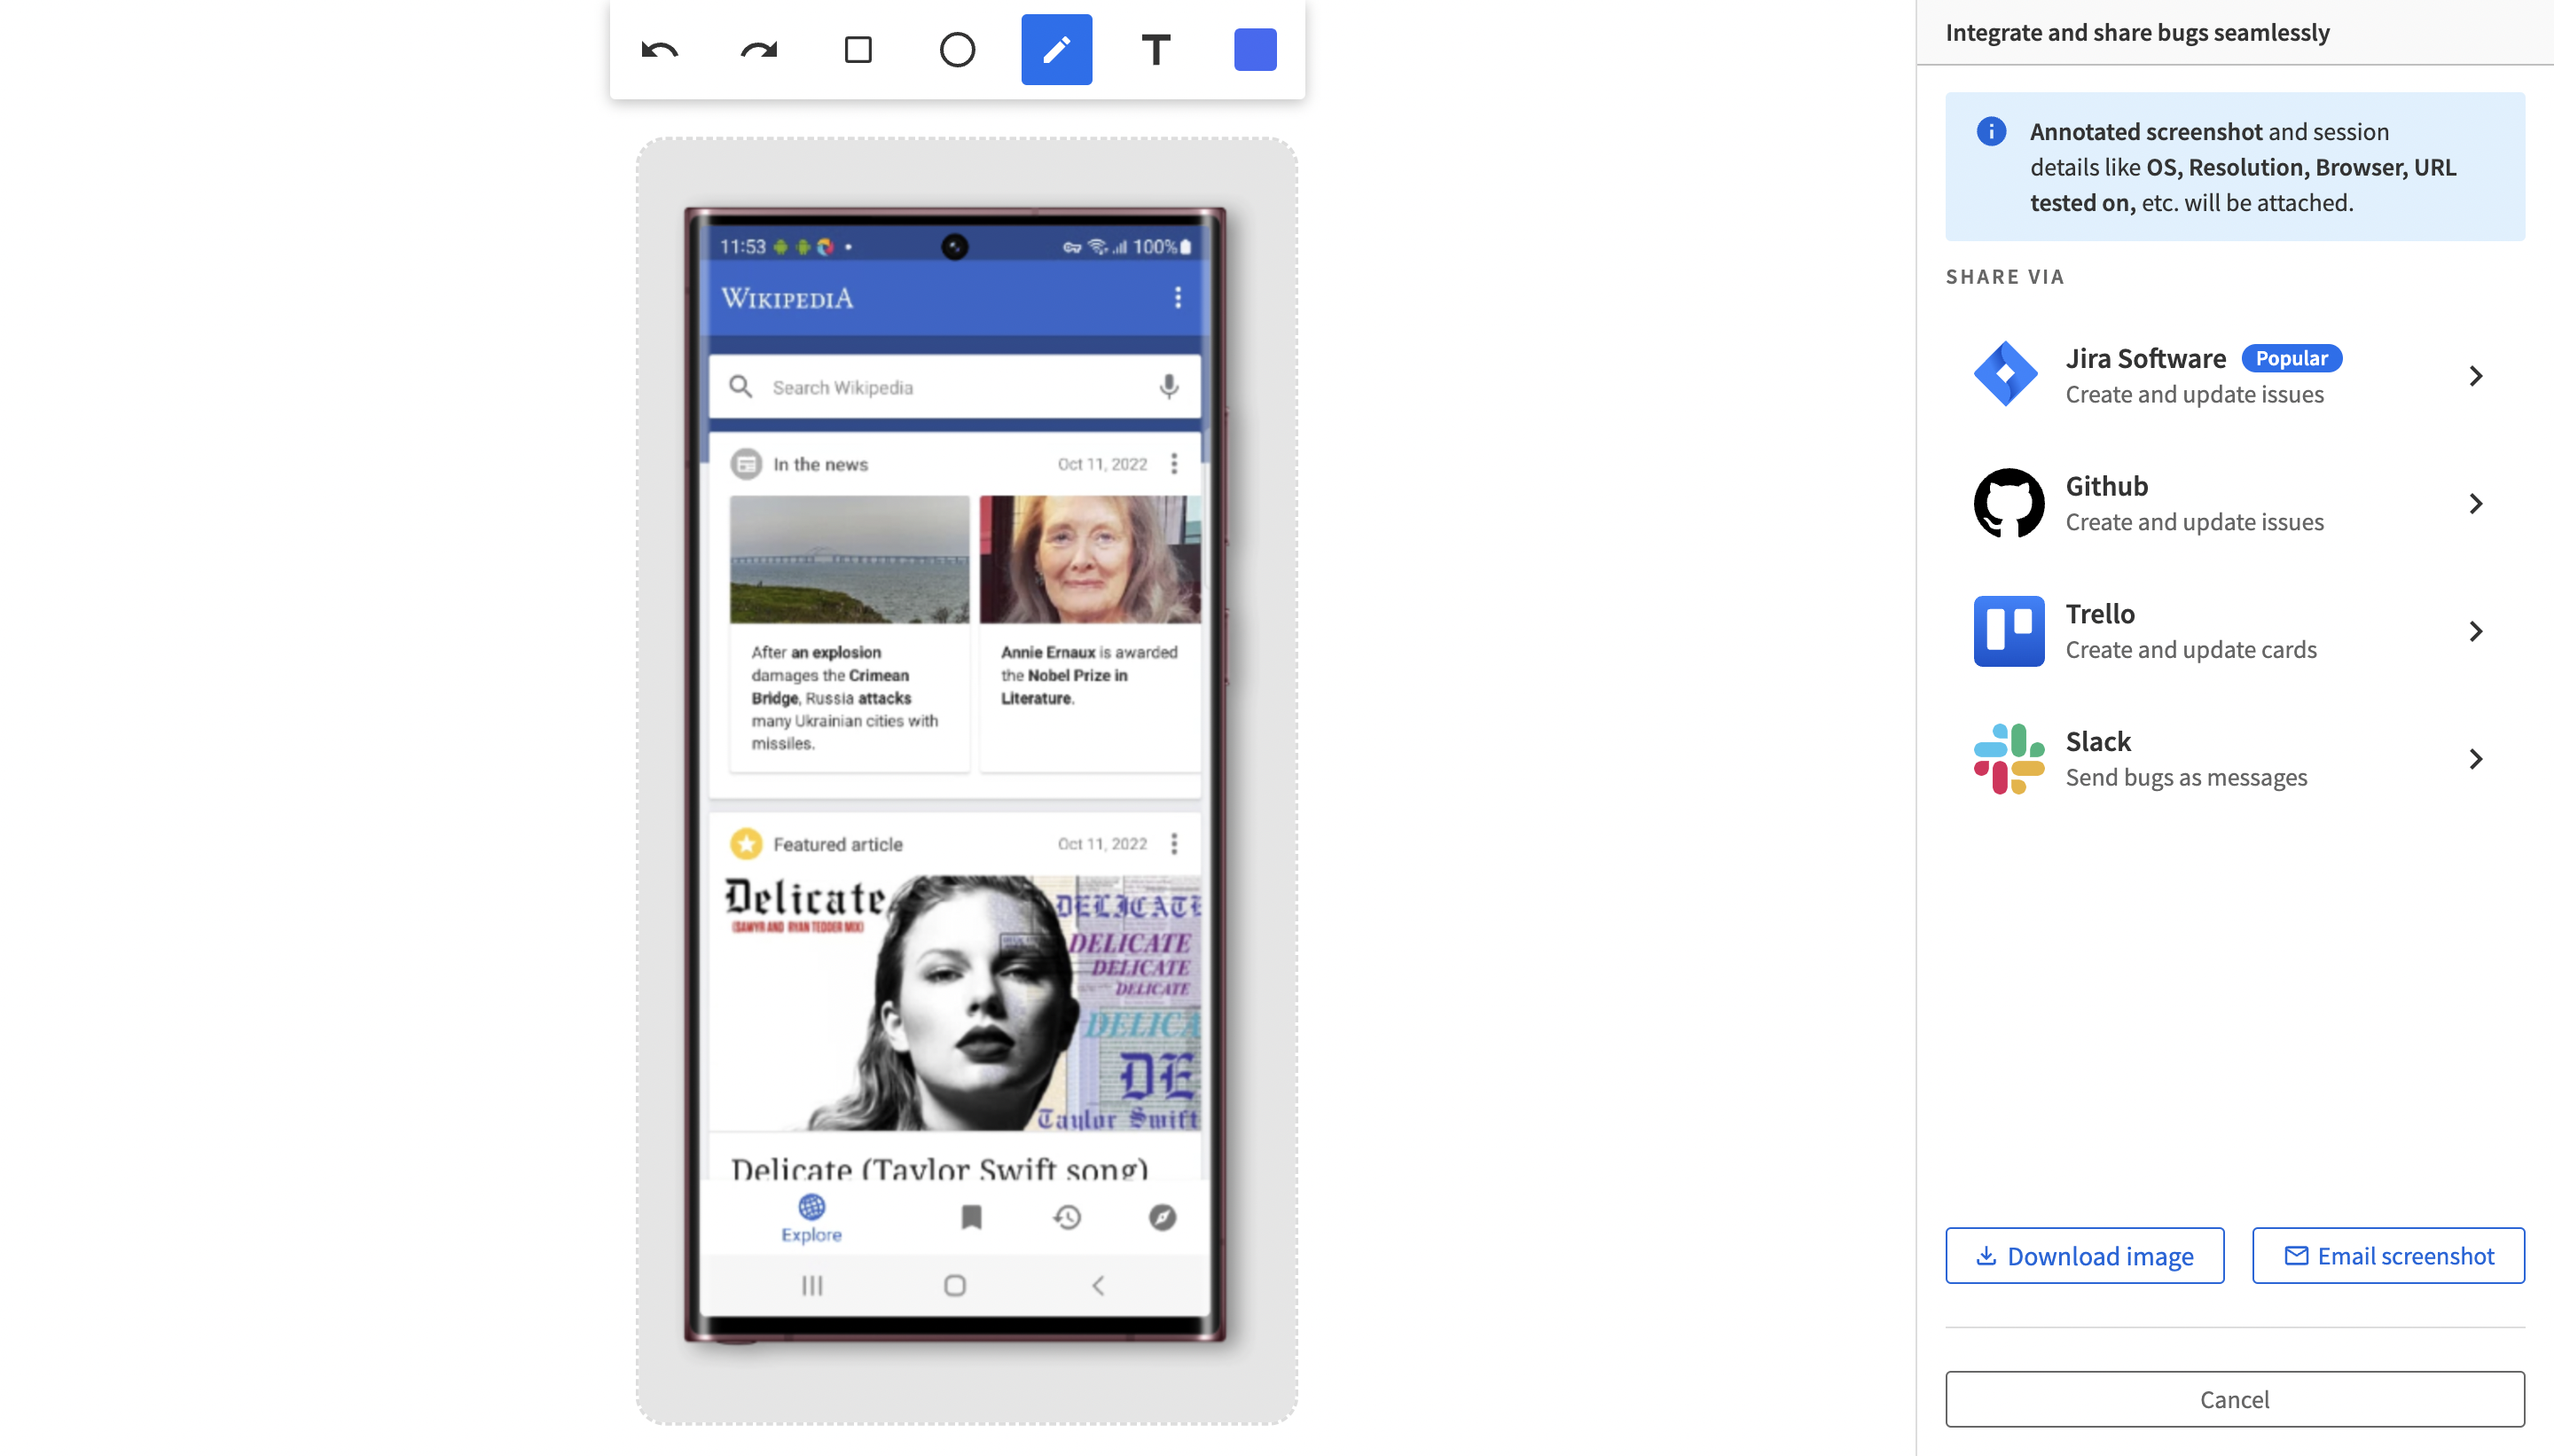
Step 6 – When you find a bug during the test – you can flag it by integrating with Jira, Trello, Slack, or Github
Wrapping Up,
Using BrowserStack for Android app testing facilitates a unified view of your test results. With instant bug reporting mechanisms, finding and locating a bug is easier – accelerating the feedback cycle and correcting defects.
By running parallel tests for native and hybrid applications, you can see what’s going wrong – and proactively battle the scenario. BrowserStack infrastructure makes your life easier by making your hunt for the right Android app testing tool easier.
