Bug reporting in Jira often becomes cluttered because of inconsistent practices and too many optional fields. Teams struggle with unclear formats, which affects how quickly bugs get understood and resolved.
Overview
What is a Bug Report?
A bug report is a structured issue created in Jira to document a software defect. It includes a summary, description, priority, environment, and attachments to help the development team identify, reproduce, and fix the problem.
How to Create a Bug Report in Jira?
To create a bug report in Jira:
- Open your project and click Create
- Set the issue type to Bug
- Fill in key fields like:
- Summary: A short, clear title describing the bug
- Description: Steps to reproduce, expected vs actual results, logs, and test data
- Environment: Device, OS, browser, or any relevant system detail
- Assignee: Assign to the responsible team member if known
- Priority & Severity: Indicate impact and urgency
- Attachments: Add screenshots, logs, or files if available
- Sprint & Labels: Add to the right sprint or tag for tracking
- Click Create to submit the bug
In this article, you’ll learn how to structure an effective Jira bug report, avoid common mistakes, and generate valuable reports for visibility and tracking.
What is a Bug Report?
A bug report is a formal record of a software issue that causes a system to behave unexpectedly or incorrectly. It includes details like how the bug occurred, what was expected, and the technical or business impact. Developers, QA teams, and product managers use bug reports to diagnose and fix problems.
What are Bug Reports in Jira?
Bug reports in Jira are created using the “Bug” issue type, allowing teams to track, assign, and resolve defects across a software development lifecycle. Jira bug reports support custom fields, workflows, and dashboards for complete visibility. Each report typically includes key fields like summary, priority, sprint, environment, and status.
Why Reporting Bugs Effectively Matters?
Bug tracking and reporting help developers fix issues faster and reduce confusion. On the other hand, incomplete or vague reports lead to delays, repeated follow-ups, and missed defects. Here are a few reasons that highlight the importance of effective bug reporting.
- Faster Debugging: Well-written steps, logs, and screenshots reduce time spent reproducing issues.
- Smoother QA Cycles: QA can quickly retest and close fixed bugs when reports are complete and traceable.
- Prevents Duplicate Work: Clear reports reduce the chances of logging the same bug multiple times or investigating already-known issues.
- Supports Root Cause Analysis: Detailed environment info and reproduction steps help identify patterns and underlying causes.
- Enables Efficient Triage: When bugs are reported with enough detail, teams can assign and resolve them correctly within the right sprint or release.
Read More: How to set up a Bug Triage Process?
- Better Prioritization: Accurate severity and impact details help teams focus on critical bugs first.
- Improves Developer-Tester Communication: Well-documented bugs reduce back-and-forth and help teams stay aligned on what needs fixing.
Components of a Good Jira Bug Report
A Jira bug report includes specific fields that help teams understand, prioritize, and resolve issues efficiently. Below is a breakdown of the key components in a typical Jira bug report.
- Summary: Provides a short and clear one-line title that describes what is broken and where, making it easy to identify the issue at a glance.
- Description: Explains the bug in full detail, covering what the user tried to do, what happened instead, what should have happened, and any supporting technical information such as logs, stack traces, or error codes.
- Environment: Describes where the bug occurred, including browser version, operating system, device model, app version, or backend environment like staging or production.
- Priority: Indicates how urgently the issue should be addressed, using predefined levels such as High, Medium, or Low based on business or user impact.
Read More: Bug Severity vs Priority in Testing
- Issue Key: Identifies the bug with a unique key automatically assigned by Jira, such as PROJ-101 or BUG-45. It also helps with search, tracking, and linking across the system.
- Attachments: Includes visual or technical evidence such as screenshots, screen recordings, or logs that help others understand or confirm the issue quickly.
- Assignee: Shows the team member currently responsible for resolving the issue, and may be assigned manually or through automatic project rules.
- Reporter: Identifies the person who created the bug report and serves as the initial point of contact for clarification or follow-up questions.
- Sprint: In projects that use Scrum, the bug is associated with a specific sprint, allowing teams to track progress and prioritize fixes within the current development cycle.
- Labels: Adds searchable tags to help categorize the issue, such as platform names, feature areas, or bug types, which improve filtering and reporting.
- Components: Groups the bug under a specific area of the project, like UI, API, or Auth, making it easier to assign issues to the right teams or feature owners.
- Linked Issues: Connects the bug to related tasks, user stories, or other bugs using link types like “blocks,” “duplicates,” or “relates to,” helping maintain clear traceability.
Also Read: How to write an Effective Bug Report
Step-by-Step Guide to Create an Effective Jira Bug Report
Follow the steps below to correctly fill each field in Jira so the bug is easy to understand, reproduce, and resolve without unnecessary follow-ups.
Step 1: Click “Create” to open a new issue form
Log in to Jira and click the “Create” button at the top. This opens the issue creation window where you can begin entering the bug details.
Step 2: Select the correct project and issue type
Choose the project where the bug belongs. Then set the Issue Type to Bug so it’s tracked correctly and doesn’t get mixed up with tasks or stories.
Step 3: Write a clear Summary
Write a one-line title that clearly describes what’s broken and where. For example, “Submit button unresponsive on Contact Us form.”
Step 4: Write a detailed Description
Explain
- What were you trying to do
- What went wrong (actual behavior)
- What should have happened (expected behavior)
- Any errors, logs, or messages you saw
If your team uses a bug template, follow its format for consistency.
Step 5: Add the Steps to Reproduce
List the actions needed to trigger the bug, one step at a time. Start from the initial screen and include all inputs and clicks. This helps developers reproduce the issue reliably.
Step 6: Specify the Environment details
Describe the context where the bug occurred. Include browser name and version, operating system, device type, app version, or any relevant backend details like staging vs. production.
Step 7: Set the Priority
Choose the appropriate priority based on how urgent the bug fix is. Use the values defined by your team, such as High, Medium, or Low.
Step 8: Add Attachments
Click the attachment icon to upload screenshots, screen recordings, or log files. These help others quickly see the problem and confirm the issue.
Step 9: Assign the bug or leave it unassigned
If you know who should fix the bug, assign it directly. Otherwise, leave it unassigned, and your triage team or lead will assign it later.
Step 10: Review the Reporter and the Sprint
Confirm that your name is listed as the Reporter. Select the bug under the Sprint field if it should be addressed in a specific sprint.
Step 11: Add Labels and Components
Use relevant Labels like “UI,” “mobile,” or “login” to help categorize the bug. Select the Component if your team has organized the project into sections like “Frontend” or “API.”
Step 12: Link related issues
If this bug is connected to other tickets (for example, it blocks a feature or duplicates another bug), use Linked Issues to connect them. This keeps the context clear for everyone.
Step 13: Click “Create” to submit the Jira Bug Report
Once all fields are filled, click the “Create” button. Jira will generate the issue key and take you to the bug page where others can view, assign, or comment.
Make Bug Reporting Easier with Requestly
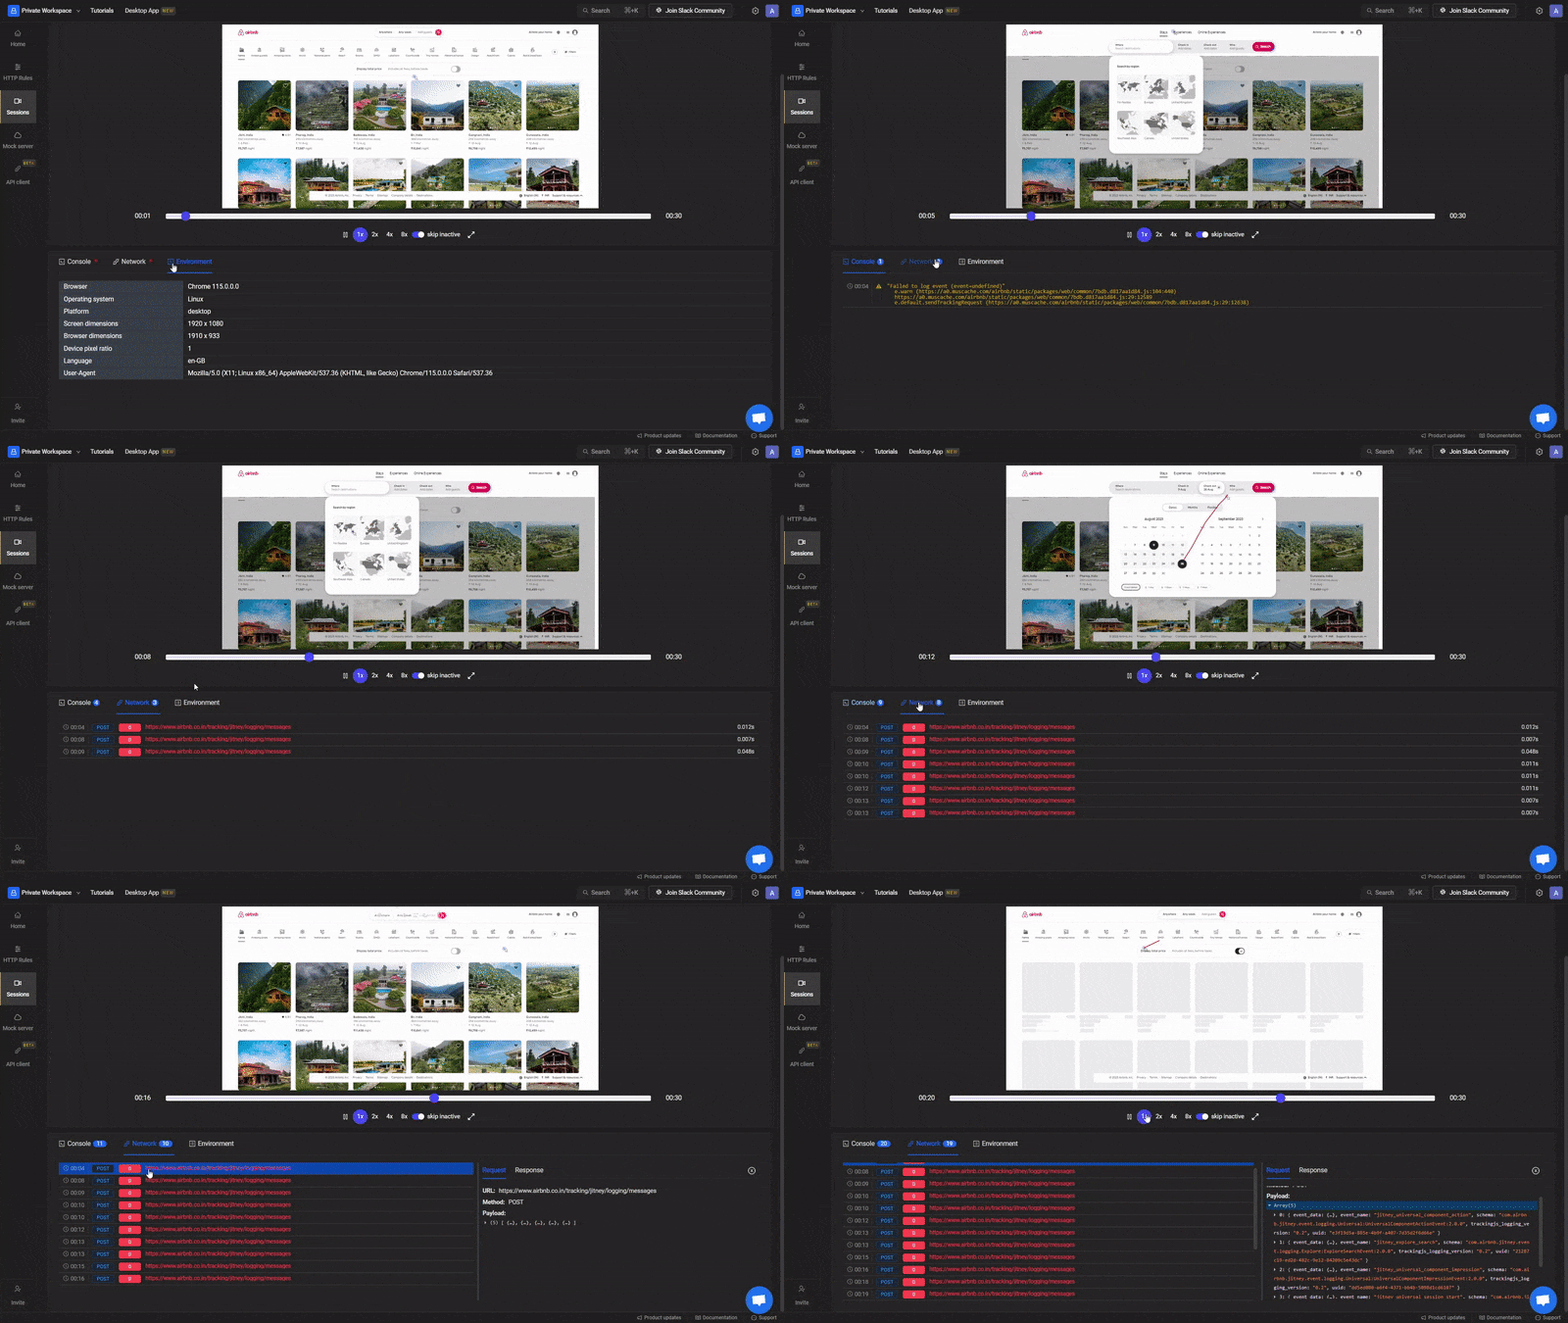
Writing a clear Jira bug report takes effort, especially when you need logs, screenshots, or exact steps to reproduce the issue. Requestly simplifies this process with Session Replays, a feature that automatically captures everything a user did on the page, along with network logs, console logs, and system details.
Instead of manually writing steps or collecting screenshots, you can just attach a session replay link to the Jira Description or as an attachment. Developers can instantly see what went wrong, where it happened, and how to reproduce it without back-and-forth.
In simple words, Requestly Session Replays allow you to:
- Capture every click, input, and screen change that led to the bug
- Automatically log API activity, errors, and console output without extra setup
- Share a single link that shows exactly what happened, when, and why
Conclusion
A well-written Jira bug report saves time, reduces confusion, and helps teams fix issues faster. Write clear summaries, detailed steps, environment details, and visual evidence to give developers everything they need to take action without delays.
Requestly makes this process easier. It automatically captures session replays, logs, and system details, so you don’t have to gather everything manually. You can just attach the replay link to your Jira ticket to give developers a complete view of the issue without any extra effort.


