Local Testing Using Self-Signed Certificates
Guide to using Self-Signed Certificates in Live for testing website features only available in secure contexts
A number of features and APIs accessible by modern websites are restricted to secure contexts i.e. only to sites accessible through HTTPS. Some of these APIs include getUserMedia, Service Workers, Storage API & Web Authentication API (Check this page for a more comprehensive list of these HTTPS-only APIs).
Testing local or dev environment websites for features using such APIs correctly therefore necessitates configuring an HTTPS environment for the website. Instead of issuing a certificate from a certificate authority for such non-customer facing testing environments, self-signed certificates are used.
Self-signed certificates are digital certificates for websites which are not signed by a publicly-trusted certificate authority (CA). Given the CA in such certificates are not recognized & trusted, while such certificates are not suitable for production environments they are perfect for local and testing environments on machines where roots for such certificates can be installed.
While remote machines/devices in Live sessions are not directly accessible for installing self-signed certificates for the website under test, enabling the Self-Signed Certificate feature enables a user to test out websites where such functionality is required.
Testing websites with self-signed certificates with Live
Accessing a local HTTPS website using self-signed certificates in Live would show a warning page by the browser indicating the website is not secure.
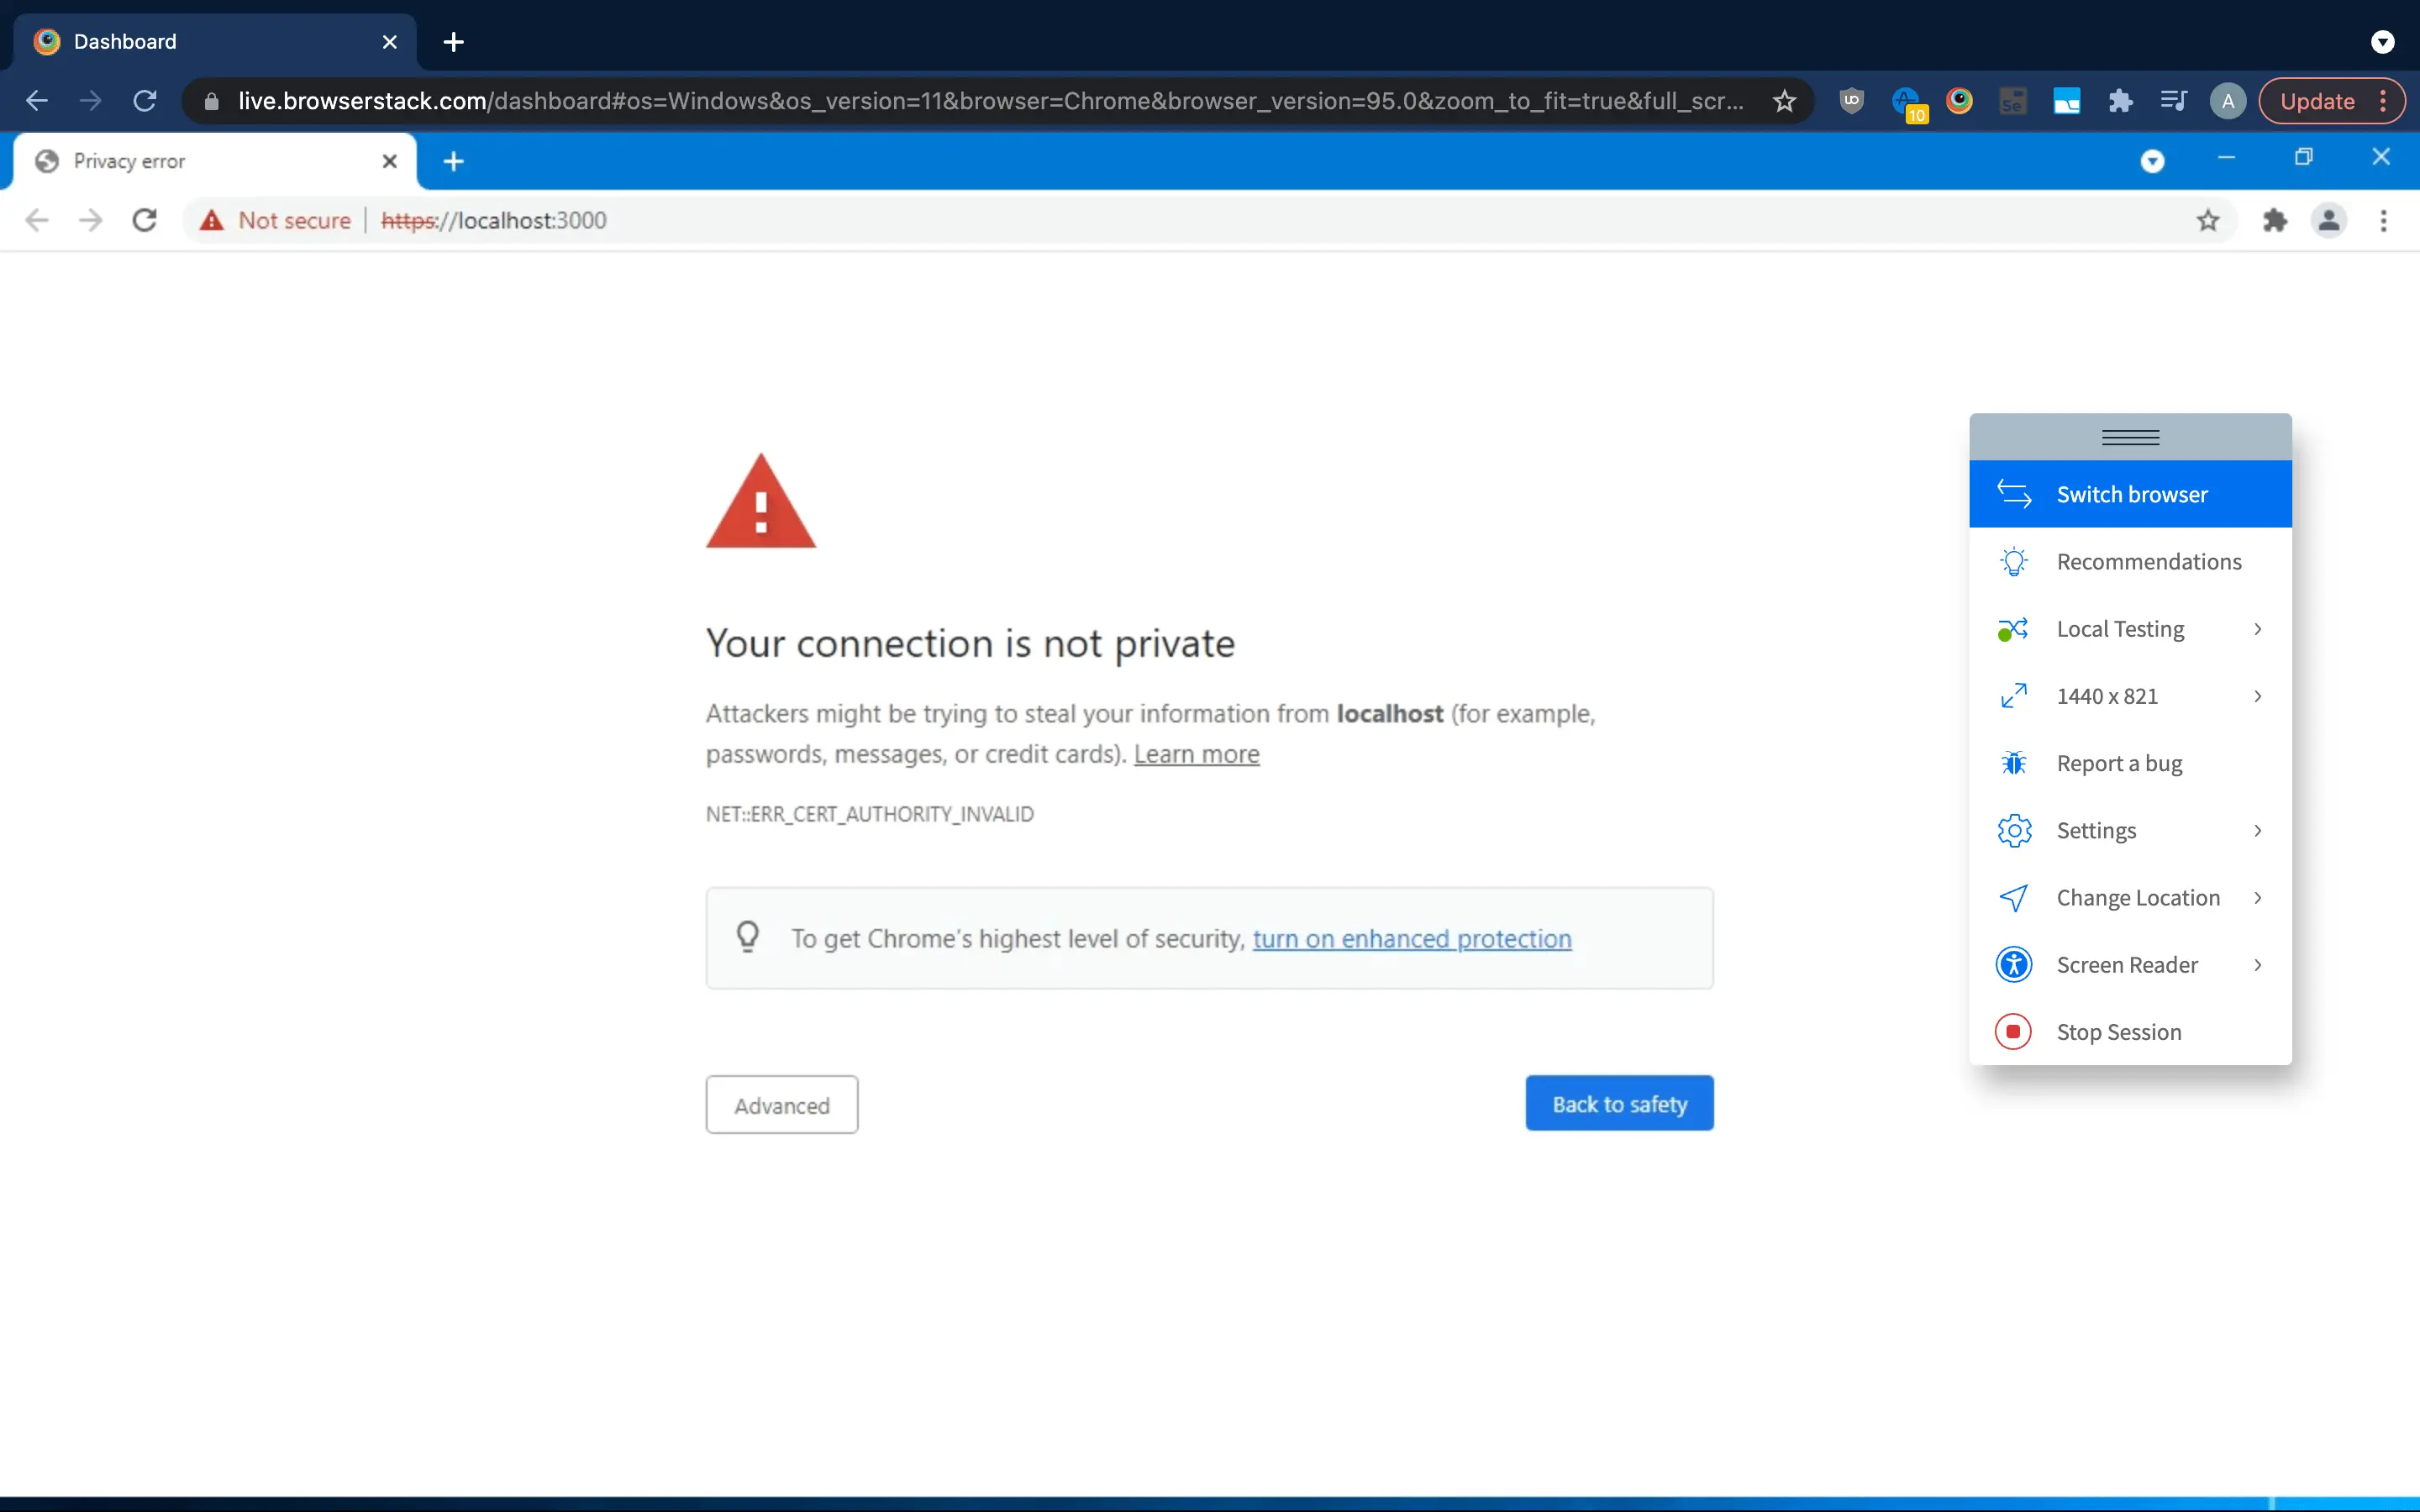
This is because the self-signed certificate used by the local website is not recognized or installed on the real device used in Live. Turning on the Self-Signed Certificate feature in Live causes a trusted dummy certificate to be installed on the remote device which enables the local website to be accessed in secure context (using HTTPS).
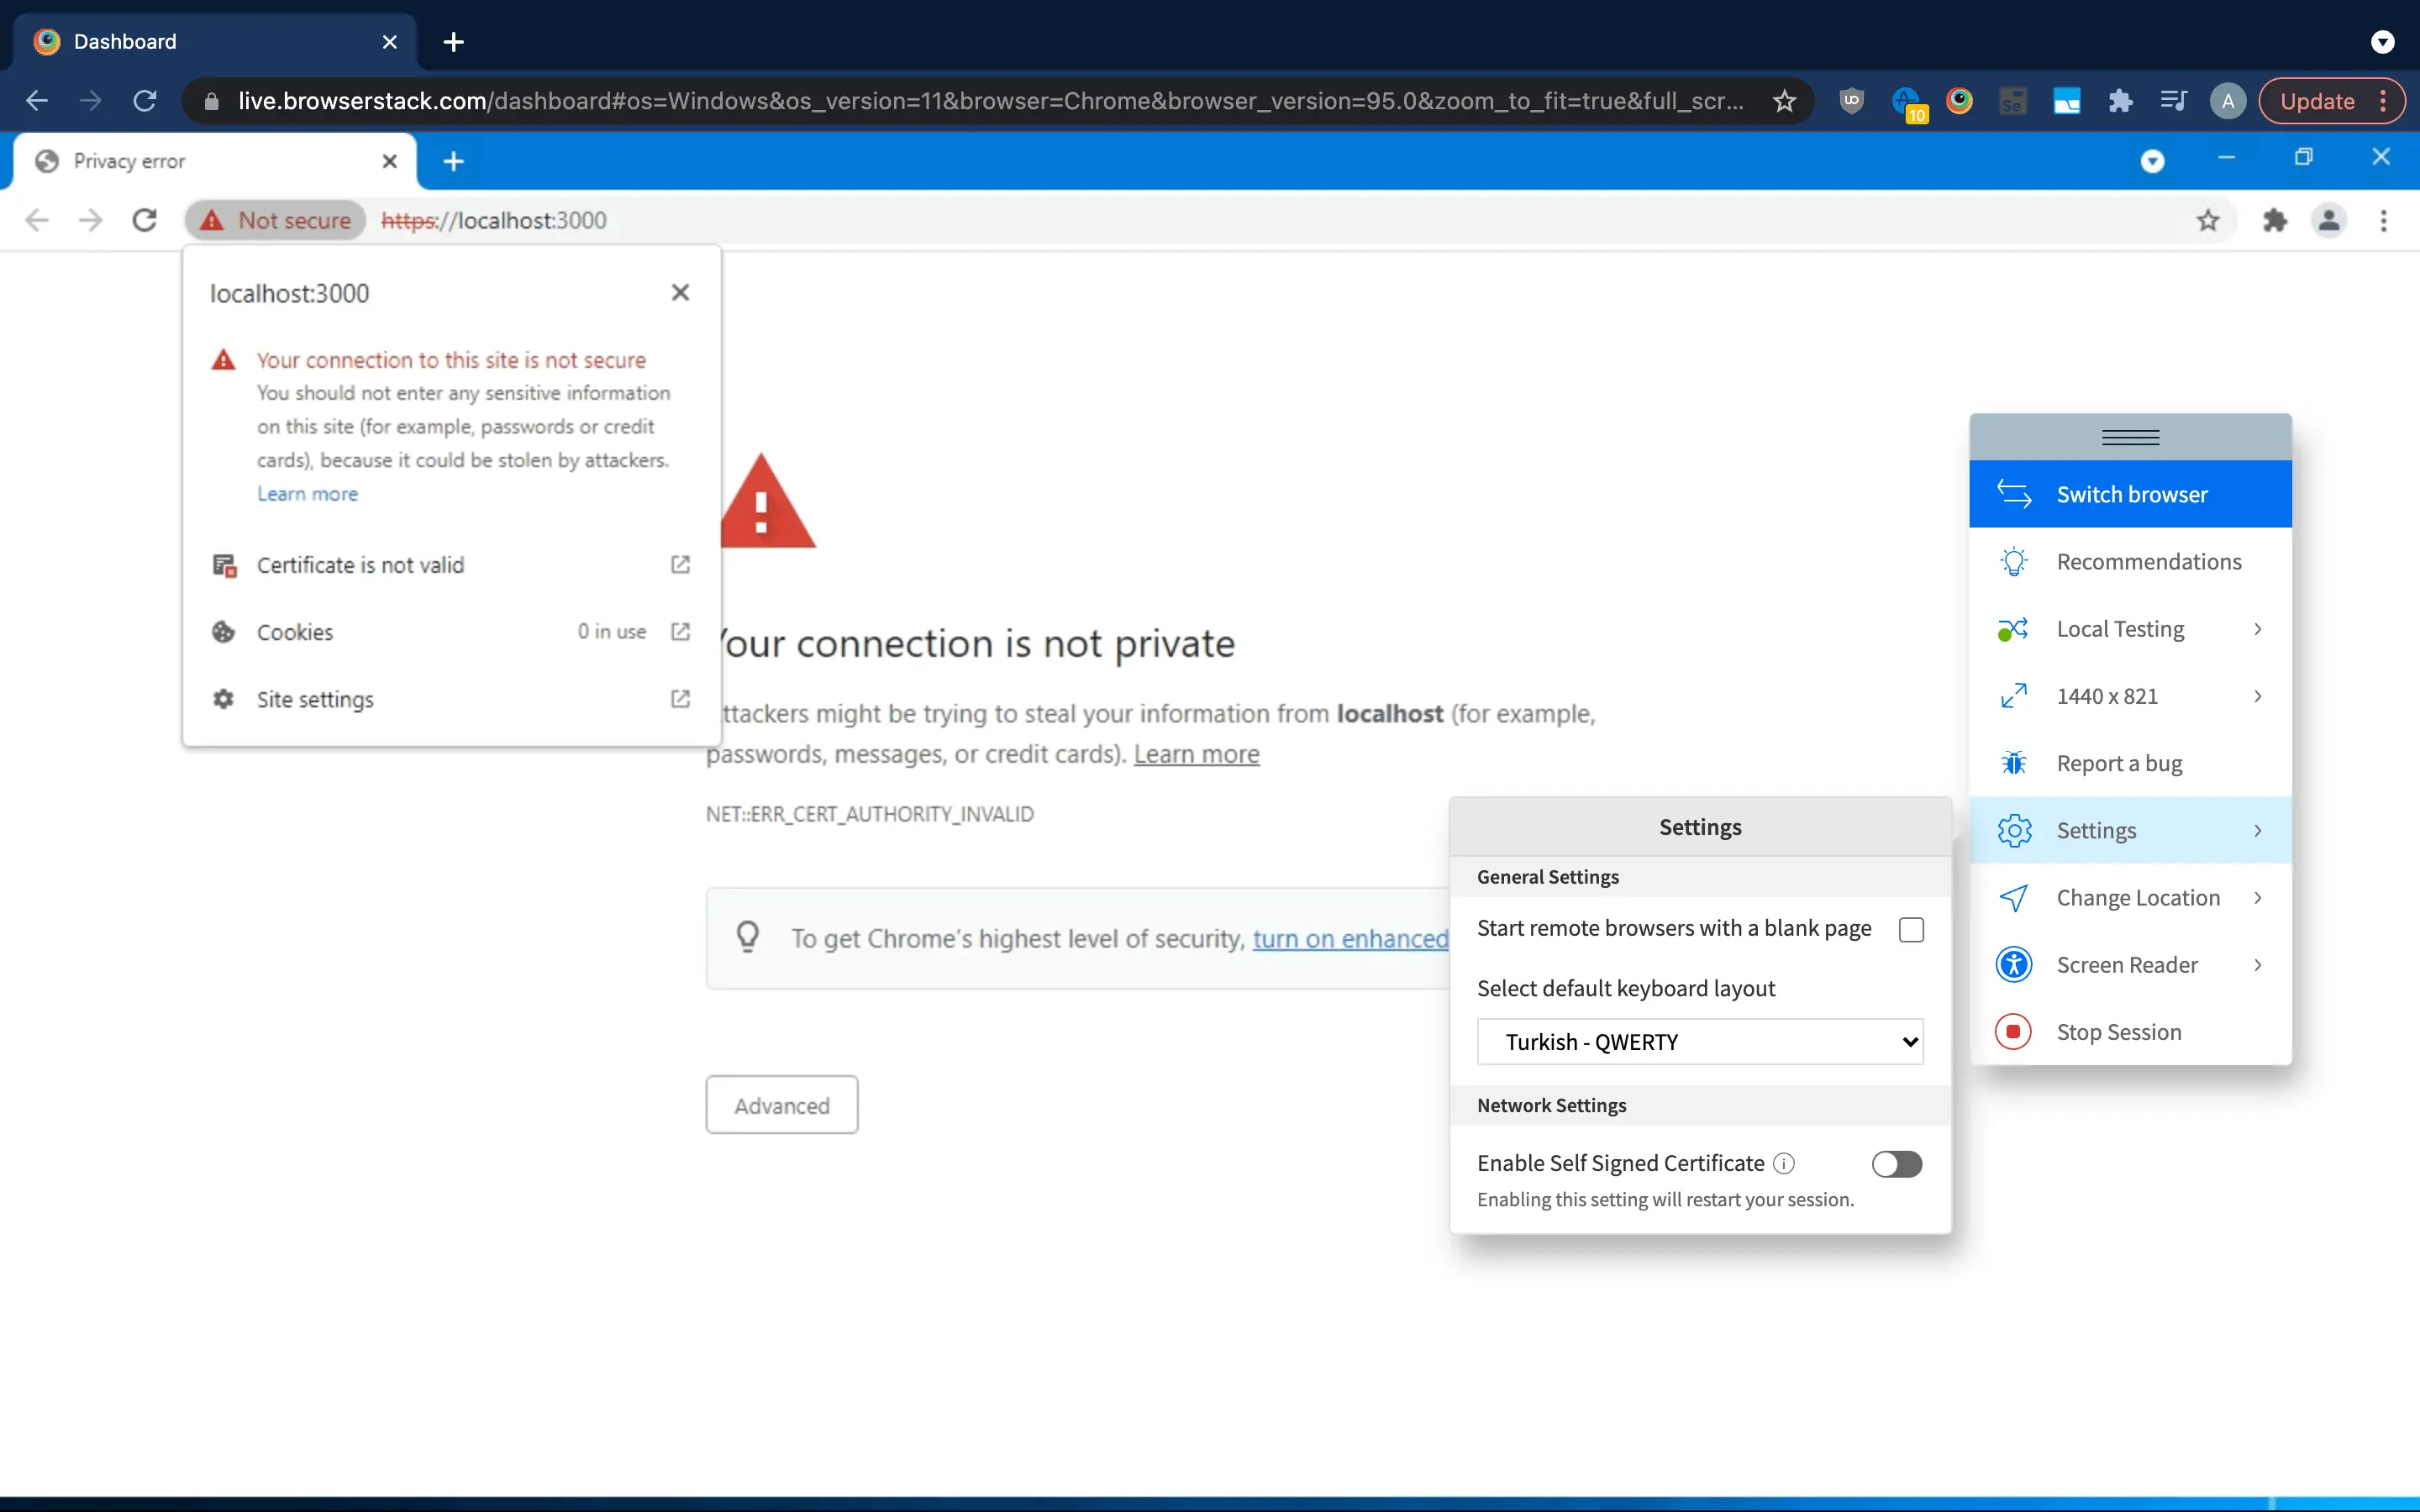
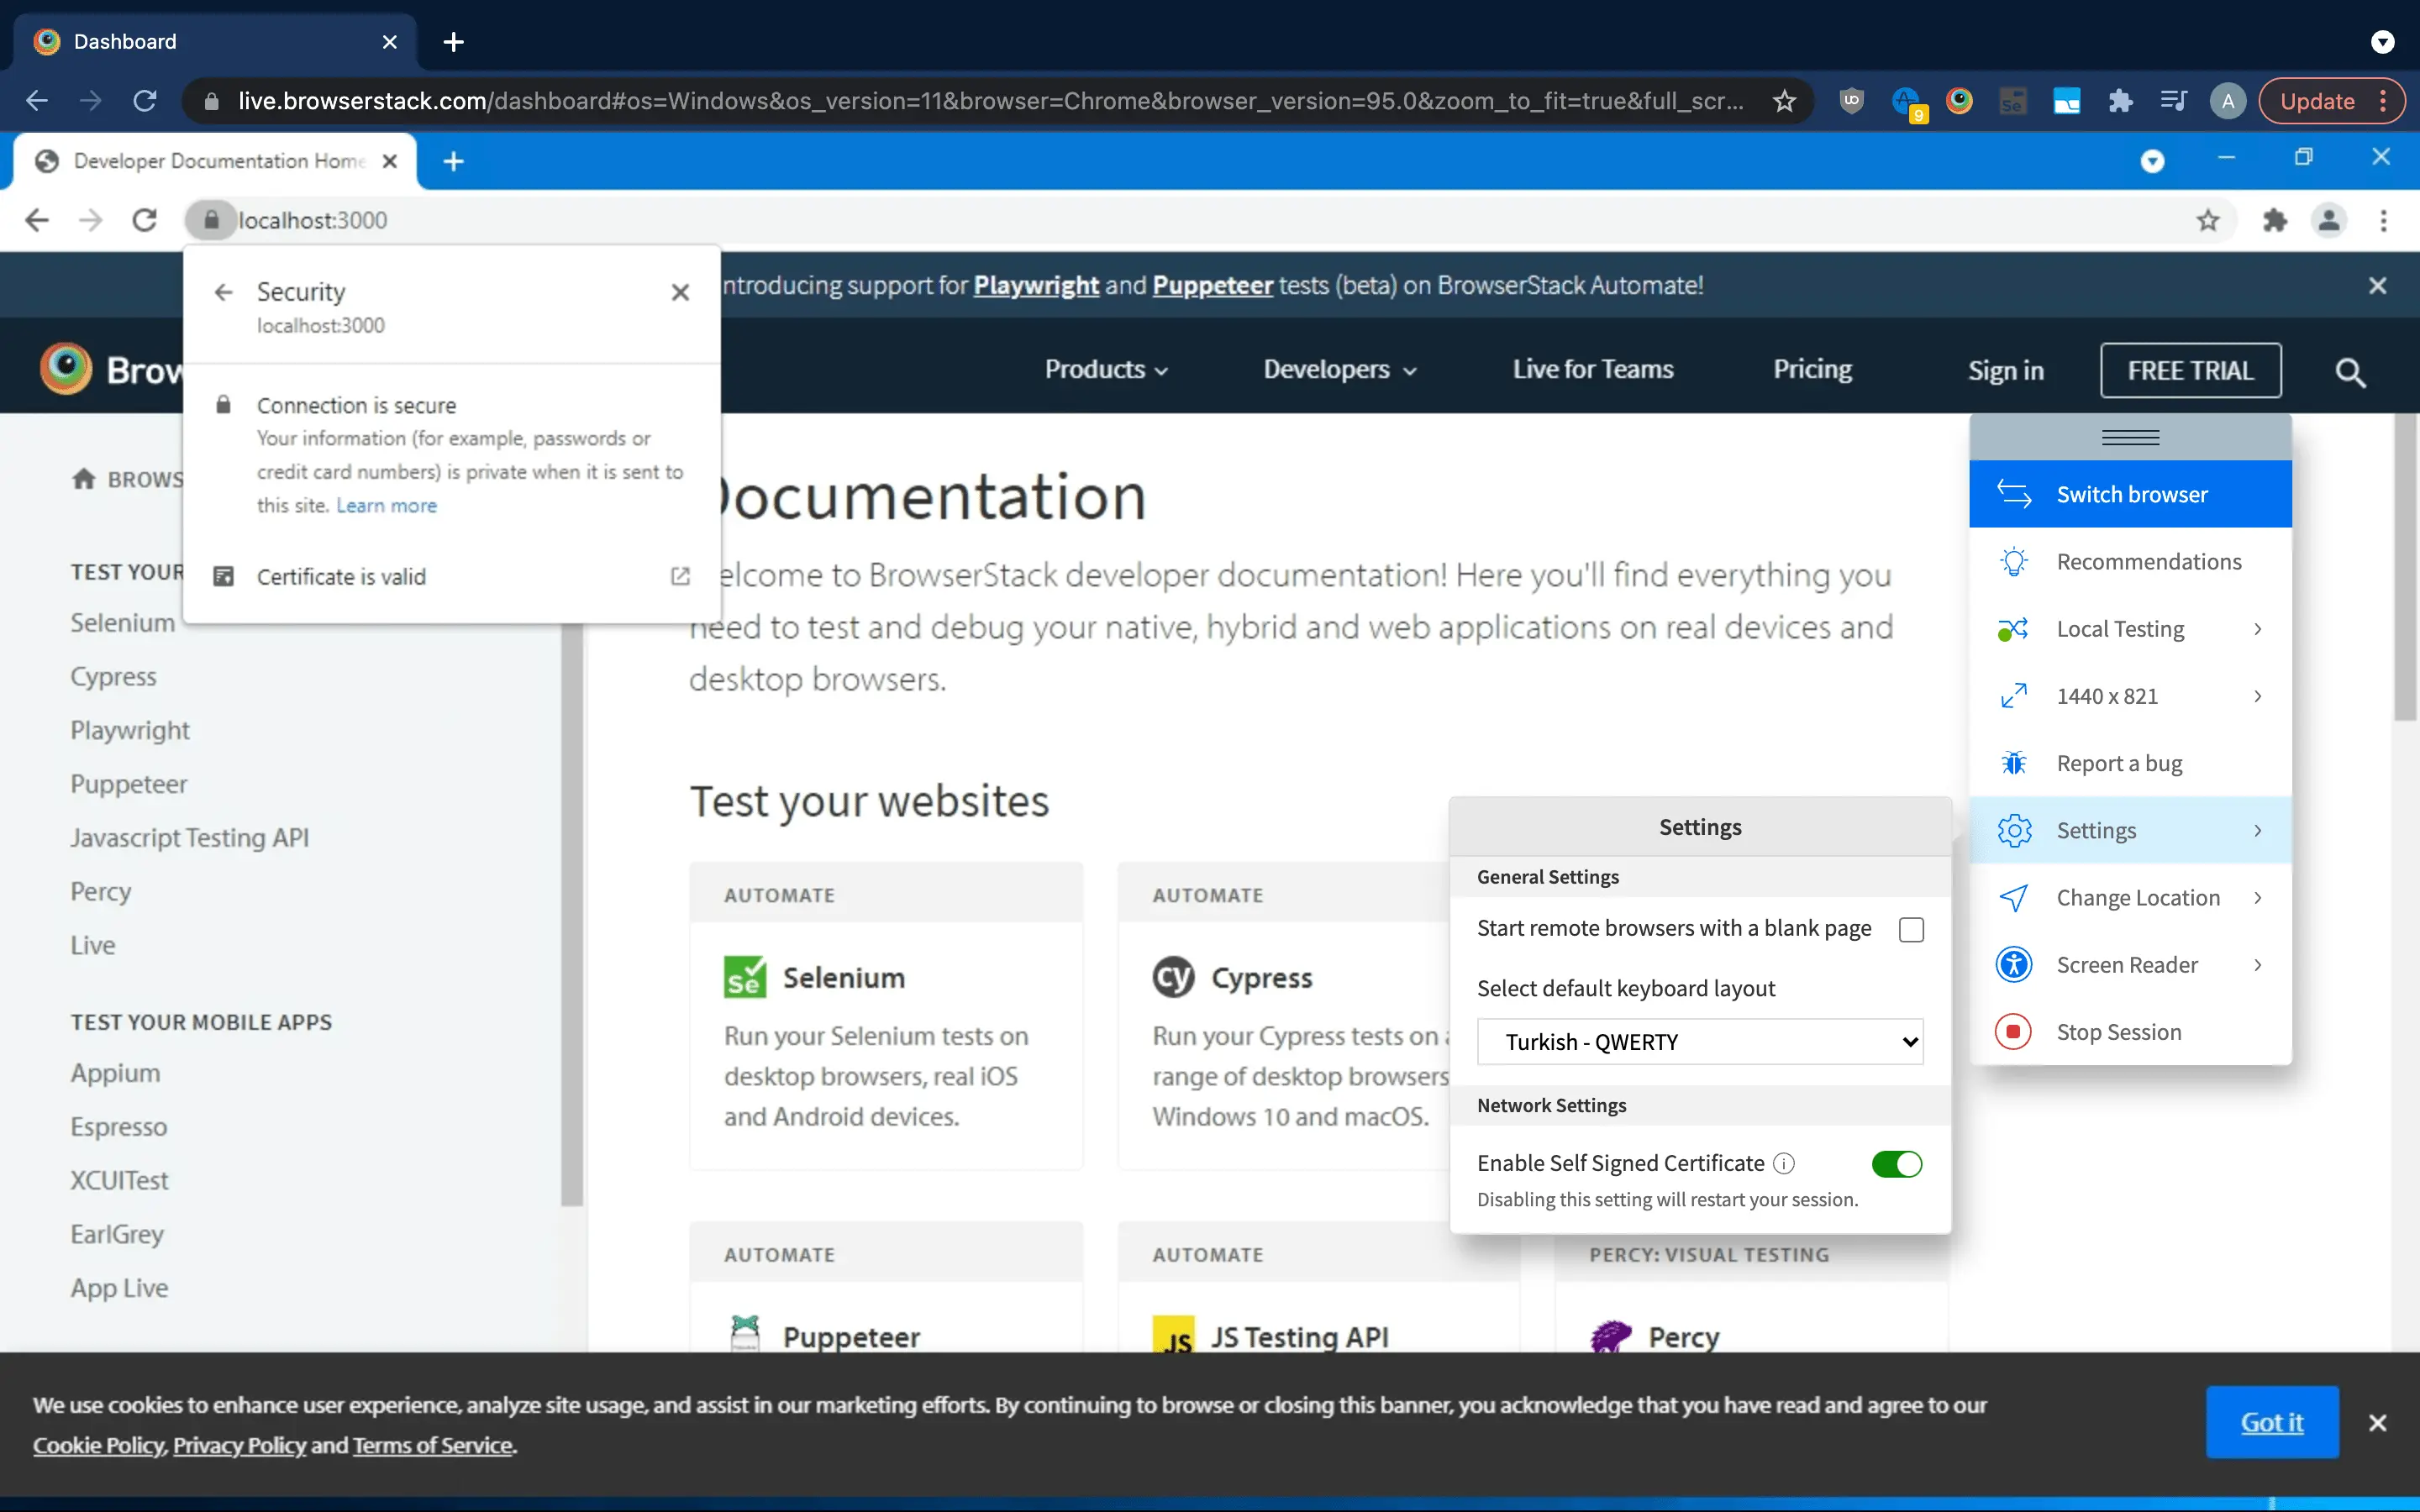
Steps to toggle the Self-Signed Certificate feature in a Live session:
Step 1: Option for enabling or disabling self-signed certificates can be toggled from the Settings menu in the in-session toolbar
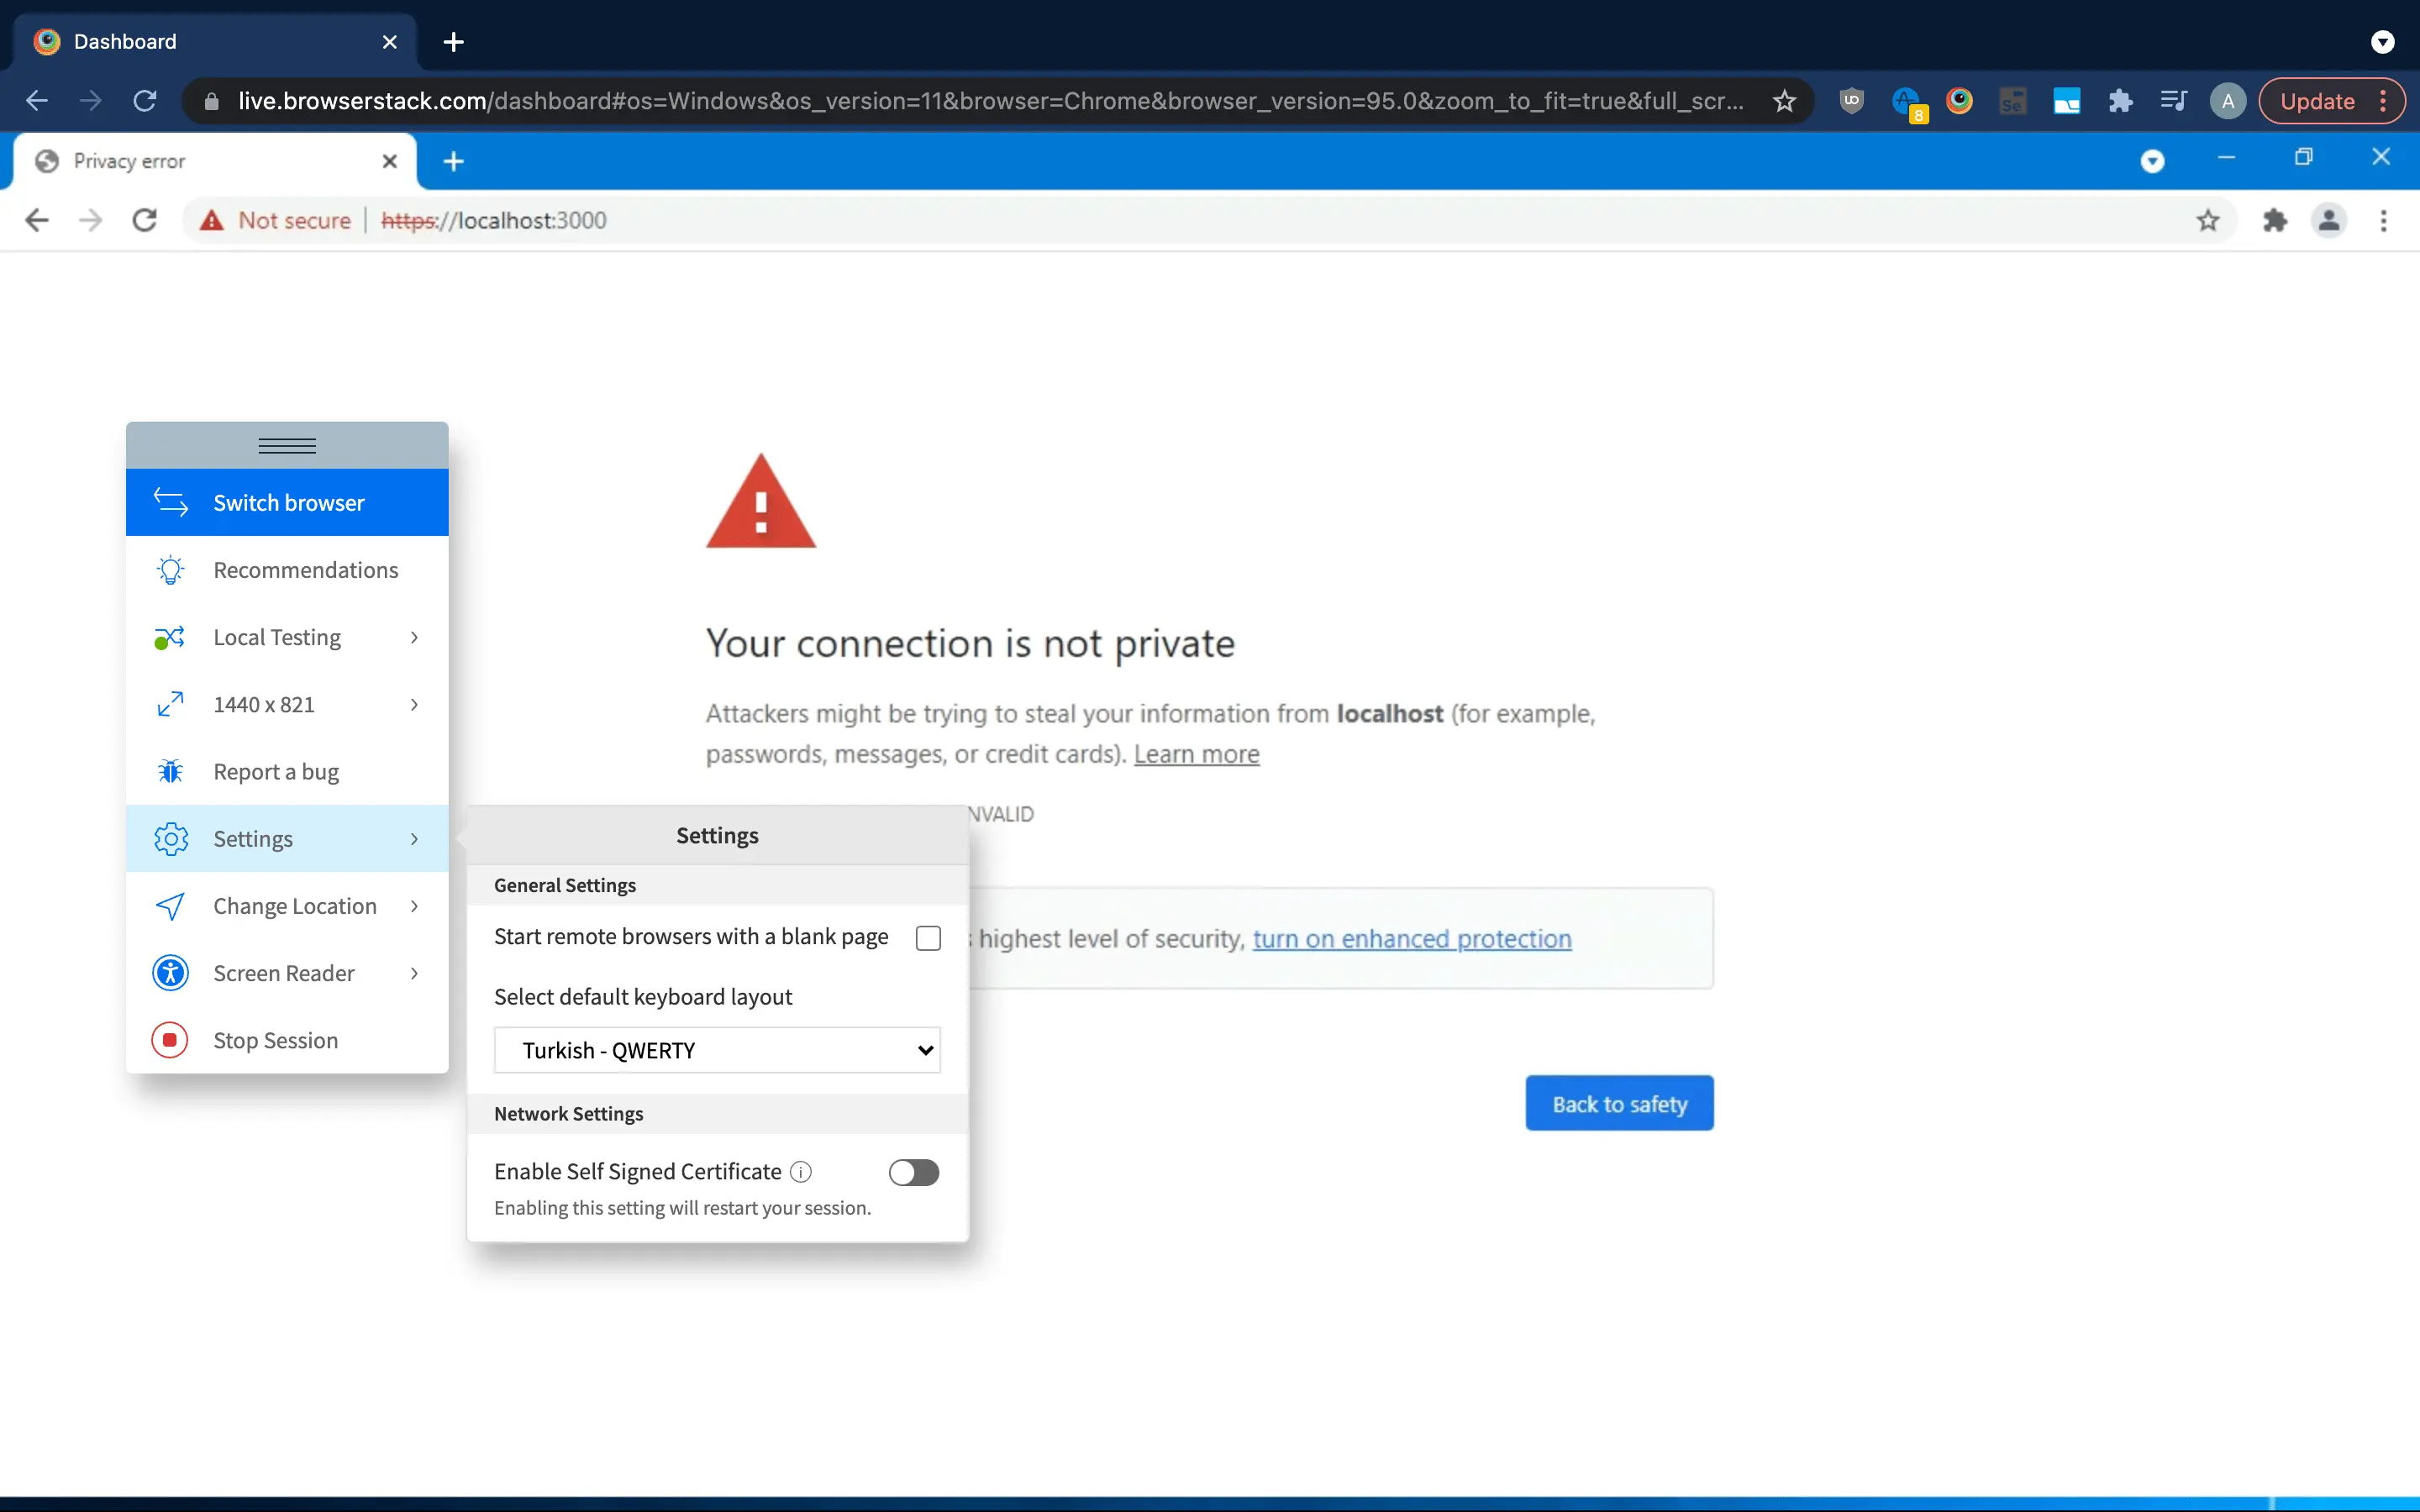
Step 2: Toggle the switch next to Enable/Disable Self-Signed Certificate. Toggling this option on/off restarts the session with the corresponding settings
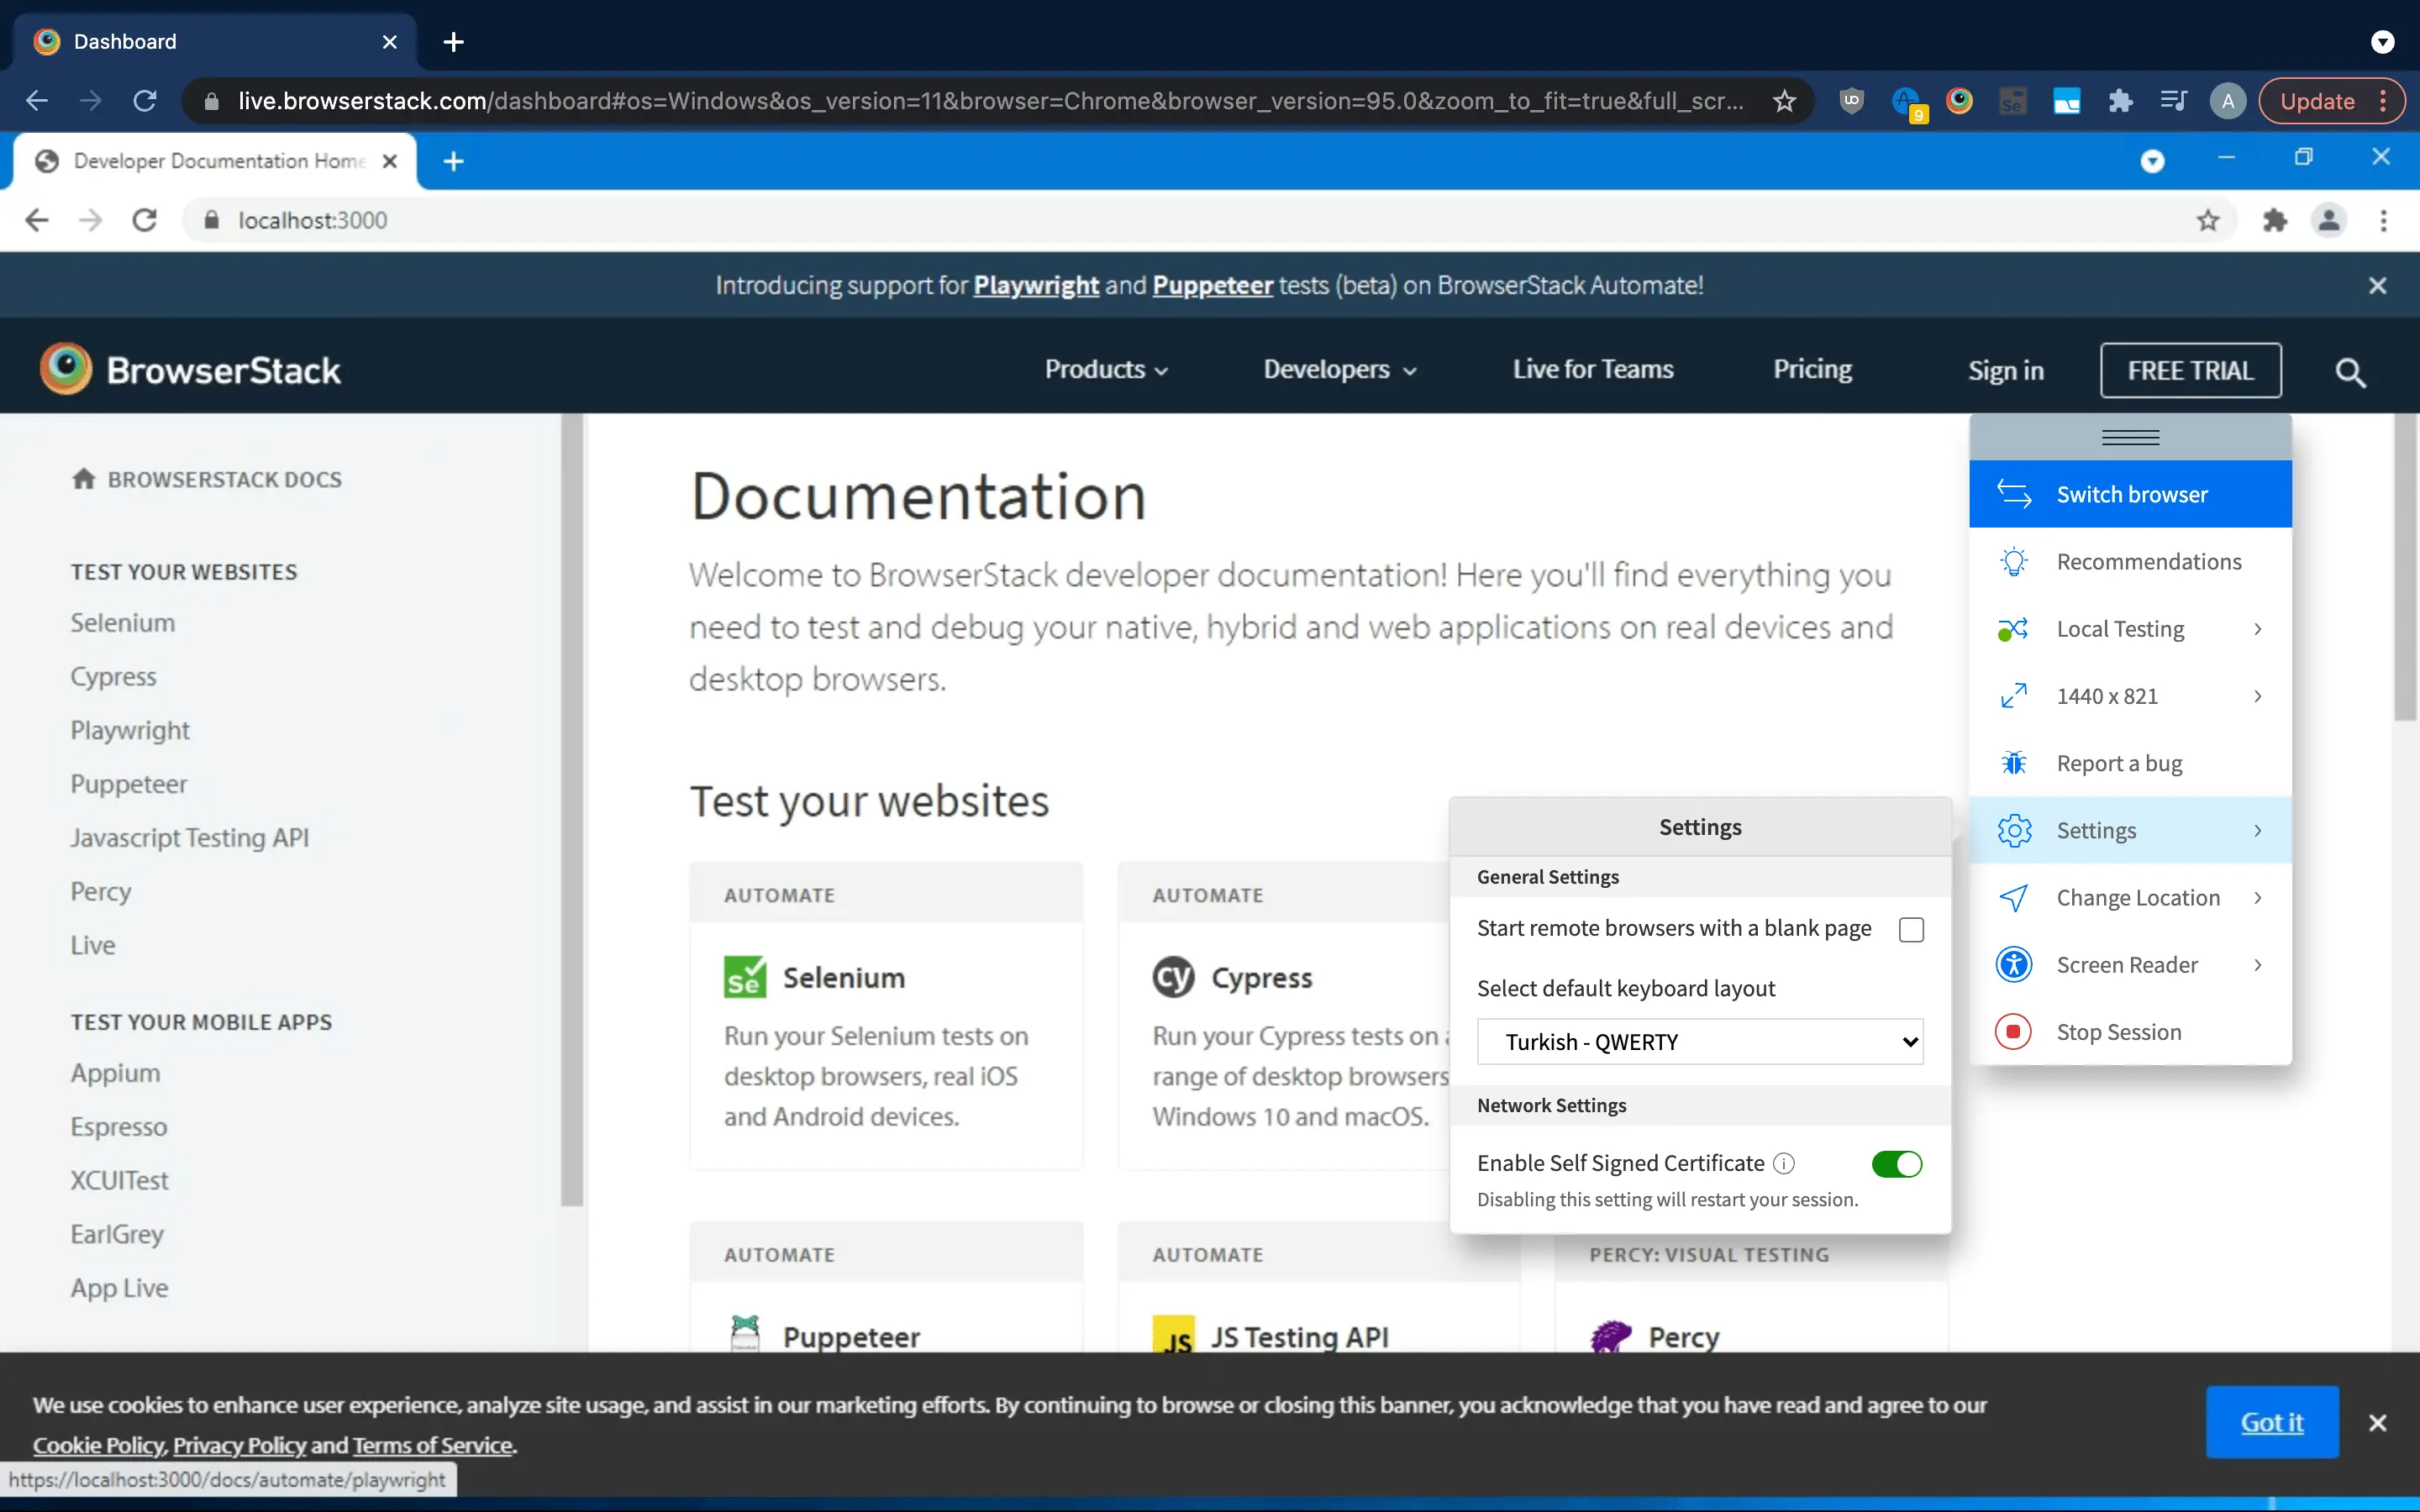
Step 3: After enabling this option for a session, the user may access their HTTPS website with self-signed certificate used & may continue testing as required. The website should now be marked as fully secure by the browser being used in the Live session
We're sorry to hear that. Please share your feedback so we can do better
Contact our Support team for immediate help while we work on improving our docs.
We're continuously improving our docs. We'd love to know what you liked
We're sorry to hear that. Please share your feedback so we can do better
Contact our Support team for immediate help while we work on improving our docs.
We're continuously improving our docs. We'd love to know what you liked
Thank you for your valuable feedback!