Shared fields (steps and backgrounds) in test cases
Discover how to create and manage the shared fields in test cases while working in Test Management.
Shared fields allow you to create reusable steps for repetitive test actions. You can share these fields with multiple test cases that utilize a step template. This feature helps save time and ensures consistency across your test cases.
By using shared fields (steps and backgrounds), you can efficiently manage your testing process. When you update a shared entity, the changes automatically apply to all test cases that use it, significantly reducing maintenance effort.
This helps you manage test cases efficiently in the following ways:
- Reduced redundancy: Eliminate duplicate steps across cases.
- Centralized updates: Edit shared fields instead of updating each test case individually.
- Improved efficiency: Save time and effort on repetitive testing.
If you update a Shared Field, changes made to the shared field automatically appear in all linked test cases.
BrowserStack Test Management supports two types of reusable components:
| Feature | Best used for | Format |
|---|---|---|
| Shared Steps | Standard test cases where a sequence of actions (e.g., Login to Dashboard) is repeated often. |
Step-by-step (Action & Expected Result) |
| Shared Backgrounds | BDD (Behavior Driven Development) test cases that require a common setup. | Gherkin Syntax (Given/When/Then) |
Create shared fields
You can manage all reusable entities from the central Shared Fields repository.
Create a shared step
Follow these steps to create a shared step:
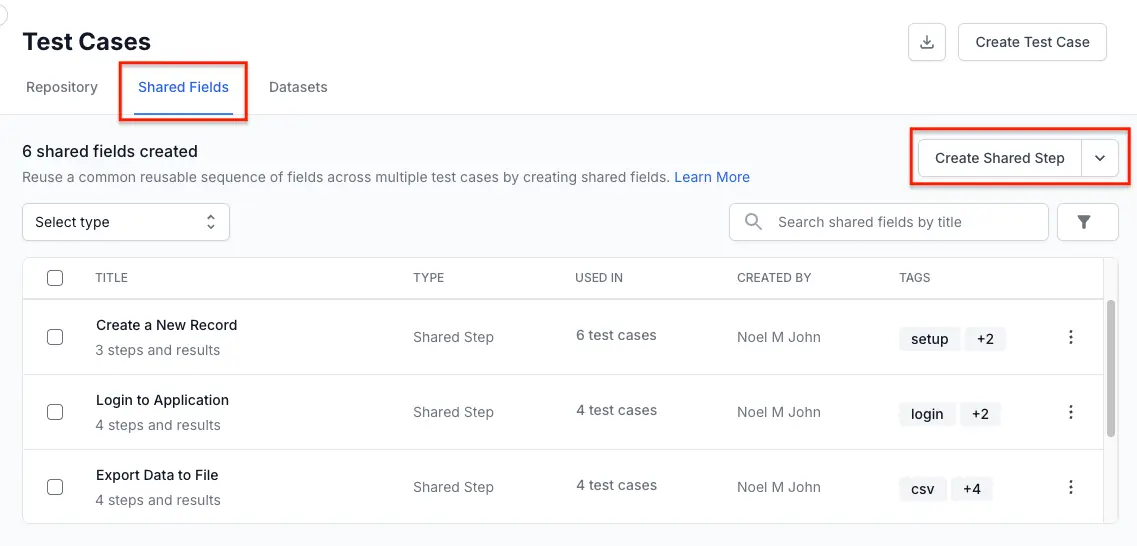
- Navigate to Shared Fields tab in the test cases repository.
-
Click the Create Shared Step button.
- In the Create Shared Step dialog, configure the following:
- Title: Enter a clear, descriptive name (e.g., Login to Application).
- Tags: Add tags (e.g., login, setup) to organize and filter the step later.
- Steps and Results: Enter the Step details, Additional Data, and Expected Result.
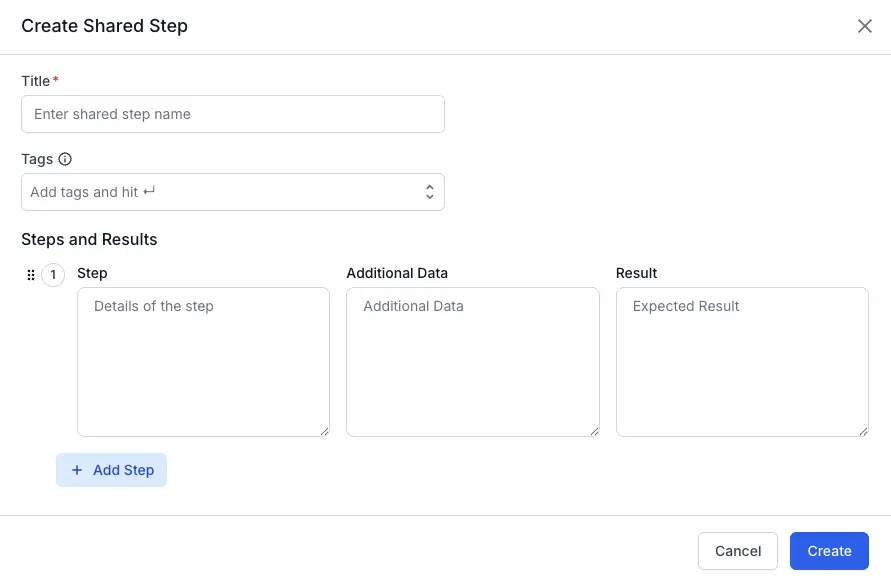
- Click Add Step to add more rows to the sequence if necessary.
- Click Create. The shared step is created and appears in the shared fields list view.
Create a shared background (BDD)
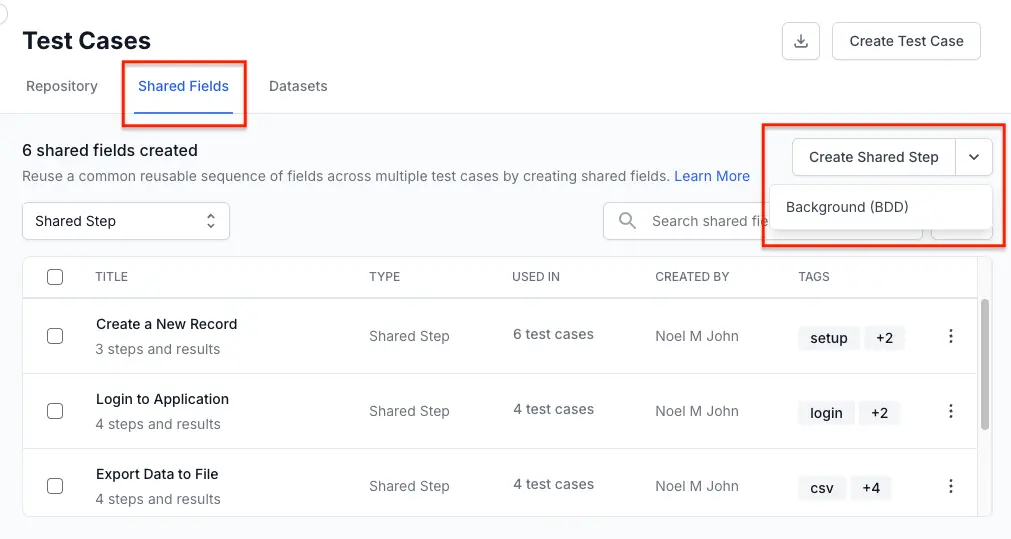
- Navigate to Shared Fields tab in the test cases repository.
-
Click the arrow (dropdown) next to the Create Shared Step button and select Background (BDD).
- In the Create Shared Background dialog, configure the following:
- Title: Enter a name for the background scenario.
- Tags: Add relevant tags for categorization.
- Background: Enter your setup instructions using standard Gherkin syntax (e.g., Given user is on the homepage).
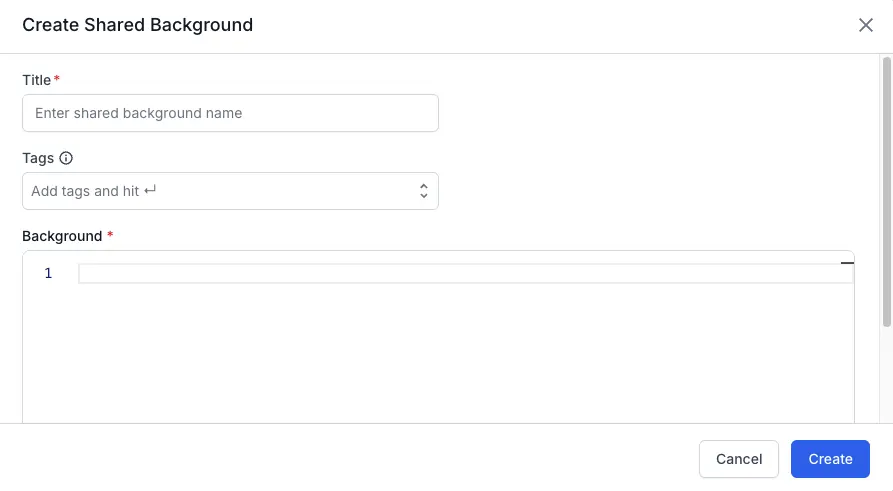
- Click Create.
The shared background is created and appears in the shared fields list view.
Add shared fields to a test case
You can add shared fields from the available shared fields to an existing or new test case using the steps template. Follow these steps to create shared fields.
- In the test case form, locate and click Add Shared Field.
- Click the title with the required shared fields from the list of shared fields.
The shared fields are added to your test case. You can add more fields or click update/create in the form per the test case requirements.
Unlink shared fields from the test case
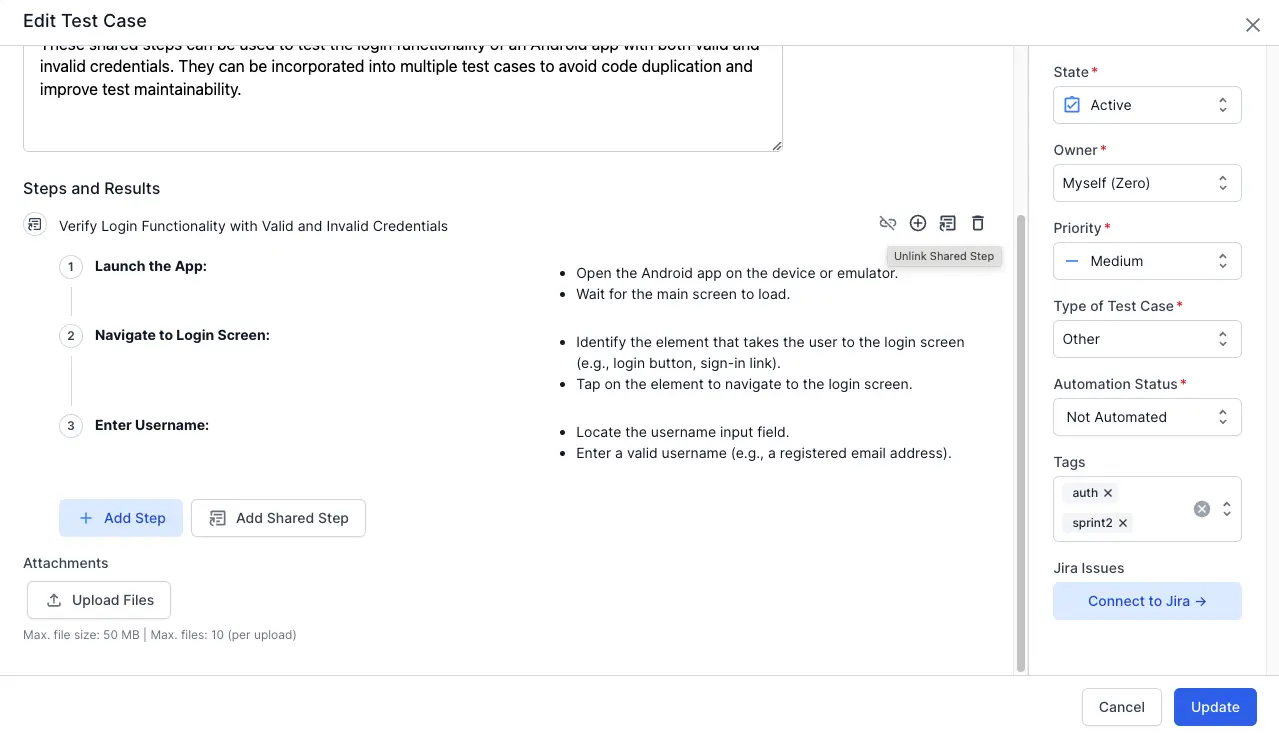
If you have linked a shared field to a test case, you can unlink the shared field. To unlink, navigate to the test case and click the Unlink Shared Field icon.
Drag and drop test steps and shared fields
The drag-and-drop feature allows you to easily reorder test steps and shared fields when you create or edit a test case using a steps template. This helps maintain an organized, logical sequence of test execution steps.
Follow these steps to reorder test steps or shared fields using drag-and-drop:
-
Navigate to the test case you want to edit, and click it.
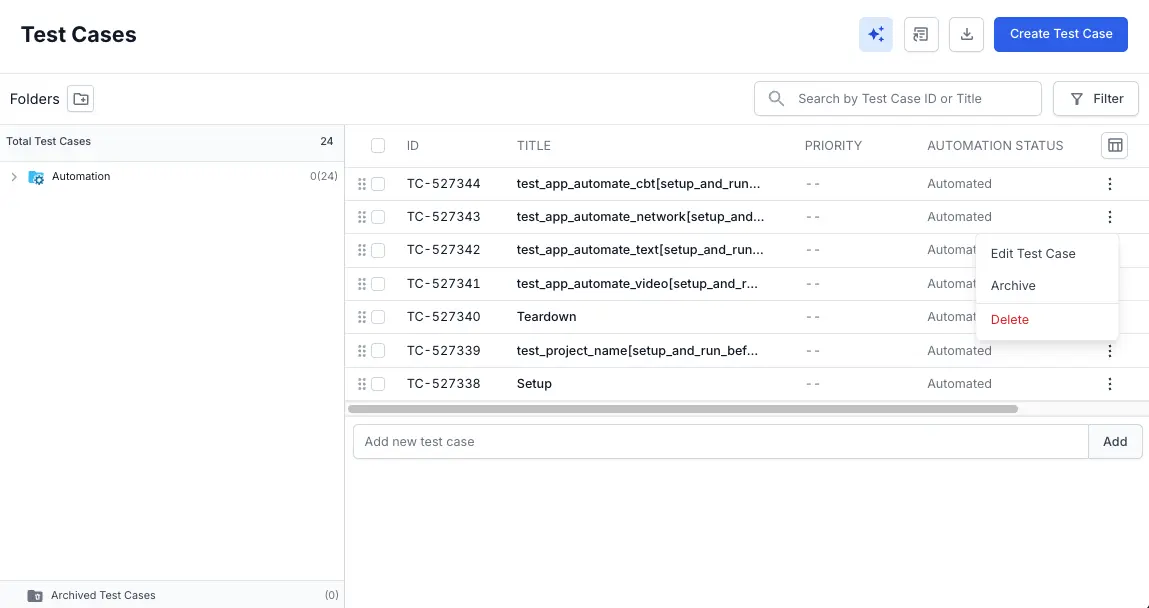
- Each test step and shared step has a drag handle located next to the step number. To drag a step:
- Click and hold the drag handle next to the step number.
- Drag the step to the desired position. A visual indicator will guide you.
- Release the mouse button to finalize the new position of the step.
By following these steps, you can effectively reorder your test steps and shared steps in any test case using a steps template, improving the flow and organization of your test scenarios.
Update a shared step
To update a shared field, follow these steps:
-
Click the menu icon (three dots) on the right of the shared field you want to modify.
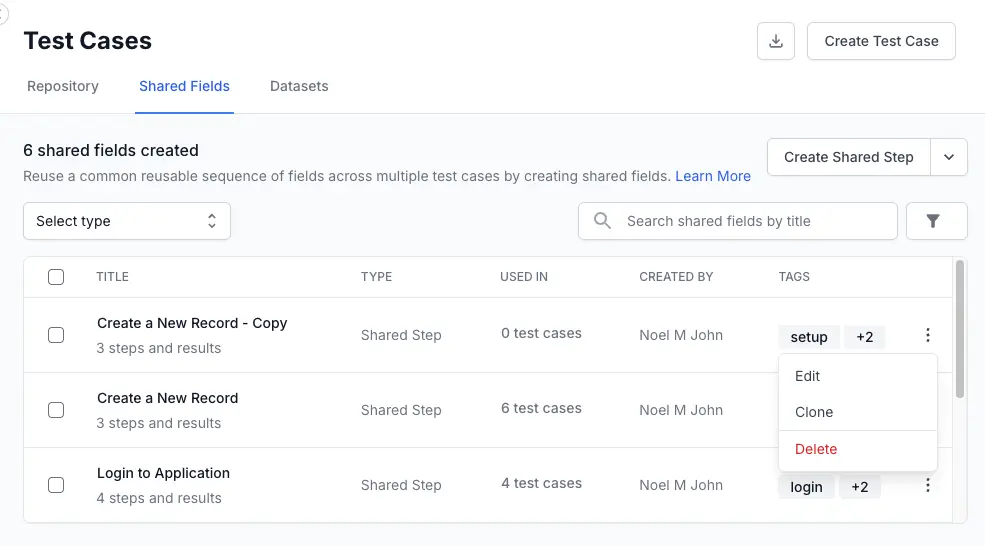
- Click Edit.
-
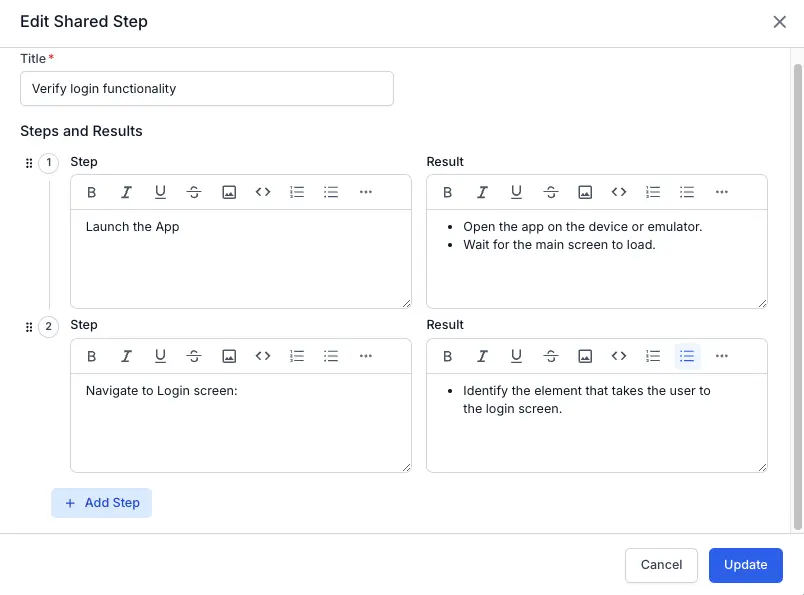
Make the necessary changes to the shared field.
-
Select the checkbox and click Update.
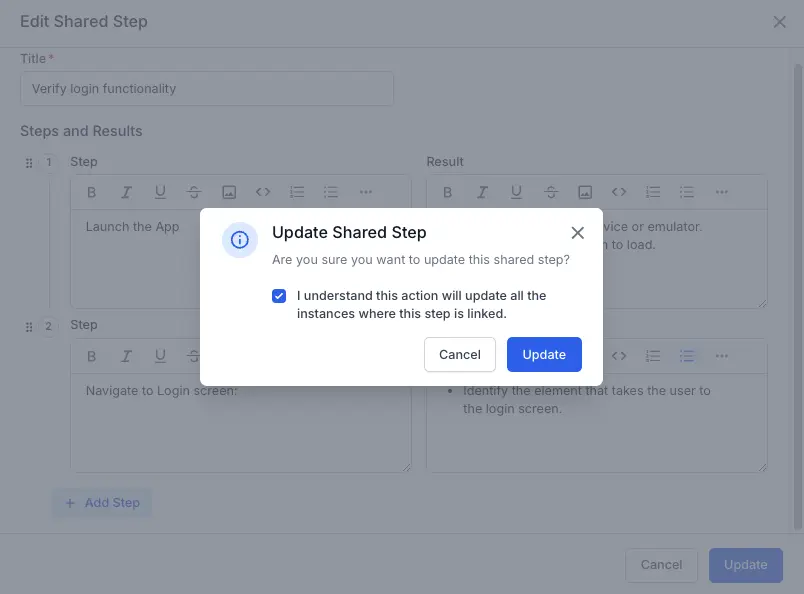
The shared field is updated and appears in the shared fields list view.
Copy shared fields to another project
This guide explains how to use the copy shared fields feature to duplicate shared fields from one project to another within your Test Management workspace. This is useful for migrating test assets, setting up new projects with a standard set of steps, or automating your testing workflows.
To copy one or more shared fields to a different project:
-
Navigate to the Shared Fields tab on the test cases dashboard.
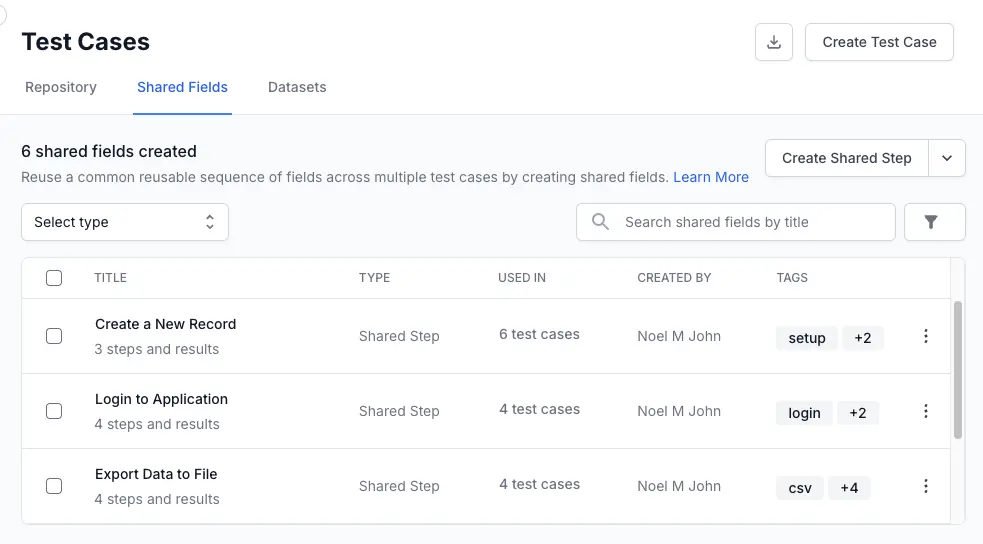
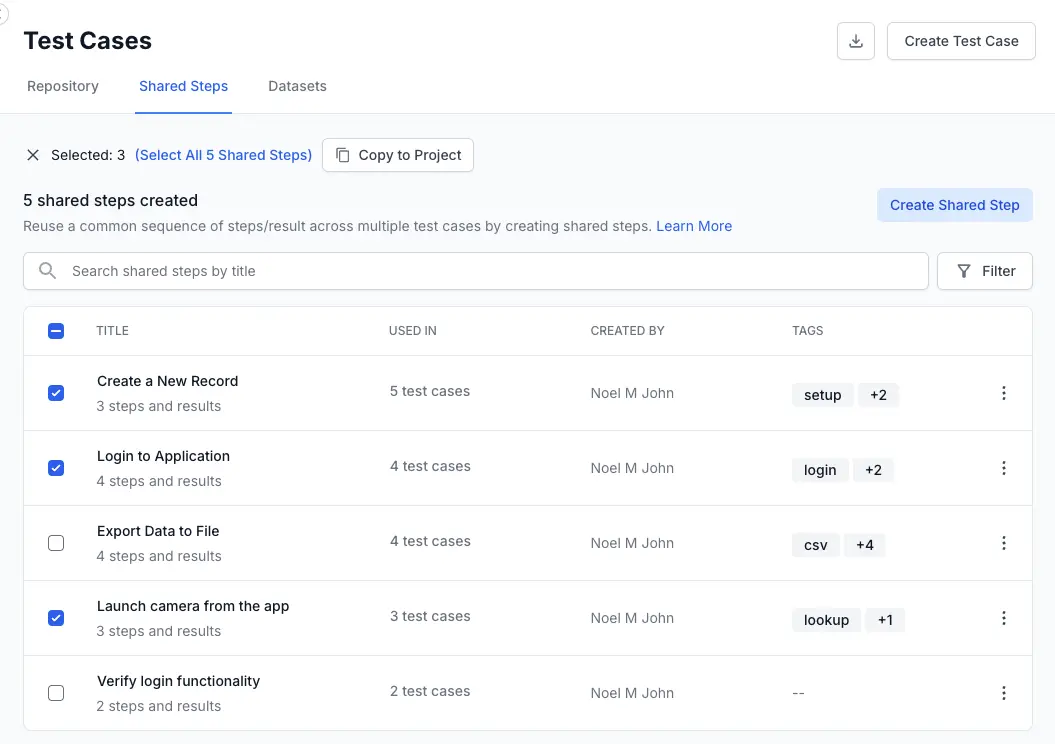
- Select the shared fields you want to copy.
-
Click the Copy to Project button that appears in the toolbar. The Copy Shared Steps dialog box appears.
-
From the Target Project dropdown, select the project to copy the steps to.
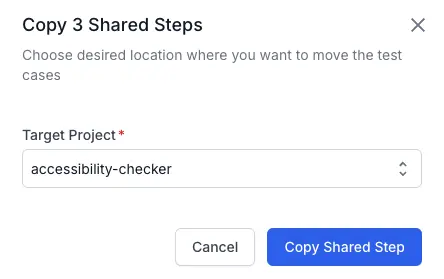
- Click the Copy Shared Step button.
You have successfully initiated a job to copy the selected shared steps, including their titles, content, and tags, to another project. This operation runs in the background, so you can keep working without interruption. You will get a confirmation notification once it is complete. If a shared step with the same title already exists in the destination project, the copied step will be renamed with a numerical suffix (e.g., Login (1)) to prevent duplicates.
Clone a shared step
You can quickly duplicate any existing Shared Step in your repository. Cloning creates an independent copy, allowing you to create variations of a test workflow without starting from scratch.
Follow these steps to clone a shared step directly from the shared fields list view.
-
Navigate to the Shared Fields tab on the test cases dashboard.

-
Locate the shared field you want to copy from the list.
-
Click the (⋮) icon on the right side of the shared field row to open the menu.

- Select Clone from the dropdown options.
-
The Clone Shared Step window will open. It comes pre-filled with all the original details. You can now update the title or tags, or modify the individual steps and expected results.
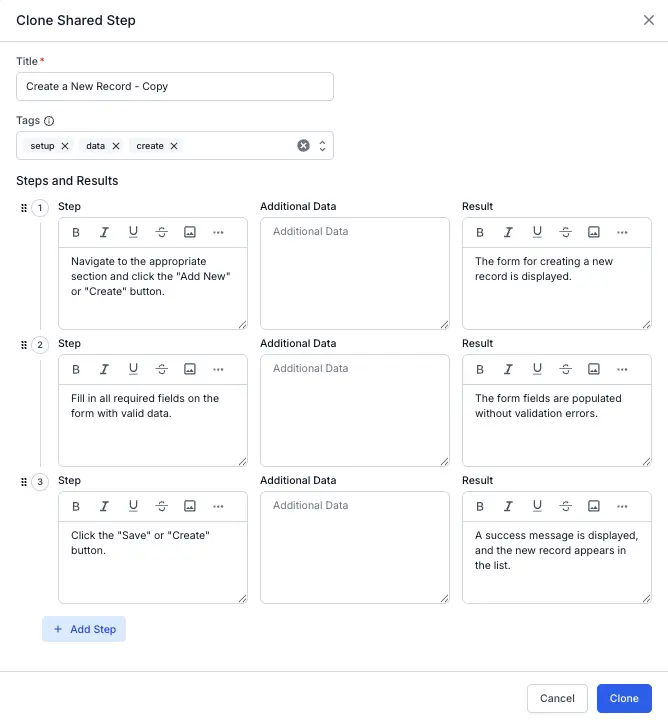
- Click the Clone button to confirm.
You have successfully cloned the shared step. A success notification will appear, and the new copy will be added to your shared fields list view. By default, the title will be the original name with - Copy appended. You can modify the title before you clone the shared step.
Delete a shared step
To delete a shared step:
-
Click the menu icon (⋮) on the right of the shared field.

-
Click Delete.
-
Select the checkbox to confirm the deletion and click Delete.
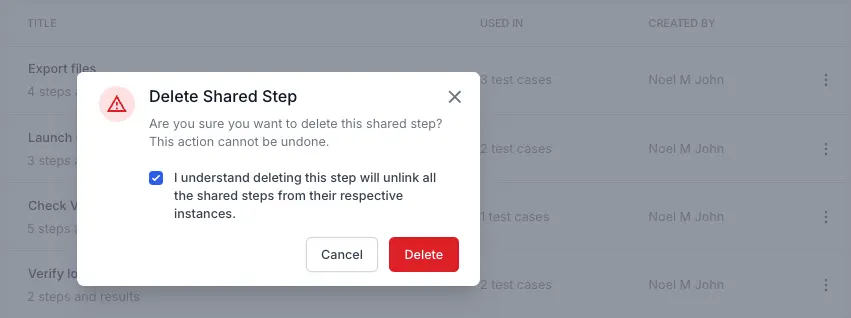
The shared step is removed from the list view and from all linked test cases.
Filter shared fields
Use filters to find specific shared fields in your repository by applying one or more tags.
Filters work in combination with the search bar. You can apply a tag filter and then use the search bar to find a specific title within those filtered results.
Filter from the shared fields list view
Follow these steps to filter the main list of all shared fields.
-
Navigate to the Shared Fields tab on the test cases dashboard.

-
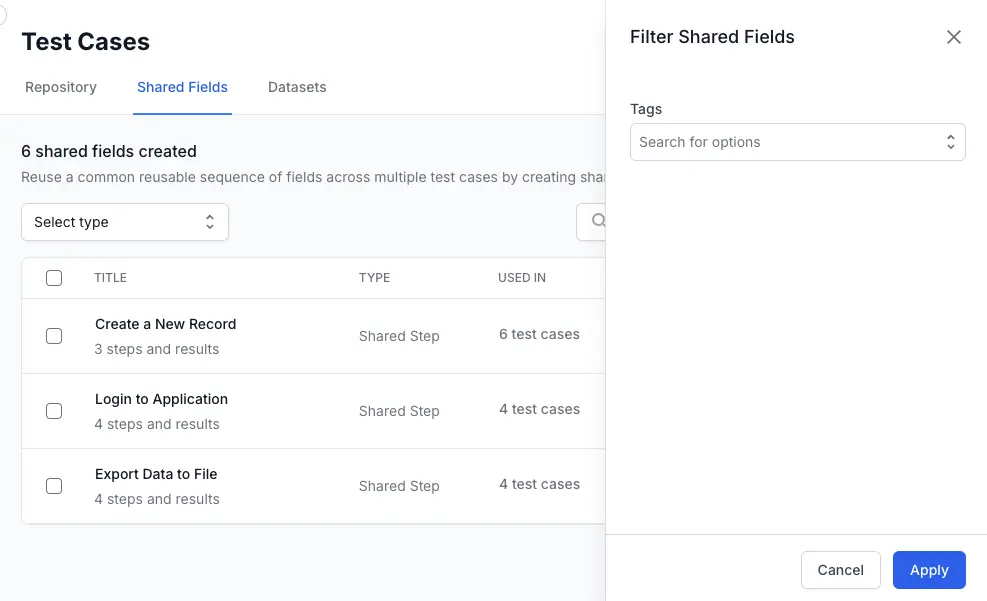
Click the Filter button.
-
In the Tags field, select one or more tags you want to filter by.
-
Click Apply.
The list will update to show only the shared fields that match your selected tags.
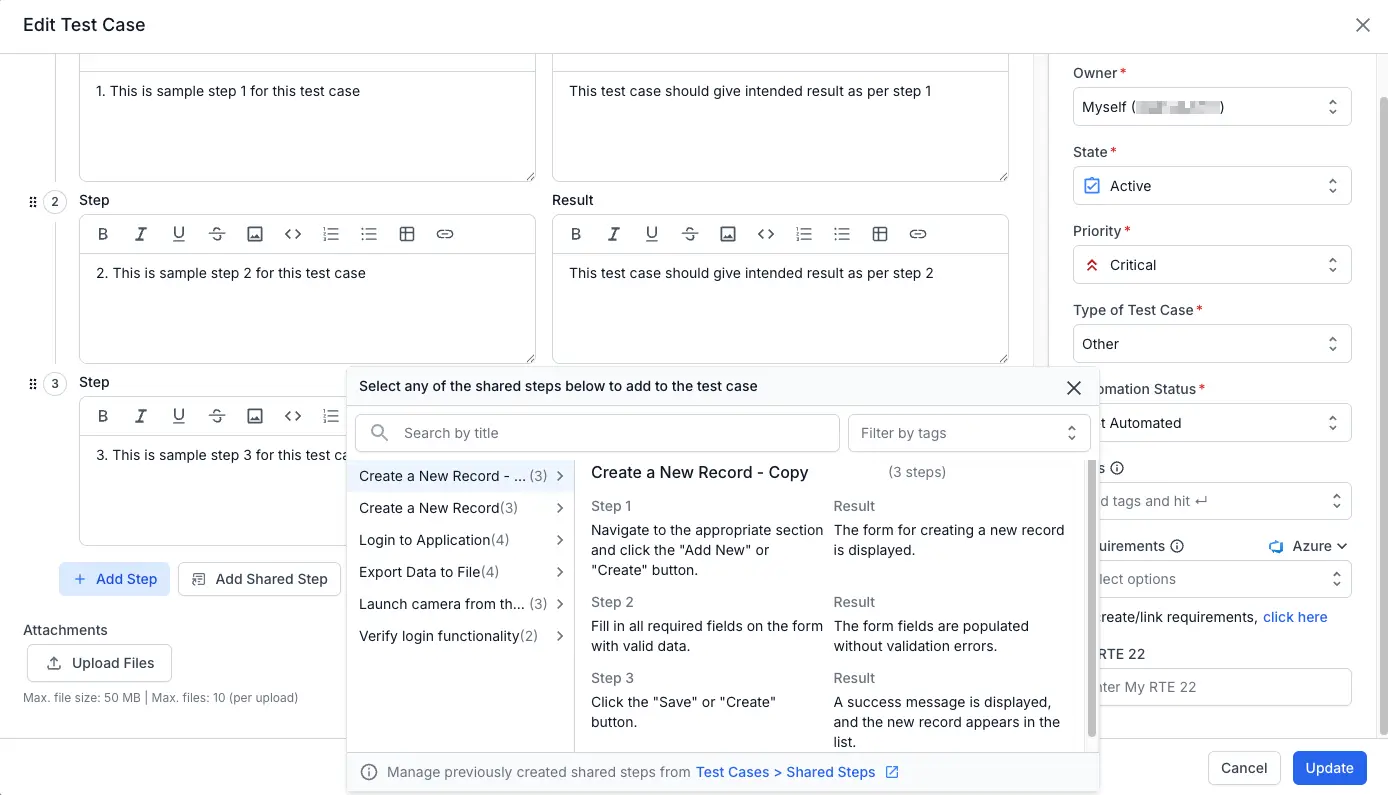
Filter when adding shared steps to a test case
Prerequisite: You should have created the shared step you want to add. Learn how to create your shared step.
Follow these steps to find a shared step while creating or editing a test case.
-
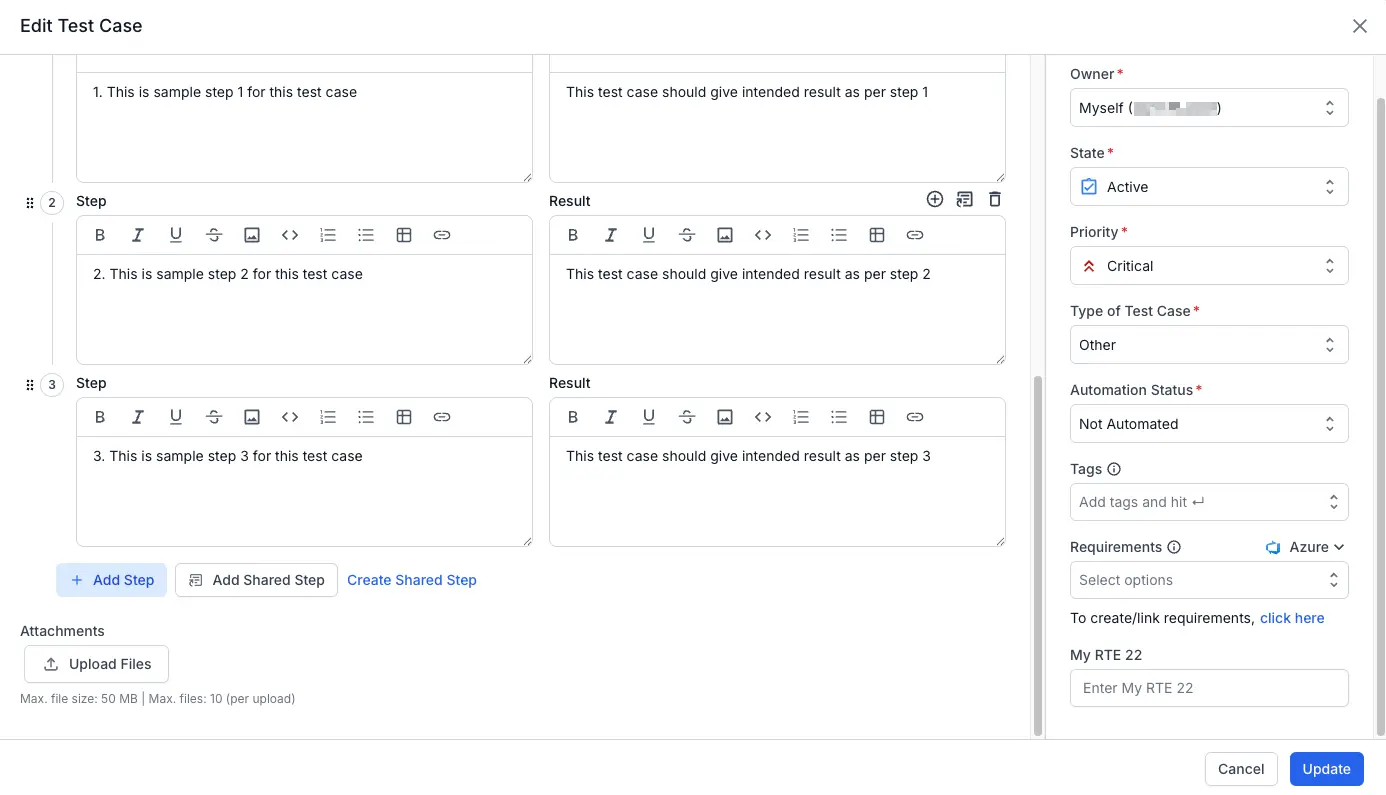
From the test case editor, click Add Shared Step.
-
Click the Filter by tags dropdown.
-
Select the tag you want to use as a filter.
The list of shared steps will update automatically to show only the steps matching that tag.
We're sorry to hear that. Please share your feedback so we can do better
Contact our Support team for immediate help while we work on improving our docs.
We're continuously improving our docs. We'd love to know what you liked
We're sorry to hear that. Please share your feedback so we can do better
Contact our Support team for immediate help while we work on improving our docs.
We're continuously improving our docs. We'd love to know what you liked
Thank you for your valuable feedback!