Jenkins is a powerful tool for automating the delivery and deployment. As modern DevOps focuses on Continuous Delivery (CI)/Continuous Deployment (CD), Jenkins can aid in accomplishing such tasks easily.
Jenkins offers a multibranch pipeline feature, where one can easily automate the pipelines for multiple branches without manually creating them. This helps maintain a consistent build and deployment process across the development, testing, and production branches. It also aids in improving code quality and early bug detection.
What is a Multibranch Pipeline in Jenkins?
A Multibranch pipeline in Jenkins is a special feature provided by Jenkins that automatically creates the pipeline for each branch without requiring them to make it manually.
Jenkins uses a unique file called Jenkinsfile. It contains the Jenkins configurations that typically follow the Groovy style syntax. When connected with the repository, it scans for the branches that contain a Jenkinsfile, and the pipeline will be created automatically. Jenkins supports many different version control systems or repositories, such as GitHub, Bitbucket, GitLab, etc.
Read More: TeamCity vs Jenkins vs Bamboo: A Breakdown
Why do you need a Multibranch Pipeline in Jenkins (Use cases)?
The Multibranch pipeline helps streamline the CI/CD process across the repository. Typically, in large organizations, many developers work in parallel on different tasks, and they will create a lot of branches. A multibranch pipeline ensures that the code written by individual developers does not cause regressions. There are many use cases as mentioned below:
- Branch Specific Requirements: Each branch might have different build and test requirements in a large project. Multibranch automatically detects the configurations and executes the build and test jobs based on the configurations.
- Pull request validation and verifications: The Jenkins multibranch pipeline automatically validates the code whenever the developer creates Pull Requests (PR). This helps to avoid code smells and other issues that may be caused after merging PRs.
- Avoid any regression issues: Jenkins’ multibranch pipeline can significantly help with regression issues. It can run specific test tasks based on the configurations. You can also configure the test execution based on a module or feature.
- Isolated CI/CD process: It allows safer experimentation without affecting the existing production code. A feature branch can have a custom test suite or deployment target without affecting the mainline pipeline. This way, you can isolate the CI/CD process
- Reduce maintenance: It allows for reduced maintenance as the pipelines are created automatically and are highly customizable.
Read More: What are Agents in Jenkins?
Key Benefits of a Jenkins Multibranch Pipeline
Jenkins multibranch pipeline helps to reduce a lot of manual tasks, especially when the project is large and many developers are working on multiple tasks.
Irrespective of the number of branches, the pipelines will be automatically created without requiring manual effort. Below are the key benefits of Jenkins Multibranch Pipelines
- Automatic detection and creation of pipelines for each branch.
- Allows branch-specific Jenkinsfile or configurations for customized workflows.
- Supports integration with GitHub, Bitbucket, GitLab, etc.
- Automatically triggers the builds and tests for each pull request.
- Reduces the manual effort to create the pipelines.
- Enables isolated experimentation without impacting the core branches
- Helps in collaboration across the projects and team members
- Increase the quality of the code and help in early bug detection
Read More: Difference between Jenkins vs Gitlab CI
Differences between Jenkins Pipeline and Multibranch Pipeline
The Jenkins pipeline, or single-branch pipeline, is a basic pipeline where one branch is created for the entire project. If you need a pipeline for another branch, you must create it manually.
Having multiple branches allows you to create separate pipelines for each branch. It is also configurable based on the branch type and provides more flexibility. Below are the core differences between single-branch and multibranch pipelines.
| Single Jenkins Pipeline | Multibranch Pipeline |
| It handles a single branch only and needs to be created manually. | Automatically detects multiple branches and creates a pipeline. It can be automated. |
| Uses only one Jenkinsfile | Multiple Jenkinsfiles for each branch |
| Requires manual effort to configure triggers | Automatic triggers |
| Not ideal for large projects or when the project has more branches | Ideal for large projects and multiple branches |
| More manual maintenance | Lower maintenance |
| Limited support for complex workflows | Suitable for complex and customized workflows |
Prerequisites for creating a Jenkins Multibranch
If you have to configure the Multibranch pipeline, below are the prerequisites.
- Jenkins server up and running with at least one Jenkins agent
- A remote repository with multiple branches (Ref: Github Repo Creation)
- Basic knowledge of Jenkins configurations and Groovy
How to create a Multibranch Pipeline in Jenkins?
Creating a Jenkins Multibranch pipeline simple and easy. Many operations can be performed using the user interface. Only Jenkinsfile will be written in the Groovy script.
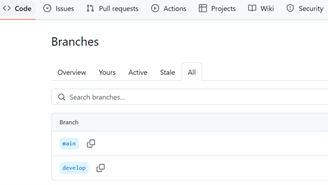
Step 1: Create a repository with multiple branches with Jenkins (for example, main and develop)
If you already have a repository you can create multiple branches under that. If you do not have it you can create a new repository with at least two branches.
For example, on GitHub it may look like below.
Step 2: Configure Jenkinsfile for each branch
Add Jenkinsfile for each branch (main and develop)
The Jenkinsfile should be the root of the branch or main
Example: Jenkinsfile for the main and develop branches.
pipeline {

    agent any

    stages {

        stage('Build') {

            steps {

                script {

                    if (env.BRANCH_NAME == 'main') {

                        echo "Building the MAIN branch..."

                    } else if (env.BRANCH_NAME == 'develop') {

                        echo "Building the DEVELOP branch..."

                    } else {

                        echo "Skipping build for unsupported branch: ${env.BRANCH_NAME}"

                        currentBuild.result = 'SUCCESS'

                        return

                    }

                }

            }

        }

        stage('Deploy') {

            steps {

                script {

                    if (env.BRANCH_NAME == 'main') {

//Add your Deploy tasks/workflow here for main branch

                        echo "Deploying the MAIN branch..."

                    } else if (env.BRANCH_NAME == 'develop') {

 //Add your Deploy tasks/workflow here for develop branch

                        echo "Deploying the DEVELOP branch..."

                    }

                }

            }

        }

    }

}
Step 3: Create a New Multibranch pipeline in Jenkins
- Navigate to the Jenkins home page.
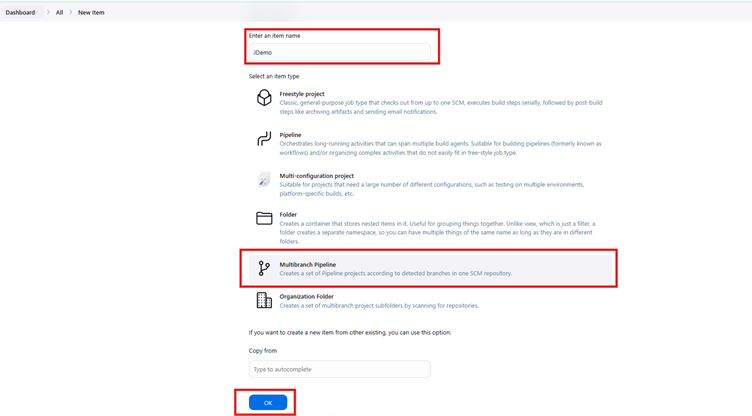
- Click on New Item
- Enter the Name (Example, JDemo), choose the Multibranch Pipeline, and Click Ok
Read More: How to set up Jenkins Docker Agent?
Step 4: Configuring Branch Sources in Jenkins
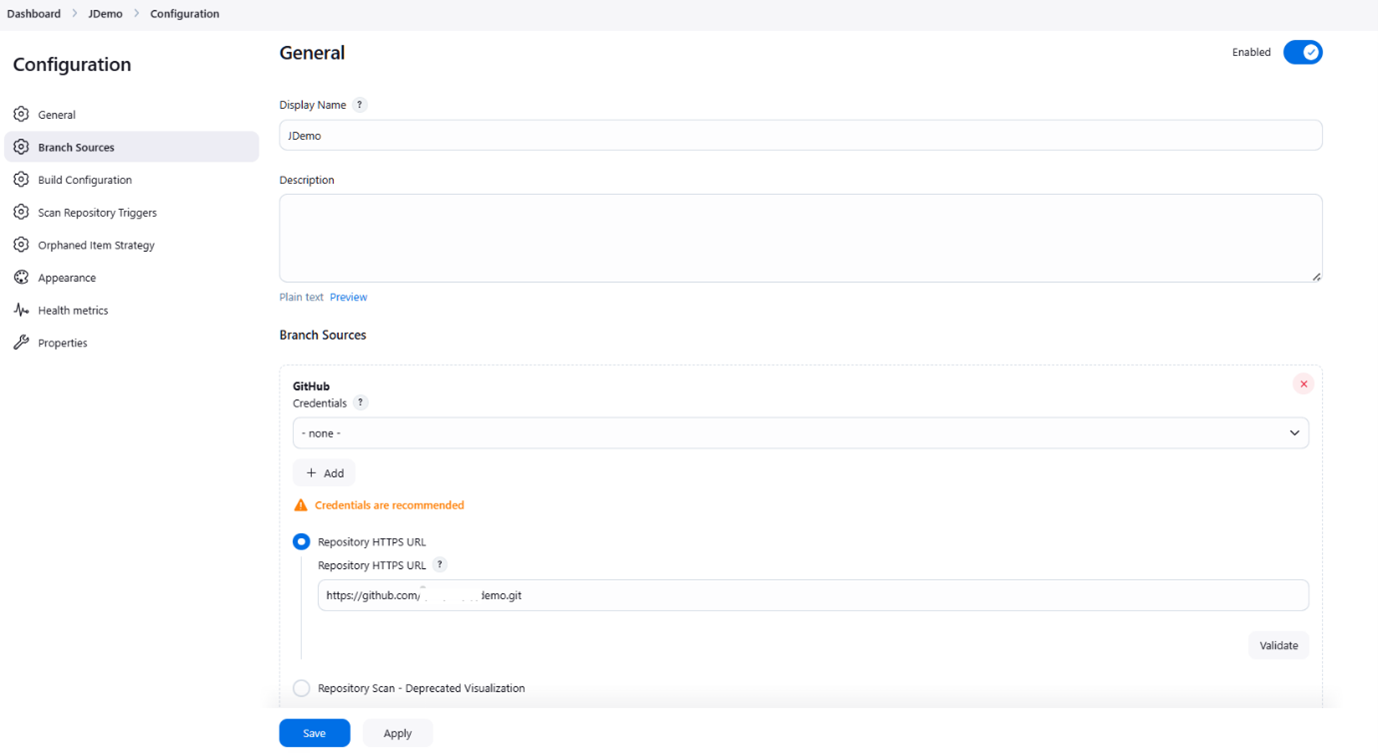
In the configuration section, enter the details.
- Display Name: JDemo
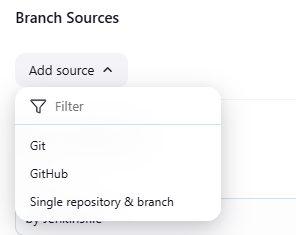
- Branch Sources: Add Correct Source (Example: Git)
- Credentials: Add credentials if required, else choose none (This demo uses a public repositor,y hence credentials are not required)
- Repository HTTPS URL: Copy the repository URL from the respective repository (Example: https://github.com/xyzmyb/mydemo.git
- Leave all the other changes to default and click on Save
Step 5: Scan for Branches
- Navigate to Newly Created Item JDemo
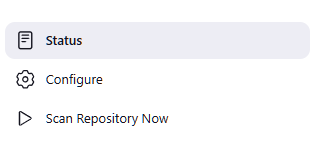
- Click on Scan Repository Now
At this stage, you should see two pipelines, namely main and develop, created.
Step 6: Execute Pipelines one by one
You are all set to execute the pipelines one by one. The execution steps will be picked based on the branch.
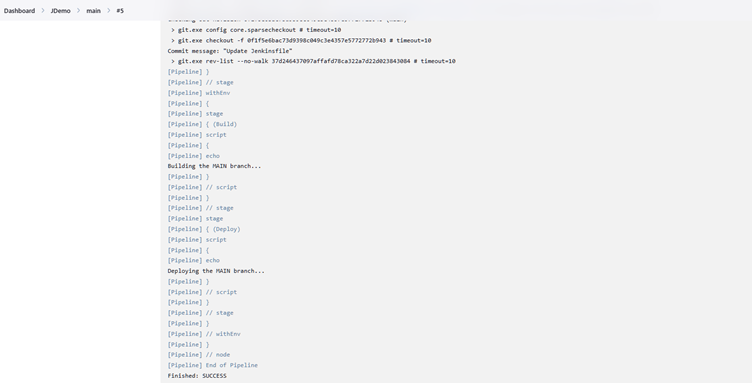
Output Main Branch
Output Develop Branch
Understanding the Jenkinsfile for Multibranch Pipelines
Jenkinsfile is a text-based file that follows Groovy syntax. Jenkins automatically looks for this file and executes the tasks.
- env.BRANCH_NAME: This is an inbuilt Jenkins variable that helps to identify the branch name for example develop, main, feature, etc.
- Logics in Jenkinsfile: Jenkins allows various logics including if and else conditions, you can define the custom logic and workflows based on the branch type.
- Stages: Stages are major phases of Jenkinsfile, such as build, deploy, test, etc. Stage (‘stageName’) is used as a syntax.
Example:
stage('Build') {

    steps {

        echo 'Compiling code...'

    }

}- Steps: Steps are commands or actions performed within the stage. For example, running scripts, sending notifications, etc.
Example:
steps {

    echo 'Running unit tests...'

}
How to build Triggers and Scan Settings for a Jenkins Multibranch?
Apart from manual scans for branches, Jenkins supports automatic scans for branches in multibranch pipelines.
Steps to Configure Scan Settings
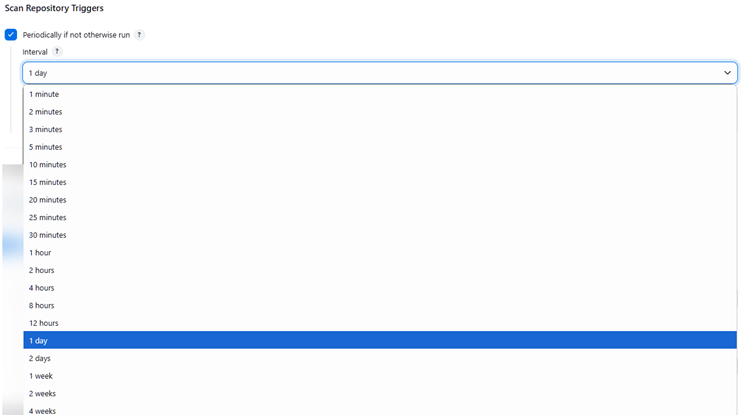
- Under Configuration, look for “Scan Repository Triggers”
- Check the checkbox on “Periodically if not otherwise run”
- Choose the interval from the drop-down.
Managing and Monitoring Jenkins Multibranch Pipelines
Managing the Jenkins multibranch pipeline is easy, as all actions are defined in the Jenkinsfile. Jenkins allows you to disable, enable, or omit the scans for specific branches. Jenkinsfile provides the following features to manage the branches.
- Define the custom branch workflows.
- Support regex patterns to include and exclude the branch names
- Anytime, you can click on “Scan Multibranch Pipeline Now” to scan branches
- Automatically clean up jobs for deleted branches.
Jenkins provides different ways to monitor the Jobs
- Use the console to get the detailed text-based logs to know execution details.
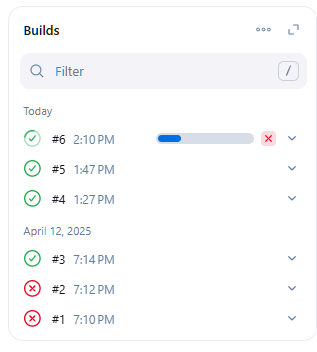
- It also provides historical job details at the branch level.
- The Blue Ocean or Pipeline Stage View plugins visualize stages, durations, and results.
- It also supports integration with Slack and Microsoft Teams for alerts and notifications.
- It provides Junit, Clover, etc, plugins to view the test coverage.
- Gadgets can be used to view the status of builds.
Best Practices when working with Jenkins Multibranch Pipeline
Large-scale organizations often follow custom workflows. As the project grows, the Jenkinsfile may become challenging to manage and lose its readability.
Below are some best practices to help manage Jenkins Multibranch pipelines more effectively.
- Use declarative pipeline syntax for better readability and maintainability
- Ensure you have a Jenkinsfile at the root level of all required branches
- Use shared libraries and standard methods for generic code and tasks
- Configure periodic scans in Jenkins to scan the branches automatically
- Apply include/exclude filters to control which branches are built
- Use branch naming conventions for better readability and management
- Use “Orphaned Item Strategy” to clean up jobs for deleted branches
- Use branch-specific logic for build, test, and deploy steps
- Use Jenkins credentials manager to store the credentials
- Enable notifications with integration for better monitoring
- Regularly update the plugins to avoid security issues
Why integrate Selenium Tests with Jenkins?
Integrating Selenium tests in Jenkins offers multiple benefits, a few of which are listed below:
- Selenium test integration in Jenkins helps catch dependent test failures or logic changes whenever framework-level modifications are made.
- It validates the development code without manual intervention, reducing testing efforts.
- It detects regression issues at an early stage and provides instant feedback.
- These benefits are especially useful in cross-browser and cross-device testing when integrated with cloud testing tools like BrowserStack. Manual testing for such scenarios can be time-consuming, but when configured with BrowserStack, tests can be executed in parallel, providing faster test results.
- It enables continuous testing, which aligns with modern development and DevOps architecture goals.
How can BrowserStack help in Jenkins integration?
BrowserStack is an all-in-one cloud testing platform that offers multiple features. One of its powerful features is BrowserStack Automate, which allows integration of different test automation frameworks such as Cypress, Playwright, Selenium, and more into BrowserStack for cross browser testing, end-to-end testing, and cross-device testing. Additionally, BrowserStack tests can be executed in parallel, providing instant results based on the number of test cases.
One of the most valuable capabilities is that BrowserStack supports Jenkins integration to enable continuous testing. Using BrowserStack and Jenkins together, you can achieve a large number of test executions in a short time. At the same time, smart reporting helps debug and understand the current code’s status. This integration also reduces the maintenance of real devices and test infrastructure.
Furthermore, BrowserStack offers test management features that allow you to create, manage, and track all your test cases and test runs, gaining insights into overall testing progress. It is also fully integrated with your test automation suites
Conclusion
The Jenkins multibranch pipeline can reduce manual tasks and CI/CD pipeline maintenance. It supports custom workflows and custom configurations at the branch level. You can configure the different stages at the branch level, like build, test, and deploy. When it comes to testing, Jenkins alone may not provide better results.
However, if it is integrated with BrowserStack Automate, the Jenkins integration becomes more powerful and reduces manual testing. Additionally, BrowserStack Test Management can help teams track, manage, and report test results with greater visibility and traceability. Furthermore, it can also help in deriving data-driven strategic decisions.

