Test video-based scenarios with Video Injection
Upload videos and test video-based scenarios in your app
Many applications such as social media and banking apps use the device camera for video-based features like video recording, facial recognition and identification, and more. You can test such features using the Video Injection feature of App Live.
Video Injection simulates the camera video function. With Video Injection, you can upload video files to the BrowserStack devices. When the camera workflow is triggered in your app, the uploaded video is used as input to the device camera to mimic the camera video function.
To test a video-based feature in your app:
Supported operating systems, video size, and video format
Operating system
- iOS 13 and above
- Android 9 and above
The devices that do not support Video Injection appear grayed out in the device listing on the App Live dashboard.
Video file format and size
- Video format: MP4
- Video size: 15 MB
Enable Video Injection for your app
To enable Video Injection:
- Log in to the App Live dashboard.
- Upload your app from the Select Source panel.
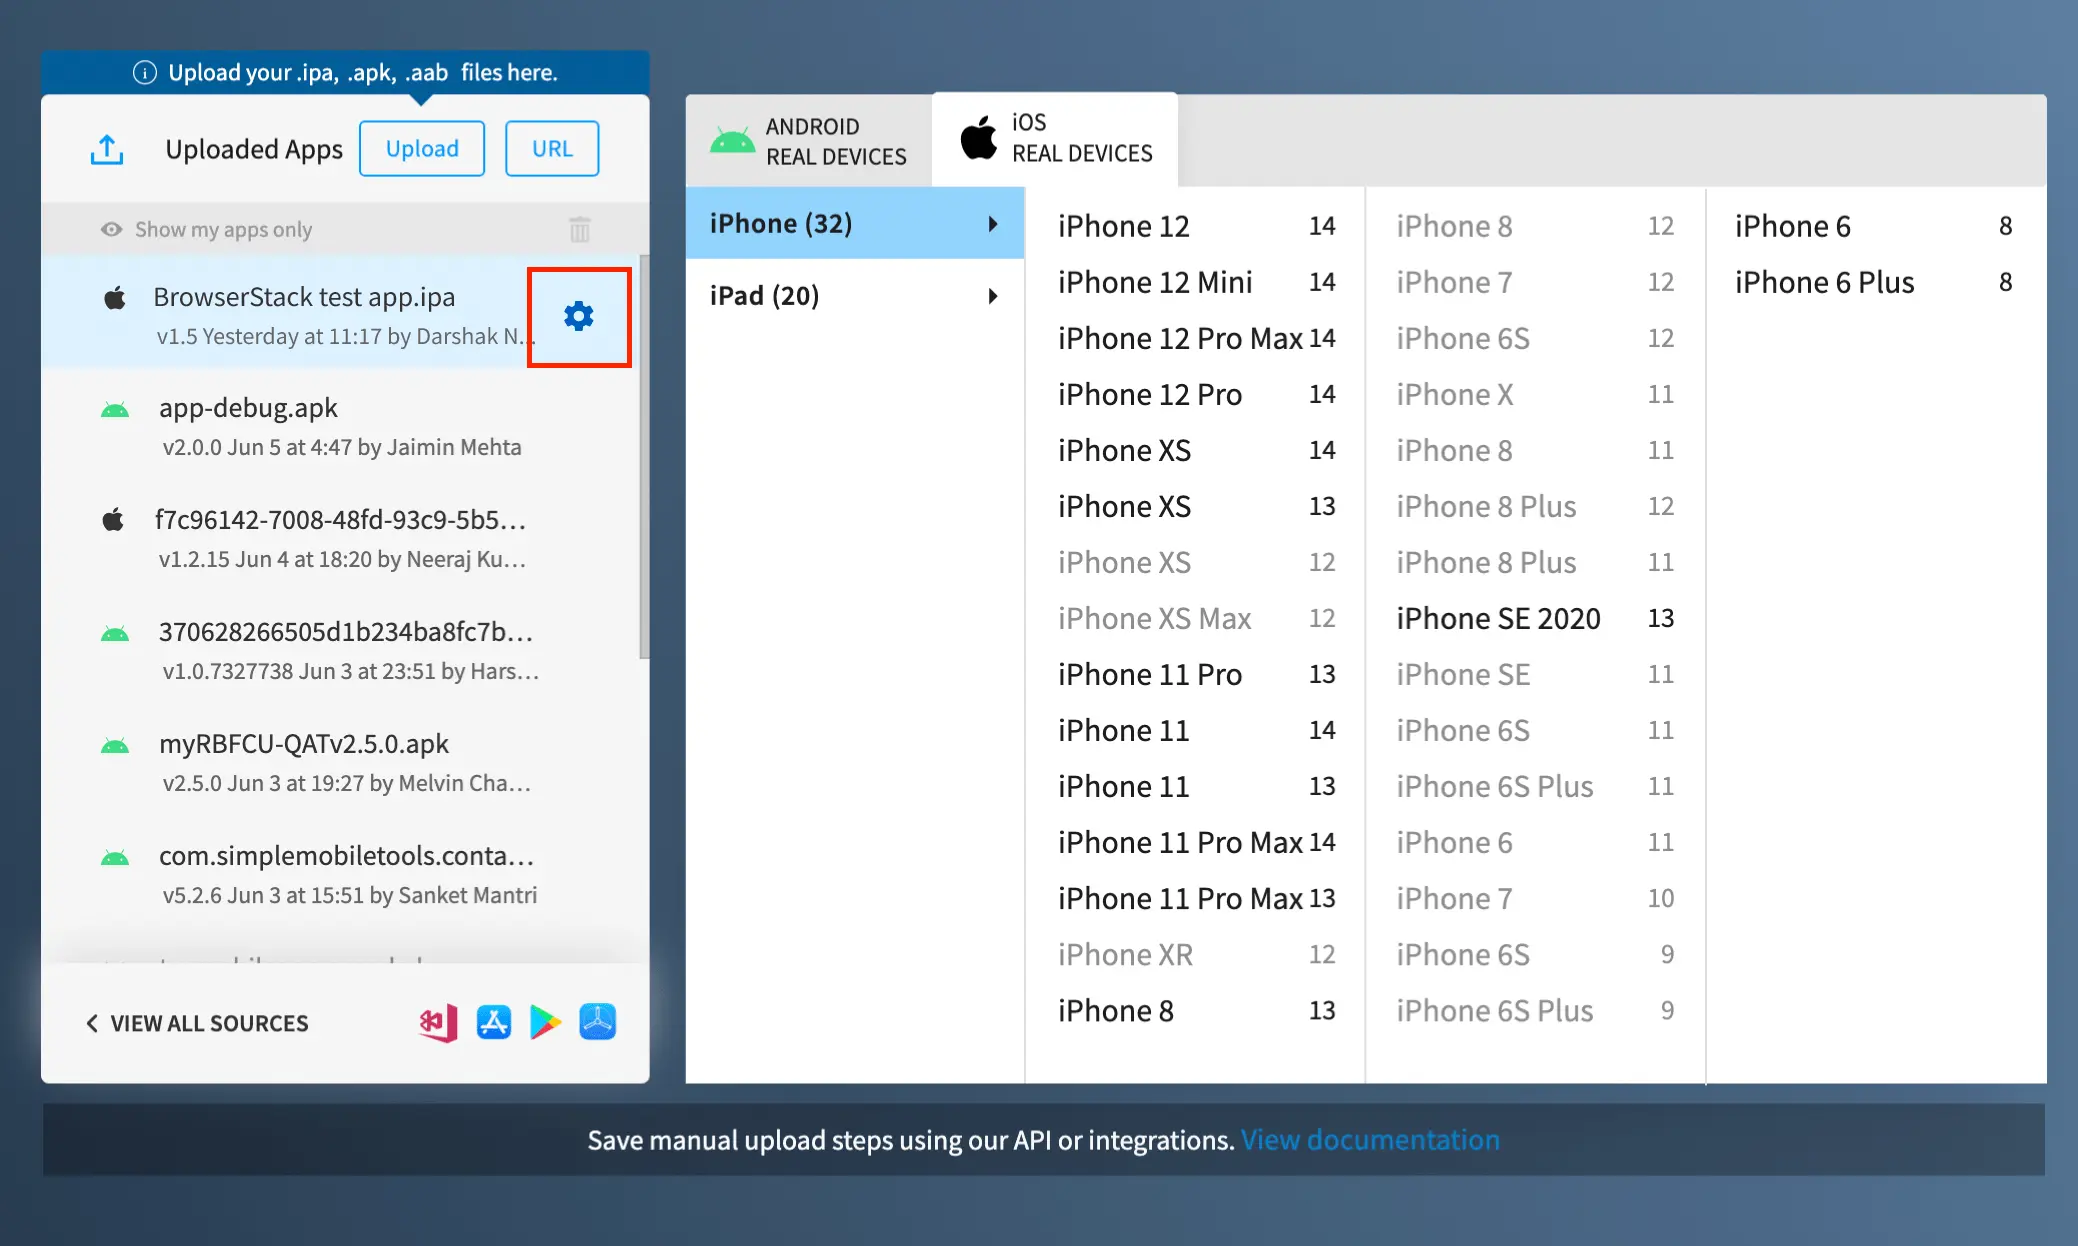
- After your app is uploaded, click the configuration icon next to the file name of your app.

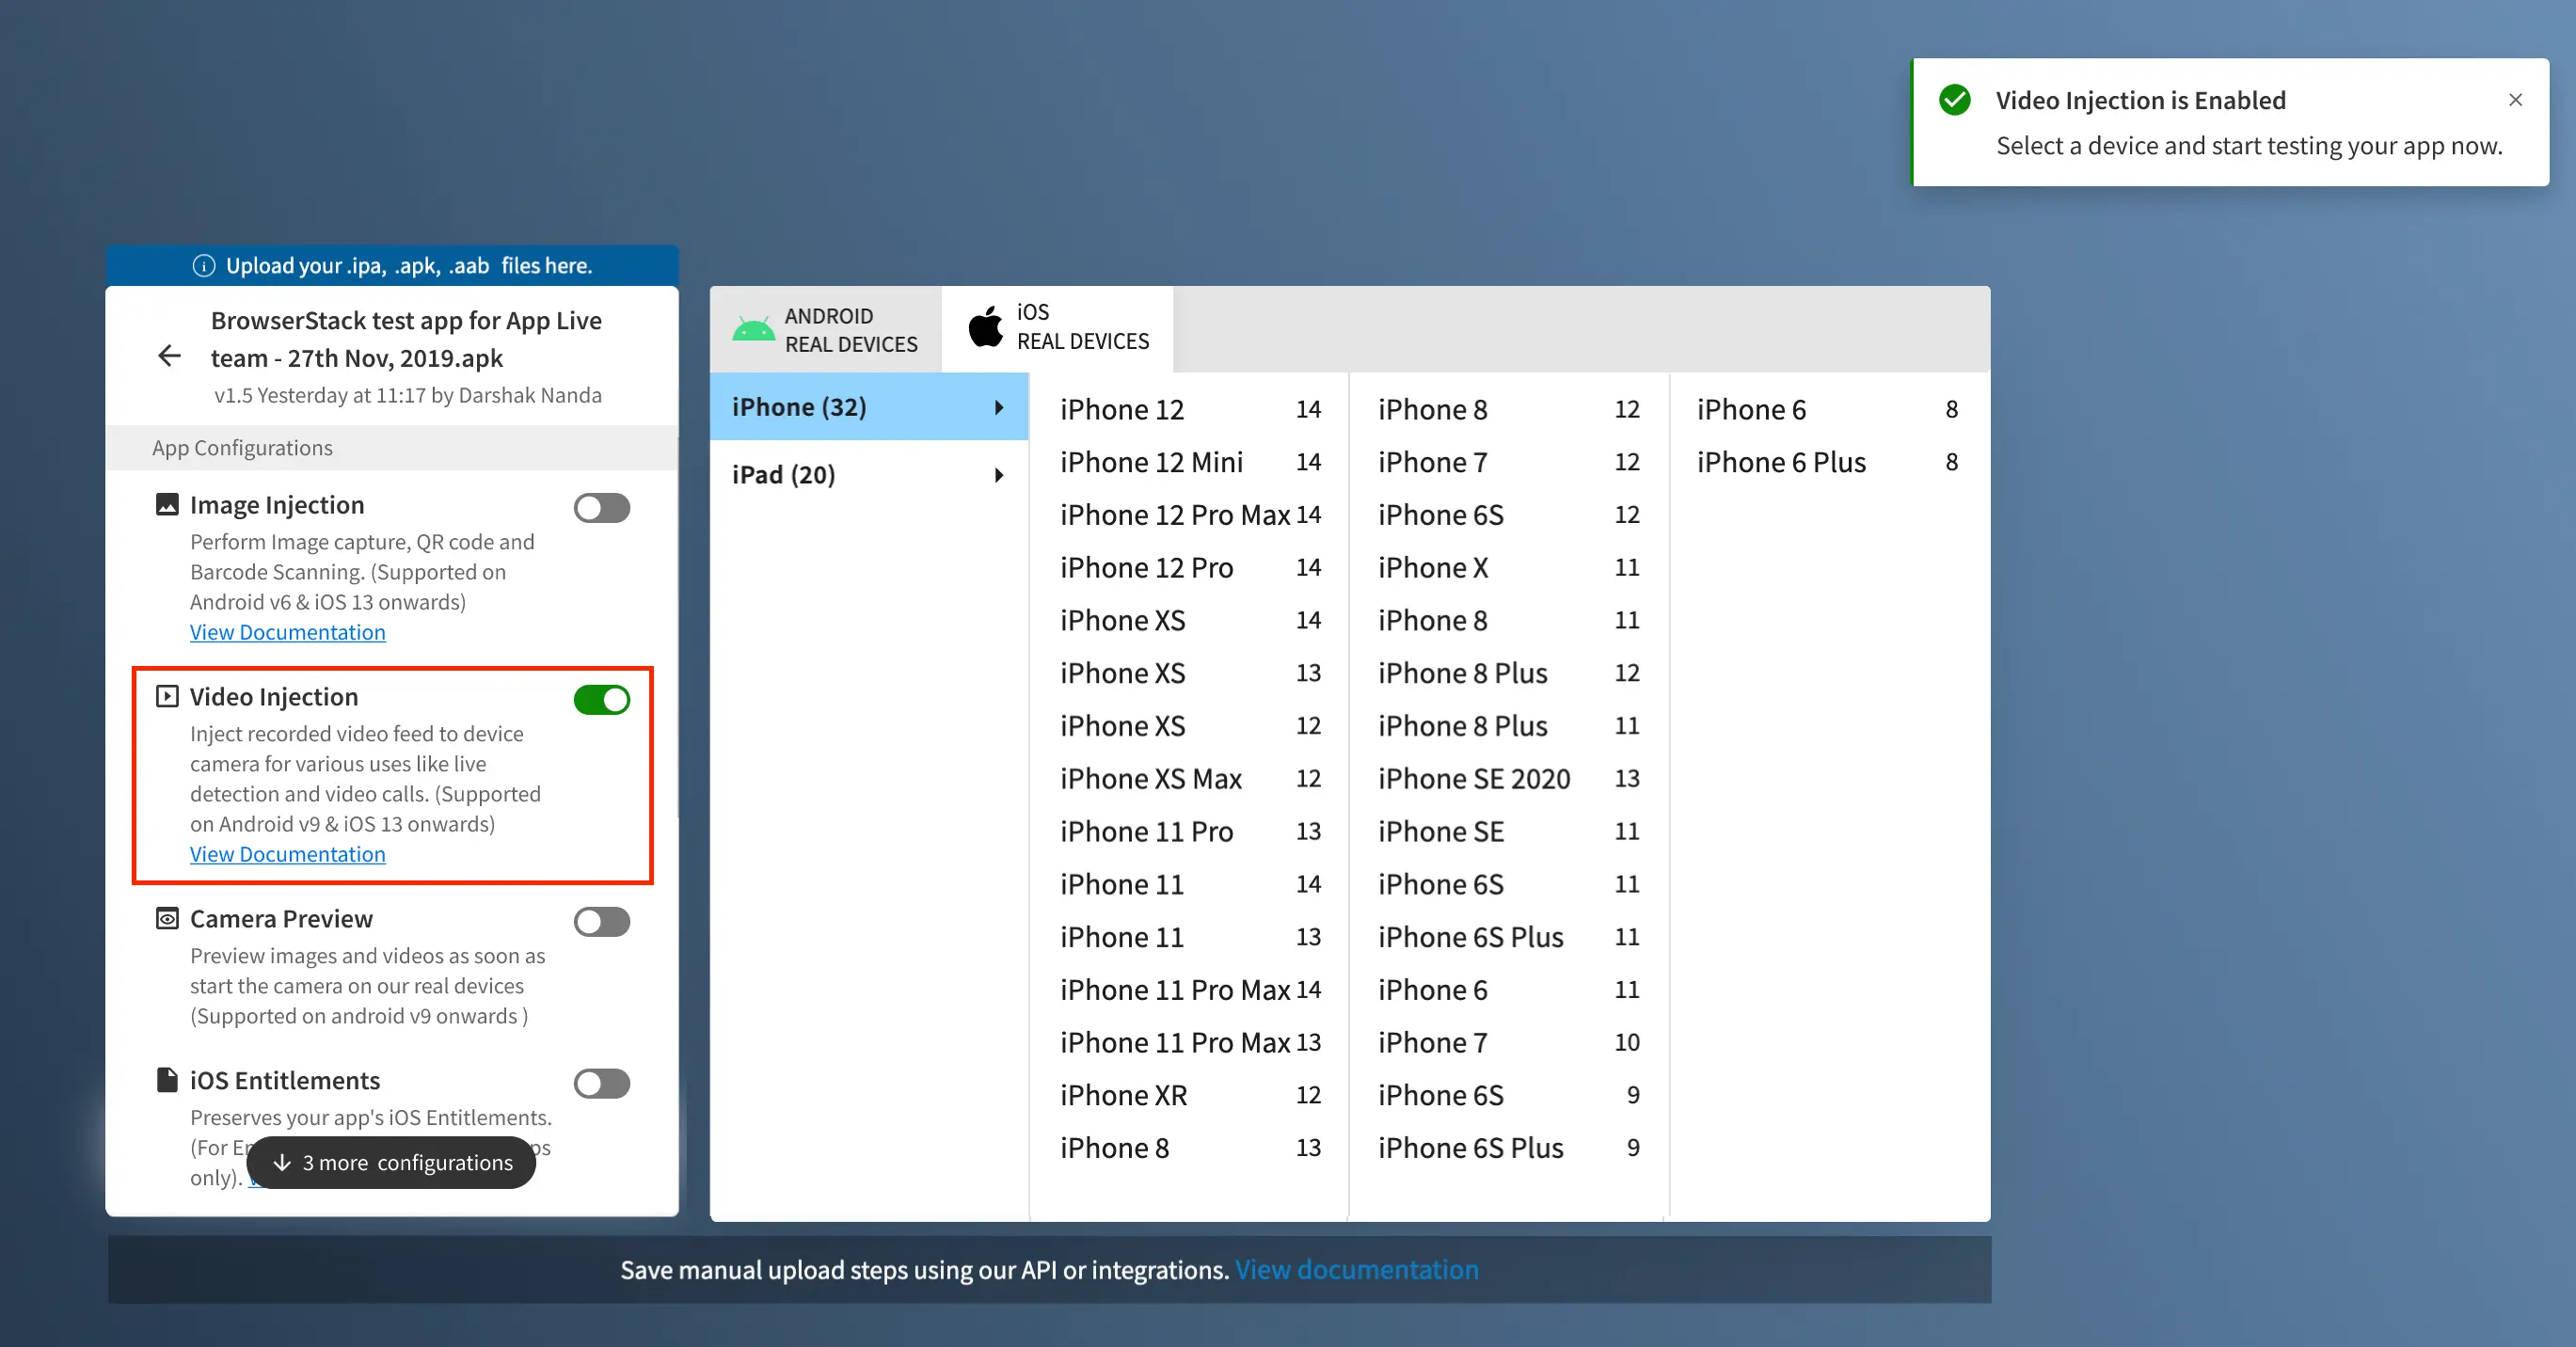
- Under App Configurations, enable Video Injection.

- Select your device from the list of available devices in the device listing to launch your test session.
Your setup session takes approximately 60 seconds.
Upload a video
To upload a video, in your App Live session:
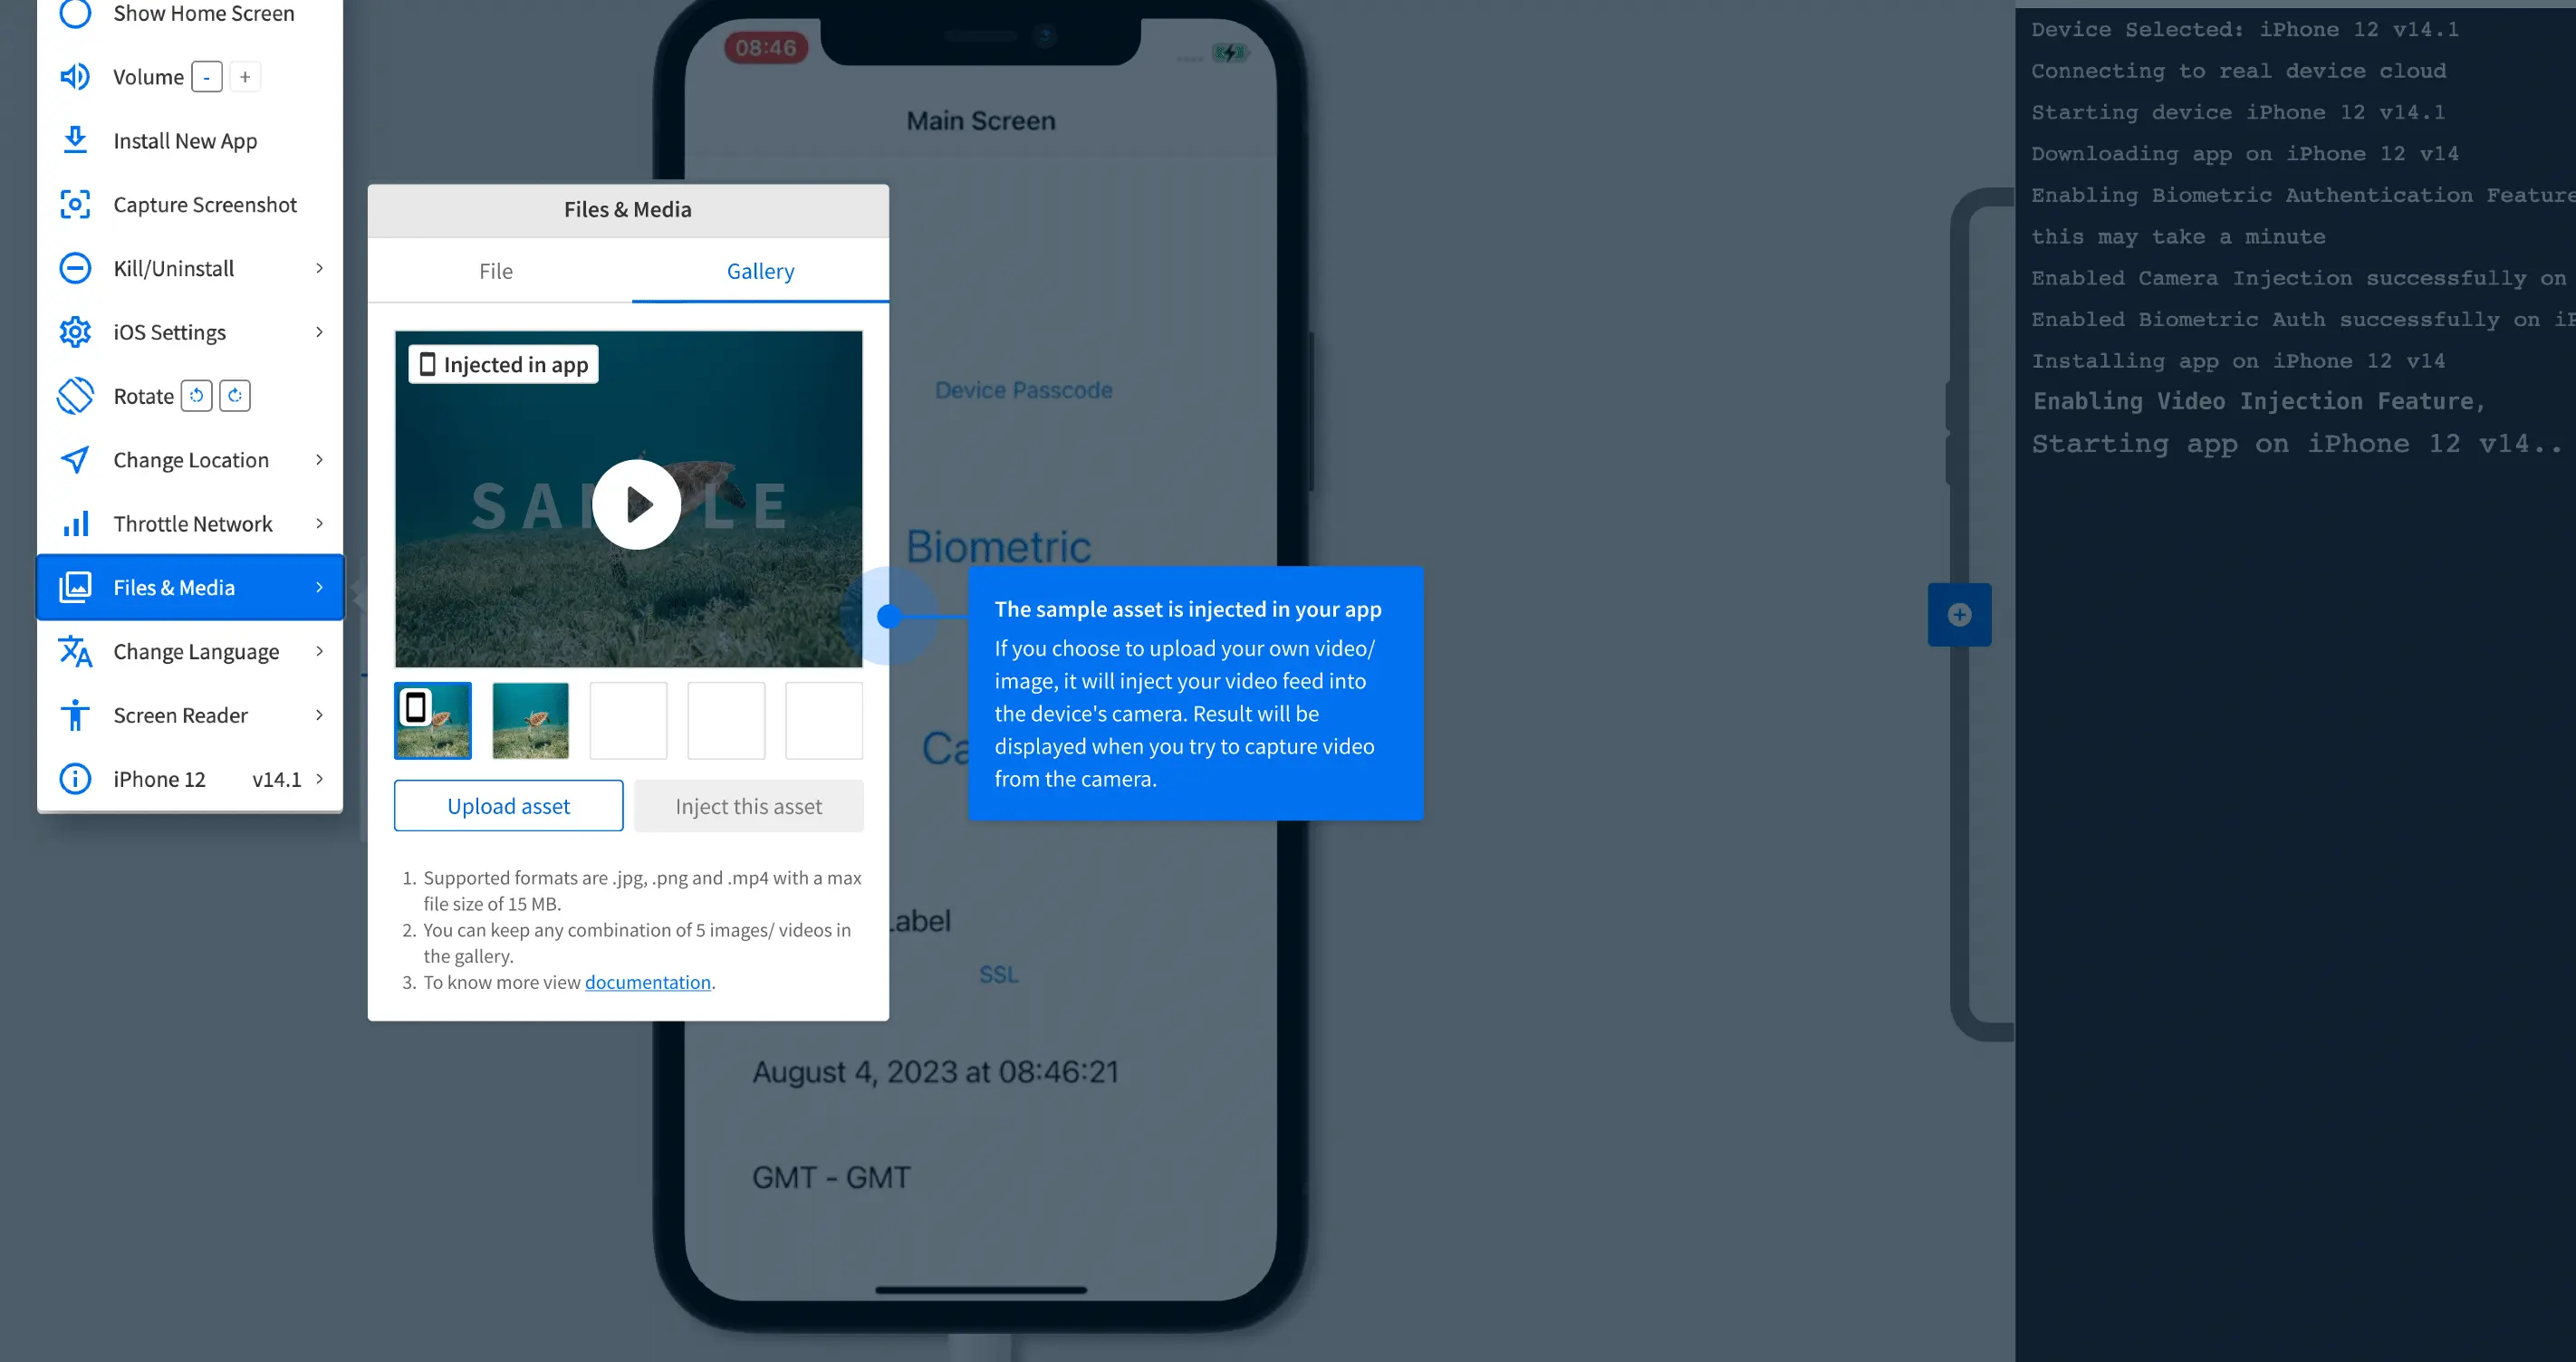
- On the App Live toolbar, click Files & Media.
- On the Files & Media prompt, click the Gallery tab.
A sample video is available on the device and injected into your application. You can use the sample video or upload your own video.
- To upload a video, click Upload asset, select the video that you want to upload from your system, and click Open.
The latest uploaded asset is injected into your app by default. However, you can select another asset from the gallery to be injected into your app, and click Inject this asset.
You can upload up to 5 assets (images/videos) to the gallery. If you upload another asset after the gallery is full, the oldest asset is removed to upload the latest asset.
Test your app with Video Injection
To test your app, in your App Live session:
- Trigger the camera workflow in your app.
- Give your app the permission to access the device camera.
The video that you selected for Video Injection is used as input to the device camera. For example, the video is displayed in the camera preview for features like face identification and verification.
We're sorry to hear that. Please share your feedback so we can do better
Contact our Support team for immediate help while we work on improving our docs.
We're continuously improving our docs. We'd love to know what you liked
We're sorry to hear that. Please share your feedback so we can do better
Contact our Support team for immediate help while we work on improving our docs.
We're continuously improving our docs. We'd love to know what you liked
Thank you for your valuable feedback!