What is Selenium IDE?
Selenium IDE (Integrated Development Environment) is primarily a record/run tool that a test case developer uses to develop Selenium Test cases. Selenium IDE is an easy-to-use tool from the Selenium Test Suite and can even be used by someone new to developing automated test cases for their web applications. One does not require any special setup to get started with Selenium IDE. You just need to add the extension of your specific browser. Selenium IDE provides you with a GUI (Graphical User Interface) for easily recording your interactions with the website.
Selenium IDE allows a user or a test case developer to create the test cases and test suites and edit it later as per their requirements. The development environment also provides the capability of converting test cases to different programming languages, which makes it easier for the user and does not mandate the need for knowing a specific programming language.
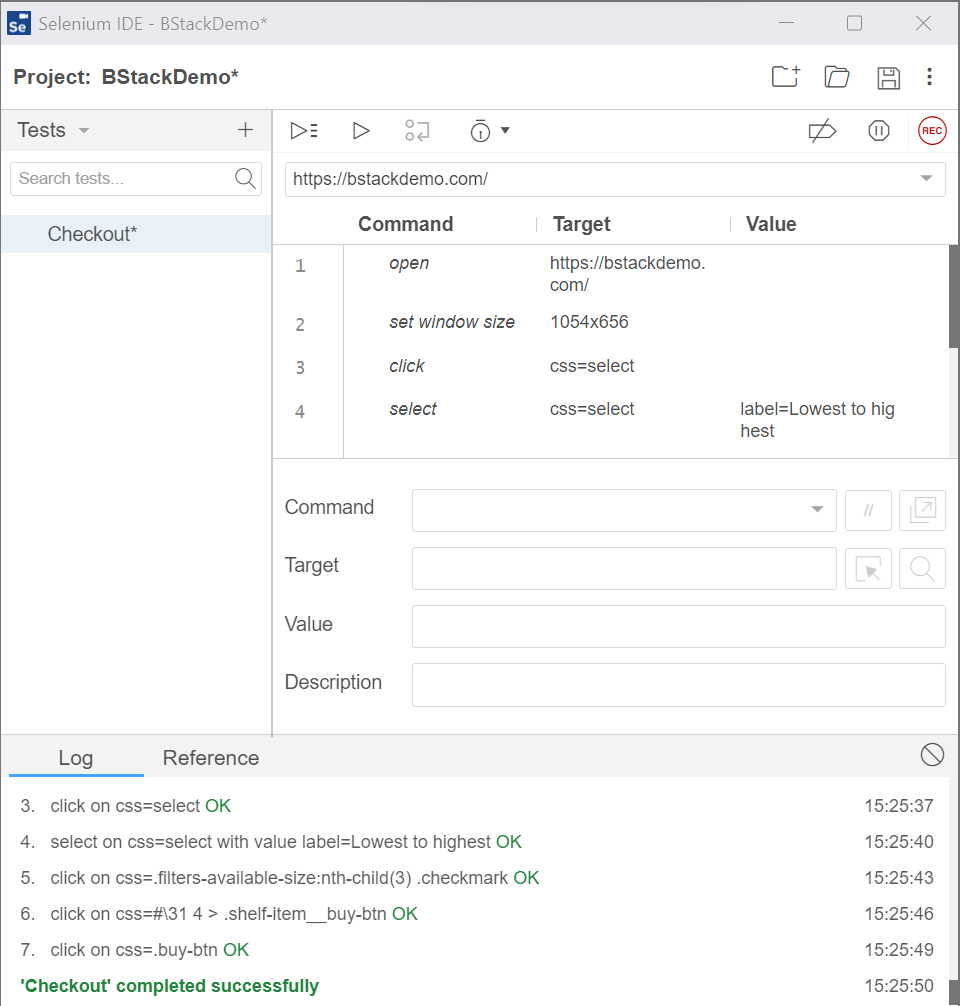
After entering the base URL for the project, the recording begins, and all the interactions with the website are recorded and categorized into three main categories as shown in the above Screenshot:
- Command
- Target
- Value
Features of Selenium IDE
There are several features provided in the IDE under the toolbar, using which one can control the execution of test cases:
- Speed Control – Helps control the speed of test cases
- Run All – Allows execution of the entire Test Suite
- Run – Runs the currently selected test
- Pause/Resume – Allows a user to pause and resume a particular test case
- Step – Helps step into each specific command in the test script
- Rollup – Helps group all the Selenese Commands together and make them execute as a single operation
The features keep on getting eliminated or added depending on the usage of different versions of Selenium IDE extensions.
Benefits of Using Selenium IDE
- Provides you the capability of automatically recording your test cases based upon the interactions with the browser
- Gives developers greater flexibility in executing the test cases. Either the test developer can run the entire test suite consisting of multiple test cases or execute a single test case
- Operates on the basis of the rich set of Selenese commands, which helps the IDE understand what needs to be done
- Allows the test developers to set breakpoints for the purpose of debugging particular test cases
- Test cases can be re-used using the run command. (e.g. allowing you to re-use the logic of login or reload on multiple places in the entire suite)
- Use of multiple-locators for each element in the IDE ensures successful execution
Recommended read: A detailed guide on Locators in Selenium
Next, let’s understand how commands are written in Selenium using Selenese.
What is Selenese?
Selenese is the language used to write Selenium Commands. These Selenese commands are then used to test web-applications. Based on the HTML tags of the UI elements, one can check their existence. Commands help Selenium understand what actions or operations to perform.
Classification of Selenium Commands
Selenium commands are mainly categorized into three types:
- Actions – Help manipulate or change the state of applications (e.g. click on some link or select an option from a page).
- Accessors – Enable verification and storage of the application state (e.g. consider command “storeTextPresent” – if the text is found on the page, then it stores True else stores false).
- Assertions – Help compare expected and actual results. They act like checkpoints and if both the values are equal, only then the test case passes or else it fails. Thus, Assertions help verify whether the state of the application after executing the test case conforms to the desired state (e.g. VerifyText, waitForPageToLoad). Assertions have three modes:
- Assert
- Verify
- WaitFor
Also Read: Assert and Verify Methods in Selenium
Limitations of Selenium IDE
- Not suitable for testing extensive data
- Connections with the database can not be tested
- Cannot handle the dynamic part of web-based applications
- Does not support capturing of screenshots on test failures
- No feature available for generating result reports
Learn About Selenium in Detail
How to Install Selenium IDE
Selenium IDE does not require any additional setup except adding the browser extension.
Selenium IDE browser extension on Firefox:
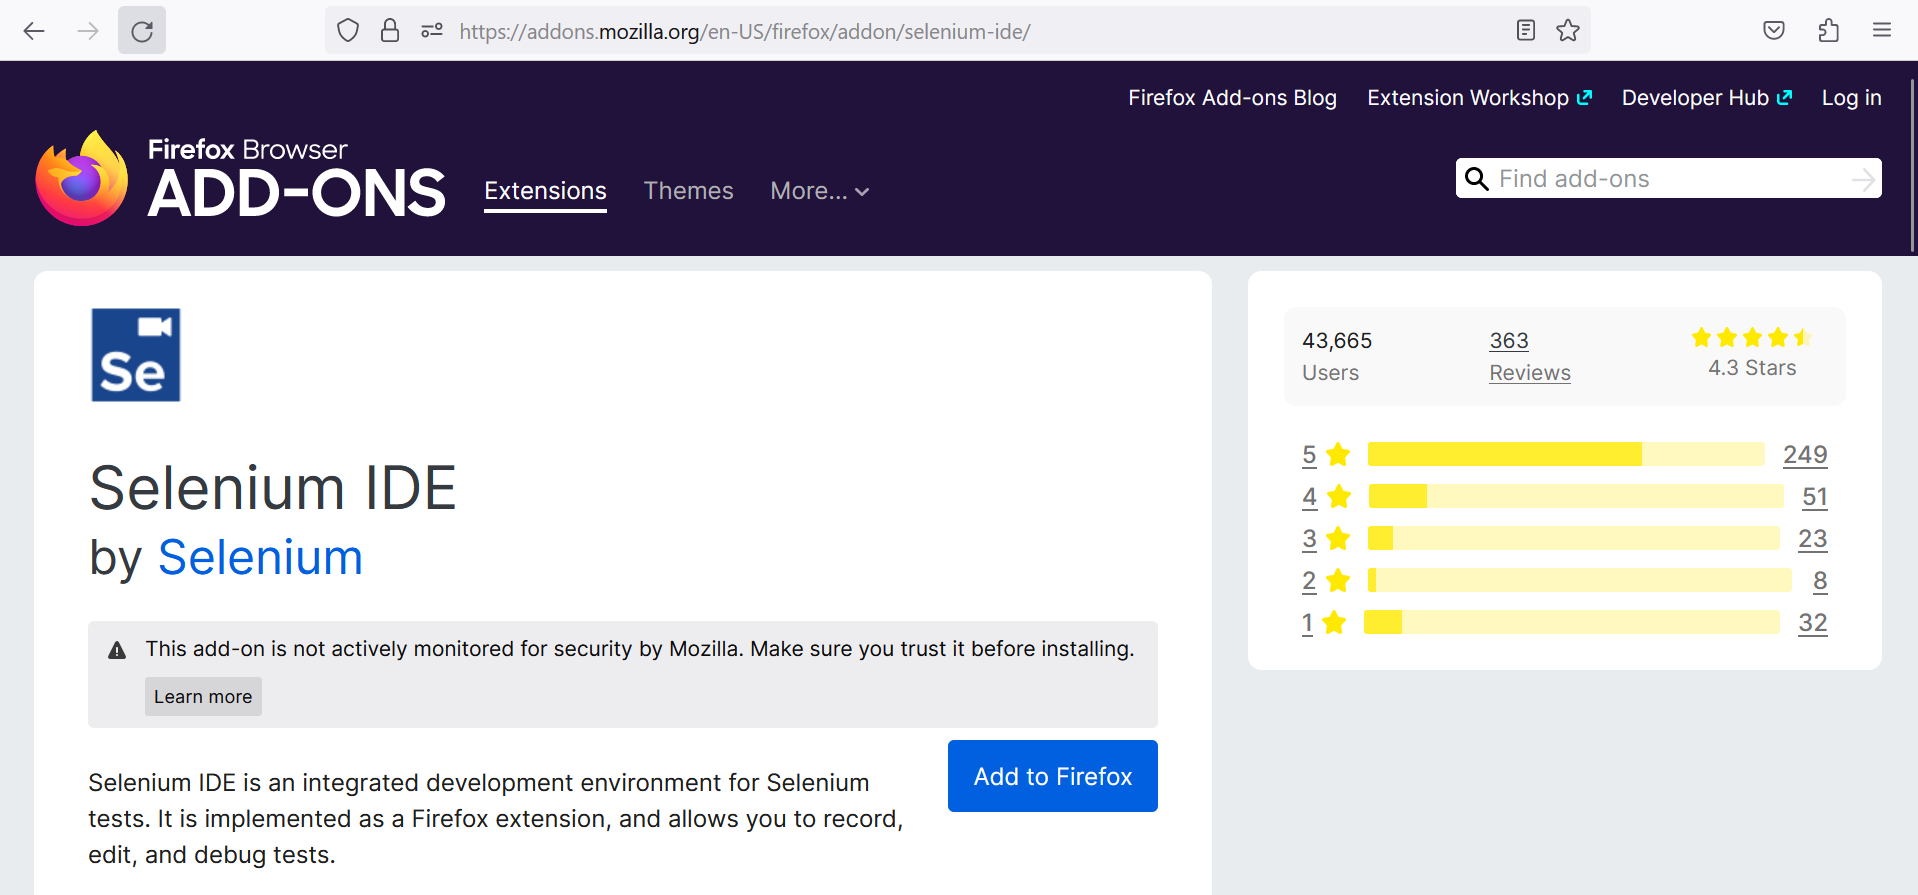
- Open Firefox browser and navigate to https://addons.mozilla.org/en-US/firefox/addon/selenium-ide/.
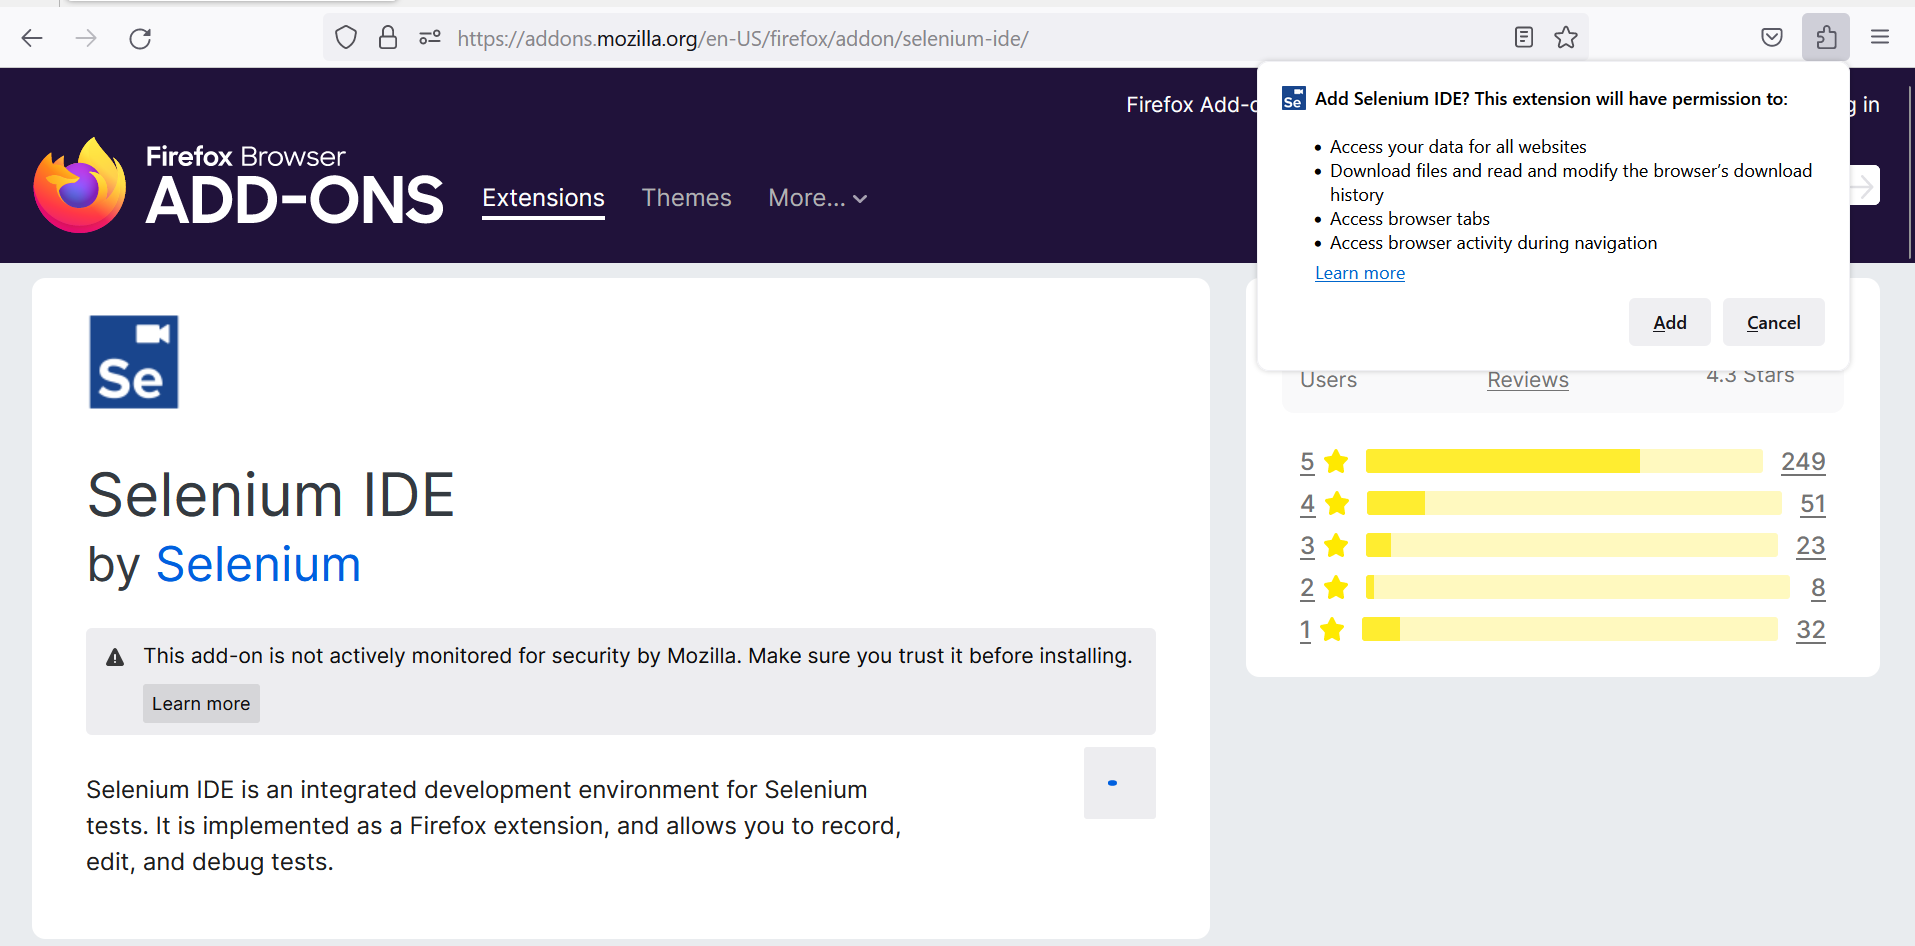
- Click on the “Add to Firefox” button which will open a pop up. Then click on the “Add” button.
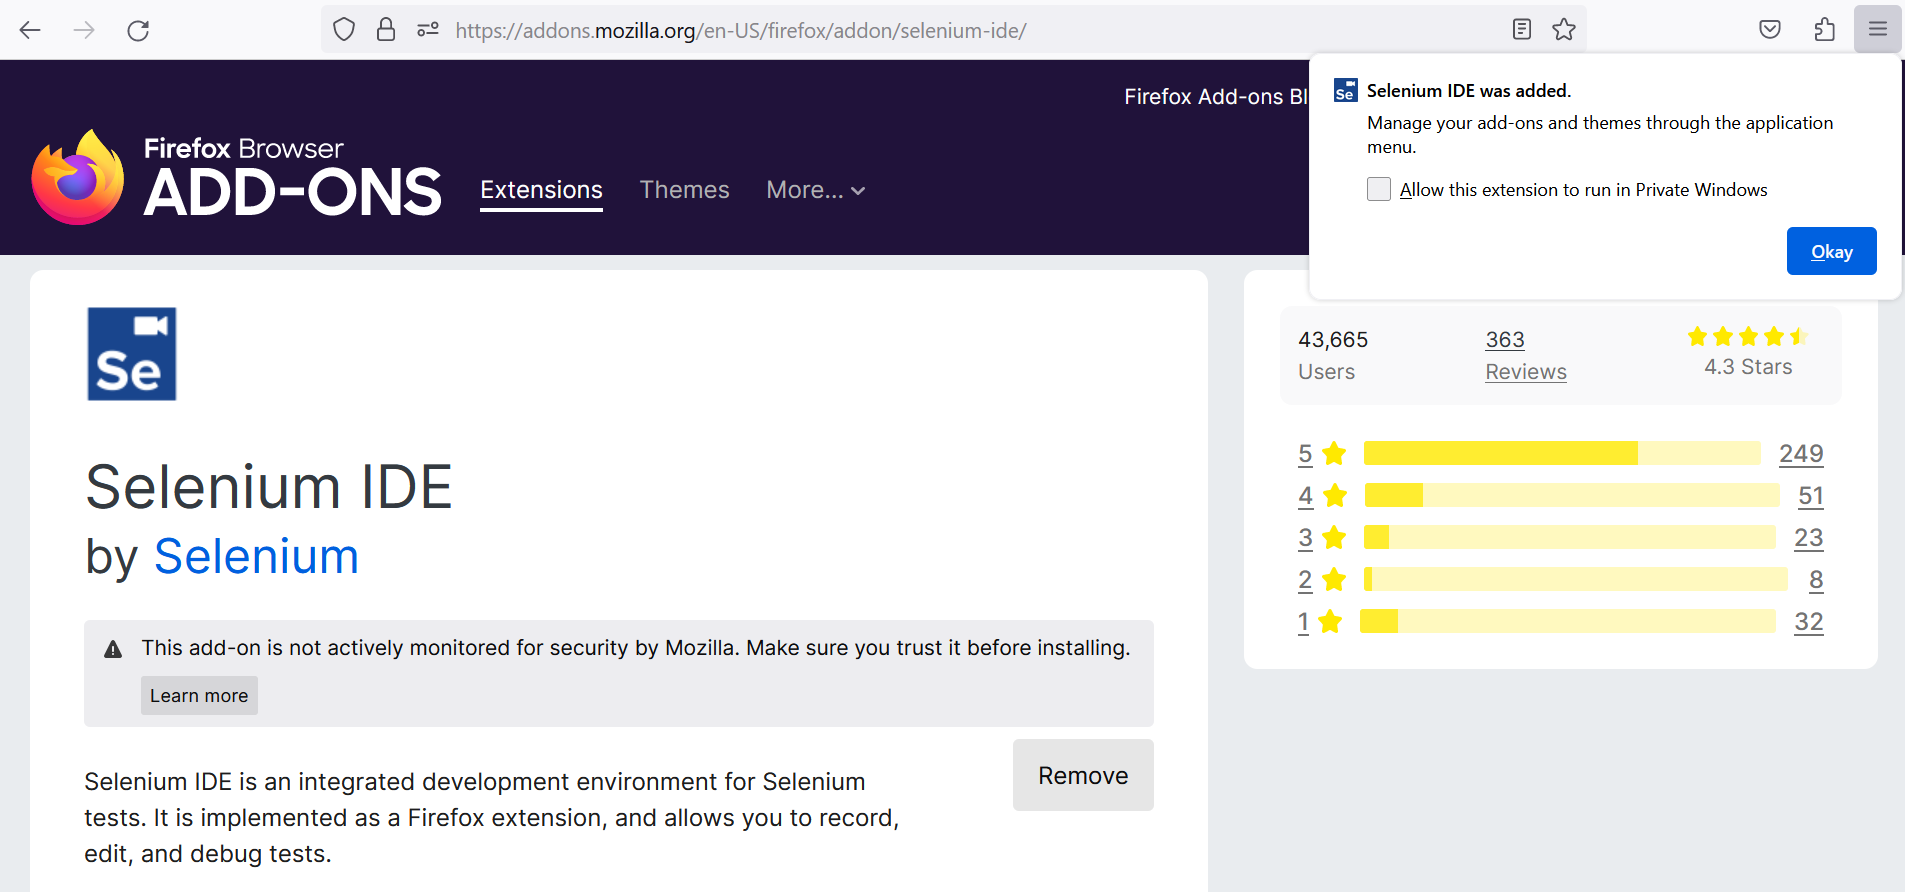
- Once the installation is complete, a pop up would be displayed saying Selenium IDE was added. Click on the “Okay” button.
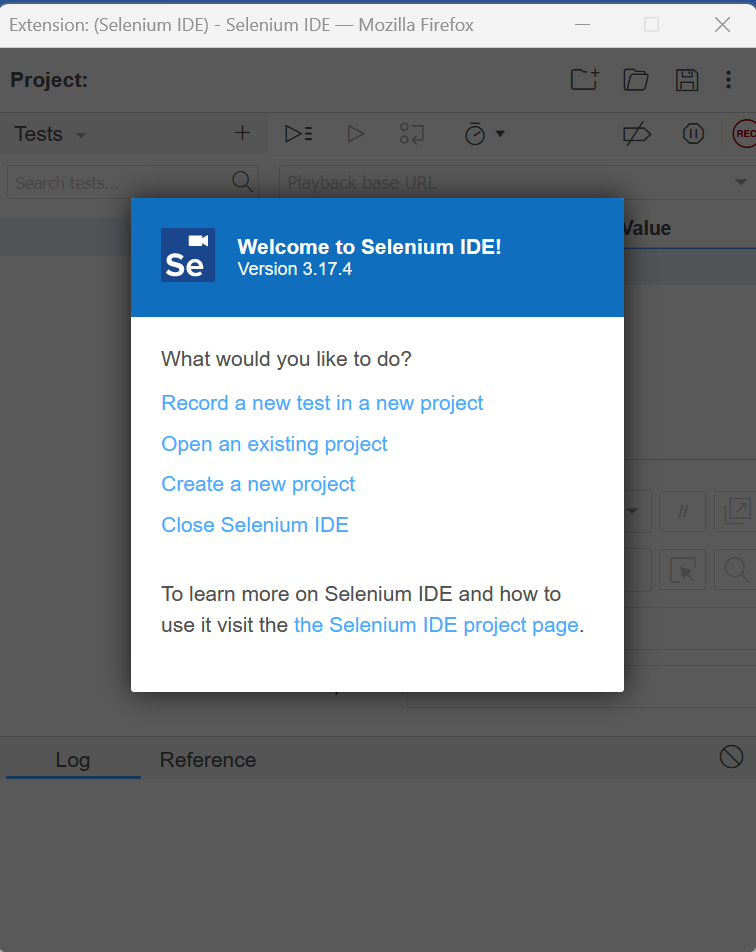
- Selenium IDE plugin should be visible now on top of the browser. Click on it to open Selenium IDE.
How to use Selenium IDE
Once we have the Selenium IDE setup on our respective browser, i.e Chrome or Firefox, it is time to see how to record and playback scripts in the IDE. We would be using the BStackDemo application to test the checkout process.
- We would Record the checkout process on the BStack Demo application.
- Save the test suite.
- Play back the script
- Export test script.
Record process in Selenium IDE
- Open Chrome/ Firefox browser and click on the Selenium plugin present at the top right corner of the browser to open Selenium IDE.
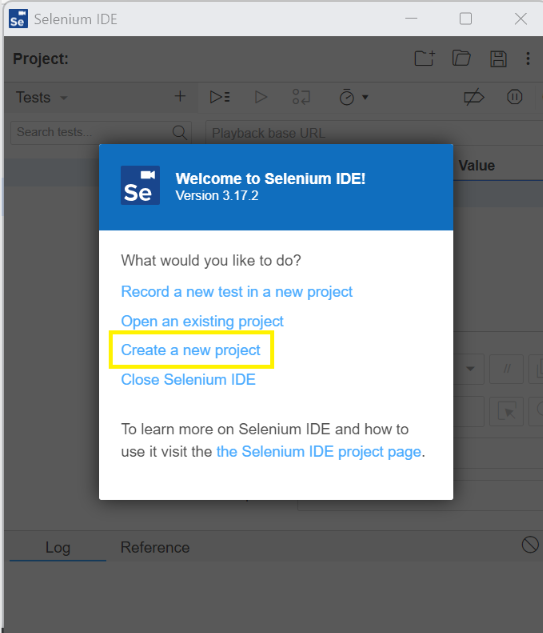
- Click on Create a new Project.
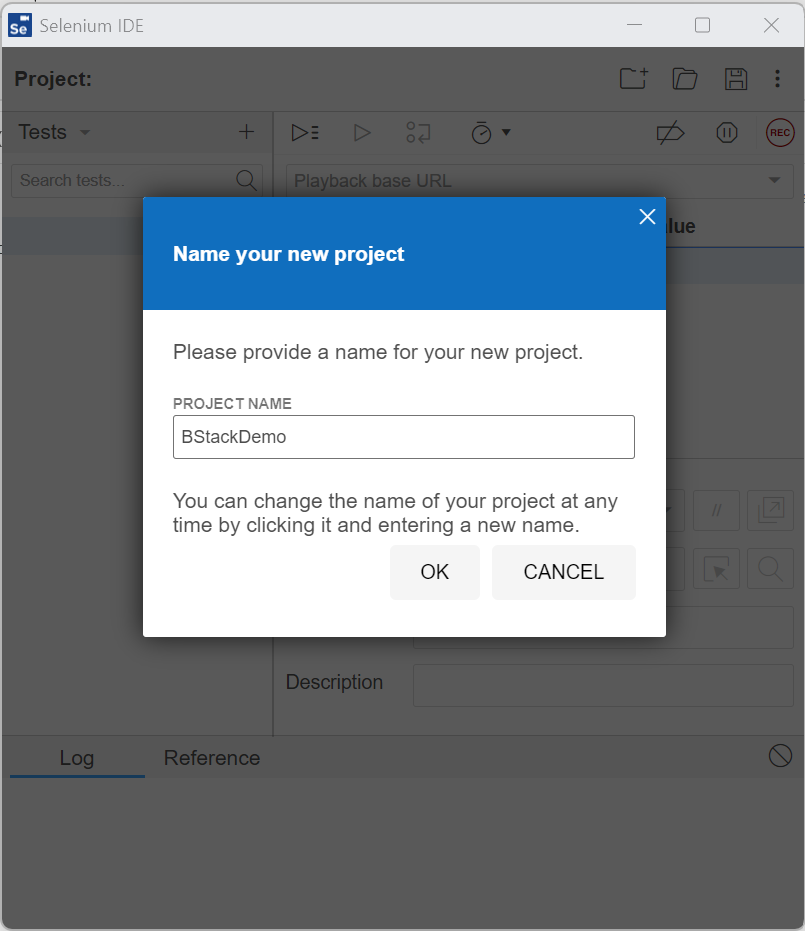
- Add the project name and click on the “OK” button.
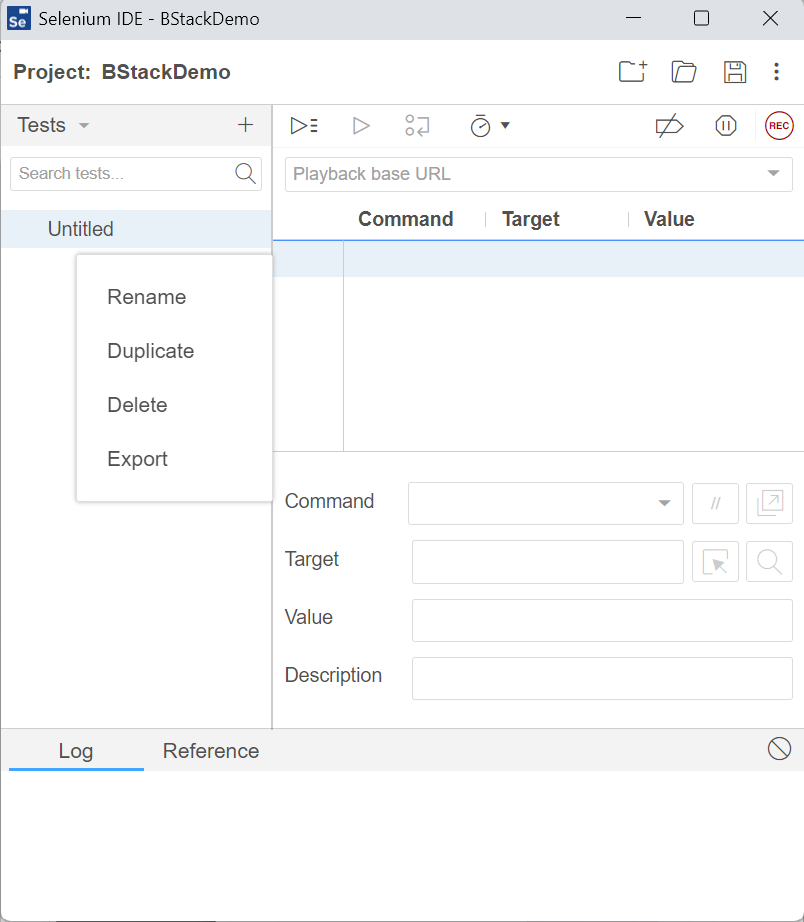
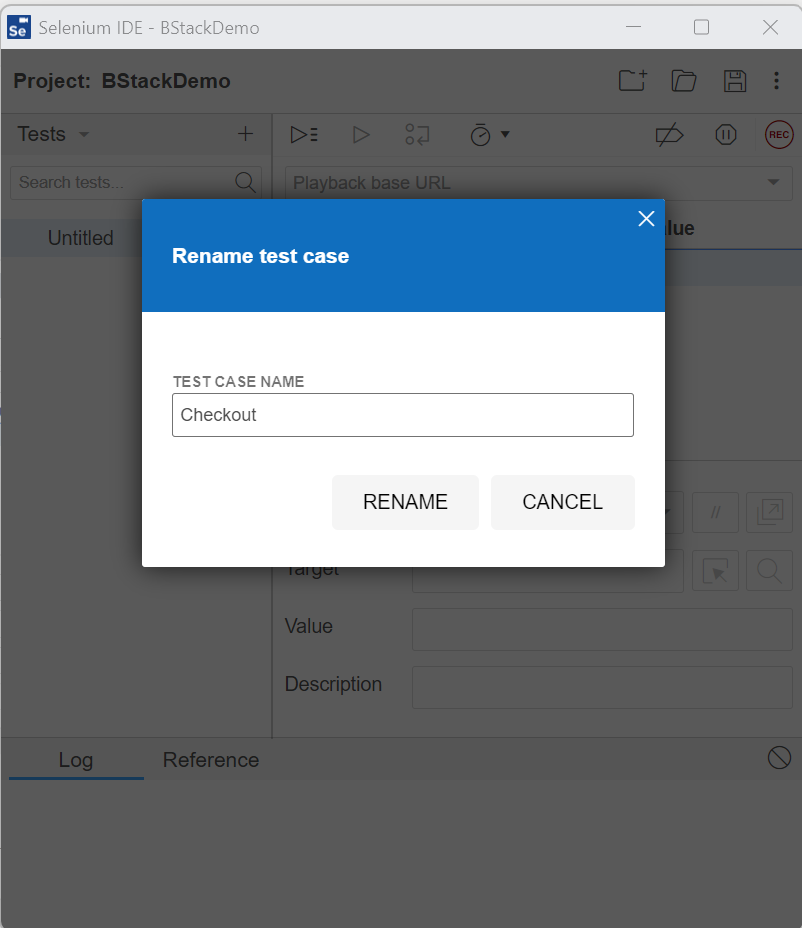
- Rename Untitled test case to any appropriate test case name.
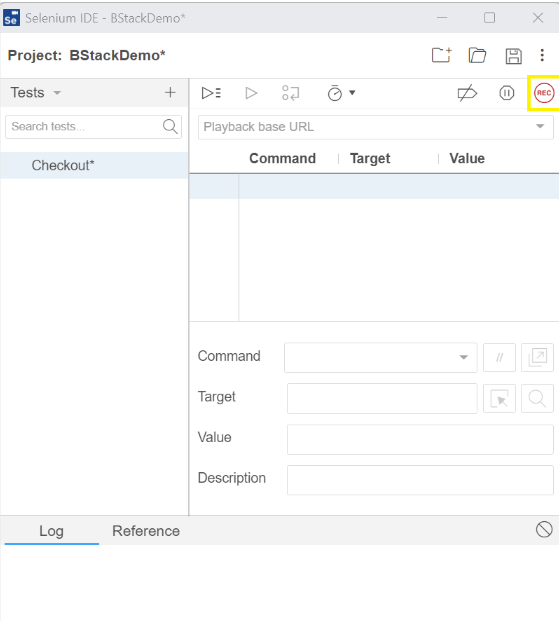
- Click on the Record button at the top right corner of IDE to start recording the steps.
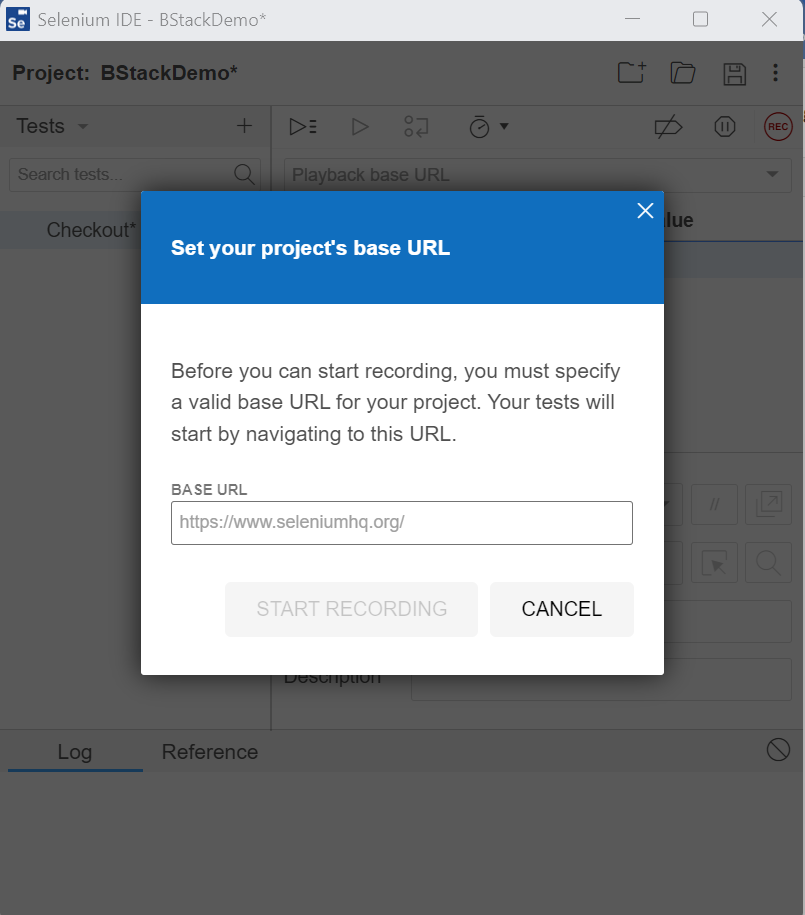
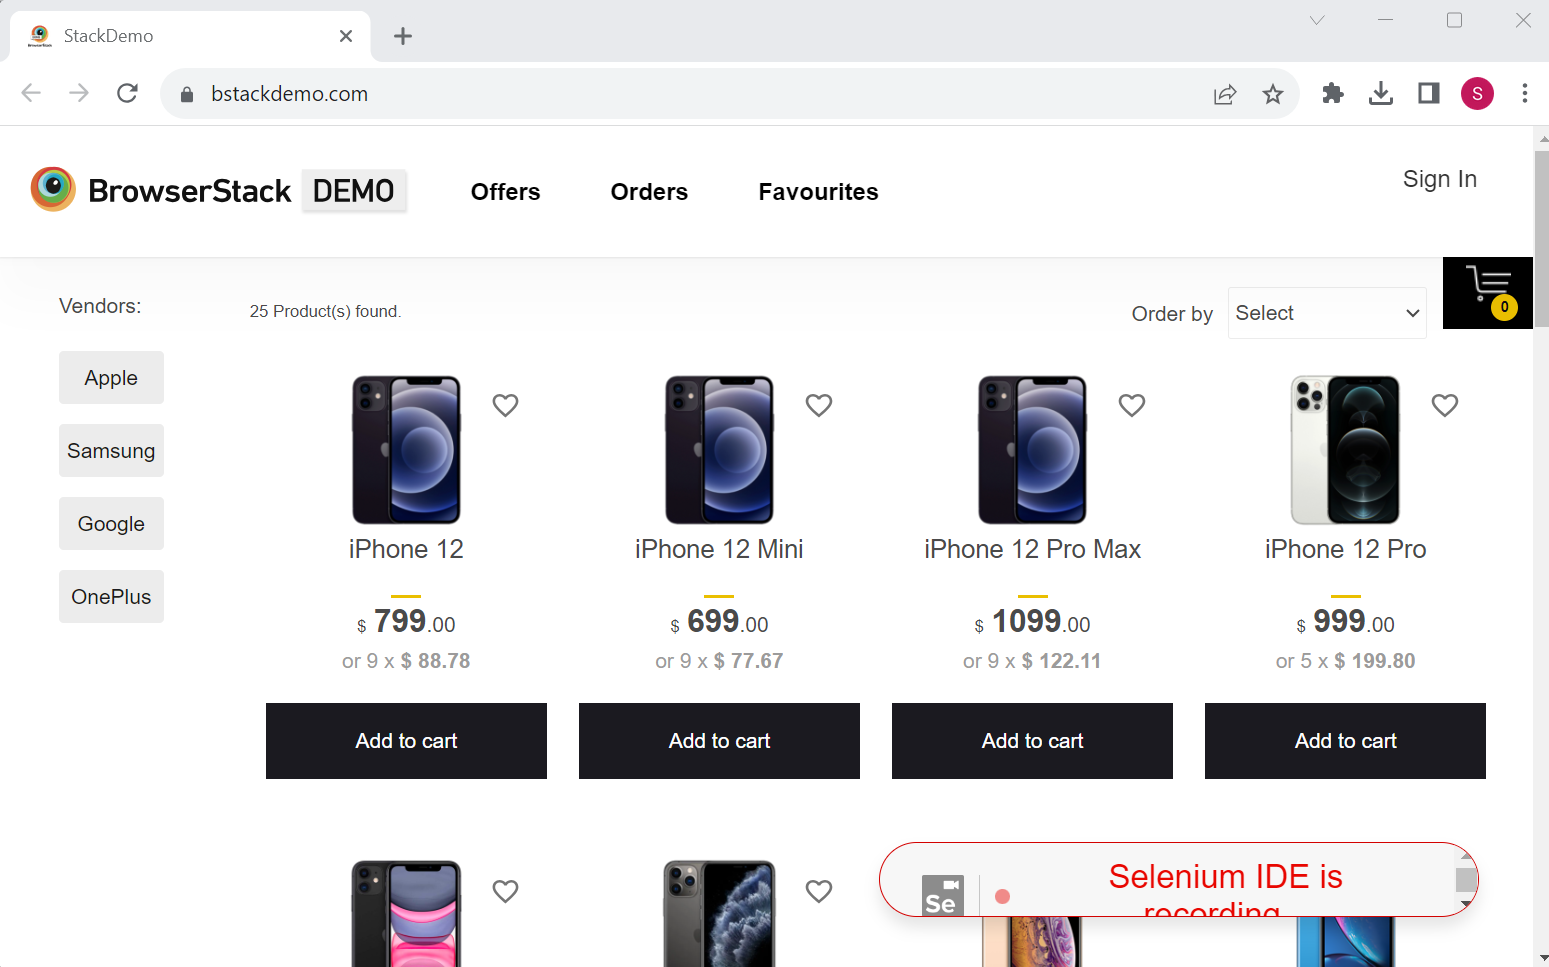
It opens the below pop up as the project is created for the first time. - Enter base URL as https://bstackdemo.com/ and click on the “Start Recording” button. And this opens the URL on the browser.
- On BStackDemo page, perform the following steps for recording:
a. Filter Order by to “Lowest to highest”.
b. Click on Samsung model.
c. Click “Add to cart” for the first item.
d. Click on the “Checkout” button. - Go to IDE and click on the Record button to stop the recording.
- All the steps are captured and executed after the recording is stopped. Save the project on the system by clicking on the Save button at the top right corner of the IDE. (It is saved in .side format)
Playback process in Selenium IDE
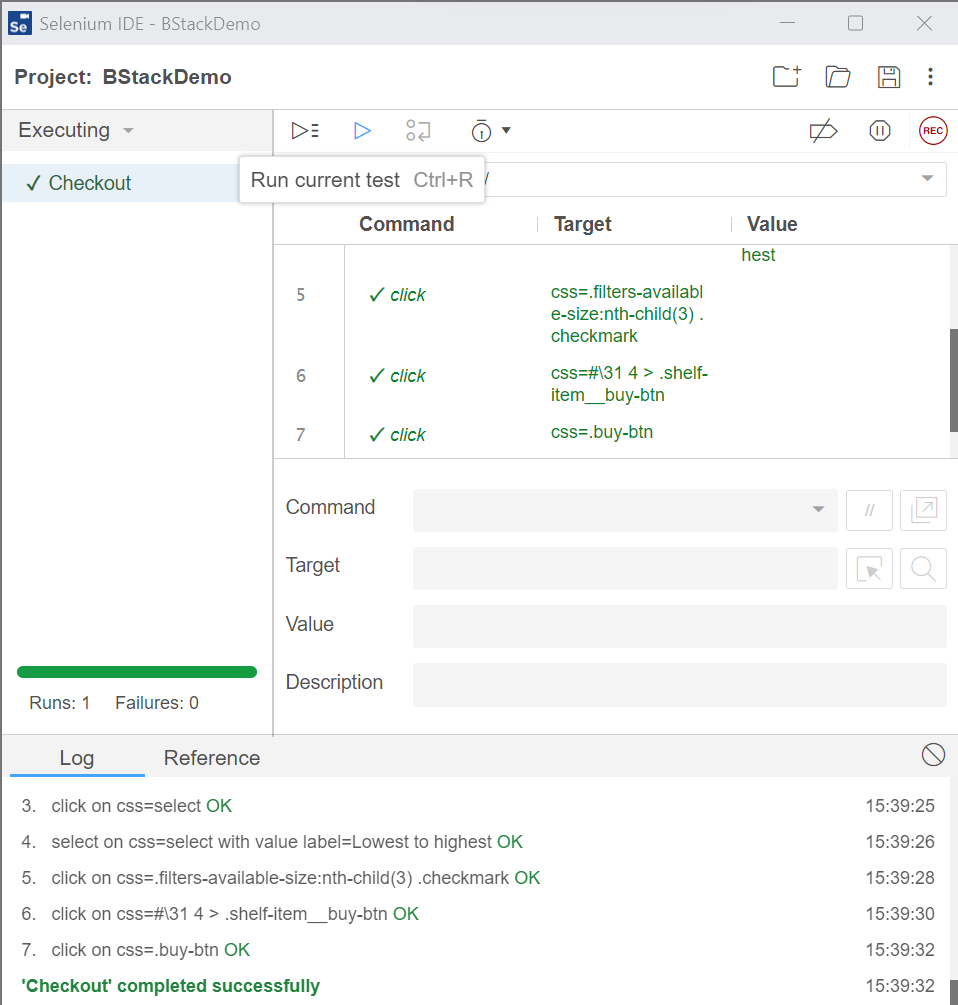
- Click on the “Run current test“ button on Selenium IDE to execute the recorded script.
- It executes the same steps recorded previously and gives a result as Pass if all the steps are performed correctly. In case it is unable to interact with any element during playback, the execution fails.
- Logs are captured for each step along with the time taken to execute each step.
Export the TestCase using Selenium IDE
Testcase can be exported in different programming languages from Selenium IDE by following below steps:
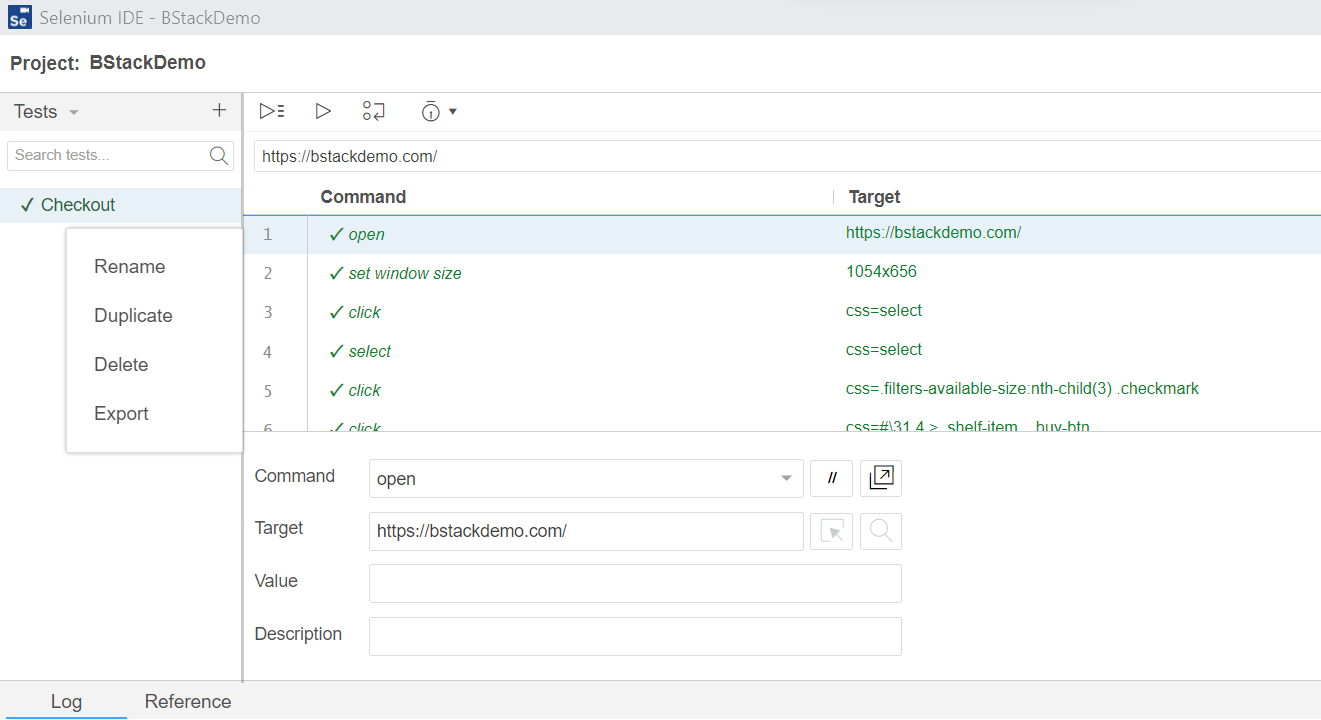
- Click on the “Export” button for the test case recorded.
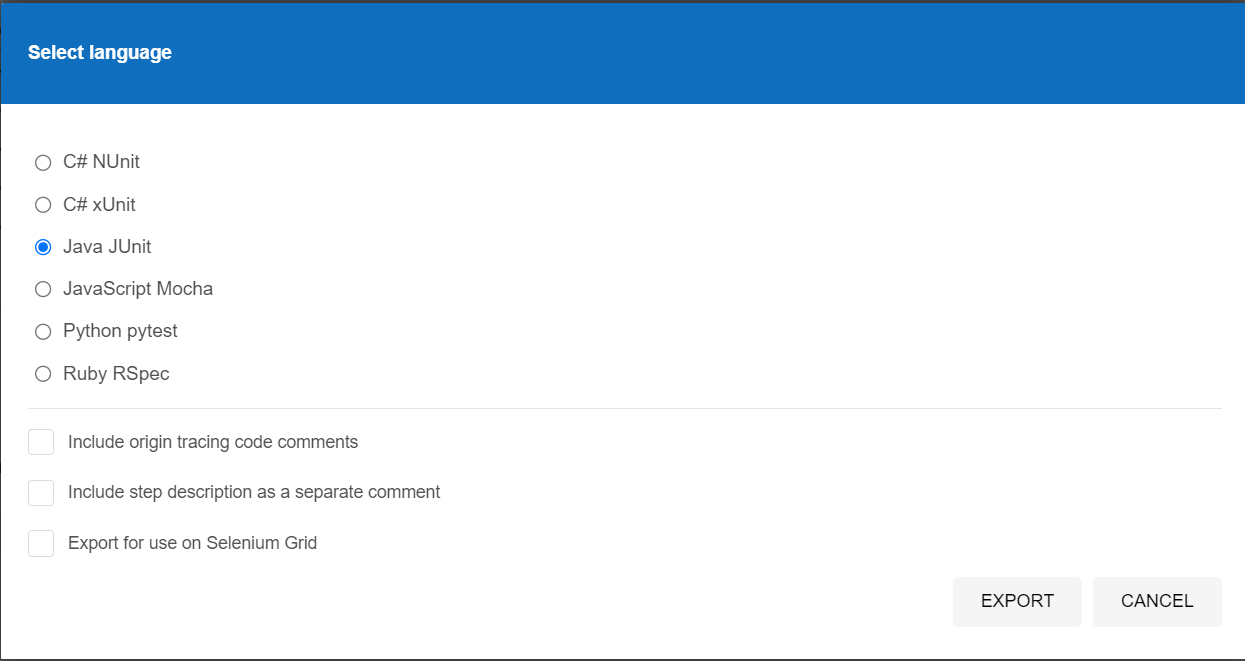
- This opens a popup to Select language. Choose any preferred language. (for eg: Java JUnit) and click on the “Export” button.
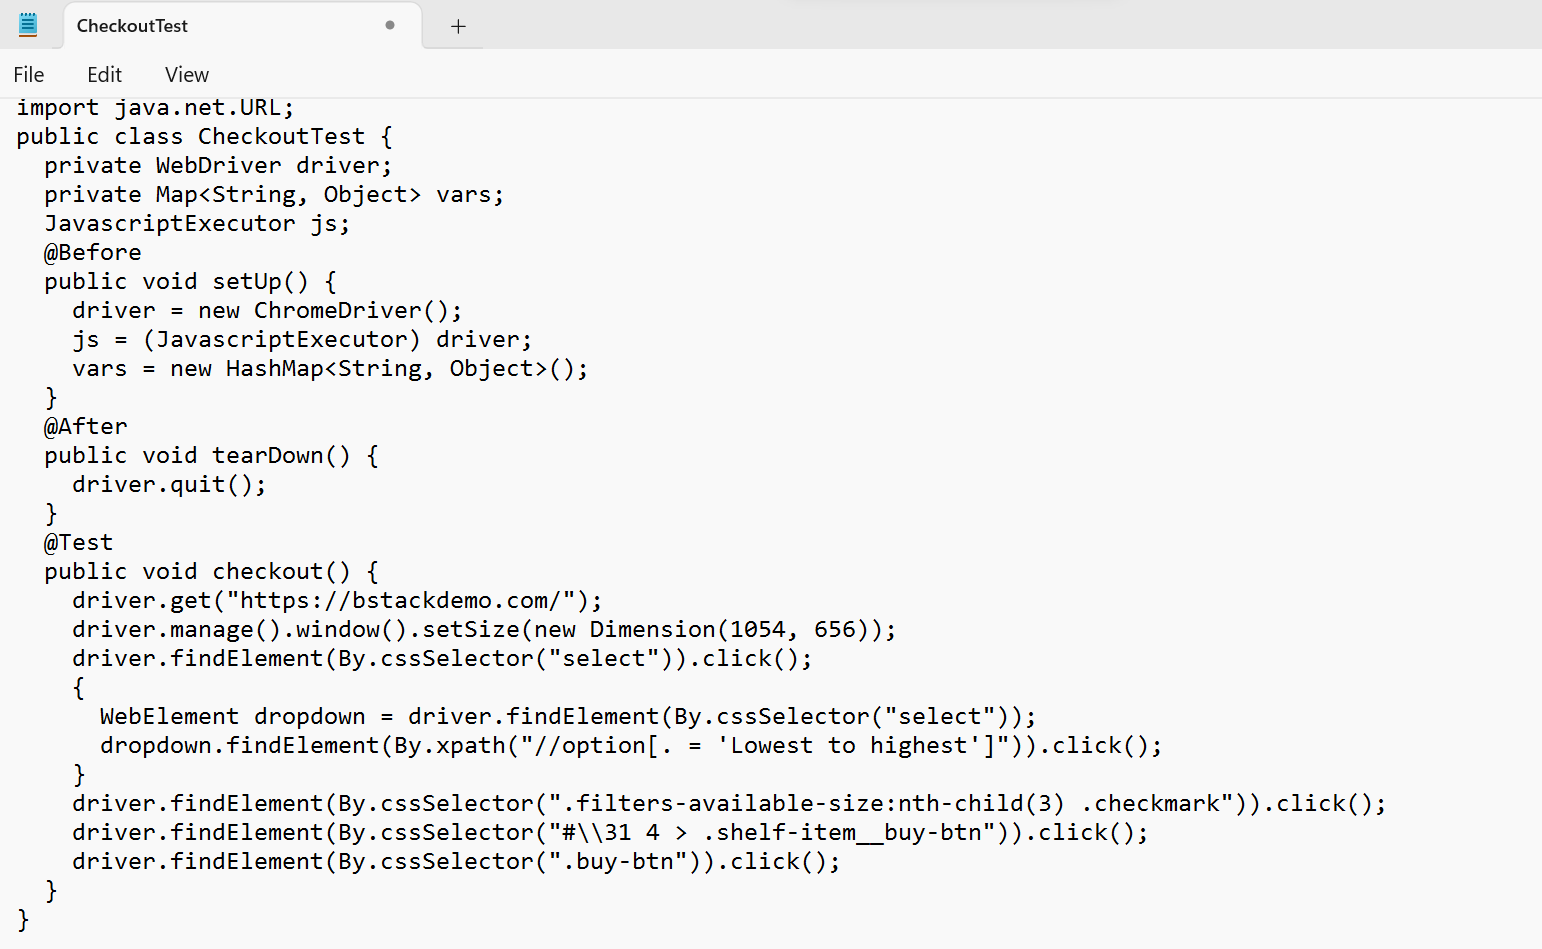
- Save the file in the local system and later open the file using Notepad or any supported editor to verify the test script.
Summary
Selenium IDE is one of the most accessible record and play tools in the Selenium Tool Suite, which requires no particular setup. Selenium IDE has add-ons for Firefox and Chrome browsers. Selenium IDE comes with a rich set of commands that are powered by Selenese, and it allows you to record and test different interactions of a web application with the browser. There are also limitations that should be kept in mind before choosing the Selenium IDE.


